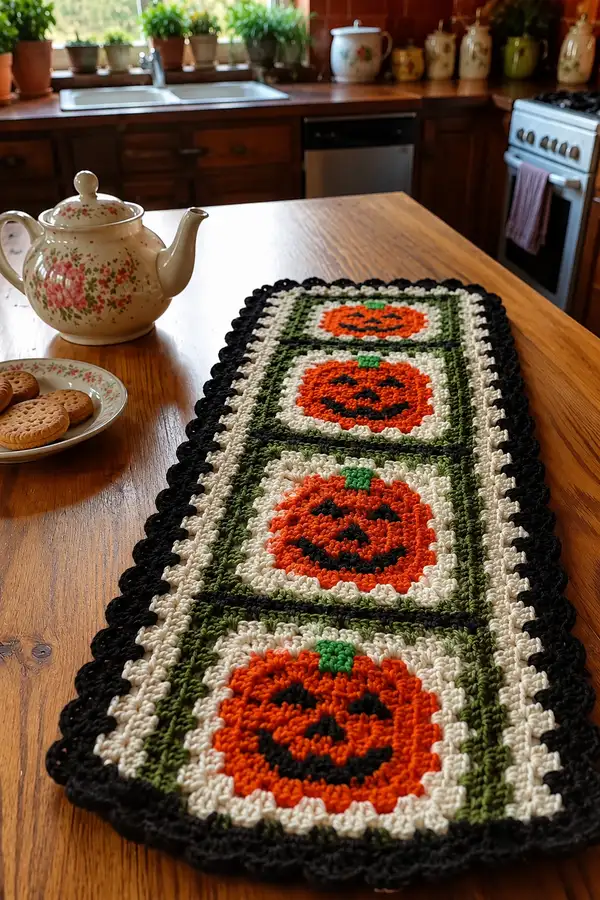
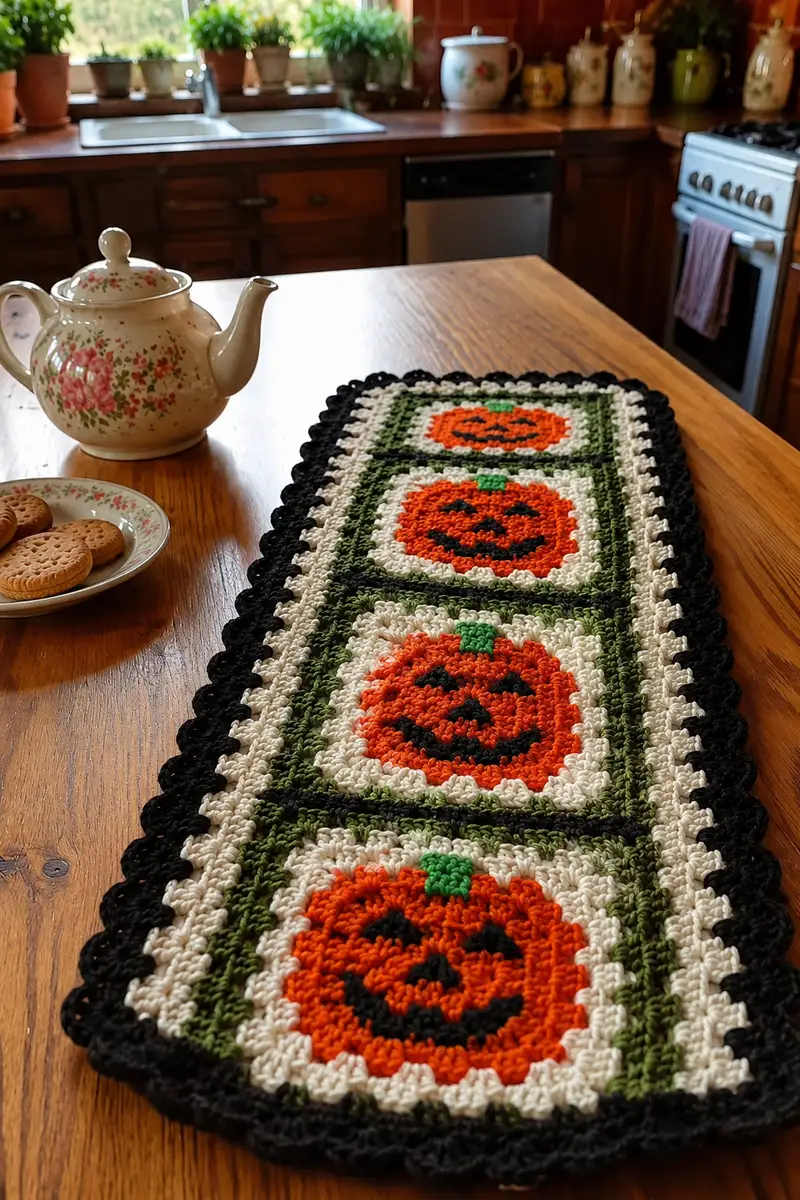
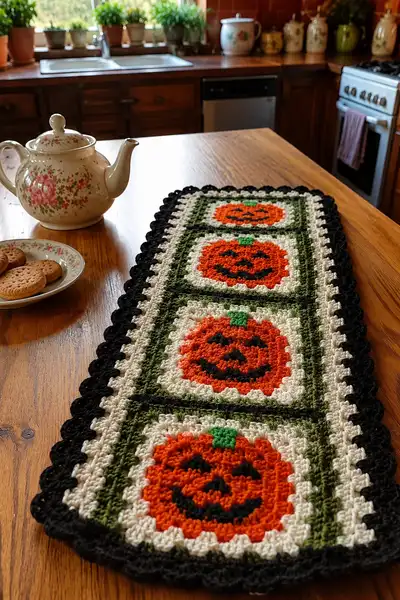
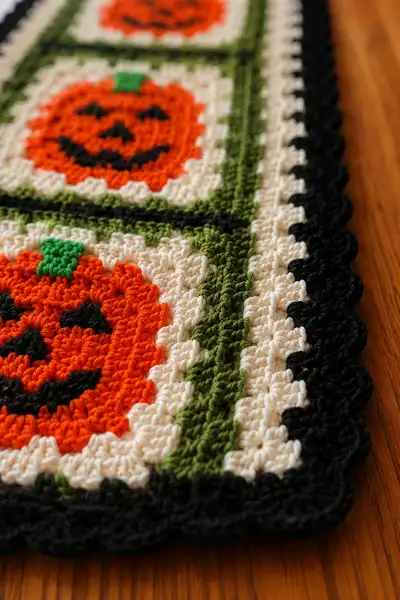
A festive, rectangular table runner featuring three charming jack-o'-lantern squares joined into a long runner with green framing, cream background and a scalloped black border. The cheerful pumpkins are worked in textured rounds with a bold orange center, green stem, and embroidered black facial features. Perfect for autumn and Halloween decorating — this pattern uses classic granny-style joining and a pretty scallop edging for a finished, polished look.
Progress Tracker
0% Complete
— Pumpkin Square (Make 3) :
Info :
Each square creates a textured pumpkin motif in the center and turns into a small square field. Work each pumpkin square identically. Use worsted weight yarn and a 4.0 mm hook for the gauge in this pattern. The rounds below create a circular pumpkin then add background rounds that square off the work into a small square. Stitch counts are provided for every round. Keep an even tension and use a stitch marker to mark the start of each round.
Round 1 :
6 sc in magic ring (6)
Round 3 :
(1 sc, inc) x 6 (18)
Round 4 :
(2 sc, inc) x 6 (24)
Round 5 :
(3 sc, inc) x 6 (30)
Round 6 :
(4 sc, inc) x 6 (36)
Round 7 :
(5 sc, inc) x 6 (42)
Round 8 :
(6 sc, inc) x 6 (48)
Info :
Rounds 1-8 build a neat circular base for the pumpkin. Keep the magic ring tight and weave the tail in later. At this stage counts are consistent; place a stitch marker at the first stitch of each round to keep track.
Round 9 :
1 sc in each st (48)
Round 10 :
1 sc in each st (48)
Round 11 :
Change to Pumpkin Orange. 1 sc in each st (48)
Round 12 :
1 sc in each st (48)
Round 13 :
(6 sc, inc) x 6 (54)
Info :
The small increase round (Round 13) gives the pumpkin a slight bulge. This makes the pumpkin feel rounder and helps with later facial placement. Use the stitch marker to identify the center front – I'll reference the center when placing the face bits.
Round 14 :
1 sc in each st (54)
Round 15 :
1 sc in each st (54)
Round 16 :
(6 sc, dec) x 6 (48)
Round 17 :
1 sc in each st (48)
Round 18 :
Change to Pumpkin Orange (continue if still orange). 1 sc in each st (48)
Info :
Rounds 9-18 form the orange pumpkin body. The face will be added using simple surface crochet or tapestry slip stitch in black. The best placement is centered vertically across R13–R16; mark the central stitch at the front and count stitches outward to map eyes and mouth precisely.
Round 19 :
Change to Background Cream. Work 1 sc in each st (48)
Round 20 :
1 sc in each st (48)
Round 21 :
1 sc in each st (48)
Info :
Switching to cream creates the inner field around the pumpkin. At this point the round is still circular. We'll begin to form the square shape in the next rounds by adding corner increases at four equally spaced points. To do that evenly, divide the 48 stitches into 4 groups of 12 stitches each.
Round 22 :
(11 sc, 3 sc in next st) x 4 — work these corner clusters at the quadrant joins (68)
Round 23 :
1 sc in each st (68)
Round 24 :
1 sc in each st (68)
Info :
Round 22 converted the circular field into a shallow square by creating 4 corner clusters (3 sc in one stitch). Each corner cluster increased the round by 2 stitches (1→3 sc), so the total rose by 8 from 60 to 68. Now each side measures 17 stitches between corner centers (68/4 = 17).
Round 25 :
Change to Olive/Forest Green. Work 1 sc in each st BLO (68)
Round 26 :
1 sc in each st (68)
Round 27 :
Change to Cream. 1 sc in each st (68)
Info :
Rounds 25-27 add a defined frame strip (green then cream) around the motif. Working the first green round in BLO creates a subtle ridge that visually separates the pumpkin square from its neighbors once joined.
Round 28 :
Change to Black for inner dividing line. Work 1 sc in each st (68)
Round 29 :
Change to Cream. 1 sc in each st (68)
Round 30 :
Work 1 sc in each st (68)
Info :
The black round (Round 28) forms a thin grid line that reads as the internal join line between squares when the runner is assembled. The two cream rounds after give a light field and help the pumpkin motif breathe inside a square 'frame'.
Round 31 :
Change to Black. Work 1 sc in each st (68)
Round 32 :
Fasten off and weave in ends carefully. Block the square if desired to make edges even and crisp.
Info :
Repeat Rounds 1–32 to make two more identical pumpkin squares (3 total). Make sure all pumpkins are oriented the same way (face front) so they read consistently on the runner.
Info :
Facial detail placement (surface crochet method): Using a small length of Jet Black yarn and a yarn needle or small hook, map the face on rounds 13–15 area. Locate center front by finding the stitch 1 round 13 that is aligned with the corner cluster between Rounds 22; from the center, count 5 stitches left and right for eye placement. Eyes are small 3–5 stitch triangular shapes — see step-by-step below.
Face - Eyes :
Using black yarn and tapestry (or surface slip stitch), start on Round 13 line: begin at the center offset (center stitch marked). Move left 5 stitches and surface slip stitch 3 stitches forming a small triangle (3 stitches wide at the base, tapering by working into the following single stitch as you move). Repeat symmetrically on the right side for second eye. (Exact stitch mapping: at round 13 with 54 stitches, locate the center front; move 9 stitches left = left eye start; work 3 surface sl st across rounds 13-14 to create a slightly raised eye)
Face - Nose :
Place nose directly between eyes on round 14 — a single small triangle of black using 3 surface sl sts stacked vertically (1 sl st, then one below). Keep the nose small and centered.
Face - Mouth :
Work the mouth across rounds 14–16 with black yarn using surface slip stitches: start about 6 stitches left of center and work a shallow smile arc that spans approximately 10–12 stitches. Build the mouth by working short curved lines of surface stitches: two small V shapes inside the arc to suggest a carved mouth. Keep the mouth proportional to the pumpkin center; alternate placement slightly if you prefer a wider smile.
Info :
If you prefer embroidered features: use backstitch or satin stitch into the orange rounds after the motif is complete. Embroidery is less visible on the back side and is ideal for a flatter look. Always secure ends and weave them in on the wrong side.
— Joining the Three Squares into Runner :
Info :
We join the three squares vertically (one above another) using a join-as-you-go method on the last cream/black rounds, or you may make all three and sew them together later. The instructions below assume join-as-you-go along long vertical edges using single crochet join. Squares are identical and each edge length between corner cluster centers equals 17 stitches (see earlier math), so the join should match stitch-to-stitch across sides.
Joining Row 1 :
Place Square A (top) with right side facing. Align Square B (middle) with Square A's lower edge so right sides face each other along the seam edge (top of B to bottom of A). Using Black yarn and a 4.0 mm hook, insert hook through next unworked edge st on Square A and the corresponding edge st on Square B, sc through both loops — sc join across 68 stitches to seam one edge together. (68 stitches joined)
Info :
When joining, work a gentle, even tension — not too tight. If using join-as-you-go, place the squares as you go and check that corner clusters align. We are matching rounds where both squares have 68 sts on that edge.
Joining Row 2 :
Repeat the join between Square B (middle) and Square C (bottom) along the next seam: sc join across 68 stitches (68)
Info :
After the two joins you will have a long runner composed of three framed squares joined by black seams. Smooth the joins and weave in any ends from the joining yarn on the wrong side. Ensure orientation is consistent so pumpkins all face the same direction.
— Long Green Divider & Frame Rows (All Around) :
Round 1 :
With Olive/Forest Green, attach yarn at any seam area and work 1 sc evenly around the entire runner, working 3 sc into each corner cluster to maintain smooth corners. Count carefully as you go — the long runner perimeter stitch count should be 68 (square width) x 3 squares with joins but because we are working one continuous round and corner increases keep perimeter consistent. For clarity: work 1 sc evenly until each corner and place 3 sc in corner cluster locations (this will expand total perimeter by 8 for each corner in first round only).
Info :
Because the runner is three squares joined, the perimeter is rectangular. Walk the perimeter and place corner clusters at the outermost four corners of the runner only (not inner seams). The exact stitch count depends on your seaming method but the structure is consistent: one sc around with 3-sc corners gives a tidy framed edge.
Round 2 :
Work 1 sc in each st BLO around to make a subtle raised ridge (this helps the frame read clearly) — work evenly and keep markers at corners.
Round 3 :
Change to Cream. Work 1 sc in each st around (this makes the light field around the squares).
Round 4 :
Work 1 sc in each st around (cream)
Info :
These rounds create a consistent frame and field around the joined squares. Work slowly over seams to ensure you don't miss or double-stitch into join places. If you used a single crochet join earlier, those join stitches are included in this round.
Round 5 :
Change to Black. Work a contrasting grid line: sc evenly around, placing sc in each st and working 3 sc in each runner corner (black).
Round 6 :
Change to Cream. Work 1 sc in each st around (cream)
Round 7 :
Work 1 sc in each st around (cream)
Info :
At this point the runner should be fully rectangular with an internal cream field and a black line that echoes the internal seams between squares. The next rounds prepare the outer scalloped border.
— Outer Scallop Shell Border :
Info :
The outer scalloped border is worked in Black to give a bold finishing edge. We'll work multiple rounds of shells and reverse shells to make a rich scallop. Work shells evenly across each side and place larger shells at corners to maintain a pretty rounded corner. The shell in this pattern = 5 dc in one stitch (a full shell).
Round 1 :
With Black, join and work 1 sc evenly around to pick up a stable base for shells. Place 3 sc in each corner st to maintain square corners.
Round 2 :
Work (ch2, sk next st, shell in next st) repeat to form initial scallops along edges. For each shell: 5 dc in same st. At corners, work (5 dc, ch2, 5 dc) into the corner st to form a large corner shell. Continue around until you have shells placed in each repeat; count shells per side and note them for subsequent rounds — there will be an even number of shells per side (approx 10–14 depending on your gauge).
Info :
Because shell repeats are cluster-based rather than sc totals, the exact number of shells per side depends on your tension. Aim to place shells evenly. If you end a side and are off by one stitch, you may adjust the spacing by adding an extra ch1 or ch2 between shells to distribute shells evenly on that side.
Round 3 :
Work shell edge round: in each shell from previous round work 1 sc centered across the shell top, then (ch3, slip into shell top) to anchor and define each scallop. At corners keep the larger corner shell shaped by working into the ch2 space and top dc of corner shell.
Round 4 :
Repeat a tidy finish: work 1 sc in each anchoring st and add a small picot if you like (ch3, sl st in first ch) at the center of every 3rd shell to add texture and detail. Fasten off and weave ends. Block lightly if desired to make scallops even.
Info :
Alternate scallop finishing: if you prefer a tighter scallop, use (3 dc) shells instead of (5 dc). If you want bigger scallops, work (7 dc). The pattern uses 5 dc for balanced texture and a clean outline in photos.
— Finishing & Surface Detail Touch-ups :
Info :
After borders are finished, weave all ends into the wrong side, trim excess, and lightly block the runner to allow shells to sit flat. Use pins and a steam iron at a safe distance to shape the scallops and flatten seams. Re-check facial embroidery: add extra satin stitch or tiny surface clusters if any eyes or mouth sections look sparse. Press gently and allow to dry.
Round - Final Check :
Inspect both sides, weave in any visible tails, and stitch down any loose joins using matching yarn. If the runner will see food/drink, you can add a lightweight fabric backing fused with fabric glue for protection (optional).
Info :
Care instructions: handwash gently in cool water and lay flat to dry. Avoid rough machine washing to preserve the scalloped edge. Spot clean small spills immediately to protect yarn color and texture.
Assembly Instructions
- Attach squares using join-as-you-go single crochet seam: align edges and single crochet into corresponding stitches across each seam, keeping gentle even tension so the seam lays flat.
- If sewing instead of joining-as-you-go, place squares right sides together, pin every 4–6 stitches along the seam, then whipstitch or mattress stitch through the backs of the edge stitches. Work the seam across the entire long side and secure ends.
- When all three squares are joined, pick up border yarn at any outer corner and work the rounds described under 'Long Green Divider & Frame Rows' around the entire runner. Place 3 sc into each corner cluster to maintain neat corners.
- After frame rounds, work the scalloped shell border in black: place shells evenly across each long and short side, and make larger shells at the four outer corners to keep a rounded shape.
- Embroider the pumpkin faces after the squares are joined (or before, as preferred) using surface slip stitch or embroidery with black yarn. Double-check placement by folding the square and centering before stitching permanently.
- Weave all ends into the wrong side, block the runner with pins and steam if desired, and trim any remaining tails. Optionally tack the scallop peaks to the wrong side with a few invisible stitches if your scallop wants to curl.
Important Notes
- 💡Use stitch markers consistently at the beginning of each round to avoid counting errors and maintain proper shaping.
- 💡Work the pumpkin faces before final joining if you prefer easier access to the center area; otherwise, use a small hook and yarn needle for surface crochet when squares are joined.
- 💡Stuffing is not necessary – this is flat crochet. However, block the squares gently for even edges.
- 💡When changing colors, carry the unused yarn along the inside of the square for 4–6 stitches and secure by crocheting over or weaving in later to avoid long tails on the wrong side.
- 💡Keep even tension when joining squares; too tight joining will pucker the runner while too loose will make seams floppy.
- 💡Pin pieces before sewing or joining permanently to ensure proper alignment; check that pumpkins all face the same direction and are centered in each square.
This festive pumpkin table runner is a joyful project that brings a burst of autumn charm to your table. The three smiling pumpkins, framed by green accents and finished with a bold scalloped black edge, make a perfect seasonal centerpiece 🧡. Each square is easy to manage, and assembling them into a long runner is satisfying and quick. Enjoy the slow, cozy process of crocheting this runner and savor the cheerful results — perfect for fall gatherings and everyday seasonal decor 🎃✨