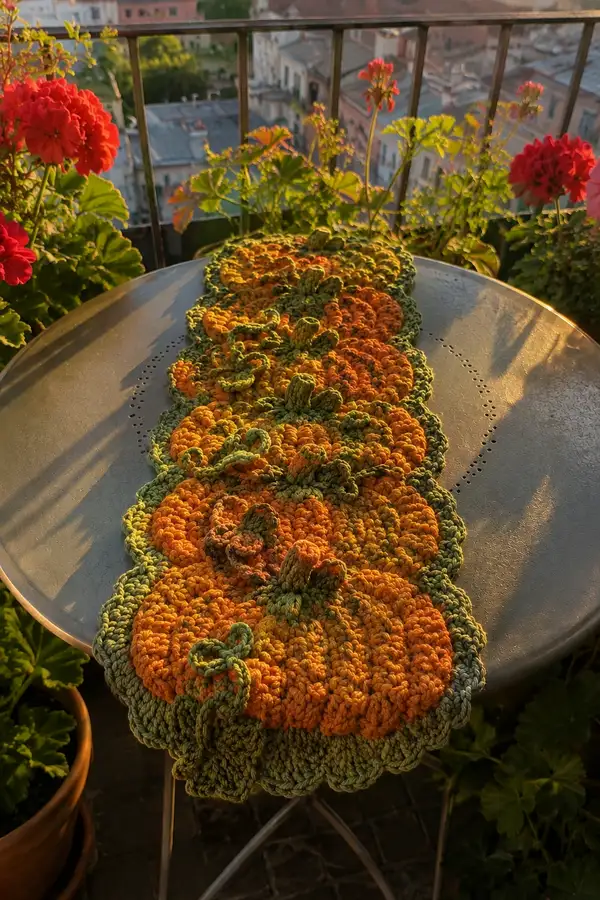
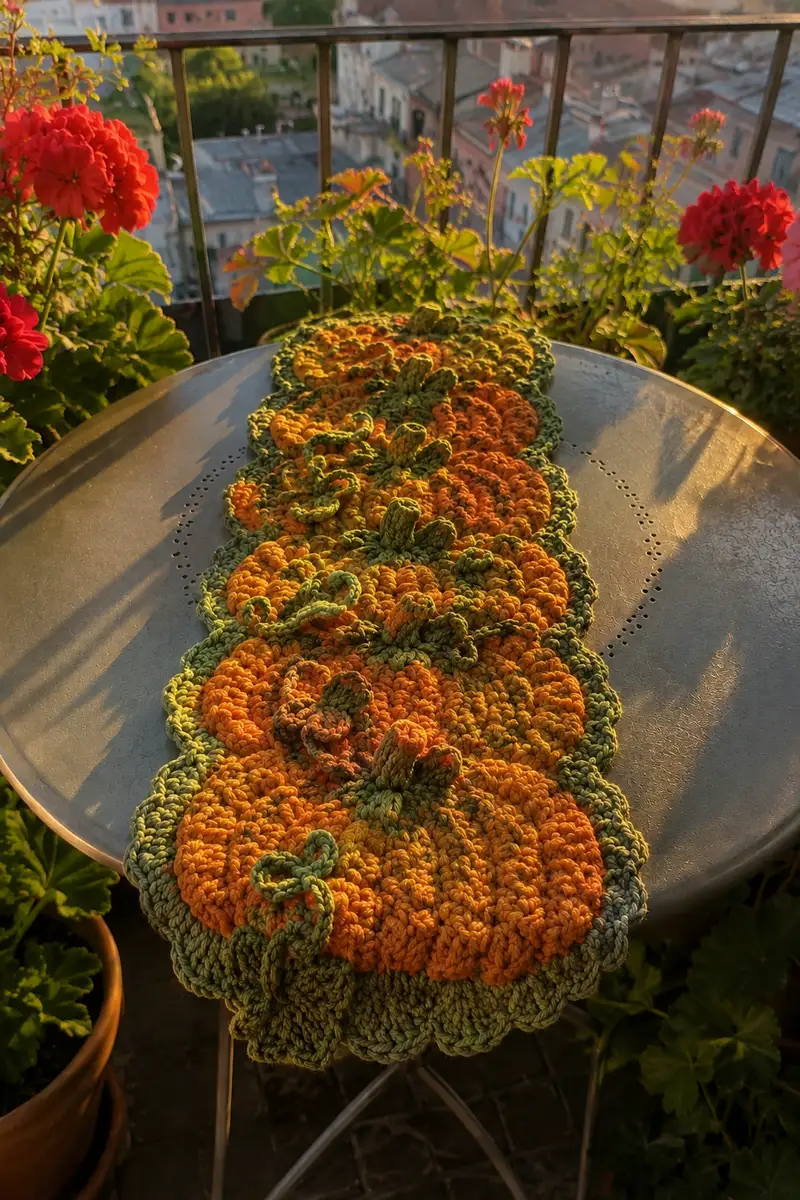
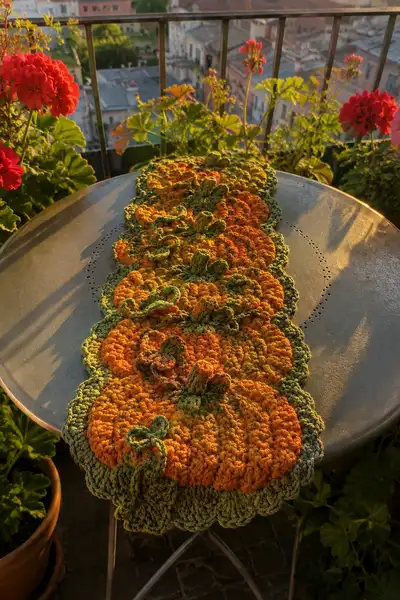
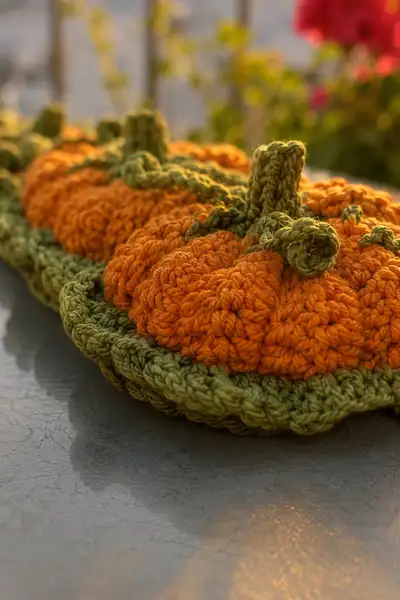
Create a warm autumn table runner featuring a row of plush, chunky bobble pumpkins in caramel and sage tones. This pattern uses puff/bobble stitches and textured rounds to form raised pumpkin lobes, stems, curly vines and a scalloped green border. Finished runner is decorative, slightly padded and perfect for holiday centerpieces or everyday autumn style.
Progress Tracker
0% Complete
— Notes, Gauge & Overview :
Info :
Gauge is flexible for a decorative runner; with 5.5mm hook and bulky yarn gauge is approximately 4 sc = 1 inch. Runner pictured measures approximately 36-40 inches long by 7-8 inches wide with four pumpkin motifs and a scalloped border. This pattern works as a series of individual pumpkin motifs joined side-by-side with optional join-as-you-go rounds. Work tightly enough that puff stitches are well defined and stuffing is unnecessary for most crafters.
Info :
Puff stitch technique: Yarn over, insert hook, yarn over, pull up loop (3 loops on hook) repeat 3 more times in same stitch (you will have 9 loops on hook), yarn over and pull through all loops, ch 1 to secure the puff (puff counts as 1 stitch). For smaller or larger puffs use 3 or 4 repeats as described below in specific rounds.
— Pumpkin Motif (Make 4) - Motif A :
Round 1 :
6 sc in magic ring (6)
Round 3 :
(1 sc, inc) x 6 (18)
Round 4 :
(2 sc, inc) x 6 (24)
Round 5 :
(3 sc, inc) x 6 (30)
Round 6 :
(4 sc, inc) x 6 (36)
Round 7 :
(5 sc, inc) x 6 (42)
Round 8 :
(6 sc, inc) x 6 (48)
Info :
These first increases create a round disc base. Keep counts accurate. Do not fasten off; you will now begin textured rounds to form the lobes. Place a marker at the start of this round — counting will remain at 48 through the textured rounds.
Round 9 :
1 sc in each st (48)
Round 10 :
(7 sc, puff) x 6 (48)
Info :
Puff notes: Each puff uses 3 yarn-over insertions (3x loops) to create a chunky raised bobble. Work the puff into the single stitch indicated — the puff will count as one stitch. Chain 1 after each puff to secure it and keep stitch count consistent.
Round 11 :
1 sc in each st (48)
Round 12 :
(3 sc, puff, 4 sc, puff) x 6 across (48)
Info :
This round layers additional puff clusters to deepen the pumpkin lobes. Notice pattern uses two puffs per segment placed evenly to create the visual ridges. Keep the number of filler sc between puffs as written to preserve spacing.
Round 13 :
1 sc in each st BLO (48)
Info :
Working BLO on this round creates a slight ridge at the base of the next texture round and helps each lobe sit raised. Use the back loop only for a neat fold effect around the motif edge.
Round 14 :
(8 sc, puff) x 6 (48)
Round 15 :
1 sc in each st (48)
Round 16 :
(7 sc, puff) x 6 (48)
Info :
At this stage the motifs are beginning to show distinct lobes; adjust puff tension to control how tall each lobe becomes. If you prefer deeper lobes, use 4-repeat puff (more loops) but maintain consistent stitch count by always chaining 1 after the puff.
Round 17 :
1 sc in each st (48)
Round 18 :
(3 sc, puff, 3 sc, puff, 4 sc) x 6 reorganized across (48)
Round 19 :
1 sc in each st BLO (48)
Info :
If you want the center to puff slightly, add a very light stuffing disc (use less than a teaspoon of fiberfill) and then continue; most makers leave these flat as the puff stitches create sufficient volume for a table runner.
Round 20 :
(5 sc, puff, 6 sc, puff) x 6 (48)
Round 21 :
1 sc in each st (48)
Round 22 :
(6 sc, puff, 6 sc) x 6 adjusting placements (48)
Info :
At rounds 20-22 you are refining the lobe shapes; use a stitch marker to mark where each puff sits on every round so puffs stack correctly creating vertical lobes.
Round 23 :
1 sc in each st BLO (48)
Round 24 :
(2 sc, puff, 7 sc) x 6 (48)
Round 25 :
1 sc in each st (48)
Round 26 :
(4 sc, puff, 5 sc) x 6 (48)
Info :
If your yarn is slightly thicker or thinner, you may notice small differences in the number of stitches between puffs — adjust filler sc between puffs so the repeated pattern totals 48 sts. Always recount at the end of the round.
Round 27 :
1 sc in each st (48)
Round 28 :
(3 sc, puff, 6 sc) x 6 (48)
Round 29 :
1 sc in each st BLO (48)
Round 30 :
Finish with (sc, hdc, sc) in each st around to create a soft roll, sl st to join, fasten off and leave tail for joining (48)
Info :
Fasten off leaving a long tail for sewing and joining. Pin the completed motif flat and block lightly if desired to even out shape before attaching stems and vines. Repeat this entire motif 3 more times to make a total of 4 pumpkin motifs for the runner.
— Pumpkin Motif (Make 4) - Motif B (Repeat Motif A with slight variation) :
Info :
Repeat rounds 1-30 from Motif A to create Pumpkin Motif B. For visual interest, shift the starting point of the puff pattern by 2-3 stitches on Round 10 for Motif B so lobes do not line up perfectly with Motif A — this produces an organic, hand-made look when the pumpkins are joined.
Round 1 :
6 sc in magic ring (6)
Round 3 :
(1 sc, inc) x 6 (18)
Round 4 :
(2 sc, inc) x 6 (24)
Round 5 :
(3 sc, inc) x 6 (30)
Round 6 :
(4 sc, inc) x 6 (36)
Round 7 :
(5 sc, inc) x 6 (42)
Round 8 :
(6 sc, inc) x 6 (48)
Round 9 :
1 sc in each st (48)
Round 10 :
Shifted pattern: (3 sc, puff, 9 sc, puff) x 4 and then adjust to total 48 across (48)
Info :
This variation shifts puff placement; always check your total to remain at 48. Continue following motifs rounds 11-30 as in Motif A but mirror or slightly alter the filler sc counts to vary lobe alignment.
Round 11 :
1 sc in each st (48)
Round 12 :
(3 sc, puff, 4 sc, puff) x 6 (48)
Round 13 :
1 sc in each st BLO (48)
Round 14 :
(8 sc, puff) x 6 (48)
Round 15 :
1 sc in each st (48)
Round 16 :
(7 sc, puff) x 6 (48)
Round 17 :
1 sc in each st (48)
Round 18 :
(3 sc, puff, 3 sc, puff, 4 sc) x 6 (48)
Round 19 :
1 sc in each st BLO (48)
Round 20 :
(5 sc, puff, 6 sc, puff) x 6 condensed across (48)
Round 21 :
1 sc in each st (48)
Round 22 :
(6 sc, puff, 6 sc) x 6 (48)
Round 23 :
1 sc in each st BLO (48)
Round 24 :
(2 sc, puff, 7 sc) x 6 (48)
Round 25 :
1 sc in each st (48)
Round 26 :
(4 sc, puff, 5 sc) x 6 (48)
Round 27 :
1 sc in each st (48)
Round 28 :
(3 sc, puff, 6 sc) x 6 (48)
Round 29 :
1 sc in each st BLO (48)
Round 30 :
Finish with (sc, hdc, sc) around to create an inner border, sl st to join, fasten off leaving a tail for joining (48)
Info :
Repeat motif process for Motif C and Motif D, shifting puff placement in each motif by a few stitches to avoid perfectly aligned lobes across the length of the runner. Motifs should be identical in overall count and texture but asymmetrically aligned for a natural look.
— Stem (Make 4) :
Info :
Stems are crocheted in sage color using 4.0mm hook for tightness. The stem is a small tube that is worked in continuous rounds and sewn to the top center of each pumpkin motif. Use tight single crochets to keep the tube firm.
Round 1 :
ch 6, sl st to join to form a ring (6)
Round 2 :
6 sc in ring (6)
Round 3 :
1 sc in each st around (6)
Round 4 :
1 sc in each st (6)
Round 5 :
(inc, 2 sc) x 2 then 2 sc (8)
Round 6 :
1 sc in each st around (8)
Round 7 :
1 sc in each st around (8)
Round 8 :
sl st next st, fasten off leaving long tail for sewing. Fold base flat and whip stitch shut slightly then sew stem to top center of pumpkin motif through the inner border tail left previously.
Info :
If you prefer a thicker stem, work Rounds 5-7 to increase to 10 sts total before finishing. For extra firmness insert a small pipe-cleaner or wrapped yarn core before closing top (secure ends and hide inside stem). Fasten off leaving long tail for sewing.
— Curly Vine & Tendrils (Make 4 vines, multiple tendrils) :
Info :
Vines are made with a simple chained curl technique worked in sage. Tendrils are short chained spirals and are sewn onto the motifs to create organic connecting lines between pumpkins.
Round 1 :
Using 4.0mm hook and sage yarn, ch 40 for a long vine (or desired length). If your runner has more pumpkins add length proportionally.
Round 2 :
Working into 2nd ch from hook, sc across chain to end. Fasten off and sew vine along the top edge of each motif connecting stem bases. Alternatively use a BOS (backstitch) to secure in even intervals.
Round 3 :
Tendrils: make several ch 12 spirals. For each tendril, ch 12, sc in 3rd ch from hook then sc in next ch, continue by working 2-3 sc in each ch to encourage the chain to curl tightly until you reach the end. Fasten off leaving long tail for sewing.
Info :
To make tighter curls, use a smaller hook for tendrils. Vines can be worked in two strands held together for a chunkier braided look before sewing in place.
— Leaf Accent (Make 8-12) :
Round 1 :
With sage yarn ch 6, sl st into 2nd ch from hook, hdc in next, dc in next, hdc in next, sc in last, turn to form leaf base and sl st into foundation ch to close (approx 5 sts)
Round 2 :
Edge: ch 1, sc evenly around leaf edge working (sc, hdc, dc) at the leaf tip to create point, then sl st to join. Fasten off leaving tail to sew to pumpkin top near stem.
Info :
Make leaves in two sizes by adjusting the chain foundation (4-8) to add visual variety. Sew leaves between the stem and vine placements for a natural look.
— Joining Pumpkin Motifs :
Info :
You can join motifs using whip stitch/sewn join or join-as-you-go (JAYG) with slip stitch at the last round. Pin motifs in a straight line with about 1-2 stitches of overlap at edges so puff lobes slightly nest together. The examples below give both sewn and JAYG instructions.
Method A - Sewn Join :
Place two completed pumpkin motifs right sides up, aligning the outer decorative rounds (the final (sc,hdc,sc) round). Using the long tails left from each motif, whip stitch through the back loops of both motifs at evenly spaced points to join the edges securely. Work across the length of the overlap using small, even stitches. Repeat to attach all pumpkins into a row.
Method B - Join-As-You-Go :
On Motif 2, work final round as follows: (sc to first join point, sl st into corresponding st on adjacent motif, continue sc to next join point, sl st into adjacent motif) across to join permanently while finishing round. This creates an integrated seam. Fasten off and weave in ends.
Info :
Pin motifs first to ensure alignment before sewing. If using JAYG, work slowly to keep tension even so motifs do not pucker. You can also block motifs lightly before joining to make edges even.
— Runner Foundation & Inner Connecting Round :
Round 1 :
With sage yarn join to outer round of the first joined motif in any stitch at the long side, ch 1, sc evenly around the long joined edge of all motifs creating a uniform foundation edge. Aim for approximately 4-6 sc per lobe area; total counts vary with number of motifs.
Round 2 :
1 sc in each st around (maintain count) — this evens the join seam and begins the inner border (count across entire joined assembly; this is a continuous working round along the top and bottom edges, working across the small connecting seams).
Info :
When working along the sides between motifs, insert 2-3 sc to firm up the connection. Keep tension consistent to avoid rippling. This inner connecting area will be the anchor for the outer scalloped border.
Round 3 :
1 sc in each st across top, continue around the entire runner (this round is a tidy even round — do NOT add increases unless you need to flatten the runner). Fasten off with long tail for final border attachment if you prefer to crochet border separately.
— Scalloped Outer Border :
Info :
The scalloped border uses a series of shells in sage to frame the pumpkins and create a finished edge. Work in the round along the outermost stitches of the runner. Adjust number of shells to evenly space along the long sides and ends.
Round 1 :
Join sage yarn with sl st anywhere on outer edge, ch 1, sc evenly across until you reach a corner or seam junction. For a long continuous side plan for shells every 6-8 stitches depending on desired scallop size.
Round 2 :
(sk 2 sts, 5 dc in next st, sk 2 sts, sl st in next) repeat across to form shells. At ends work 3 dc shells to round out the corner. Join with sl st, fasten off and weave in ends.
Round 3 :
Optional second scallop: Join lighter sage or variegated green and work (sl st in top of shell, ch 2, 3 dc in same space, ch 2, sl st into next shell top) repeat across to add depth and a layered look. Fasten off and weave in tails.
Info :
If you prefer a chunkier border work two rows of shells, alternating shell sizes for a ruffled finish. Blocking after the border is strongly recommended to flatten shell curves and even the runner’s profile.
— Final Finishing Touches :
Info :
Sew stems into the center top area of each pumpkin. Position vines between stems and sew lightly along the surface with the long vine tail. Attach tendrils and leaves around stems to taste. Weave in all ends hiding yarn tails into puff spaces for a neat back. Lightly block the completed runner and steam or wet-block the scallops to open them up and allow the runner to sit flat.
Round 1 :
Weave in ends: use tapestry needle and weave tails through back loops 4-5 times and trim close. Pin runner flat and dampen slightly for blocking; let dry fully before use.
Info :
Optional light stuffing: If you wish for slightly more pronounced lobes, insert a very small amount of fiberfill under some puff rounds before final seaming. Do not overstuff or the runner will not lie flat on the table.
This chunky bobble pumpkin table runner is a delightful handmade accent that brings autumn warmth to any table. Each puff and scallop adds depth and character while the sage border frames the pumpkins beautifully. Whether you make it for holiday dinners or daily cozy décor, this runner will spark compliments and create a seasonal mood. Enjoy stitching, tailoring the look, and sharing the finished piece with friends or family. 🧶🍁