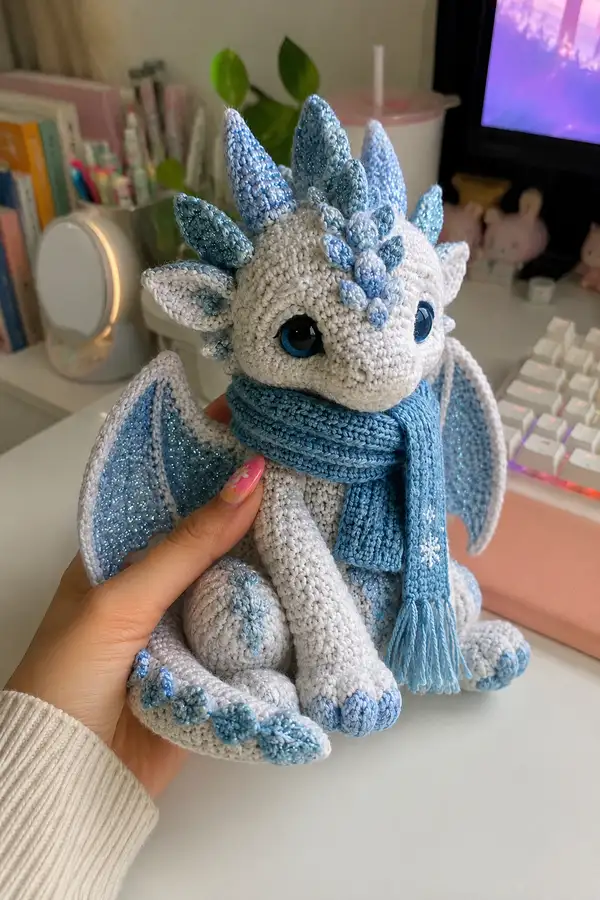
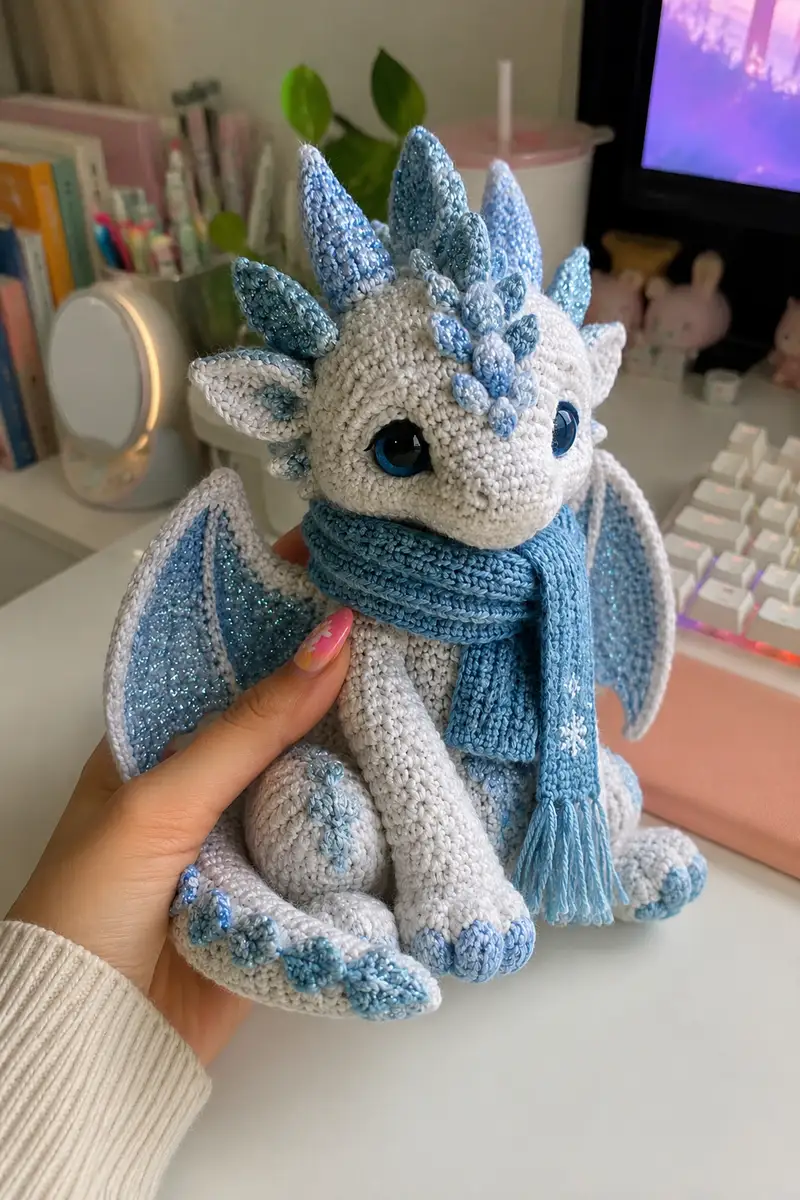
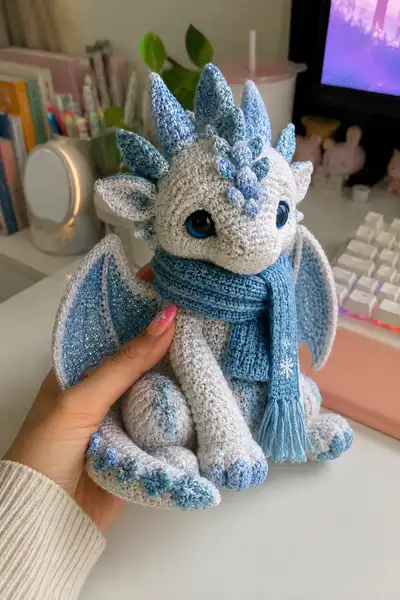
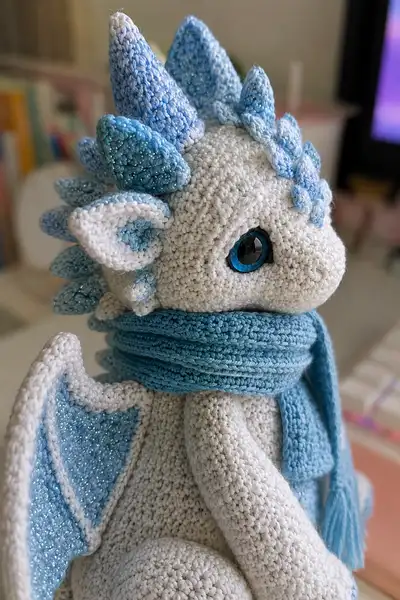
Create a cuddly snowy ice dragon with shimmering blue scales, glittery wing inners, and a cozy ribbed scarf. This amigurumi features expressive blue safety eyes, layered spike ridges down the head and tail, and textured paw pads. The finished plush sits upright and is richly detailed with contrast color accents and tiny scale motifs for a wintry, magical finish.
Progress Tracker
0% Complete
— Head :
Round 1 :
6 sc in magic ring (6)
Round 3 :
(1 sc, inc) x 6 (18)
Round 4 :
(2 sc, inc) x 6 (24)
Round 5 :
(3 sc, inc) x 6 (30)
Round 6 :
(4 sc, inc) x 6 (36)
Round 7 :
(5 sc, inc) x 6 (42)
Round 8 :
(6 sc, inc) x 6 (48)
Round 9-12 :
1 sc in each st (48)
Info :
Place safety eyes between rounds 11-12, approximately 10-12 stitches apart measured across the round for the look in the photo. Mark the first stitch of the round with a stitch marker to keep track of round starts.
Round 13 :
(6 sc, dec) x 6 (42)
Round 14 :
1 sc in each st (42)
Round 15 :
(5 sc, dec) x 6 (36)
Round 16 :
1 sc in each st (36)
Round 17 :
(4 sc, dec) x 6 (30)
Round 18 :
1 sc in each st (30)
Info :
Begin stuffing head firmly but not hard. Use small amounts of stuffing and work them into the facial area to keep snout shape smooth. Continue stuffing lightly after each decrease round.
Round 19 :
(3 sc, dec) x 6 (24)
Round 20 :
(2 sc, dec) x 6 (18)
Round 21 :
(1 sc, dec) x 6 (12)
Info :
Fasten off, leaving a long tail for sewing the head to the body later if you are closing the neck now. For this design we leave the head opening to attach to the neck piece — finish closing after neck is sewn to body for smoother join.
Round 23-28 (Neck shaping as part of head) :
Rejoin at neck opening to build short neck tube: Round 23: 1 sc in each st around (6) Round 24: (inc) x 6 (12) Round 25: 1 sc in each st (12) Round 26: (1 sc, inc) x 6 (18) Round 27: 1 sc in each st (18) Round 28: (2 sc, inc) x 6 (24)
Info :
This neck extension will be sewn into the top of the body. Stuff lightly through the neck to round 27 and stop stuffing head more until later when you join to a half-stuffed body for neat shaping.
— Head Scales & Ridge (Make cluster pieces) :
Round 1 :
6 sc in magic ring (6)
Round 3 :
(1 sc, inc) x 6 (18)
Round 4 :
1 sc in each st (18)
Round 5 :
Fold cluster flat and sc through both loops across to create petal shape. Finish off leaving tail. Make 12 small clusters for forehead and top ridge.
Info :
Sew clusters onto the head center starting at the forehead and working backward along the crown. Use different shades of icy blue held single or combined with metallic thread for sparkle. Pin in place before stitching.
— Horns / Spikes (Make 8: 4 large, 4 medium) :
Large Horn - Round 1 :
6 sc in magic ring (6)
Large Horn - Round 2 :
6 inc (12)
Large Horn - Round 3 :
(1 sc, inc) x 6 (18)
Large Horn - Round 4 :
(2 sc, inc) x 6 (24)
Large Horn - Round 5 :
1 sc in each st (24)
Large Horn - Round 6 :
(3 sc, dec) x 6 (18)
Large Horn - Round 7 :
(2 sc, dec) x 6 (12)
Large Horn - Round 8 :
(1 sc, dec) x 6 (6)
Large Horn - Round 9 :
6 dec (3) - Fasten off leaving tail, lightly stuff cone before final decreases (cone tip slightly pointed)
Info :
Make 4 large cones and 4 medium cones (medium cones stop after round 5 and shape with (1 sc, dec) rounds to result in a slightly shorter cone). Use combined sparkly yarn for the outer rows to add glitter to tips.
— Ears (Make 2) :
Round 1 :
6 sc in magic ring (6)
Round 3 :
(1 sc, inc) x 6 (18)
Round 4 :
(2 sc, inc) x 6 (24)
Round 5 :
1 sc in each st (24)
Round 6 :
Change to contrast 'Icy Blue' yarn for inner ear. 1 sc BLO in each st for curved edge (24)
Round 7 :
Fold ear and sc through both layers across base 6-8 sts to create a cupped ear. Fasten off leaving tail for sewing.
Info :
Sew ears to the sides of the head approximately between rounds 8-10 (counting from top of head increases). Angle them slightly forward for the expression shown in the photos.
— Body :
Round 1 :
6 sc in magic ring (6)
Round 3 :
(1 sc, inc) x 6 (18)
Round 4 :
(2 sc, inc) x 6 (24)
Round 5 :
(3 sc, inc) x 6 (30)
Round 6 :
(4 sc, inc) x 6 (36)
Round 7 :
(5 sc, inc) x 6 (42)
Round 8 :
(6 sc, inc) x 6 (48)
Round 9-12 :
1 sc in each st (48)
Info :
If adding clothing or textured lines on the body, change to BLO for one round to leave a ridge. Otherwise continue even rounds until you shape the waist. Keep body unstuffed until head and neck are attached for cleaner joining.
Round 13 :
(6 sc, dec) x 6 (42)
Round 14 :
1 sc in each st (42)
Round 15 :
(5 sc, dec) x 6 (36)
Round 16 :
1 sc in each st (36)
Round 17 :
(4 sc, dec) x 6 (30)
Round 18 :
1 sc in each st (30)
Info :
Stuff body lightly at this point to provide a stable base for the head. The body should be firm but still slightly soft so the dragon can sit naturally. When half full, place the neck extension from the head inside the top opening and mark position for sewing.
Round 19 :
(3 sc, dec) x 6 (24)
Round 20 :
(2 sc, dec) x 6 (18)
Round 21 :
(1 sc, dec) x 6 (12)
Round 22 :
6 dec (6) - Fasten off leaving a long tail for final closure after the head is sewn on and stuffing is finished
Info :
Sew the head neck tube into the top of the body opening by matching the 24-stitch neck edge to the body opening. Use mattress or whip stitch and ensure the seam is neat and concealed by the head scales and horns.
— Front Legs / Arms (Make 2) :
Round 1 :
6 sc in magic ring (6)
Round 3 :
(1 sc, inc) x 6 (18)
Round 4 :
1 sc in each st (18)
Round 5 :
Change to Icy Blue for paw/toe tips. (2 sc, inc) x 6 (24)
Round 6-8 :
1 sc in each st (24)
Round 9 :
(3 sc, dec) x 6 (18)
Round 10 :
1 sc in each st (18)
Round 11 :
(2 sc, dec) x 6 (12)
Round 12 :
1 sc in each st (12)
Round 13 :
(1 sc, dec) x 6 (6)
Round 14 :
6 sc (6) - Fasten off leaving long tail for sewing into the body. Stuff palm/toes firmly, arm lightly.
Info :
Sew arms to the sides of the body approximately between body rounds 12-16 to achieve the sitting pose. Attach so elbows point slightly forward for the relaxed look of the photo.
— Back Legs (Make 2) :
Round 1 :
6 sc in magic ring (6)
Round 3 :
(1 sc, inc) x 6 (18)
Round 4 :
(2 sc, inc) x 6 (24)
Round 5 :
(3 sc, inc) x 6 (30)
Round 6-8 :
1 sc in each st (30)
Round 9 :
Change to darker blue for toe pads. (4 sc, inc) x 6 (36)
Round 10-12 :
1 sc in each st (36)
Round 13 :
(4 sc, dec) x 6 (30)
Round 14 :
(3 sc, dec) x 6 (24)
Round 15 :
(2 sc, dec) x 6 (18)
Round 16 :
(1 sc, dec) x 6 (12)
Round 17 :
6 dec (6) - Fasten off leaving tail for sewing. Stuff foot firmly to create stable seat shape and pad for sitting.
Info :
When sewing legs on, position approximately at the bottom front edge of the body so the dragon sits upright. Reinforce with extra stitches through the base for durability.
— Tail :
Round 1 :
6 sc in magic ring (6)
Round 3 :
(1 sc, inc) x 6 (18)
Round 4 :
1 sc in each st (18)
Round 5-7 :
1 sc in each st (18)
Round 8 :
(1 sc, dec) x 6 (12)
Round 9 :
(6 sc) around (12)
Round 10 :
Change to small scale clusters: alternate one cluster (made as head scale but only two rounds) and 6 sc across the tail to create ridged scales along one edge. Work to desired length about 14-18 rounds total, finishing with tapering decreases to a point.
Info :
For poseable tail, insert craft wire along the tail tube before stuffing. Bend the wire at the tip to anchor and wrap with yarn so ends are not sharp. Sew tail into the back of body at center lower rounds for stability.
— Wings (Make 2 - Outer Frame and Inner Sparkle Panel) :
Outer Frame - Round 1 :
6 sc in magic ring (6)
Outer Frame - Round 2 :
6 inc (12)
Outer Frame - Round 3 :
(1 sc, inc) x 6 (18)
Outer Frame - Round 4 :
(2 sc, inc) x 6 (24)
Outer Frame - Round 5 :
(3 sc, inc) x 6 (30)
Outer Frame - Round 6-8 :
1 sc in each st (30)
Info :
The outer frame will create the wing border — work the outer rounds in the main Snow White color while the inner panel is done in the sparkly blue yarn. Use BLO on last round of frame to create a neat ridge for joining the inner panel.
Inner Panel - Round 1 :
Ch 24, 1 sc in 2nd ch from hook and across (23), turn and work back in rows to make a tapered membrane approximately 12-14 rows. Shape the top edge by decreasing on each end every 3rd row to make a teardrop membrane shape.
Inner Panel - Round 2-14 :
Continue in rows: decrease 1 st at each end every 3rd row to taper (work until row width matches inside of outer frame). Fasten off leaving tail for joining.
Join :
Pin inner panels inside the outer frames and sew with whip stitch through both pieces. Add a decorative ridge by working a round of sc over the seam in contrast blue to define wing bones.
Info :
Use metallic or glitter-blend yarn for the inner panel to get the sparkle effect in the photo. Make sure edges are neat; block lightly with steam (if yarn allows) before sewing for smooth membranes.
— Wing Bone Detail :
Round 1 :
With contrast blue, 6 sc in magic ring (6)
Round 2-8 :
1 sc in each st, lengthen to form 7-8 small bones. Fasten off and sew along the wing curve at intervals to create ribbed bone detail.
Info :
Sew wings onto the upper back between body rounds 8-12. Tuck slightly under the head ridge so wings sit naturally. Reinforce each wing base with several passes of yarn for a secure attachment.
— Paw Pads and Toe Tips :
Round 1 :
Ch 4, 6 sc in 2nd ch from hook and around to form oval (6)
Round 2 :
Inc across short edges to shape oval (10)
Round 3 :
1 sc in each st (10) - Fasten off and stitch pads to the underside of feet. Make two for each back foot and one for each front paw.
Info :
Use contrast blues for pads and color slightly darker at tips for a shaded look. Use matching embroidery to create tiny triangular nails on toes if desired.
— Decorative Scale Edging Along Limbs (Optional but shown):
Round 1 :
Make small scallops: 6 sc in magic ring, finish and sew as single scallop. Repeat scallops spaced evenly along limbs and tail.
Info :
These scalloped scales are made in alternating shades of blue and white and sewn in staggered rows at the outer leg edges to mirror the photo. Make about 18-24 small scallops total.
— Scarf (Ribbed, Removable) :
Row 1 :
Ch 7, sc in 2nd ch from hook and across (6)
Row 2-60 :
Turn, ch1, 1 sc BLO in each st (6) - Repeat for a long ribbed strip approximately 60 rows for a long wraparound scarf. Adjust length for personal preference.
Row 61 :
Fasten off, weave in ends, add fringe by knotting small lengths of yarn along ends. Optionally add embroidered snowflake motifs using white yarn.
Info :
The scarf in the photo is made with Icy Blue held single and worked in BLO to create a ribbed texture. Make it removable to change colors or wash separately.
— Assembly & Finishing Touches :
Info :
Block any wing panels lightly if using cotton to help smooth edges. Pin all parts in place on the body to confirm spacing before sewing. Use a tapestry needle and secure with close, even stitches so seams are invisible from the outside.
Detail :
Sew horns and clusters along the crown and neckline in an alternating pattern: large cone at center back of head, flanked by medium cones and small clusters to form the layered ridge. Reinforce with extra passes for safety if toy is for a child.
Final :
Embroider nostrils using 6 strands of contrasting blue for subtle definition. Add tiny blush with fabric-safe paint if desired. Secure all safety eye washers and weave in remaining ends.
This snowy ice dragon is a magical mix of sculpting and sweet detail — layered scales, glittery inner wings, and a cozy scarf come together to make a beloved companion. Each section is designed to be customized and carefully assembled for a polished finish. I hope you enjoy making every textured ridge and starry inner wing almost as much as you'll enjoy cuddling the finished dragon! ❄️🧶