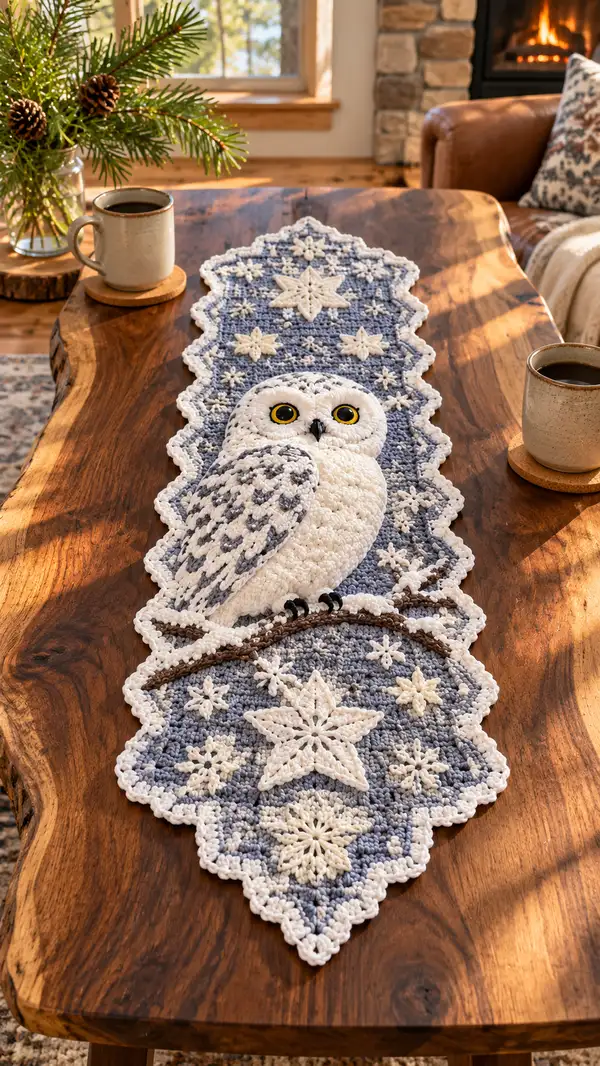
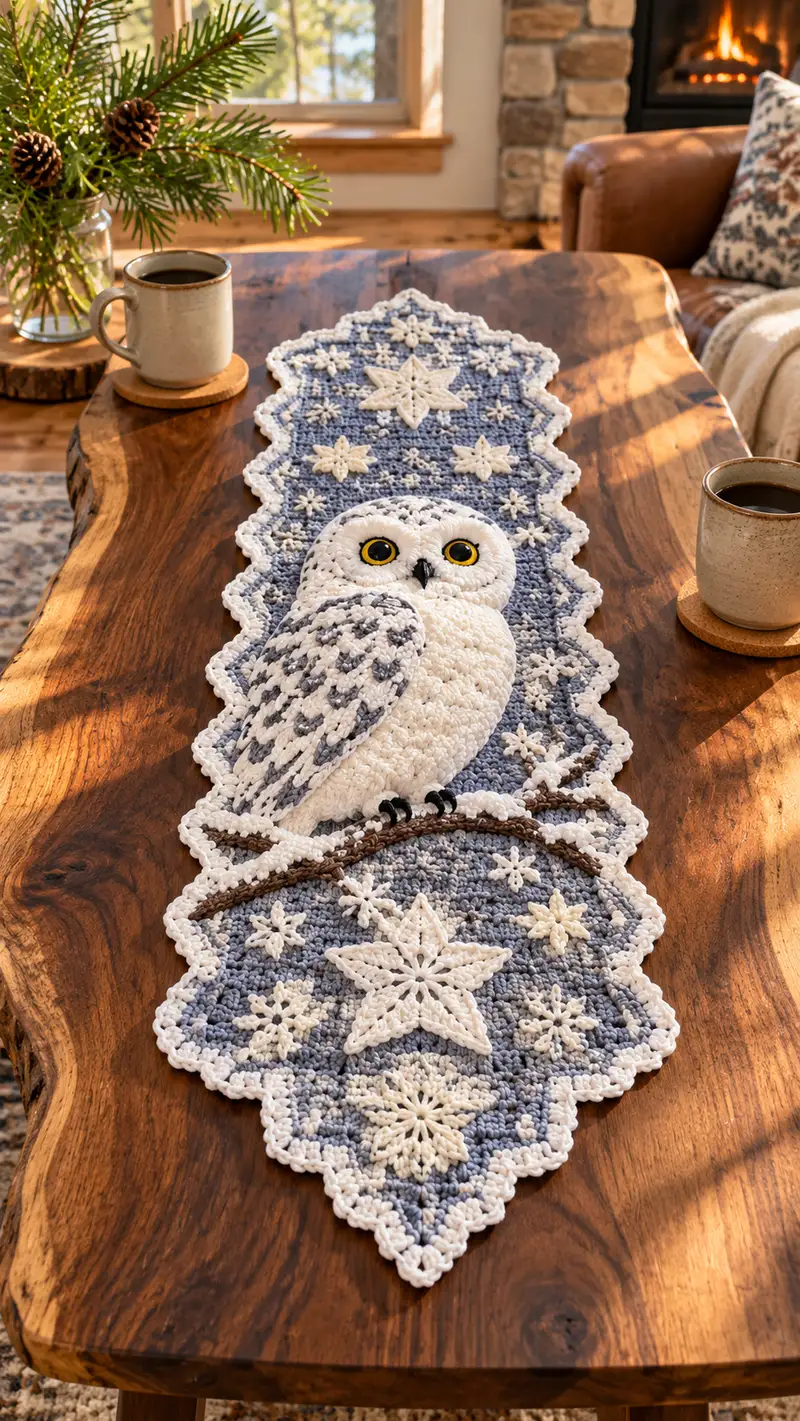
A cozy winter table runner featuring a textured snowy owl perched on a snowy branch, set against a soft silver-blue background with raised star and snowflake motifs. The pattern uses simple stitches and layered applique9 techniques to create dimensional wings, a sculpted head, and decorative snowflake stars. Finished with a scalloped white border, this runner makes a beautiful seasonal centerpiece for holiday or winter decor.
Progress Tracker
0% Complete
— Runner Base Panel :
Info :
This runner base is worked in joined rounds from a central medallion to create a long diamond/rectangular panel. You will work texture using alternating rows of hdc and dc clusters to mimic the photographed dense fabric. Use 4.0mm hook for a slightly firm fabric; adjust if your tension differs.
Round 1 :
mr, 8 hdc in ring (8)
Round 2 :
2 hdc in each st around (16)
Round 3 :
(1 hdc, inc) x 8 (24)
Round 4 :
(2 hdc, inc) x 8 (32)
Round 5 :
(3 hdc, inc) x 8 (40)
Info :
Begin alternating texture: work one round in hdc, next round in dc clusters to create a dense textured fabric. Keep rounds flat by increasing only on corner points (four corners for a diamond expansion). Mark the 4 corner stitches to guide increases.
Round 6 :
1 hdc in each st around (40)
Round 7 :
(dc cluster over next 3 sts, ch1) repeat around, align clusters evenly (40 cluster positions)
Round 8 :
1 hdc in each st around (40)
Round 9 :
Increase round at 4 corner markers: (9 hdc, inc) x 4 (44)
Round 10 :
1 hdc each st (44)
Round 11 :
Dc cluster round: (dc cluster over next 3 sts, ch1) repeat around (44 cluster positions)
Round 12 :
1 hdc each st (44)
Round 13 :
Increase round at 4 corners: (10 hdc, inc) x 4 (48)
Round 14 :
1 hdc each st (48)
Round 15-22 :
Repeat rounds 11-14 twice more, increasing only at the four corner points each increase round. End of round 22 stitch count (56)
Info :
By round 22 you have built the central medallion. From here we will begin lengthening the runner by working extra rows on two opposite sides to create an elongated shape. Mark the two opposite long sides.
Round 23 :
Work along entire round in hdc (56)
Round 24 :
Lengthen: working only along two opposite sides (identified earlier), add 4 extra hdc at the middle of each long side (total +8) while keeping corners increases the same: (result 64)
Round 25 :
1 hdc in each st around (64)
Round 26 :
Dc cluster round across (64 cluster positions)
Round 27 :
1 hdc in each st (64)
Round 28 :
Lengthen again on long sides by adding 6 hdc at each long-side center (+12) and keep corner increases as before (result 76)
Round 29-36 :
Continue alternating textured rounds (hdc / dc cluster) and adding length every fourth round by only increasing in the long-side centers and keeping corner increases consistent until runner reaches approximate desired length. Typical count after round 36 (approx 100 sts across wide section depending on your increases)
Info :
Stop lengthening once your base measures approximately 34-40 inches in length from diamond tip to diamond tip depending on desired finished size. Block flat before applique9 placement to ensure even surface for sewing motifs.
Round 37-44 :
Work even in pattern (hdc round, dc cluster round alternately) without increases (maintain current stitch count). This builds body height and creates a dense canvas for applique9. Maintain counts accurately each round.
Round 45 :
Prepare for edge shaping: 1 hdc in each st (even)
Round 46 :
Sc around entire piece working 3 sc in each corner ch-sp to create gentle scallop base for final border (maintain stitch count; add stitches only in corner points)
Info :
We will add a decorative scalloped border after applique9 assembly. Keep base panel flat and blocked; do not fasten off if you plan to add border in one continuous piece.
— Owl Head (applique9) :
Info :
This sculpted owl head is worked in rounds in white, using increases to make a slight dome. It is then flattened and sewn onto the base as an applique9 with a raised eye ring. Use 3.5mm hook for a slightly firmer head.
Round 1 :
mr, 6 sc in ring (6)
Round 3 :
(1 sc, inc) x 6 (18)
Round 4 :
(2 sc, inc) x 6 (24)
Round 5 :
(3 sc, inc) x 6 (30)
Round 6 :
(4 sc, inc) x 6 (36)
Round 7 :
(5 sc, inc) x 6 (42)
Round 8 :
(6 sc, inc) x 6 (48)
Round 9-14 :
1 sc in each st around (48) - work 6 rounds even to build a shallow dome
Info :
Round 9-14 creates the height for the head. Place small stitch markers at the positions where the eyes will be mounted later (approx between rounds 11-12). For this head, plan to place eyes on round 12 and spaced 10-12 sts apart center-to-center depending on desired expression.
Round 15 :
(6 sc, dec) x 6 (42)
Round 16 :
(5 sc, dec) x 6 (36)
Round 17 :
(4 sc, dec) x 6 (30)
Round 18 :
(3 sc, dec) x 6 (24)
Info :
Begin gentle stuffing between rounds 16-18 to keep the head slightly raised but still flat enough to applique. Use only a very small amount of fiberfill to maintain a slightly domed look.
Round 19 :
(2 sc, dec) x 6 (18)
Round 20 :
(1 sc, dec) x 6 (12)
Info :
Fasten off leaving 12-14" tail for sewing. The small center hole will be closed when sewn down to the base slightly, which helps flatten the head at the back and maintain shape.
Round 22 (Eye ring applique) :
With yellow (or chosen iris color), make two small eye rings: mr, 6 sc (6). Round 2: (1 sc, inc) x 3 (9). Fasten off leaving tails for sewing. Sew yellow ring onto head centered on round 12 positions.
Round 23 (Eye pupil) :
Using black, embroider a small circle in each yellow ring or sew on 10mm safety eyes before final sewing. If using safety eyes, secure firmly before stuffing head.
Info :
If you prefer embroidered eyes for safety, use black yarn to stitch a tight spiral within the yellow ring. Add a small white French knot for pupil highlight if desired.
— Owl Body (applique9 sculpted panel) :
Info :
The body is a slightly oval flat dome created in rounds then lightly stuffed to raise it off the base. Work in white. Use a bobble/staggered puff texture to mimic snowy owl plumage. The body attaches beneath the head and overlaps slightly.
Round 1 :
mr, 8 hdc in ring (8)
Round 2 :
2 hdc in each st (16)
Round 3 :
(1 hdc, inc) x 8 (24)
Round 4 :
(2 hdc, inc) x 8 (32)
Round 5 :
(3 hdc, inc) x 8 (40)
Round 6 :
1 hdc each st (40)
Round 7 :
Begin texture row: *ch1, puff in next st (puff: yarn over, insert hook, pull up loop 3 times, yarn over, pull through all loops), skip next st* rep around (approx 20 puffs)
Round 8 :
1 hdc in each st and in each ch1 space to anchor puffs (40)
Round 9 :
(3 hdc, inc) x 8 (48)
Round 10 :
1 hdc each st (48)
Round 11-14 :
Repeat puff texture rows alternating with hdc anchor rounds to build a slightly domed oval. Keep stitch counts even. After round 14 expect approx 48 stitches around.
Info :
Leave a long tail at the end for sewing. Lightly stuff the body in the center only to create a raised look when sewn flat. The edges should remain relatively flat for secure sewing to the base.
Round 15 :
Work decreases to slightly narrow the base where it will meet the branch: (6 hdc, dec) x 6 (42)
Round 16 :
(5 hdc, dec) x 6 (36)
Round 17 :
1 hdc each st (36) - fasten off leaving tail
— Left Wing (Make 1) :
Info :
Left wing is an elongated teardrop shape worked flat in rows in white with dark gray overlay feather pattern worked by tapestry or surface loops. Use 3.5mm hook for dense stitch definition.
Round 1 (start at top tip) :
ch6, sc in 2nd ch from hook and across, turn (5)
Round 2 :
ch1, sc across, inc in last st (6)
Round 3 :
ch1, sc across to last 2 sts, (sc, inc) (7)
Round 4 :
ch1, sc in each st (7)
Round 5 :
ch1, sc across, inc at middle edge to begin gentle widening (9)
Round 6-10 :
Continue increasing one or two sts at the outer edge every other row to create teardrop shape until wing measures approximately 9-10" from top tip. Typical stitch count at widest point ~20-24.
Round 11 :
Work three rows even in sc to create body of wing.
Round 12-18 :
Begin overlay feather marks using tapestry technique in dark gray: *sc in white, sc in dark gray for a short 2-st repeat*, stagger them to create a V-like feather pattern. Follow photo for spacing: place dark gray stitches in pairs every 3-4 rows to suggest mottled feathers.
Round 19 :
Decrease along outer edge to taper to bottom: sc dec every 4th st across until tip forms. Typical final tip 3-5 sts. Fasten off leaving long tail for sewing.
Info :
Make sure overlay stitches sit neatly; carry unused yarn invisibly on the wrong side or use small bobbins to change colors frequently. Block the wing flat for neater edge before sewing onto body.
— Right Wing Overlay Feathers (Make 1 smaller) :
Round 1 :
ch5, sc across (4)
Round 2-6 :
Work increases on outer edge to create a smaller teardrop approx 2/3 the size of left wing. Add tapestry dark gray marks every 2-3 rows to create scale effect. Fasten off leaving tail for layering on top of left wing to create the layered look seen in photo.
Info :
Sew the smaller right wing half overlapping the left wing by approximately 1" so that feathers appear layered with contrast spots visible.
— Owl Beak :
Info :
Simple triangular beak crocheted in black and sewn to the head between the eyes. Work small and firm with 3.5mm hook.
Round 1 :
ch4, sc in 2nd ch from hook and across (3)
Round 2 :
ch1, sc across, sc2tog at end to shape triangle (2)
Round 3 :
ch1, sc across (2), dec to 1, fasten off leaving tail for sewing; position between the eyes and sew top point to head pulling gently so beak protrudes slightly.
— Owl Feet / Talons (Make 2) :
Info :
Small black talons made as short crocheted claws. They are sewn to the branch beneath the body. Work tightly for stability.
Round 1 :
ch6, sc in 2nd ch from hook and across for three separate claws, join and sc across base to make a 3-toed foot. (work as small flat piece approx 6 sts wide)
Round 2 :
ch1, sc across, fasten off leaving tail. Make two identical pieces and sew them beneath the body onto the brown branch so claws wrap over branch as in photo.
— Branch Applique9 :
Info :
The snowy branch is worked as a long chain with surface slip stitches and then a second round to build thickness. Work in brown and add white puff-like snow on top with white yarn. The branch is sewn on top of the base panel prior to attaching owl feet and body so that the owl appears perched.
Round 1 :
ch long length to match width of runner where owl sits (approx 40-50 ch depending on scale), turn and sc back along chain (approx same number) to create a dense rope
Round 2 :
Work 2 rounds of sc around the chain rope to build thickness; on one side add increases to form slightly curved shape like a branch bulge. Fasten off leaving long tail for placement.
Round 3 (Snow cap) :
With white, attach and work small puff clusters on top of branch irregularly: *ch1, puff in next st*, leaving 1-2 sts between puffs. This creates a snowy effect. Fasten off and weave tails through branch underside.
Info :
Pin branch across runner before sewing. Place it so the body seams over it slightly, then sew the branch down with large invisible stitches catching multiple base panel rounds for stability.
— Large Star Snowflake Motif (Make 2) :
Info :
These raised star motifs are worked separately and applique9ed to the base. They use chain loops and dc clusters to create a lacy star. Block these motifs flat using pins and a spray of water for crisp points.
Round 1 :
mr, ch3 (counts as dc), 11 dc into ring, sl st to top of ch3 to close (12)
Round 2 :
*ch5, sl st into next dc*, rep around to create 12 ch-sp loops; sl st to join
Round 3 :
Into each ch5 loop: (sc, hdc, 5 dc, hdc, sc) to form a pointed petal. Fasten off and block points well.
Round 4 :
Optional: Add a reverse single crochet border around each petal for definition using white.
Info :
Sew stars onto runner with white tail using ladder stitch from the back. Place two large stars: one toward each end of the runner as in photo, leaving room for smaller snowflakes in between.
— Medium Star Motif (Make 6) :
Round 1 :
mr, 6 hdc in ring, sl st to join (6)
Round 2 :
*ch4, sl st into next hdc*, around to create 6 loops
Round 3 :
In each ch4: (sc, 3 dc, sc) to form points; fasten off and block. These are sewn around the runner for mid-size snowflakes.
Info :
Stagger the medium stars around the large star and around the owl to create the icy scattered look from the photograph.
— Small Snowflake/Bobble Stars (Make many) :
Round 1 :
mr, ch4, (sl st, ch4) x 5, sl st to close creating a small daisy of 6 loops
Round 2 :
In each loop: sc, ch2, sc to form tiny points. Fasten off and block flat.
Round 3 :
For additional texture, add a small popcorn or bobble in center: join white, (yarn over 4 times, insert hook into center, pull up loop 4 times, yarn over and pull through) finish to create a raised bobble and secure with sl st.
Info :
These tiny motifs are numerous; make at least 10-14 to match the photo and place them irregularly for natural scatter.
— Scalloped Border & Final Edging :
Info :
After all applique9 pieces are sewn, work a continuous scalloped border around the entire runner in white to frame the piece. The scallops create the pointed diamond edging seen in the photo.
Round 1 :
With white, join in any sc on outer edge, sc evenly around edge, work 3 sc in each corner ch-sp to create shape. Keep stitch count even.
Round 2 :
*sl st in next st, 5 dc in next st (or space), sl st in next st* repeat around to create scallops (adjust spacing so scallops fall over points)
Round 3 :
Optional reverse single crochet (crab stitch) around scallop ridge for clean finish. Fasten off and weave in ends.
Info :
Block entire runner flat after border is complete to open star points and set scallops. Use pins and a light steam or spray and allow to dry completely before use.
— Assembly & Placement :
Info :
Plan your layout on the blocked base by pinning large star motifs first (one at each end), then the owl centered along the runner toward one end as in photo. Space medium stars and small snowflakes around them in a balanced composition.
Round 1 :
Pin owl head and body first: align head so lower edge of head overlaps top of body by approx 1/2" to mimic natural perch. Tack head and body with a few loose stitches to hold while you position wings and branch.
Round 2 :
Position branch across base where body will sit and secure with basting stitches. Place body over branch so its lower edge sits just above the branch allowing space for feet to wrap around branch. Sew using a whip or mattress stitch catching both branch and base fabric securely.
Round 3 :
Sew the wings to the body edges so the left large wing appears folded across the front and the smaller right wing layered on top. Use long tails to stab through multiple rounds of body and catch base panel for strength. Sew from the wrong side to hide ends.
Round 4 :
Attach star and snowflake motifs: start with large stars at ends, then medium stars, then small snowflakes. Use matching white yarn and invisible/ladder stitch from back for neat finish. Space motifs to match photo or personal arrangement.
Round 5 :
Sew talons under the body to the branch so the black claws wrap over the branch. Reinforce with a few extra passes if this section will be handled often.
Info :
Weave in all long tails to back of runner, and use small hidden stitches to secure motifs. Trim any stray fibers and lightly steam block once again after assembly to ensure every piece lies flat and neat.
Working this Snowy Owl and Silver Star table runner is such a satisfying and cozy project—each layered wing, puff stitch feather, and crisp star adds to a wintery tableau you can display with pride. The modular construction lets you crochet motifs at your own pace, then assemble them like a little textile collage. I hope stitching this runner brings you the same cozy joy and seasonal charm I felt making it. 🧶❄️✨