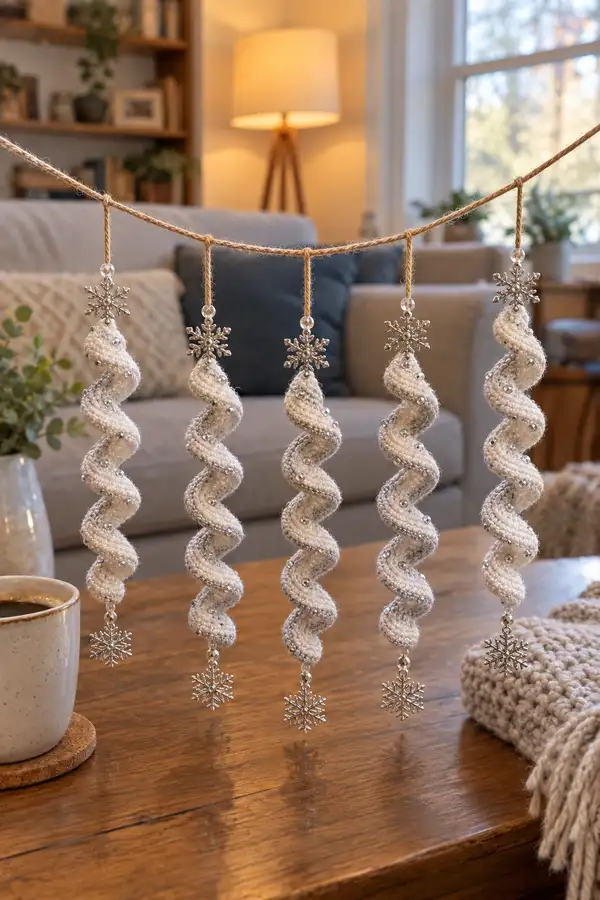
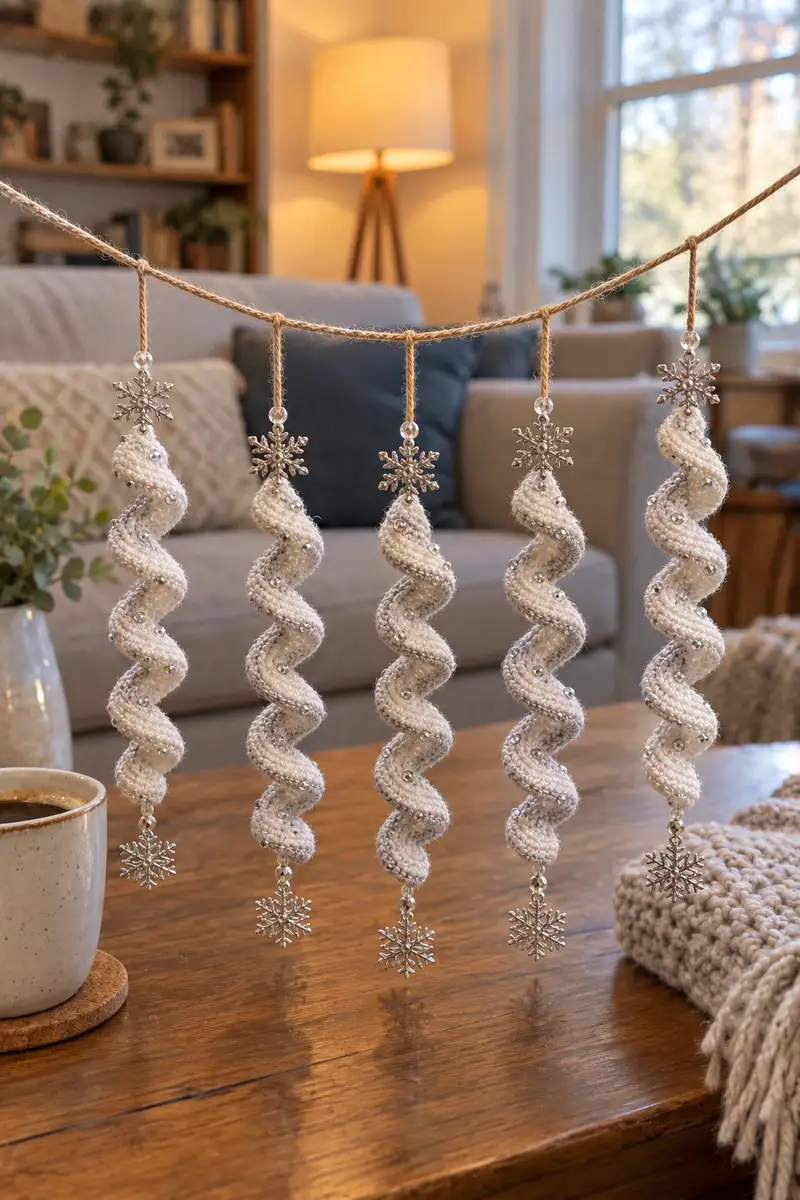
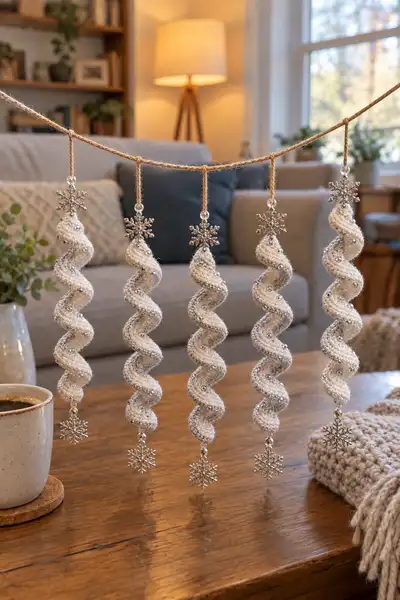
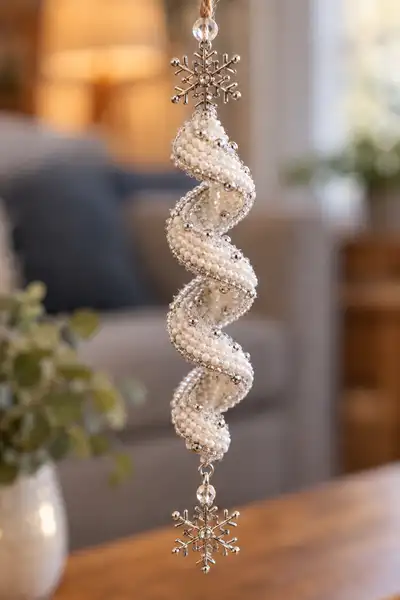
Handmade spiral icicle ornaments edged with sparkling silver beads and finished with snowflake charms — perfect for a festive garland. This pattern teaches you how to crochet a tubular spiral, add seed and metallic beads, insert optional internal wire for shape retention, and assemble a charming hanging strand. The elegant white-and-silver icicles are lightweight, shimmery, and designed to hang beautifully as a garland or individual ornaments.
Progress Tracker
0% Complete
— Main Spiral Icicle :
Intro :
Make one icicle to begin with as you practice bead placement and tension. The tube is worked in continuous rounds (no joining) from top (small tip) to bottom (wider funnel) using a magic ring start and cycles of increases and decreases. Beads are pre-strung on the working yarn and slid into place as indicated. Optional: insert a thin craft wire lengthwise to maintain a spiral shape and make the icicle slightly poseable. The pattern below lists 132 rounds for a full-length icicle approximately 7.5-8 inches long when lightly stuffed. If you prefer longer or shorter icicles, repeat cycles to lengthen or shorten.
Materials Prep :
Pre-string 120-150 pearl seed beads and 30-40 small silver spacer beads onto the main yarn for each icicle you plan to make. Use a beading needle or fine wire to help. Reserve 2 large crystal beads and 2 snowflake charms for top and bottom of each icicle. Keep the bead strand to the side in the direction you will be crocheting so beads slide toward the hook easily.
Round 1 :
6 sc in magic ring (6)
Round 3 :
(1 sc, 1 inc) x 6 (18)
Round 4 :
(2 sc, 1 inc) x 6 (24)
Round 5 :
(3 sc, 1 inc) x 6 (30)
Round 6 :
(4 sc, 1 inc) x 6 (36)
Info :
At the end of Round 6 you have reached the working circumference for the icicle tube (36 sts). From here on we will work even rounds and alternating expansion/contraction cycles to create the helical spiral. Place a stitch marker at the first stitch of Round 7 and move it up each round to mark the start. Keep tension slightly firmer than usual so stuffing and beads do not show through the fabric.
Round 7-12 :
1 sc in each st (36)
Info :
If adding bead accents beginning at Round 13, slide a pearl seed bead onto the yarn prior to the stitch indicated in the beading notes. To attach a bead into a sc stitch, slide bead close to hook, insert hook into stitch, yarn over and pull through making the sc while holding bead in front so it sits on the outer surface. Use a stitch marker at the start of Round 13 to keep bead placement consistent each rotation.
Round 13 :
(4 sc, 1 dec) x 6 (30)
Round 14-16 :
1 sc in each st (30)
Round 17 :
(4 sc, 1 inc) x 6 (36)
Round 18-20 :
1 sc in each st (36)
Info :
Cycle explanation: Rounds 13-18 form one contraction-then-expansion sequence. These alternating decreases and increases are what creates the long helical bias in the tube — the fabric will start to twist slightly as you continue. Keep moving your stitch marker; you are working continuous rounds so the tube will have a visible continuous seam on the inside that becomes the inner curve of the spiral.
Round 19 :
(4 sc, 1 dec) x 6 (30)
Round 20-22 :
1 sc in each st (30)
Round 23 :
(4 sc, 1 inc) x 6 (36)
Round 24-26 :
1 sc in each st (36)
Info :
Begin beading here if you didn't earlier: On Round 24 and every second expansion round after, slide a silver spacer bead onto the yarn and work it into the outermost stitch of the curve to create a subtle metallic highlight. A consistent rhythm (for example, one silver bead every 6-9 stitches along the outer curve) will catch the light without overpowering the pearl beads.
Round 27 :
(4 sc, 1 dec) x 6 (30)
Round 28-30 :
1 sc in each st (30)
Round 31 :
(4 sc, 1 inc) x 6 (36)
Round 32-34 :
1 sc in each st (36)
Info :
Stuffing note: Start lightly stuffing the tube now (between Rounds 32 and 34). Use small amounts of polyester fiberfill added gradually; push the stuffing into the tube so it fills the inner curve first and leaves a little softness so the spiral has movement. If using internal wire, thread it through now before the stuffing becomes too dense. Fold wire end and pad with a small fiberfill nub to avoid sharp points.
Round 35 :
(4 sc, 1 dec) x 6 (30)
Round 36-38 :
1 sc in each st (30)
Round 39 :
(4 sc, 1 inc) x 6 (36)
Round 40-42 :
1 sc in each st (36)
Info :
Continue pre-positioning beads: for the pearl seed beads, plan a staggered packing along the inner curves so they look clustered. For the outer metallic beads, place them more sparingly at the crests of each coil so they reflect the light. A good starting pattern is: on each expansion round, place a pearl bead on every 2nd stitch for 6 stitches (forming a short strand), then skip 6 stitches; on the next contraction round avoid beading so beads nest in the fabric.
Round 43 :
(4 sc, 1 dec) x 6 (30)
Round 44-46 :
1 sc in each st (30)
Round 47 :
(4 sc, 1 inc) x 6 (36)
Round 48-50 :
1 sc in each st (36)
Info :
Texture option: If you want more pronounced ridges along the spiral, work Round 49 in BLO (1 sc in each st BLO (36)). Doing that once every 12 rounds will create a subtle ridge that the beads can sit against. Make sure to note this in your stitch counter so the placement lines up along the length.
Round 51 :
(4 sc, 1 dec) x 6 (30)
Round 52-54 :
1 sc in each st (30)
Round 55 :
(4 sc, 1 inc) x 6 (36)
Round 56-58 :
1 sc in each st (36)
Info :
Bead technique: When you want to embed a seed bead into a stitch, slide bead up, bring the yarn over and insert into the stitch, then complete the sc while holding the bead on the working yarn so it seats on the outside. For slightly larger silver beads, you can place them on top of two adjacent stitches by crocheting the next sc as a sc2tog over the two stitches and letting the bead rest between. Always test placement on a small swatch first.
Round 59 :
(4 sc, 1 dec) x 6 (30)
Round 60-62 :
1 sc in each st (30)
Round 63 :
(4 sc, 1 inc) x 6 (36)
Round 64-66 :
1 sc in each st (36)
Info :
Length check: At Round 66 your icicle should be approximately half the desired final length. Compare to your reference item (cup or ruler). If you want a longer icicle, continue cycles; if shorter, begin tapering earlier. The shown finished icicle uses about 132 rounds total; you can stop after 96 rounds for a 60–70% length variation.
Round 67 :
(4 sc, 1 dec) x 6 (30)
Round 68-70 :
1 sc in each st (30)
Round 71 :
(4 sc, 1 inc) x 6 (36)
Round 72-74 :
1 sc in each st (36)
Info :
Continue adding beads as designed. For the sample look, alternate a short cluster of 3-5 pearly seed beads followed by a single silver bead located at a crest. This alternating cluster-sparkle repeat along each expansion segment creates the shimmery, refined surface seen in the finished photo.
Round 75 :
(4 sc, 1 dec) x 6 (30)
Round 76-78 :
1 sc in each st (30)
Round 79 :
(4 sc, 1 inc) x 6 (36)
Round 80-82 :
1 sc in each st (36)
Info :
Mid-assembly check: Gently shape the spiral by letting the tube hang; the natural twist will show. If you used wire, bend gently to create a tighter or looser coil. If you like a sharper spiral, tighten tension slightly and add a small amount of stuffing so the outer curve becomes fuller.
Round 83 :
(4 sc, 1 dec) x 6 (30)
Round 84-86 :
1 sc in each st (30)
Round 87 :
(4 sc, 1 inc) x 6 (36)
Round 88-90 :
1 sc in each st (36)
Info :
Edge contrast: If you want a silver edge like in the photo, you can carry a strand of metallic thread along the outermost edge during the final third of the icicle. To do this, hold metallic thread alongside the yarn and work stitches so the metallic strand is caught into the outer loop of the stitch — or work a final slip stitch round catching the metallic thread on the outermost ridge (see finishing section).
Round 91 :
(4 sc, 1 dec) x 6 (30)
Round 92-94 :
1 sc in each st (30)
Round 95 :
(4 sc, 1 inc) x 6 (36)
Round 96-98 :
1 sc in each st (36)
Info :
Final stuffing: Between Rounds 96 and 100, push the remaining stuffing into the tube so the bottom becomes slightly heavier than the top. This helps the icicle hang straight and encourages the spiral to dangle into a neat helix. Avoid overstuffing which will reduce the coil and bead depth.
Round 99 :
(4 sc, 1 dec) x 6 (30)
Round 100-102 :
1 sc in each st (30)
Round 103 :
(4 sc, 1 inc) x 6 (36)
Round 104-106 :
1 sc in each st (36)
Info :
Begin preparing to taper and close the tube: plan to reduce length by starting a few final contraction sequences so the bottom tip returns to a small closed point. Keep beads away from the final 6-8 rounds to make finishing tidy and easy to close.
Round 107 :
(4 sc, 1 dec) x 6 (30)
Round 108-110 :
1 sc in each st (30)
Round 111 :
(3 sc, 1 dec) x 6 (24)
Round 112-114 :
1 sc in each st (24)
Round 115 :
(2 sc, 1 dec) x 6 (18)
Info :
Prepare end assembly: remove any remaining beads from the yarn tail for the bottom charm, and reserve a 12-15 cm yarn tail to sew through the last rounds and secure the charm. Use a stitch marker for the start of the final decreases so you keep consistent shaping.
Round 116 :
(1 sc, 1 dec) x 6 (12)
Info :
Finish stuffing lightly through the last opening so the tip is rounded but not bulky. Fasten off leaving a long tail for closing. Use the tapestry needle to weave the tail through the front loops of the remaining stitches, pull tight to close, and secure with a knot on the inside of the tip. Weave tail into the tube 5-6 rounds to hide it.
Round 118 :
Fasten off; close opening by weaving tail and securing (final shape)
Round 119 :
Optional: 1 sc in each st BLO around top opening to create a neat rim if you left a small hole during construction (36 or 30 depending on where you finished)
Info :
If you used an internal wire, push wire so one end is near the top center and the other near the bottom and wrap both ends into loops using pliers. Insert them into the stuffing and cover with a small piece of yarn worked around the loop to avoid any sharp edges. Re-stitch seam if needed to hide hardware.
Round 120 :
Optional metallic slip-stitch round around outer ridge: join metallic thread and sl st evenly around outer bulge (approx 36 sl st) to create the shimmering edge seen in the photo
Info :
After finishing one icicle, make the remaining icicles the same way so they hang consistently in a garland. Keep notes of where and how many beads you placed for each key round so they all match.
— Top Hanging Cord & Loop :
Round 1 :
Ch 30 (or desired length for loop) and sl st back through chain to form sturdy cord. Fasten off leaving long tail for attaching to top of icicle.
Info :
Alternatively, you can use a short piece of twine folded and sewn into the top center of icicle for a rustic look as shown. Slip a crystal bead onto the twine above the icicle and knot securely.
Round 2 :
Sew loop to top opening of icicle by passing yarn tail through top stitches and around four to six rounds. Use sturdy back-and-forth stitches to anchor loop. Weave tail back into tube and trim.
— Beading Technique & Edge Embellishment :
Info :
Pre-string all beads before you begin. To add beads while crocheting, slide bead up to hook and work the sc normally so the bead rests on the outside of the stitch. For silver bead accents, place them on the prominent outer stitches of expansion rounds; for pearl clusters, add a bead every second stitch during the inner curve rounds. Use clear fabric glue sparingly to secure any beads that feel loose, and weave in ends to hide knots.
Round 1 :
If working an outer metallic round, join metallic thread at a discreet inner stitch and sl st evenly around the outer curve catching metallic thread into each sl st (approx 36 sl st). Fasten off and weave ends.
Info :
Using a small beading needle is helpful when your yarn eye is too small for seed beads. If the seed beads are tight on the yarn, use a thinner nylon thread to string beads and then attach that beaded strand to the tube using fine stitches; this isolates bead weight from yarn tension.
— Snowflake Dangles & Bottom Charm Assembly :
Step 1 :
At the top and bottom of each icicle add a clear crystal bead and a metal snowflake charm. Insert a short eye pin through the crystal bead, form a small loop with round-nose pliers, and attach to the top loop's twine knot and to the bottom tip by sewing through the final stitches and securing the jump ring.
Step 2 :
At the bottom tip, use the long tail left after finishing the tip to sew through the center of the snowflake jump ring, then secure with multiple passes and a knot hidden inside the tip. Add a tiny dab of clear glue to the knot for extra security if making as gifts.
Info :
Spacing the metal snowflakes evenly on a garland: for a 5-icicle garland leave about 6-8 inches between hanging cords, or configure spacing to your display. Test hang before final securing to ensure the crystals and snowflakes face the preferred direction.
— Finishing & Final Touches :
Step 1 :
Weave all yarn tails into the body of the icicle for at least 6 rounds. Trim ends close to fabric. Tuck or glue exposed beads or knots for a secure finish. If using metallic slip-stitch edging, hide ends by weaving them into the sl st round.
Step 2 :
Assemble garland by threading twine through each top loop or knot, sliding on crystal spacer beads between icicles if desired. Knot or tie the twine at both ends and hang on a mantel, window, or across a doorway.
Info :
Final shaping: gently twist each icicle with your fingers to emphasize the spiral. If using wire, adjust bend so every icicle hangs in the same direction for a pleasing repetitive pattern. For a softer, natural spiral, avoid wire and allow the tube to twist naturally under its own bias created by the increase/decrease cycles.
This sparkling spiral icicle ornament set is a beautiful way to bring handmade charm to your holiday decor! Each detailed icicle combines crochet, beadwork, and a little metalwork for a shimmering finish that catches the light. The careful instructions make it easy to create matching pieces for a garland or individual decorations. I hope you enjoy every stitch and sparkle you add — happy crocheting! 🎄✨