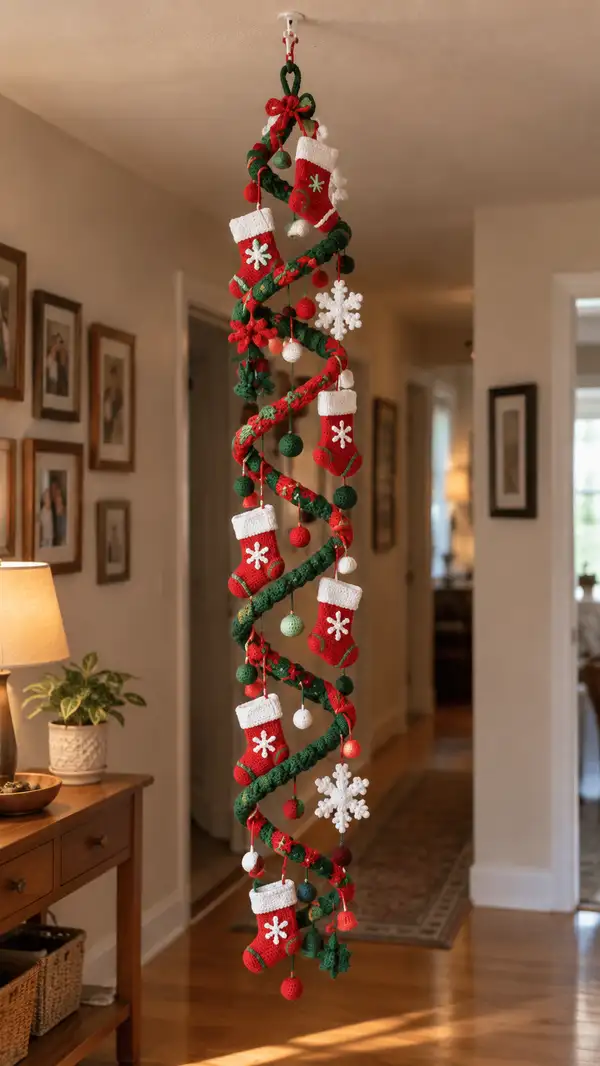
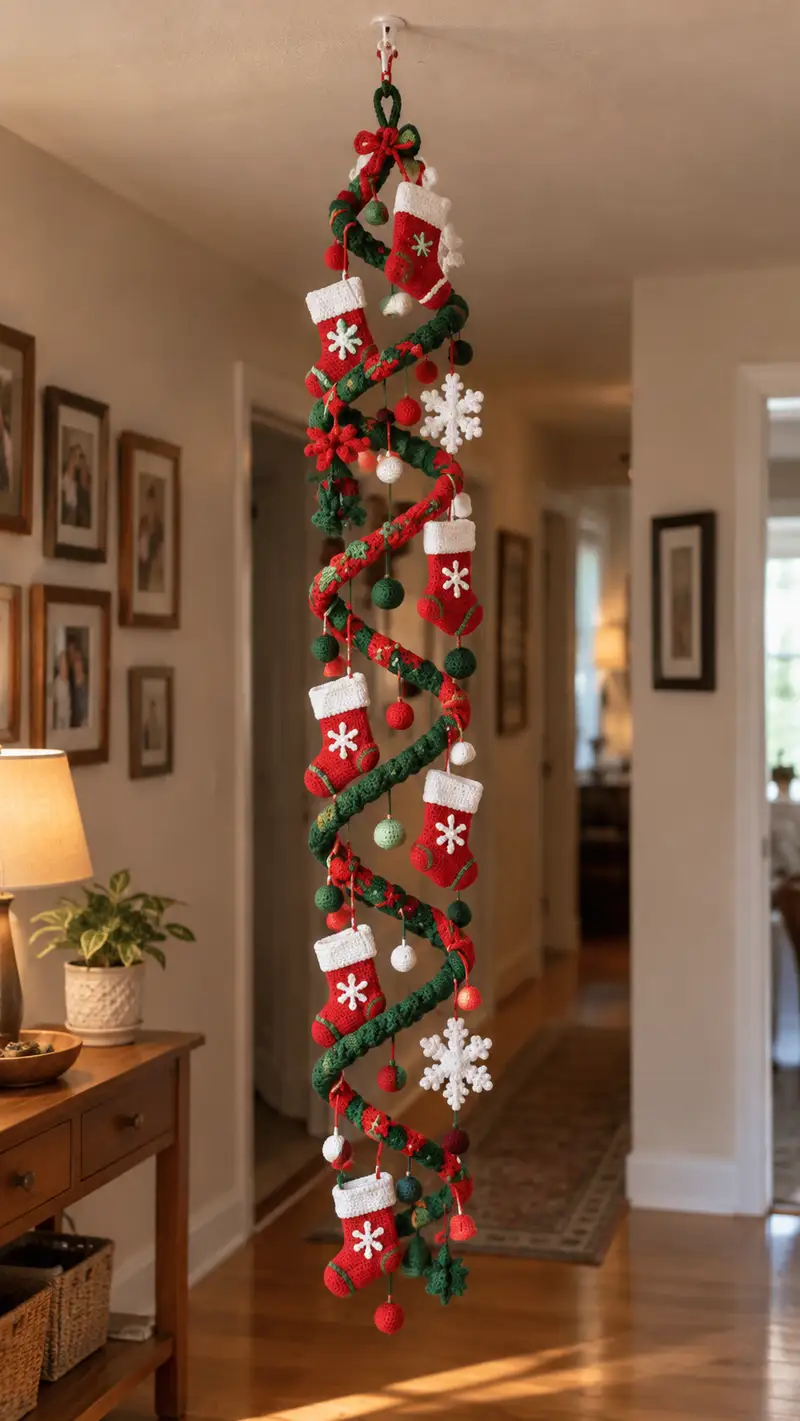
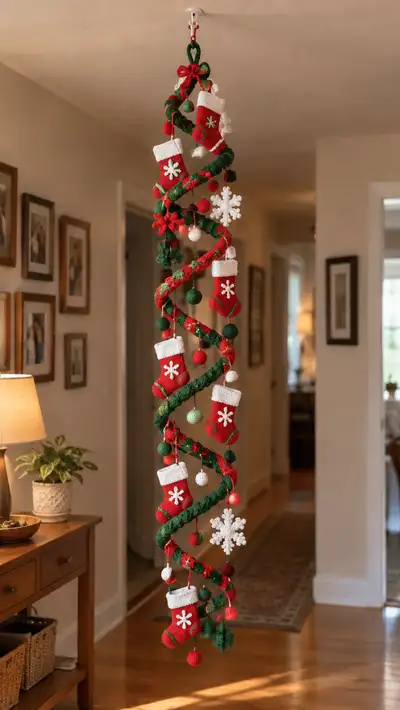
Create a festive hanging spiral garland adorned with tiny crochet stockings, snowflakes, round ornaments and bows. This vertical spiral wrap features alternating red and green stripes, textured rounds and dangling amigurumi ornaments for a charming holiday display. The finished piece hangs from a hook and makes a bright, handmade centerpiece for doorways or stairwells.
Progress Tracker
0% Complete
— Materials and General Notes :
Info :
This pattern is modular. Make the spiral tube first, then make several identical ornaments (stockings, balls, snowflakes, bows, flowers) and attach them on cords at even intervals. Work tightly for amigurumi fabric so stuffing does not show through. Use stitch markers to mark the beginning of each round. For color changes, finish the last st of the old color before joining the new color and carry ends inside the tube or weave them in later.
Info :
Gauge is not critical for the overall design but affects the final size. Using worsted weight yarn and a 3.5mm hook will yield ornaments approximately 6-8 cm tall per stocking. Estimate required yarn and make adjustments for bigger or smaller versions.
— Spiral Tube (Main Helix) :
Info :
The spiral tube is a crocheted amigurumi tube worked in continuous rounds. You will insert a thin cord or wire inside for structure and wrap it with the tube to form the hanging spiral. This tube is worked to a diameter of approximately 4-5 cm and a length of 140-160 rounds (or until desired hanging length). I recommend making the tube in three repeated color/texture segments that you stitch together as you go or change color inline for stripes.
Round 3 :
(1 sc, inc) x 6 (18)
Round 4 :
(2 sc, inc) x 6 (24)
Round 5 :
(3 sc, inc) x 6 (30)
Round 6 :
(4 sc, inc) x 6 (36)
Round 7 :
(5 sc, inc) x 6 (42)
Round 8 :
(6 sc, inc) x 6 (48)
Info :
At Round 8 you have 48 sts and approximately a 4-5 cm tube diameter depending on hook tension. If you'd like a slimmer tube, stop increasing earlier; for a thicker tube increase to 54 sts by continuing pattern: (7 sc, inc) x 6 = 54.
Round 9-14 :
1 sc in each st (48)
Info :
Start color pattern now. For a striped spiral, change color every 6-10 rounds. To add surface texture, work 1-2 rounds in BLO to create a ridge. Mark the first stitch of the round with a stitch marker.
Round 15 :
1 sc in each st BLO (48)
Round 16-22 :
1 sc in each st (48)
Info :
Change color at Round 23 to alternate green/red. To carry yarn, twist the two yarns at color change to avoid gaps and weave tails at the finished end. Keep a long interior cord accessible to slide through the tube after you have worked about 20-30 cm to prevent pulling the cord through the tube later.
Round 23-28 :
Change to contrast color. 1 sc in each st (48)
Round 29 :
1 sc in each st BLO (48)
Round 30-36 :
1 sc in each st (48)
Info :
To create a braided/striped look similar to the photo, use an overlay of small flower motifs (crocheted granny-flower discs) sewn onto the exterior every 6-8 rounds. Make 12-16 small 8-round motifs and sew them on later. Continue working straight in rounds to the desired length; for a 1.5m hanging garland you will need approximately 140-160 rounds of 48 sts each. For an entry way as pictured, work 120 rounds (approx. 1m) and then add extra length as desired.
Round 37-60 :
Continue 1 sc in each st (48) alternating color every 6-8 rounds and adding 1 round BLO every 10 rounds for texture. Repeat color pattern: 6 rounds green, 6 rounds red, 6 rounds mixed or variegated. (48 each round)
Info :
Insert thin cord or wire: After you have a tube length of about 30-40 cm, thread a thin cord or flexible wire through the tube. If you prefer a softer spiral, use cotton cord; for a more rigid and vertical helix use a narrow wire wrapped in yarn to avoid poking. Anchor the cord at the top end with a few stitches or a knot inside the tube to keep it from sliding.
Round 61-120 :
Continue 1 sc in each st (48) alternating color segments, adding decorative surface motifs or sewn-on granny flowers at intervals. Work until tube reaches desired hanging length (approximately 120 rounds for a medium-length spiral). (48)
Info :
Finish the tube by decreasing if you want a tapered end for neatness, or simply fasten off and weave in ends. If you decrease: (6 sc, dec) x 6 -> (42) then (5 sc, dec) x 6 -> 36 and continue to 6 dec -> 6 and close with stuffing minimal to keep shape. Leave an opening to remove or adjust cord if needed.
— Stocking Ornament (Make 6 or desired number) :
Info :
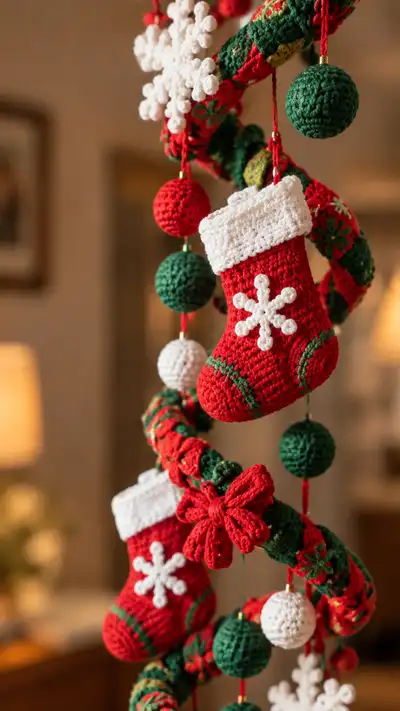
Each stocking is crocheted in continuous rounds using red for body and white for cuff. The stockings in the photo are about 6-7 cm tall finished. Work tightly with a 3.5mm hook. Make 6 matching stockings and add white snowflake applique and green embroidered accents.
Round 1 :
Using red yarn: 6 sc in mr (6)
Round 3 :
(1 sc, inc) x 6 (18)
Round 4 :
(2 sc, inc) x 6 (24)
Round 5 :
(3 sc, inc) x 6 (30)
Info :
We will form a short round toe by flattening and working back and forth for a foot shape then join to work the leg tube. Stuff lightly later. Keep stitch marker at round start.
Round 6 :
1 sc in each st (30)
Round 7 :
(3 sc, dec) x 6 (24)
Round 8 :
1 sc in each st (24)
Round 9 :
(2 sc, dec) x 6 (18)
Round 10 :
1 sc in each st (18)
Info :
Begin working the heel by working half the stitches in short rows to create a curved heel flap. Mark the half-point for ankle shaping. Leave a long tail for sewing or continue seamlessly to the leg.
Round 11 :
Work over 9 sts only (turning rows): ch1, 9 sc across, ch1, turn; repeat this short-row 4 times to form a small heel cup—then join back in continuous round across all 18 sts, sl st to first st. (heel formed)
Round 12 :
1 sc in each st around (18)
Round 13 :
(2 sc, inc) x 6 (24)
Round 14 :
1 sc in each st (24)
Round 15 :
(3 sc, inc) x 6 (30)
Round 16 :
1 sc in each st (30)
Info :
Now shape the leg tube upwards without increases. Work 6-8 rounds for a short stocking (6 cm), more for taller stockings. Add green embroidery lines later along foot edges by using surface slip stitch or small sc in contrasting color.
Round 17-22 :
1 sc in each st (30)
Round 23 :
Change to white yarn: 1 sc in each st (30)
Round 24 :
1 sc in each st BLO (30)
Round 25 :
1 sc in each st (30)
Info :
Fold the white cuff down or leave up. For a folded cuff, work two rounds in white then fold and tack at seam points. Make a hanging loop by ch 10 with white yarn and sew to back of cuff before fastening off.
Round 26 :
Fasten off white, change to red: 1 sc in each st (30)
Round 27 :
Fasten off leaving long tail for sewing (no stuffing required for stockings that will hang flat). Weave in ends and tack cuff if folded. (30)
Info :
Snowflake applique: Make a six-pointed snowflake using white yarn and surface slip stitches or tiny tubes. See Snowflake Section for full applique. Sew the snowflake centered on the stocking front with small stitches, and add green surface embroidered lines along toe and heel using a running stitch or surface slip stitch.
— Ornament Ball Small (Make many: small, medium, large sizes) :
Info :
Balls are simple amigurumi spheres worked in continuous rounds and stuffed firmly. Use 6mm to 10mm beads/crimps at top if you want to add a hanging cap. Make rounds tight and stuff in small increments.
Small Ball Round 1 :
6 sc in mr (6)
Round 3 :
(1 sc, inc) x 6 (18)
Round 4 :
(2 sc, inc) x 6 (24)
Round 5-6 :
1 sc in each st (24)
Round 7 :
(2 sc, dec) x 6 (18)
Round 8 :
(1 sc, dec) x 6 (12)
Info :
Stuff firmly before closing the final rounds. Leave a long tail for sewing to the hanging cord. For medium ball, increase rounds by continuing to 30-36 sts and add more even rounds before decreasing. For large ball use 42-48 sts circumference.
— Ornament Ball Medium (Optional) :
Round 3 :
(1 sc, inc) x 6 (18)
Round 4 :
(2 sc, inc) x 6 (24)
Round 5 :
(3 sc, inc) x 6 (30)
Round 6-8 :
1 sc in each st (30)
Round 9 :
(3 sc, dec) x 6 (24)
Round 10 :
(2 sc, dec) x 6 (18)
Round 11 :
(1 sc, dec) x 6 (12)
Info :
Add a small bead or gold crimp at top for a decorative cap. Make hanging loop by using a length of yarn (approx. ch 8) or a short chain and sew securely inside the top before final closure.
— Snowflake Applique (Make 4-6) :
Info :
This snowflake is crocheted flat in white using slip stitches, chains and picot-like knobs to create six arms with round tips. Work flat and sew onto spiral or hang as separate ornaments.
Round 1 :
Ch8, sl st to form ring, ch1. Work 6 sc into ring, join with sl st. (6)
Round 2 :
*Ch5, sl st into next sc to form an arm base; rep from * 6 times, end with sl st into first sc. (6 arms)
Round 3 :
For each arm: sl st into chain 2 of arm, ch3, (dc, ch1, dc) in same ch, ch3, sl st back into arm base to form a small trefoil tip. Repeat for each arm.
Round 4 :
Optional: Add tiny bobble tips by working (ch2, 3 sc in next ch, ch2) at end of each arm and sl st back into base. Fasten off and weave ends. (Detailed technique yields 6 rounded knobs.)
Info :
Sew snowflake to spiral using small invisible stitches. For dangling snowflake use a short hanging chain and secure with knot and a bead if desired. Make multiple snowflakes to match photo spacing.
— Decorative Bow (Make 4-6) :
Info :
The bow is worked flat as two identical loops and a center band. Use red yarn and a slightly tighter hook for defined loops. Sew center band around loops and attach to the spiral.
Round 1 :
Ch12, sc in 2nd ch from hook and across (11)
Round 2-6 :
1 sc in each st (11)
Round 7 :
Fold strip to form loop and sew ends together invisibly; make a second loop in same manner to stack if desired. (11)
Round 8 :
Center band: ch6, 1 sc in 2nd ch from hook across (5), wrap around bow center and stitch closed. Fasten off. (5)
Info :
Shape the bow by pulling the center band tight and adjusting loop fullness. Sew securely to spiral and tuck ends. Use a few stitches to anchor so bow does not flop when hanging.
— Small Flower / Star Motif (Make 12-16) :
Info :
Little flower motifs are surface decorations sewn onto the spiral. Use contrasting yarn for center. Work small granny-like petals.
Round 1 :
mr, ch2 (counts as hdc), 11 hdc into ring, sl st to join (12)
Round 2 :
*Ch3, sl st into next st to form petal; rep from * 12 times to make 12 small petals. Fasten off. (12 petals)
Info :
Sew these evenly spaced along the spiral to mimic the photo's embroidered floral accents. Use small running stitches to anchor each motif securely.
— Assembly: Hanging Cords and Placement :
Info :
Cut hanging cords of red yarn for ornaments (approx. 25-30 cm each, trimmed to desired hanging length). Attach a bead or small crimp at the top of each ornament cord to function as a cap and prevent fraying. Knot the cord through the ornament's top stitch and slide crimp over knot, securing with a dab of fabric glue if desired.
Round 1 :
Plan ornament spacing: Measure the spiral length and mark points every 10-12 cm to hang a stocking or ornament. The photo shows 5-6 stockings spaced evenly with clusters of balls and snowflakes in-between.
Info :
Test hang positions by pinning the cords onto the spiral before sewing - this prevents unbalanced clusters. For a symmetric look, alternate heavy ornaments (stockings) with lighter ones (balls and snowflakes).
Round 2 :
Sewing ornaments: Use yarn needle and long tail to sew the top of each ornament cord securely to the inside of the spiral tube, or tie around the tube and hide the knot inside. Make sure knots are hidden and beads secure the cord ends.
Round 3 :
Anchoring heavy ornaments: For stockings, sew two small stitches through the spiral body and the top of the stocking to prevent spinning. Reinforce with backstitches for durability.
Info :
To make the spiral hang properly, create a hanging loop at the top of the tube. Fold the top end of the tube over a metal ring or create a sturdy yarn loop by plaiting 3 strands of yarn and sewing inside the tube top. Attach to ceiling hook with a decorative knot or covered ring.
— Finishing Touches and Embellishment :
Info :
Embroider green accent lines on stockings using surface slip stitch. Add tiny French knots or bobbles to ball surfaces as decorative texture. Add small gold tack beads to the center of flowers for sparkle. Weave in all ends and secure sewn points with an extra stitch or two for stability.
Round 1 :
Final check: Hang the spiral temporarily and adjust hanging cord lengths for each ornament to ensure they fall at pleasing, staggered heights. Trim any excess yarn tails and disguise knots inside the tube when possible.
Info :
Storage tip: To store, remove ornaments from cords and keep flat zipped in a bag to prevent crushing. The spiral tube can be coiled gently and secured with ties.
This spiral Christmas garland brings holiday cheer with handcrafted charm and modular ease. Each little stocking, ball and snowflake adds personality as you assemble the spiral into a warm, hanging display. The project is perfect for gifting or decorating an entryway and can be customized with your favorite colors and ornament combinations. 🧶🎄✨ Happy crocheting — enjoy the cozy rhythm of making festive treasures!