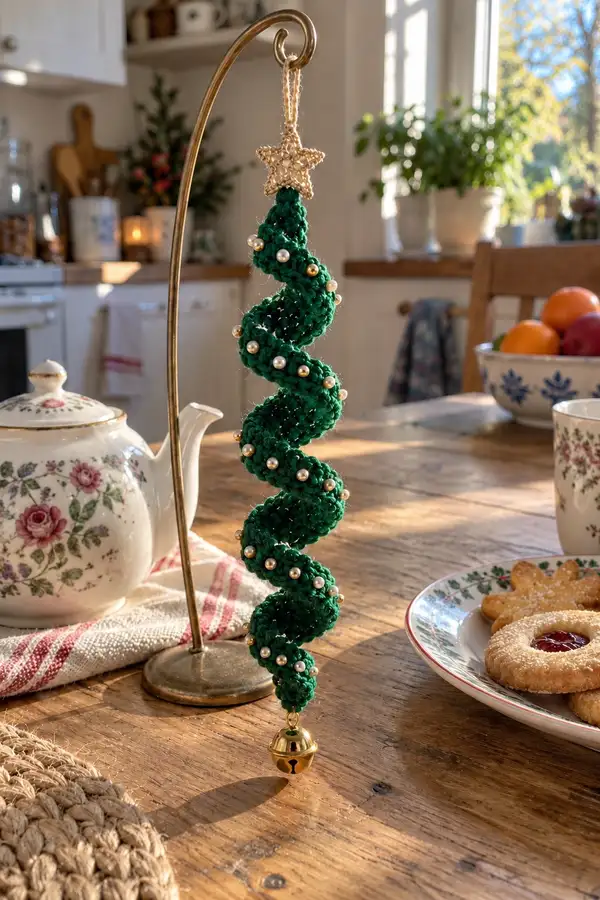
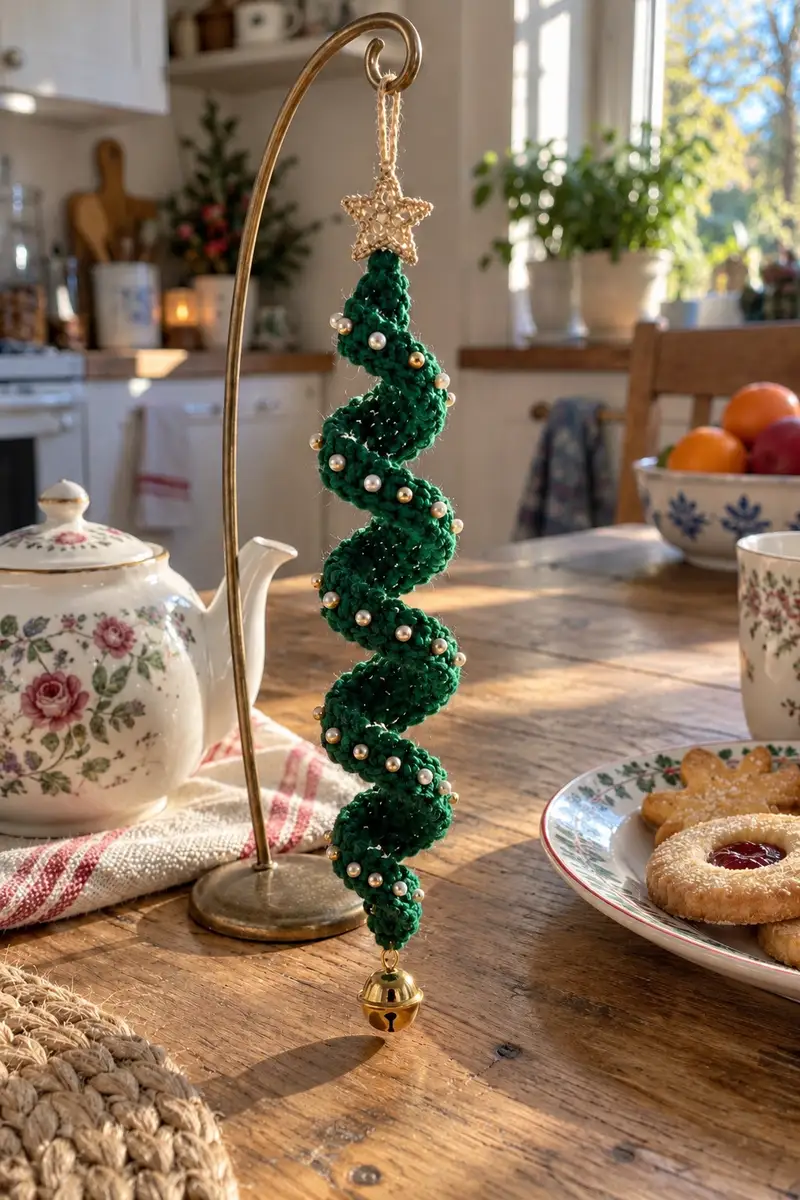
A charming spiral Christmas tree ornament crocheted in a rich forest green with a lacy gold star topper, pearl bead accents and a tinkling bell base. The long spiral coil is worked in rounds with textured ridges so it gently twists into the iconic helix shape. Lightweight and elegant, it is perfect for hanging on a tree, mantel hook or a decorative stand.
Progress Tracker
0% Complete
— Materials & Gauge :
Info :
Gauge is not critical for a decorative ornament but tightness affects final size and how well the spiral holds. With worsted cotton and 3.5mm hook, 10 sc x 10 rounds = ~3.5 cm. The finished ornament in the photo measures roughly 18-22 cm long excluding hanger; adjust rounds for your preferred length.
— Star Topper (Make 1) :
Round 3 :
(1 sc, 1 inc) x 6 (18)
Info :
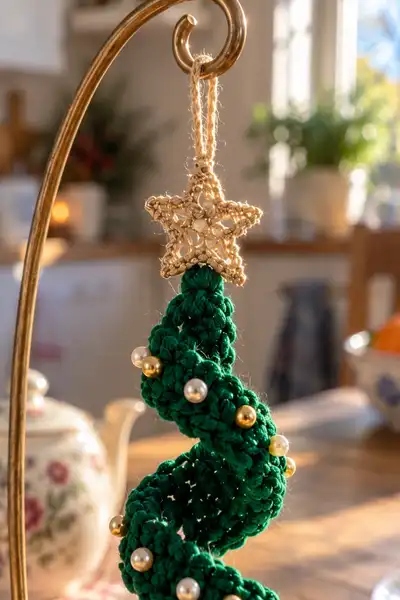
Switch to a smaller hook (2.75mm) and metallic gold yarn if you want a firm, lacy star. Keep tension consistent to maintain reversible lace.
Round 4 :
(2 sc, 1 inc) x 6 (24)
Round 5 :
1 sc in each st (24)
Round 6 :
*Ch 4, skip 3 sts, sl st in next st; rep from * around to form five points, join with sl st (5 ch-loops)
Info :
Each ch-loop will become a point of the star. Work the points in the round indicated below. Keep loops even by blocking lightly after finishing.
Round 7 (Point 1) :
In first ch-4 loop: (sl st, ch 1, 3 sc, ch 2, 3 sc, sl st) into loop. Sl st to base to finish point.
Round 8 - 11 :
Rep Round 7 into each ch-loop to create five identical points. After final point, fasten off leaving 12 cm tail for sewing. Weave tail through center and pull gently to flatten star if needed.
Info :
Optional: Sew a small 4 mm bead in the center of the star to mirror the photo. For hanging loop, leave a 10 cm tail to form a slip-loop; join with a few sl sts at the star base to secure.
— Hanging Loop & Reinforcement :
Round 1 :
With gold yarn, ch 25 (or desired length). Join ends with sl st into a small loop. Fasten off, leaving long tail for anchoring to star.
Info :
Weave the tail through the top center of the star and secure with several whip stitches using the yarn needle. This becomes the hanger for the finished ornament. For extra strength, add a small dab of fabric glue on the knot behind the star.
— Spiral Tree Body (Main Component) :
Info :
We will construct the tree as a long tubular spiral worked in rounds. The circumference is stabilized at 36 stitches; bulges are created by temporary increases and decreases within each shaping cycle so the tube returns to 36 sts. The spiral effect is achieved by offsetting the bulge placement slightly each cycle by moving your round-start marker a few stitches each time. Keep a stitch marker at round start and move it 3 stitches forward at the end of each cycle to rotate the bulge around the tube.
Round 3 :
(1 sc, 1 inc) x 6 (18)
Round 4 :
(2 sc, 1 inc) x 6 (24)
Round 5 :
(3 sc, 1 inc) x 6 (30)
Round 6 :
(4 sc, 1 inc) x 6 (36)
Info :
You now have a steady circumference of 36 stitches which will be maintained for most of the body. Place a stitch marker in the first st of Round 7 to mark round starts; this will be moved at the end of each 10-round shaping cycle to create the spiral rotation.
Round 7-10 :
1 sc in each st (36)
Round 11 :
(5 sc, 1 inc) x 6 (42)
Round 12 :
1 sc in each st (42)
Round 13 :
1 sc in each st BLO (42)
Round 14 :
(5 sc, 1 dec) x 6 (36)
Info :
This 4-round bulge (R11-R14) creates a puff that will act as a coil segment. After Round 14, move your stitch marker 3 sts forward (towards the next st) to offset the next bulge placement by 3 stitches. This offset is the key to the spiral rotation.
Round 15-18 :
1 sc in each st (36)
Round 19 :
(5 sc, 1 inc) x 6 (42)
Round 20 :
1 sc in each st (42)
Round 21 :
1 sc in each st BLO (42)
Round 22 :
(5 sc, 1 dec) x 6 (36)
Info :
Repeat the 8-round shaping cycle 1 (Rounds 11-18) and cycle 2 (Rounds 19-22 combined with earlier even rounds) to create evenly spaced bulges that spiral. Each time you finish the decrease round return to 4 rounds of even 36 sts before starting the next bulge. Move your start-marker 3 sts forward after every bulge block to rotate the bulge laterally around the tube.
Round 23-26 :
1 sc in each st (36)
Round 27 :
(5 sc, 1 inc) x 6 (42)
Round 28 :
1 sc in each st (42)
Round 29 :
1 sc in each st BLO (42)
Round 30 :
(5 sc, 1 dec) x 6 (36)
Info :
At this point you've completed three bulge cycles. Check the tube length against your desired final length—each full bulge cycle (increase through decrease plus 4 even rounds) is about 8 rounds and ~1.2-1.8 cm of vertical length depending on yarn. For a long spiral like the photo you will repeat the bulge cycle 6-9 times total depending on desired length.
Round 31-34 :
1 sc in each st (36)
Round 35 :
(5 sc, 1 inc) x 6 (42)
Round 36 :
1 sc in each st (42)
Round 37 :
1 sc in each st BLO (42)
Round 38 :
(5 sc, 1 dec) x 6 (36)
Info :
Continue repeating the bulge cycle: 4 rounds even (36), increase round to 42, 1-2 rounds even 42 (or one BLO round to emphasize ridge), then decrease back to 36. Move start-marker 3 sts forward after each decrease round. Repeat until you have 7-9 bulges total or desired ornament length is reached.
Round 39-50 :
Repeat pattern: Rounds A: 4 rounds 1 sc in each st (36), R B: (5 sc, 1 inc) x 6 (42), R C: 1 sc in each st (42), R D: 1 sc in each st BLO (42), R E: (5 sc, 1 dec) x 6 (36). Move marker 3 sts forward after each cycle. (Follow cycles until you reach Round 50.)
Info :
If you prefer a more dramatic spiral, after completing a bulge decrease, work the next 4 even rounds in FLO to create an opposite-facing ridge. Experiment in a small swatch to see which combination creates the photographed spiral look.
Round 51-82 :
Continue repeating the bulge cycle as described above, maintaining careful marker movement every cycle to rotate the bulges. By Round 82 you should have approximately 7-9 bulges and a tube length similar to the pictured ornament (~18-22 cm). If you want a longer ornament, continue repeating cycles until you reach desired length.
Info :
Optional internal shaping: If your spiral needs more structure, insert a thin length of floral wire (folded so ends are not sharp) into the tube after Round 50 and run it down the center through the open bottom. This lets you pose the coil but is not necessary for a soft hang.
Final Bulge Cycle (Example Rounds 83-88) :
Round 83-86: 1 sc in each st (36). Round 87: (5 sc, 1 inc) x 6 (42). Round 88: (5 sc, 1 dec) x 6 (36).
Round 89-92 :
1 sc in each st (36)
Info :
At the lower end of the ornament the tube tapers slightly in the photographed piece. We'll taper cleanly for attaching the bell: after your last bulge and 3 rounds even, begin gradual decreases over 6 rounds to reduce circumference from 36 down to 8-10 sts for a neat tip.
Round 93 :
(3 sc, 1 dec) x 9 (27)
Round 94 :
1 sc in each st (27)
Round 95 :
(2 sc, 1 dec) x 9 (18)
Round 96 :
1 sc in each st (18)
Round 97 :
(1 sc, 1 dec) x 9 (9)
Round 98 :
1 sc in each st (9)
Round 99 :
9 dec (0) - if using this exact decrease pattern close to 0, more practical: Round 99: 4 dec, leave 1 sc remaining and fasten off leaving long tail for bell attachment
Info :
Fasten off leaving a long tail (~20 cm). Use this tail to sew on the bell hardware. If you have 1-3 sts left, weave the tail through remaining stitches to close the tip tightly, then insert small jump ring through center to attach bell.
— Bead Embellishment Placement :
Info :
There are several ways to attach beads: either sew them on after finishing the tube or pre-string them onto the yarn before you begin and slide into place as you work. In the pictured ornament, the beads sit on the bulging ridges spaced evenly around each bulge. We recommend sewing after finishing so you can place beads precisely.
Placement Guide :
Sew eight faux pearls around the mid-section and smaller gold beads scattered between pearl placements on higher and lower bulges. Place one pearl on each bulge crest approximately centered on the bulge (use the marker to find crests: each bulge cycle has a highest point where increases were made).
Info :
Use a beading needle and matching thread to sew beads through the tube fabric; a small knot inside the tube and a few weaves through the stitches keep beads secure. For extra security, add a small dab of fabric glue behind each bead.
— Bell Base & Final Tip :
Round 1 :
Using tail left from tip, thread through a small gold jump ring and sew through remaining stitches at the bottom tip. Make several passes to secure ring. Fasten off and weave in ends.
Round 2 :
Attach bell to jump ring. Check attachment for secure hold. If desired, reinforce with a couple of stitches of metallic thread around ring and through lower stitches of the tip.
Info :
If you used a floral wire internally, trim and fold ends so they do not extend beyond the bottom. Cover wire ends with a tiny scrap of yarn before sewing the ring on to avoid metal-on-metal noise.
— Final Finishing Touches :
Info :
Block gently by pinning the spiral into a loose helix on a padded surface and spritz lightly with water or steam from a distance (if the yarn allows). This helps set the spiral shape. Once dry, attach the star to the top.
Attach Star :
Use the long tail from the star and a yarn needle to sew the star to the topmost 6 stitches of the tube. Make small stitches through star base and tube, pulling tight enough to seat the star but not so tight as to distort the top coil. Bury tails and weave through several stitches.
Info :
For a neater look, sew the hanger loop through the back of the star and into the topmost tube stitches so the hanger and star share an anchor and the top does not twist loose.
Optional Embellishments :
Add a small metallic thread spiral around the tube by sewing a length of gold thread along the bulge crests to create a garland effect. Alternatively, add tiny sequins or metallic embroidery for extra shimmer.
This delightful spiral tree ornament brings a little handmade magic into any holiday display. Each ripple and bead is small but meaningful, and the lacy star and tinkling bell give it a nostalgic, vintage vibe. Take your time shaping and embellishing — the results are worth the care. 🧶✨ Hang it on a tree, a mantle hook, or on a special stand for a sweet seasonal accent. Happy stitching and merry decorating! 🎁