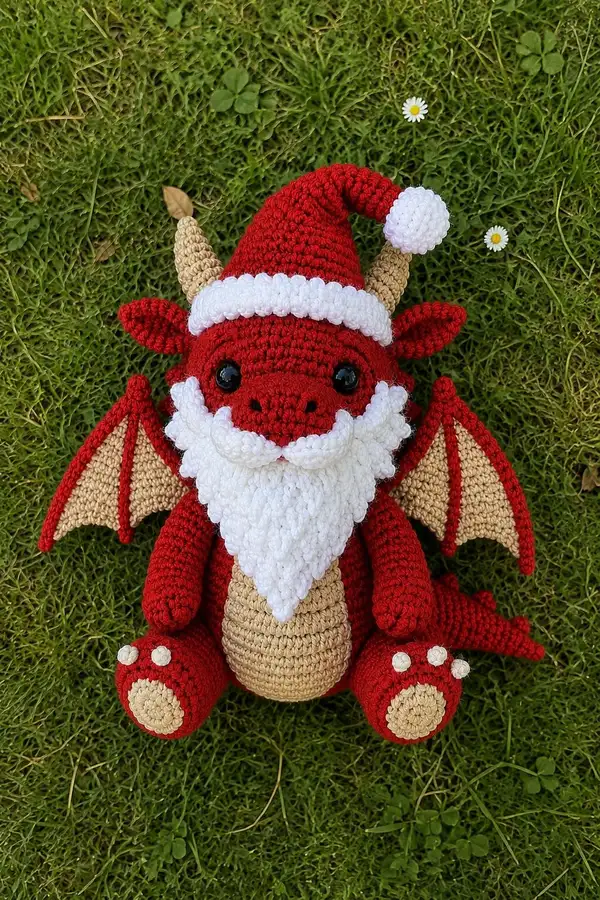
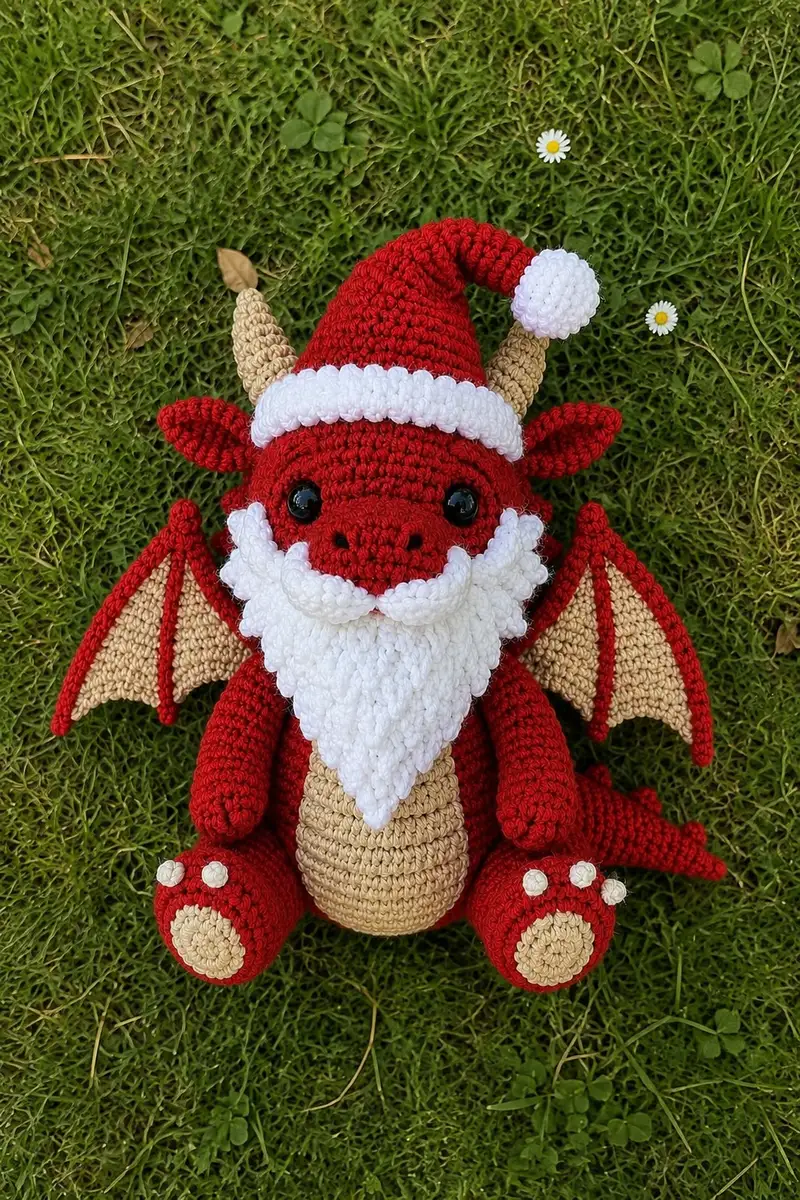
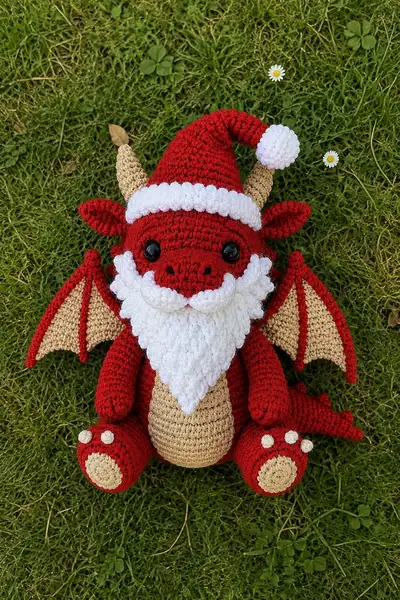
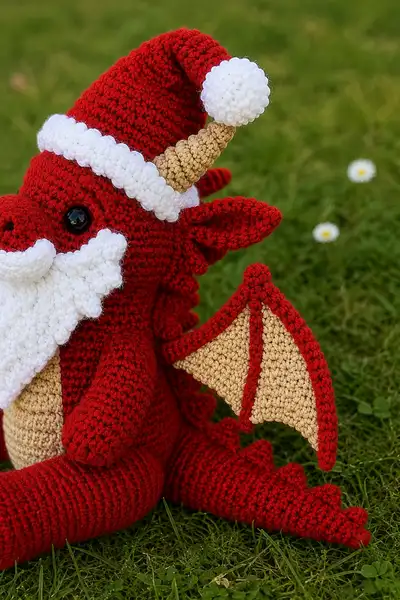
Create a lovable festive dragon dressed as Santa — complete with a floppy red Santa hat, fluffy white beard, cream belly, golden horns, and scalloped wing membranes. This plush amigurumi features rounded limbs, a tapered tail with spikes, sewn-on paw pads and shiny black safety eyes. Detailed shaping and colorwork make this piece a charming holiday centerpiece or handmade gift.
Progress Tracker
0% Complete
— Head :
Round 1 :
6 sc in magic ring (6)
Round 3 :
(1 sc, 1 inc) x 6 (18)
Round 4 :
(2 sc, 1 inc) x 6 (24)
Round 5 :
(3 sc, 1 inc) x 6 (30)
Round 6 :
(4 sc, 1 inc) x 6 (36)
Round 7 :
(5 sc, 1 inc) x 6 (42)
Round 8 :
(6 sc, 1 inc) x 6 (48)
Round 9-16 :
1 sc in each st (48) (work 8 rounds even to build head height)
Info :
Place safety eyes between rounds 13-14, approximately 10-12 sts apart depending on desired expression. For 12mm eyes on this size, aim for 10-11 stitches between the eyes center-to-center. Use stitch markers to mark eye placement.
Round 17 :
(6 sc, 1 dec) x 6 (42)
Round 18 :
(5 sc, 1 dec) x 6 (36)
Info :
Begin stuffing head firmly from this round. Use small amounts of fiberfill to shape cheeks and forehead; push stuffing up into forehead and around eye sockets for a round look. Continue to add stuffing as you decrease.
Round 19 :
(4 sc, 1 dec) x 6 (30)
Round 20 :
(3 sc, 1 dec) x 6 (24)
Round 21 :
(2 sc, 1 dec) x 6 (18)
Round 22 :
(1 sc, 1 dec) x 6 (12)
Info :
At this point the head is closed down to 6 sts. Finish stuffing so the head is plump but not overfilled (to allow sewing to the body). Fasten off leaving a long tail for sewing if you plan to attach later. If you prefer to add a neck tube, continue with rounds below.
Round 24-30 :
1 sc in each st (6) (work 7 rounds even to form a short neck tube if desired)
Info :
If you want a longer neck, add more even rounds here. If you plan to attach directly to the body opening, leave a 15-20cm tail and fasten off. Weave the tail through the final 6 stitches and pull closed if you are finishing here.
— Muzzle / Snout :
Round 1 :
6 sc in magic ring (6)
Round 3 :
(1 sc, 1 inc) x 6 (18)
Round 4-6 :
1 sc in each st (18) (work 3 rounds even for muzzle height)
Info :
Embroider nostrils with black yarn between rounds 2-4: use small straight stitches to create two dots or tiny ovals. Position muzzle centered under eyes and sew with ladder stitch using the long tail. Stuff lightly to keep a soft snout.
Round 7 :
(1 sc, 1 dec) x 6 (12)
Round 8 :
6 dec (6) - fasten off leaving a long tail for sewing
— Beard (fluffy triangular bib) :
Info :
The beard is a flat triangular piece worked in rows using puff stitches and sc to achieve a fluffy texture. Work back-and-forth rows (we still label them as rounds for consistency). Use white yarn. Begin at the chin point and increase outward to form the triangle.
Round 1 :
ch 3, 2 sc in 2nd ch from hook, turn (2)
Round 2 :
ch 1, sc in first st, 2 sc in last st (3)
Round 3 :
ch 1, sc in first 2 sts, 2 sc in last st (4)
Round 4 :
ch 1, sc across increasing last st 2 sc (5) — continue increasing one stitch at right edge each row
Round 5-6 :
Work even rows increasing 1 st each right-side row until you reach approximately 15-16 sts across at the top edge (this will create a triangle about 10-11 cm wide). Use sc rows and alternate with puff rows for texture.
Round 7 :
Puff row: ch1, *yarn over, insert hook in next st, yarn over, pull up loop, repeat 3 times in same st (5 loops on hook), yarn over and pull through all loops, ch1 to close puff; sc in next st* rep across finishing with sc in last st. (puff stitches across)
Round 8-12 :
Alternate puff rows and sc rows, increasing 1 sc at the right-most edge at every second sc-row to continue the triangle shaping until desired triangle size achieved (approx 12-14 rows total). Fasten off leaving tail for sewing.
Info :
Block the triangular beard flat if needed. Sew the beard to the face under the muzzle so the point sits at the chin and the wide top sits just below the hat brim. For the curled moustache pieces, crochet 2 small tubes (6 sc in mr, then 1-4 rounds even) and wrap gently into spirals, sew to each side of the muzzle.
— Body :
Round 1 :
6 sc in magic ring (6)
Round 3 :
(1 sc, 1 inc) x 6 (18)
Round 4 :
(2 sc, 1 inc) x 6 (24)
Round 5 :
(3 sc, 1 inc) x 6 (30)
Round 6 :
(4 sc, 1 inc) x 6 (36)
Round 7-12 :
1 sc in each st (36) (work 6 rounds even to reach torso height)
Info :
At round 8 you can change to the cream/golden yarn to start the belly panel. Work the front belly as a separate oval panel to sew on later, or change color and continue rounds in the golden color for a built-in belly. If adding a separate belly, crochet an oval piece as directed in the Belly Panel section below.
Round 13 :
(4 sc, 1 dec) x 6 (30)
Round 14 :
(3 sc, 1 dec) x 6 (24)
Round 15 :
(2 sc, 1 dec) x 6 (18)
Info :
Begin stuffing the body moderately from this round, focusing on the lower belly and base so the dragon sits steadily. Leave the top opening wide enough to attach the head by sewing or inserting the neck tube.
Round 16 :
(1 sc, 1 dec) x 6 (12)
Round 18-24 :
1 sc in each st (6) (work 7 rounds even to form short belly base and prepare for head attachment)
Info :
Leave a long tail for sewing the head. If you made the head with a neck tube, stuff the body well and insert the neck tube into the body opening, pin in place and sew evenly using ladder stitch around the seam. Fasten off and weave in ends.
— Belly Panel (optional separate piece) :
Round 1 :
6 sc in magic ring (6)
Round 3 :
(1 sc, 1 inc) x 6 (18)
Round 4 :
(2 sc, 1 inc) x 6 (24)
Round 5-7 :
1 sc in each st (24) (work 3 rounds even to make an oval)
Info :
Finish off leaving long tail. Sew the belly panel to center front of the body with even stitches; stretch slightly as you sew so it lays flat and matches body curvature.
— Arms (Make 2) :
Round 1 :
6 sc in magic ring (6)
Round 3 :
(1 sc, 1 inc) x 6 (18)
Round 4-6 :
1 sc in each st (18) (work 3 rounds even for hand/fist)
Info :
For a slightly tapered wrist, on round 7 do (4 sc, 1 dec) x 3 to reduce to 15 sts. Stuff hand firmly but leave room to bend slightly.
Round 7 :
(4 sc, 1 dec) x 3 (15)
Round 8-14 :
1 sc in each st (15) (work 7 rounds even for lower and mid arm)
Round 15 :
(4 sc, 1 inc) x 3 (18) - widen slightly for shoulder
Round 16-20 :
1 sc in each st (18) (work 5 rounds even; last round prepare for sewing by leaving tail)
Info :
Stuff hands firmly and arms lightly. Insert optional wire at the core before finishing if you want poseable arms — ensure wire ends are wrapped in yarn to avoid poking through stitches. Sew arms to sides of body approximately at rounds 9-12 of the body depending on desired arm position; pin before sewing.
— Legs (Make 2) :
Foot Disc Round 1 :
6 sc in magic ring (6)
Foot Disc Round 2 :
6 inc (12)
Foot Disc Round 3 :
(1 sc, 1 inc) x 6 (18)
Foot Disc Round 4 :
(2 sc, 1 inc) x 6 (24)
Info :
Create a contrasting cream paw pad using the small round above. Sew it onto the top of the foot later. For the foot side, continue with red yarn and join to the edge of the disc to build the foot sides.
Round 5 :
Join red yarn to any stitch of the disc edge, ch1, 1 sc in each st around (24)
Round 6-12 :
1 sc in each st (24) (work 7 rounds even to build foot height)
Round 13 :
(2 sc, 1 dec) x 6 (18)
Round 14-20 :
1 sc in each st (18) (work 7 rounds even for lower leg)
Round 21 :
(3 sc, 1 dec) x 3 (15) - begin tapering for hip
Round 22-25 :
1 sc in each st (15) (work 4 rounds even; leave long tail for sewing to body)
Info :
Stuff feet firmly and legs moderately. Position legs evenly at the lower front of body; typically attach to rounds 2-6 of the body's base to create a seated pose. Use several secure passes when sewing for stability.
— Paw Pad Details (Make 4 small dots per foot) :
Round 1 :
6 sc in magic ring (6) - small cream dots
Round 2 :
1 sc in each st (6) - finish off leaving tail for sewing
Info :
Sew three small dots on top of each foot aligned above the main paw pad and one larger cream disc in center (the larger disc created in the Foot Disc section). This gives the adorable paw detail visible in the photo.
— Ears (Make 2) :
Round 1 :
6 sc in magic ring (6)
Round 3 :
(1 sc, 1 inc) x 6 (18)
Round 4-6 :
1 sc in each st (18) (work 3 rounds even)
Round 7 :
(2 sc, 1 dec) x 6 (12)
Round 8-10 :
1 sc in each st (12) - flatten slightly and leave tail for sewing
Info :
Sew ears to top sides of head at rounds 8-9 (measured from head rounds earlier). Curve the tips slightly forward when sewing to match the cute forward-facing ear look.
— Horns (Make 2) :
Round 1 :
6 sc in magic ring (6) (use gold/beige yarn)
Round 3 :
(1 sc, 1 inc) x 6 (18)
Round 4-6 :
1 sc in each st (18) (work 3 rounds even)
Round 7 :
(2 sc, 1 dec) x 6 (12)
Round 8 :
(1 sc, 1 dec) x 4 (8)
Round 9-12 :
1 sc in each st (8) (work 4 rounds even; leave tail for sewing)
Info :
Make the horns slightly curved by stuffing lightly and flattening then sewing the base to the top of the head behind the ears. For the spiral look on the photographed horns, stitch horizontal spiral ribbing by using slip stitches in rounds around the cone after attaching and stuffing.
— Tail (Tapered cone with spikes) :
Round 1 :
6 sc in magic ring (6)
Round 3 :
(1 sc, 1 inc) x 6 (18)
Round 4 :
(2 sc, 1 inc) x 6 (24)
Round 5-16 :
1 sc in each st (24) (work 12 rounds even to build tail length)
Info :
Stuff the tail lightly as you go to keep it flexible. For a tapered look, after the tail base use occasional decreases. Leave a hole near the base to sew into the body securely.
Round 17 :
(3 sc, 1 dec) x 6 (18)
Round 18-20 :
1 sc in each st (18) (3 rounds even)
Round 21 :
(2 sc, 1 dec) x 6 (12)
Round 22-24 :
1 sc in each st (12) (3 rounds even)
Round 25 :
(1 sc, 1 dec) x 6 (6) - fasten off leaving long tail for sewing to body
Spikes (Make 8-10) :
Round 1: 6 sc in magic ring (6). Round 2: 1 sc in each st (6). Fasten off leaving long tail. Fold a spike slightly and sew along the tail center top at even intervals. For the triangular serrated look in the photo, you can make small cone spikes and sew them in alternating angles.
— Wing Membranes (Make 2) :
Info :
Wings are flat triangular/rounded pieces worked in the golden/beige yarn as a membrane, then edged and ribbed with the main red yarn to create the defined webbing lines. All rows are worked in rounds labeling to maintain pattern style.
Round 1 :
6 sc in magic ring (6) (golden/beige)
Round 3 :
(1 sc, 1 inc) x 6 (18)
Round 4 :
(2 sc, 1 inc) x 6 (24)
Round 5-8 :
1 sc in each st (24) (work 4 rounds even - you now have a small round which you'll shape into a wing triangle by adding edge increases on one side)
Round 9 :
Change to red yarn (Info: Change to red yarn. Carry unused yarn inside if working stripes). Attach red and sc 8 sts along one curve to create the wing outer ridge, then work sc evenly across to shape the outer edge so wing becomes a fat triangle (total around increases will be small)
Round 10-12 :
1 sc in each st BLO (24) to create a ridge, then fold and single crochet along edges to sharpen wing points. (Use BLO for a neat ridge along the join)
Round 13 :
Add ribs: With red yarn stitch 3 straight raised ribs by surface slip stitch from top edge to bottom edge spaced evenly (Info: place ribs roughly 6-8 sts apart depending on wing width). These are surface stitches sewn on after wing is finished if you prefer a neat finish.
Round 14-16 :
Work 3 rounds of sc around entire wing edge in red to create a bold border (approx 24-30 sts depending on shaping). Fasten off leaving tail for sewing.
Info :
Sew wings to upper back of the dragon at about body rounds 9-12. Pin them slightly angled upward to mimic the photograph. For shape, add a few small stitches to tack ribs in place; you can also insert thin cardboard or plastic if you want rigid wings (not necessary for this plush look).
— Santa Hat :
Info :
Hat is crocheted in the round in red with a white fluffy brim and pompom. Work decreases at the top to create a floppy tip. The brim uses a textured stitch (puff or shell) to look fluffy in the photo.
Round 1 :
6 sc in magic ring (6) (red)
Round 3 :
(1 sc, 1 inc) x 6 (18)
Round 4 :
(2 sc, 1 inc) x 6 (24)
Round 5-9 :
1 sc in each st (24) (work 5 rounds even to form cone)
Round 10 :
(3 sc, 1 inc) x 6 (30) - widen slightly for brim area
Round 11-15 :
1 sc in each st (30) (work 5 rounds even for hat height)
Round 16 :
(3 sc, 1 dec) x 6 (24)
Round 17 :
(2 sc, 1 dec) x 6 (18)
Round 18 :
(1 sc, 1 dec) x 6 (12)
Round 19 :
6 dec (6) - fasten off leaving long tail. Stuff lightly to create a soft floppy tip and curve the hat over the head to sit like in the photo.
Brim :
Using white yarn, join to the lower brim edge and work 2-3 rounds of puff or shell stitch (for example, *sc in next st, puff in next st* around) to create the fluffy band. Fasten off and sew brim to hat base. Create a white pompom by crocheting a small ball: 6 sc in mr, inc rounds to 12, 1 sc round, fasten off and stuff densely, then attach to hat tip.
Info :
Sew the hat to the top of the head, tucking brim slightly over the forehead above the eyes. Make sure beard sits under the brim as in the picture. For a removable hat, sew only at a couple of points or add snaps.
— Decorative Back Spikes (Make 8) :
Round 1 :
6 sc in magic ring (6)
Round 2 :
(1 sc, 1 inc) x 3 (9)
Round 3 :
1 sc in each st (9)
Round 4 :
1 sc in each st (9) - fasten off leaving long tail for sewing
Info :
Sew these along the back from the neck to the tail, spacing them evenly. Flatten slightly as you sew to get the scalloped ridge effect in the photos.
— Assembly Instructions :
Step 1 :
Attach head to body by inserting the neck portion into the body opening. Pin in place first, then sew securely using whip stitch or ladder stitch all around, ensuring even attachment and no gaps.
Step 2 :
Position arms on sides of body at rounds 9-12 for a natural seated look. Sew through both arm and body using ladder stitch for invisible seam; use matching yarn for neatness.
Step 3 :
Attach legs to bottom of body at rounds 1-3, spacing evenly and making sure feet align so dragon sits stably. Sew securely, adding extra stitches at inner seams for stability.
Step 4 :
Sew ears to top of head at rounds 7-9, spacing them about 10-12 stitches apart and curving slightly forward. Attach horns behind the ears at the top of the head.
Step 5 :
Pin and sew wings to upper back at rounds 9-12. Angle them out and slightly upward; sew additional tacking stitches from wing base to a few back stitches for stability.
Step 6 :
Sew tail into the back center at the lower body opening (around body rounds 16-18 depending on your assembly). Make sure the tail is well secured with several passes of the yarn needle.
Step 7 :
Sew the beard under the muzzle, starting from the chin point and working outwards. Secure moustache curls and any small facial details. Weave in all tails and trim.
Step 8 :
Attach the hat by sewing only at a few points if you want removable hat, or sew fully for permanent placement. Add pompom and check all seams. Embroider any nostril detail or small mouth lines with black yarn.
— Finishing Touches & Tips :
Info :
Weave in loose ends securely and hide them inside the stuffing when possible. Use small safety eyes and secure with washers behind the head. If giving to small children, embroider eyes instead of using safety eyes to avoid choking hazards.
Info :
Check symmetry by laying the assembled amigurumi on a flat surface. Adjust stuffing and sewing as needed. Add blush to cheeks lightly with a pastel if desired. Steam-block flat pieces slightly to even out stitches if needed.
This cheerful Santa Dragon is a delightful combination of holiday spirit and playful fantasy — a perfect handmade gift or seasonal keepsake. Each carefully crocheted part comes together to create a character full of charm, from the fluffy beard to the ribbed wings and golden horns. I hope you enjoy every stitch while making it and that it brings a smile to whoever receives it. Happy crocheting and holiday crafting! 🎁🧶