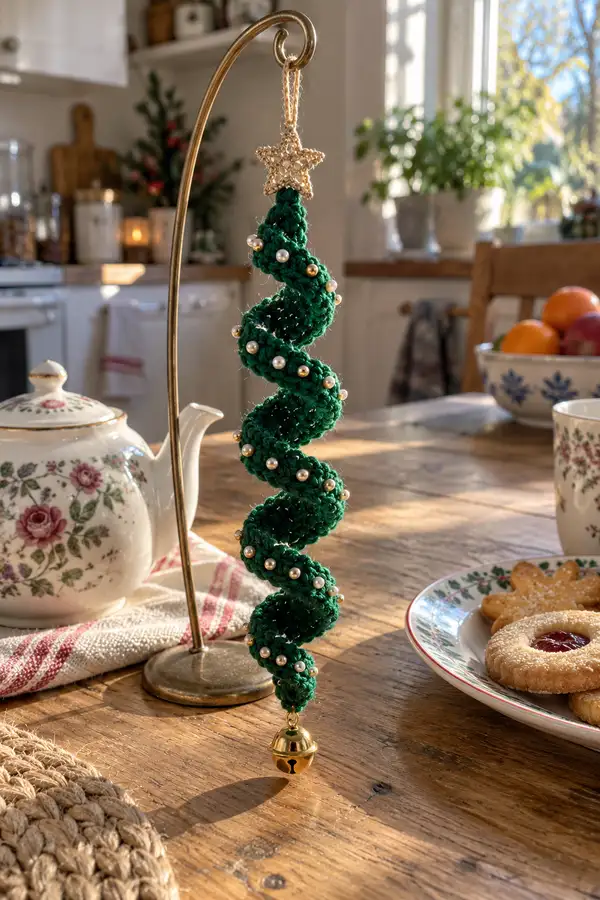
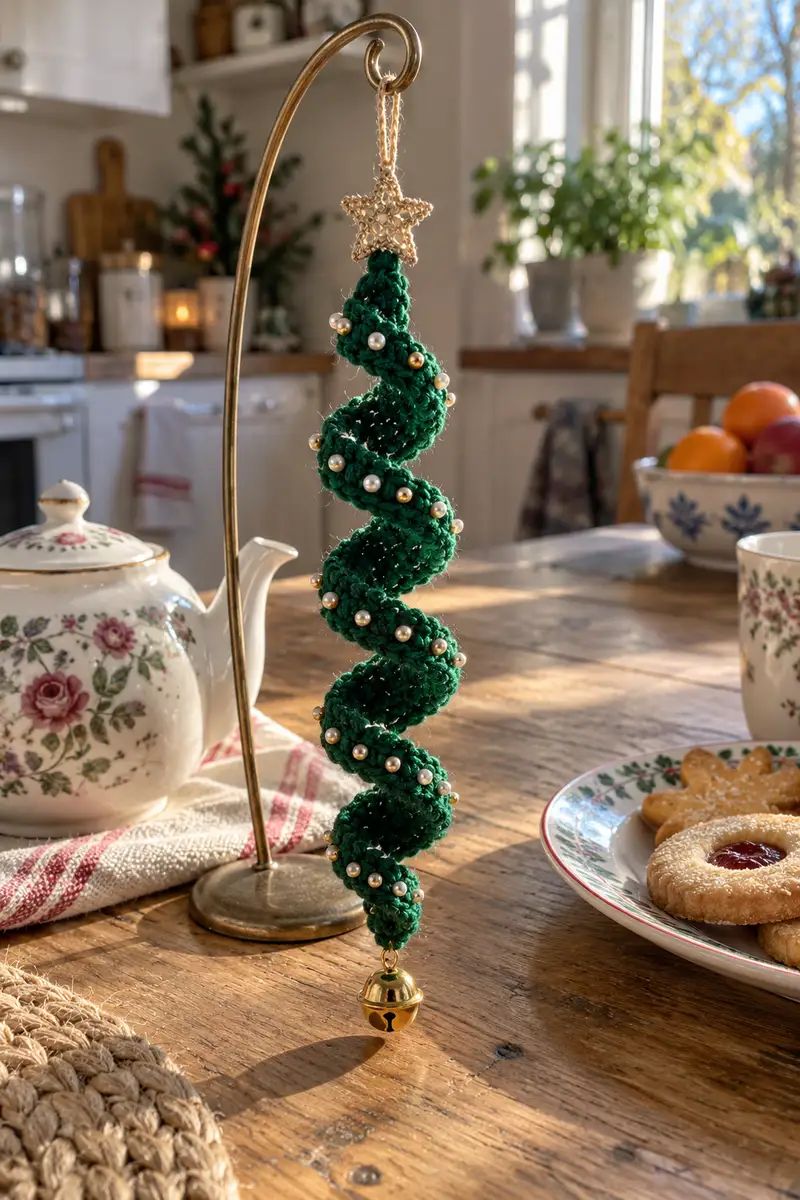
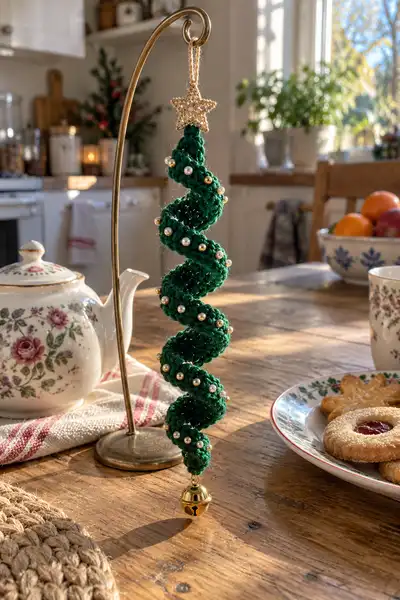
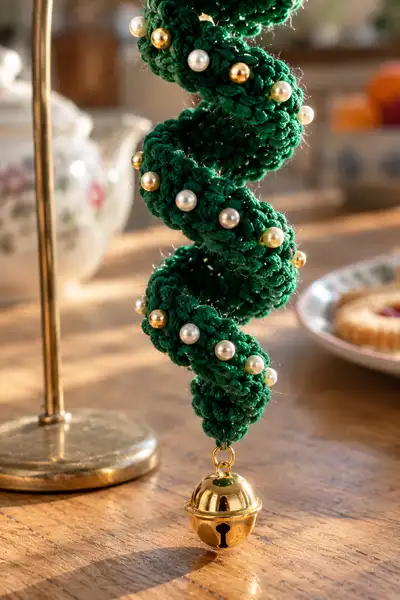
Make a charming spiral Christmas tree ornament with rich emerald green ruffles, pearl and gold bead accents, a sparkling gold star topper, and a jingling bell. This hanging decoration curls into a graceful corkscrew, perfect for trees, windows, or special gift wrap. The pattern uses basic amigurumi-style crochet in the round with shaping and an internal wire core to hold the corkscrew shape. A lovely small project with lots of opportunities to customize beads, star, and finishing hardware.
Progress Tracker
0% Complete
— Materials & Gauge :
Info :
Gauge is not critical for this ornament but a tight fabric (approx. 20 sc x 20 rows = 4in using 3.5mm hook) helps hide wire and beads. Use a smaller hook if your stitches are loose. Final finished length for the photographed example is approx. 9-11 inches (including bell) with 8 ruffled bulb modules.
— Core Preparation (Wire & Loop) :
Info :
Cut a length of 18-20 gauge craft wire about 11-12 inches long. If you prefer, use two pieces joined for a very long ornament. Bend one end to create a small closed loop for hanging (approx. 6-8mm loop) or leave a tail to thread through a jump ring later. This wire will be inserted inside the tube as you work and will allow you to shape the final corkscrew.
— Spiral Body :
Round 1 :
6 sc in magic ring (6)
Round 3 :
(1 sc, 1 inc) x 6 (18)
Round 4 :
(2 sc, 1 inc) x 6 (24)
Round 5 :
(3 sc, 1 inc) x 6 (30)
Round 6 :
(4 sc, 1 inc) x 6 (36)
Round 7 :
(5 sc, 1 inc) x 6 (42)
Round 8 :
(6 sc, 1 inc) x 6 (48)
Round 9-11 :
1 sc in each st (48)
Info :
Rounds 1-11 build the initial cylinder and establish the large circumference we will use as the peak of the first bulb. Keep a stitch marker at the beginning of Round 1 and move it each round. Insert the prepared wire now: thread the wire through the center of the tube so the hanging loop end extends slightly from the top of the tube (you will still be able to pull it further as you work). The top loop should be flush with the top edge once complete.
Round 12 :
(6 sc, 1 dec) x 6 (42)
Round 13 :
(5 sc, 1 dec) x 6 (36)
Round 14-15 :
1 sc in each st (36)
Info :
Rounds 12-15 create the first neck/connector below the bulb peak. The tube stays hollow but snug around the wire. If your wire is stiff, you can shape a slight curve here to help the corkscrew form later.
Round 16 :
(4 sc, 1 inc) x 6 (42)
Round 17 :
(5 sc, 1 inc) x 6 (48)
Round 18 :
(6 sc, 1 inc) x 6 (54)
Round 19-21 :
1 sc in each st (54)
Info :
Rounds 16-21 expand the tube to a larger bulb — this is the ruffled, prominent section that will show the bead clusters. The photographed ornament has pronounced bulges: we achieve that by expanding to 54 stitches and holding it for several rounds.
Round 22 :
(6 sc, 1 dec) x 6 (48)
Round 23 :
(5 sc, 1 dec) x 6 (42)
Round 24-25 :
1 sc in each st (42)
Info :
Finish the first complete bulb module by narrowing the tube down again; this produces the stacked-bulb look. Keep the fabric firm and even — the bulb should hold shape around the wire so the final spiral looks sculptural.
Round 26 :
(4 sc, 1 inc) x 6 (48)
Round 27 :
(5 sc, 1 inc) x 6 (54)
Round 28 :
(6 sc, 1 inc) x 6 (60)
Round 29-31 :
1 sc in each st (60)
Info :
This larger bulb (Rounds 26-31) is slightly more exaggerated; when the wire is spiraled the extra volume helps the spiral step to be visible. If you prefer smaller bulbs, stop increases earlier and hold fewer rounds at the peak.
Round 32 :
(6 sc, 1 dec) x 6 (54)
Round 33 :
(5 sc, 1 dec) x 6 (48)
Round 34-35 :
1 sc in each st (48)
Info :
At this stage you have produced two bulb sections. The pattern repeats in a predictable way: expand with three increase rounds, hold for 2-3 rounds, then decrease with two rounds and hold. Repeat until you reach the desired length. The photographed example contains 8 major bulb modules; follow the module repeats below.
Round 36 :
(4 sc, 1 inc) x 6 (54)
Round 37 :
(5 sc, 1 inc) x 6 (60)
Round 38 :
(6 sc, 1 inc) x 6 (66)
Round 39-41 :
1 sc in each st (66)
Info :
If you prefer less dramatic bulges, reduce one of the increase rounds (i.e., stop at 60 instead of 66). Keep notes on each bulb: how many stitches you used at the peak and how many rounds you held at the peak; this helps keep symmetry for later bulbs.
Round 42 :
(6 sc, 1 dec) x 6 (60)
Round 43 :
(5 sc, 1 dec) x 6 (54)
Round 44-45 :
1 sc in each st (54)
Info :
Move stitch marker carefully at the start of each round. If counts vary slightly due to tension, make minor corrections by doing 1 or 2 additional decreases in the next round rather than ripping back; small changes rarely show once beads and shaping are added.
Round 46 :
(4 sc, 1 inc) x 6 (60)
Round 47 :
(5 sc, 1 inc) x 6 (66)
Round 48 :
(6 sc, 1 inc) x 6 (72)
Round 49-51 :
1 sc in each st (72)
Info :
Rounds 46-51 form another pronounced bulb. You can adjust the number of peak rounds (here we used 3 rounds of holding at 72) to achieve more layered or more tapered look. Note that as the circumference grows the beads will sit farther apart — plan bead counts accordingly.
Round 52 :
(6 sc, 1 dec) x 6 (66)
Round 53 :
(5 sc, 1 dec) x 6 (60)
Round 54-55 :
1 sc in each st (60)
Info :
At this halfway point you can test the spiral: gently twist the wire inside into a loose corkscrew shape, spacing the bulb modules evenly. Make adjustments to wire shape to get the pitch (spacing between coils) you prefer. Pull the wire slightly down to keep the top loop flush.
Round 56 :
(4 sc, 1 inc) x 6 (60)
Round 57 :
(5 sc, 1 inc) x 6 (66)
Round 58 :
(6 sc, 1 inc) x 6 (72)
Round 59-61 :
1 sc in each st (72)
Info :
Continue repeating expansion and contraction rounds as above. The pattern in each bulb is symmetrical: increase rounds, hold peak, decrease rounds, hold connector. Keep consistent counts for visual regularity.
Round 62 :
(6 sc, 1 dec) x 6 (66)
Round 63 :
(5 sc, 1 dec) x 6 (60)
Round 64-65 :
1 sc in each st (60)
Round 66 :
(4 sc, 1 inc) x 6 (66)
Round 67 :
(5 sc, 1 inc) x 6 (72)
Round 68 :
(6 sc, 1 inc) x 6 (78)
Round 69-71 :
1 sc in each st (78)
Info :
You may notice counts increasing as we enlarge bulbs. Keep stitch math consistent: each '(k sc, 1 inc) x 6' round adds 6 stitches. Each '(k sc, 1 dec) x 6' round removes 6 stitches. That reliable increment keeps symmetry and allows easy planning of bulb peaks.
Round 72 :
(6 sc, 1 dec) x 6 (72)
Round 73 :
(5 sc, 1 dec) x 6 (66)
Round 74-75 :
1 sc in each st (66)
Round 76 :
(4 sc, 1 inc) x 6 (72)
Round 77 :
(5 sc, 1 inc) x 6 (78)
Round 78 :
(6 sc, 1 inc) x 6 (84)
Round 79-81 :
1 sc in each st (84)
Info :
Rounds 76-81 form the penultimate bulb. If you plan to make the ornament shorter or longer, simply add or remove complete bulb modules (one module = increase rounds + peak rounds + decrease rounds + connector rounds). The photographed version contains 8 full bulbs with a tapered tip.
Round 82 :
(6 sc, 1 dec) x 6 (78)
Round 83 :
(5 sc, 1 dec) x 6 (72)
Round 84-85 :
1 sc in each st (72)
Round 86 :
(4 sc, 1 dec) x 6 (66)
Round 87 :
(3 sc, 1 dec) x 6 (60)
Round 88 :
(2 sc, 1 dec) x 6 (54)
Round 89 :
(1 sc, 1 dec) x 6 (36)
Info :
Rounds 86-90 taper the tip down to a small point suitable for finishing. At Round 90 you have a tiny closed point — fasten off leaving a long tail to thread through the center and tie off onto the bottom hardware ring. Remove excess wire or fold and hide it carefully inside the last few rounds.
— Top Star :
Info :
Make the star separately in metallic yarn and attach to the top loop. The star is small (approx 1in) and can be sewn on. You can also make a beaded star using seed beads or a pre-made charm.
Round 1 :
Using metallic yarn, ch 6, sl st to 1st ch to form ring (6)
Round 2 :
*(ch 2, hdc in ring) x 5, ch 2, sl st to ring* — join to form 5 spokes
Round 3 :
Working around each spoke: *(sl st into next ch-2 sp, (sc, hdc, sc) in same sp, sl st into next sp)* — rep 5 times to make 5 star points
Round 4 :
Embellish with a small bead in the center: sew a single bead over the center and secure tightly. Fasten off leaving long tail for sewing.
Info :
Sew star to the top loop you created with the wire. Use several secure passes and knot tightly. Add a drop of fabric glue if desired for extra security; hide knot tail inside the top tube and trim close.
— Hanging Loop :
Round 1 :
With main yarn, ch 20 (or desired loop length), sl st to attach to top of ornament (creates a hanging loop)
Info :
You can use the wire loop or a crocheted chain loop. If using chain, reinforce by threading a length of thread or thin wire through the chain before attaching to top for durability.
— Bead Embellishments :
Info :
You will place approx. 16-24 small pearl/gold beads spaced over the bulb peaks. Use a beading needle and upholstery thread or thin yarn to sew beads through single stitches on bulb peaks. Choose placement after shaping so beads sit naturally in rounded areas.
Bead Placement Step 1 :
Decide on bead pattern: alternate pearl/gold beads every 8-10 stitches along the outermost round of each bulb peak. For larger peaks (72-84 sts) place beads approx every 10-12 sts; for smaller peaks (48-60 sts) place every 6-8 sts.
Bead Placement Step 2 :
Thread bead onto needle, push needle through stitch from back to front, pull bead flush to surface, then pass needle back through a neighboring stitch and knot securely on inside of tube. Repeat for all beads.
Info :
To avoid pulling stitches out of shape, sew beads with short anchor stitches and do not pull the thread overly tight. If a bead feels loose, add an extra pass before knotting and bury the tail within the stitches.
— Bell & Bottom Hardware :
Info :
The small gold jingle bell adds weight and a charming sound. Attach a small jump ring to the bell eye, then secure the jump ring to the bottom stitch of the ornament using the long tail left when you closed the tip.
Attach Bell Step :
Thread the long tail from Round 90 through the bottom stitch, then through a small split/jump ring, then knot several times around the ring. Weave the tail through several interior stitches to hide it and trim close. Optionally, add a drop of glue to the knot for security.
Info :
Test the balance of the ornament by holding from the top loop. If the spiral hangs twisted incorrectly, adjust the internal wire slightly to correct the pitch. Once satisfied, trim or tuck any remaining wire ends so nothing protrudes from the tube.
— Finishing & Blocking :
Info :
Lightly steam-block or shape by hand to encourage the corkscrew. Do not soak wet if metallic yarn is used for the star; steaming held at a safe distance will relax the stitches and set the shape. Allow to fully dry before final bead attachment and hanging.
Final Touches :
Weave in all tails using yarn needle. Make sure all beads and the star are firmly attached. Give the ornament one final gentle twist along the internal wire to get an even spiral shape and check symmetry before gifting or hanging.
You did it — a beautiful spiral tree ornament that shines with festive charm and handmade personality! Each ruffled bulb and tiny bead adds to the elegant corkscrew silhouette that hangs and jingles with joy. This small project is perfect for gifting, decorating, or creating a set in different colors. Enjoy the finishing touches — shaping the wire and stitching on the star is where the magic comes alive. Happy crafting and merry decorating! 🎄✨