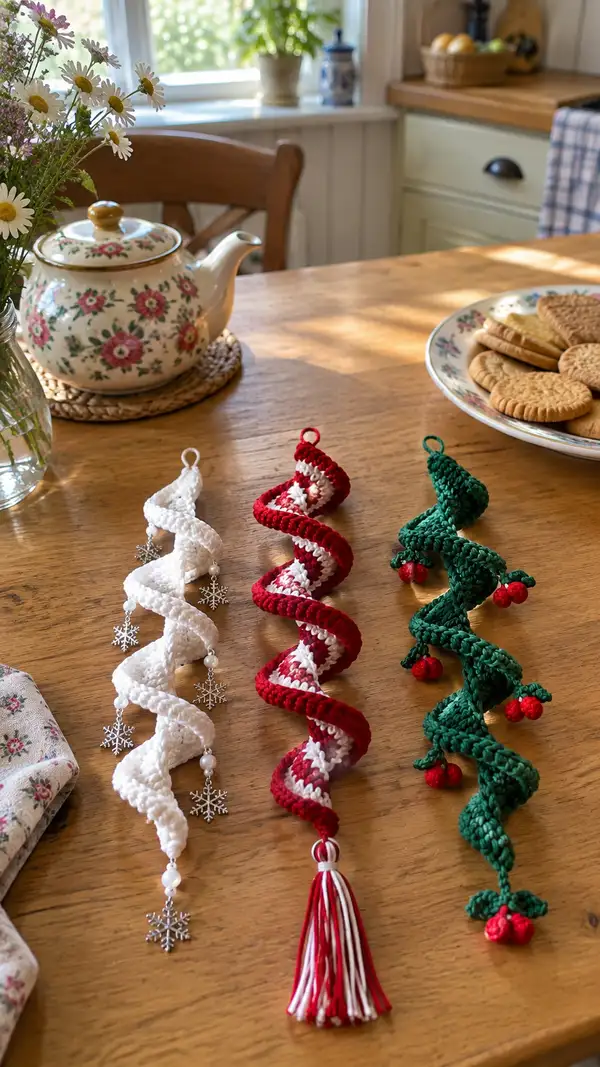
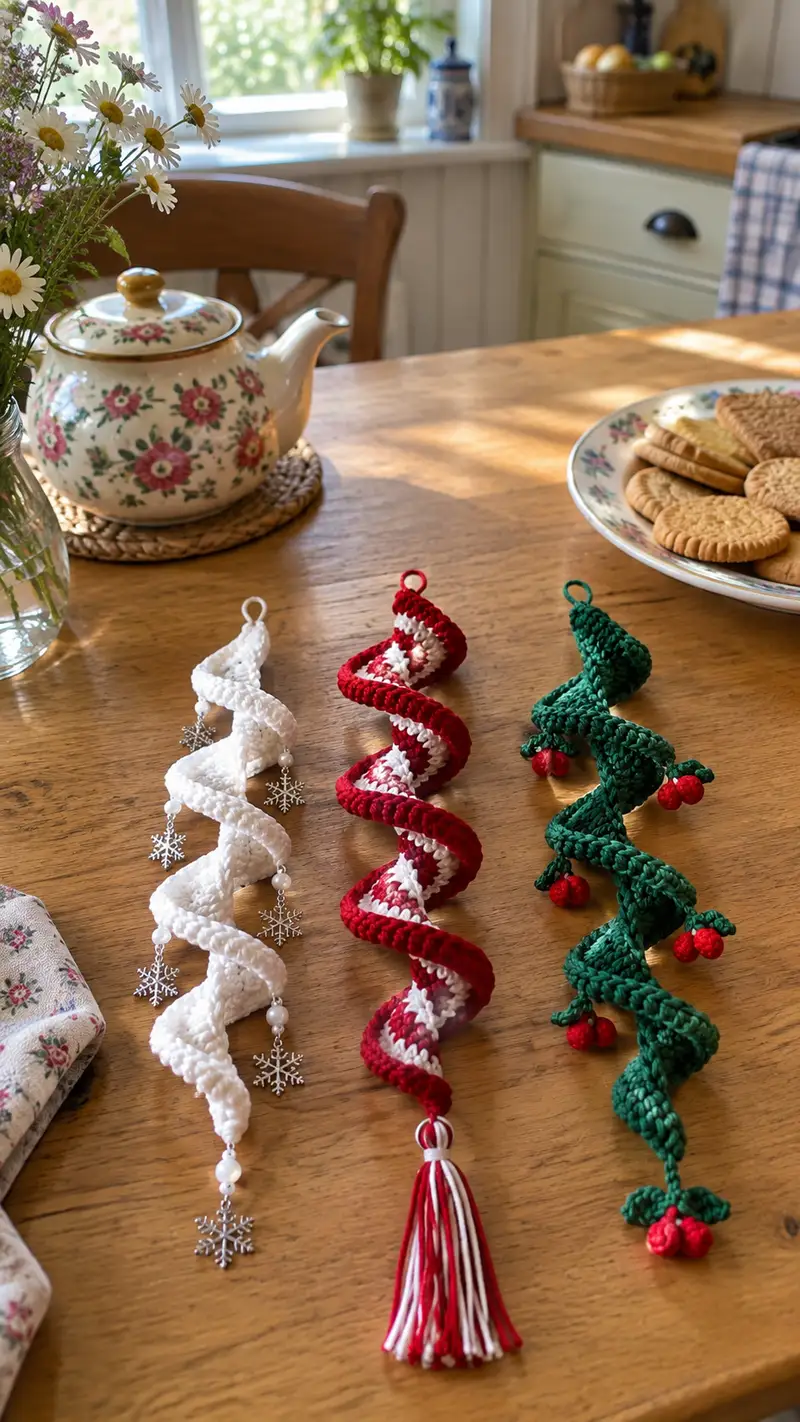
Create a charming spiraled crochet ornament that coils into a festive ribbon — perfect for tree decorations, garlands, or gift toppers. This pattern includes three variations shown: a snowy white spiral with dangling snowflake charms, a candy-cane striped spiral with a tassel, and a holly-inspired green spiral with tiny cherry clusters. The instructions walk you step-by-step through crocheting the spiral segments, edging, leaves, cherries and tassel, and assembly tips for a polished finish.
Progress Tracker
0% Complete
— Overview & Construction Notes :
Info :
This pattern builds the spiraled ornament as a series of tapered tube segments worked in continuous rounds. Each segment is worked from a small diameter (6 sts) up to a peak diameter (30 sts), held even to create height, and then decreased back down. When several segments are made and attached consecutively along a seam, the outer edges will form a swell and collapse that naturally curls into a spiral when pinned and lightly shaped. The sample pictured uses small rounds per segment to produce 6 full 'waves' along a 6-8 inch long ornament. Work tightly enough that no stuffing shows through, and use a stitch marker to mark the beginning of each round.
Info :
Gauge is flexible for this project. Using worsted cotton with a 3.5mm hook will give firm, structured coils. If you prefer softer, slightly larger spirals, go up a hook size. The pattern below provides full round-by-round stitch counts and multiple Info tips for shaping and assembly.
— Spiral Body (Make 6 Segments to join into one long spiral) :
Round 1 :
6 sc in magic ring (6)
Round 3 :
(1 sc, 1 inc) x 6 (18)
Round 4 :
(2 sc, 1 inc) x 6 (24)
Round 5 :
(3 sc, 1 inc) x 6 (30)
Info :
These first five rounds create the bulb that forms the inner turn of a single wave. Keep tension consistent. If working stripes, change color on the last yarn-over of Round 5 to start Round 6 in the next color.
Round 6-9 :
1 sc in each st (30)
Info :
These even rounds build the tall section of the bulge. For a longer bulge (bigger curve), work extra even rounds here; for a tighter turn, reduce to 1-2 even rounds. Mark the start of Round 6 with a stitch marker.
Round 10 :
(3 sc, 1 dec) x 6 (24)
Round 11 :
(2 sc, 1 dec) x 6 (18)
Round 12 :
(1 sc, 1 dec) x 6 (12)
Info :
Fasten off leaving a 6–8 inch tail. Place the completed segment to one side. This tapered sequence (6->12->18->24->30->(hold)->24->18->12->6) forms one complete bulge or 'wave'. Make a total of 6 identical segments for a full-length ornament, or fewer for a shorter coil. If you are making a striped candy-cane version, alternate colors every full segment or every round per your preference (see Color Change Info below).
Color Change Info :
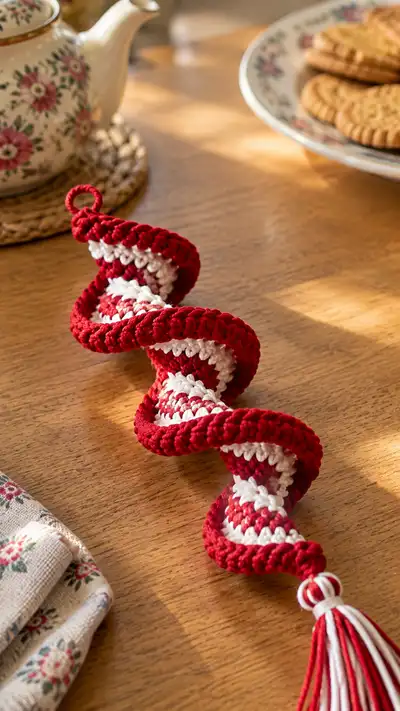
To make the candy-cane version, change color at the end of Round 5 in each segment as noted above. For an evenly striped look, carry both colors and twist them at the join, or fasten off and weave in ends between segments. For the two-tone red/white spiral shown, work segments in alternating solid colors (red, white, red, white, red, white) so each bulge alternates color.
Info :
Repeat the 13-round segment pattern to make a total of 6 segments. Keep stitch counts exact for each segment; the math is critical so the edges match when joining. If you prefer more/less curl, adjust the number of segments you join: more segments = longer spiral with more waves, fewer segments = short spiral.
— Spiral Body Continued (Segments 2–6) :
Segment 2 - Round 1 :
6 sc in magic ring (6)
Segment 2 - Round 2 :
6 inc (12)
Segment 2 - Round 3 :
(1 sc, 1 inc) x 6 (18)
Segment 2 - Round 4 :
(2 sc, 1 inc) x 6 (24)
Segment 2 - Round 5 :
(3 sc, 1 inc) x 6 (30)
Segment 2 - Info :
Keep color consistent with previous segment if making a solid spiral. If making the green holly variant, this is a good place to add a tiny stitch of contrasting thread to anchor leaf placement later.
Segment 2 - Round 6-9 :
1 sc in each st (30)
Segment 2 - Round 10 :
(3 sc, 1 dec) x 6 (24)
Segment 2 - Round 11 :
(2 sc, 1 dec) x 6 (18)
Segment 2 - Round 12 :
(1 sc, 1 dec) x 6 (12)
Segment 2 - Round 13 :
6 dec (6)
Info :
Make Segments 3, 4, 5 and 6 following the exact same 13-round progression. Each segment must have identical stitch geometry (6 → 30 → 6), because when seamed along one side the outer perimeter of all bulges will align and create the visible spiral edge. After making each segment, leave a long tail when fastening off to make seaming easier (about 6-8 inches).
Note on Stitch Tension :
Use a consistent hook and tension for all segments; slight variations across segments will show when coiled. If you notice one segment is larger, gently block and reshape it before seaming, or rework that segment to match others.
— Joining Segments into One Long Tube :
Info :
Lay segments in a line with their flat faces aligned so the 6-stitch ends meet in sequence. You will seam them along one radial seam (a straight seam through the center of each segment) so that the outer edges of the bulges line up to form the continuous outer ridge of the spiral. Use mattress stitch or whip stitch with the long tails left earlier.
Joining Step 1 :
Take Segment 1 and Segment 2. With RS facing out, align them so their rounds line up. Insert needle through back loop only of the final round of Segment 1 and into the back loop only of the first round of Segment 2. Use the long tail from Segment 1 to sew; sew through all rounds of the seam every 2-3 stitches to create a firm join. Continue connecting segments sequentially until all six are joined in a single chain. After seaming, weave in the tails along the seam for a clean finish.
Info :
When seaming, pull the seam snug but not so tight it puckers. The seam becomes the inner spine of the spiral; a slightly flexible seam helps the ornament curl naturally. If you want a stiffer spiral, sew with smaller, closer stitches and use a slightly thicker yarn or a touch of craft glue along the seam (use sparingly).
— Outer Edge Edging (Make 1 attached continuous edging) :
Info :
Once the segments are joined you will have a long tube of repeated bulges. The outermost perimeter of these bulges becomes the visible wavy edge when coiled. Add an edging along that outer edge to accentuate the wave. This edging is worked as continuous rounds along the outermost loops (work into the FLO of the outer edge stitches when possible) and creates a defined ridge.
Round 1 :
Attach yarn at one end of the joined tube to the outermost stitch of the first bulge. Ch 1, sc evenly around the outermost edge working 1 sc into each outer stitch (estimate 120 sts for a 6-segment chain; exact count will vary by tension) (estimate 120)
Info :
If your stitch count is different, work 1 sc evenly around; do not try to force a specific number. Even spacing is more important than the exact count. Place a marker at the start of the round.
Round 2 :
1 sc in each st (120)
Round 3 :
1 sc in each st BLO (120)
Info :
Working the third round in BLO creates a ridge that makes the outer edge sit proudly when coiled. If you used a contrasting color for the edging, change color at the start of Round 1.
Round 4 :
(4 sc, 1 inc) around (repeat) — if you have 120 sts, work (4 sc, inc) x 20 = 140 (140)
Round 5 :
1 sc in each st (140)
Round 6 :
1 sc in each st BLO (140)
Info :
These extra increases give the outer ridge a firm, slightly thicker profile that helps the spiral hold its curve. If you prefer a slimmer edge, omit Round 4 and work two even rounds instead.
Round 7 :
Sl st into next st and fasten off. Weave in ends securely along seam and edging. Trim any excess.
Info :
At this point you should have one long, joined tube with a prominent outer ridge. Lay it flat and experiment with coiling it by hand. Pin into the natural spiral shape you like on a blocking board or foam, spacing the bulges evenly to reproduce the look in the photos. Spray lightly with water to set the shape, or use a very light starch if you want a crisper coil. Allow to dry fully before proceeding to embellishments.
— Tassel & Hanging Loop (Candy-cane version) :
Loop :
At top tip of the joined tube, ch 8, sl st back into 2nd ch from hook and across to create a 7-ch small loop, sl st to base and fasten off. Weave tail inside loop for neatness.
Info :
Adjust the chain length for a larger or smaller hanging loop. For the candy-cane sample, make the loop from both red and white strands twisted for a two-color look.
Tassel Assembly :
To make the tassel, cut 24 strands of yarn 8 inches long alternating red and white. Fold them in half and use a coordinating scrap to tie them at the folded end. Wrap a 3-inch length of yarn a few times about 1/2 inch from top to form the tassel head and trim bottoms to align. Sew the folded top into the bottom tip of the spiral, using the loop and a few stitches to secure. Add a decorative tassel cap by winding contrasting yarn around the base if desired.
Info :
For a neater finish, glue the inside knot with a tiny drop of fabric glue and hide it inside the top tip of the spiral. For a chunky tassel, increase the number of strands.
— Cherry (Make 6 for the holly version; each cherry uses same rounds) :
Round 1 :
6 sc in magic ring (6)
Round 3 :
(1 sc, 1 inc) x 6 (18)
Round 4 :
1 sc in each st (18)
Round 5 :
(1 sc, 1 dec) x 6 (12)
Info :
Stuff lightly at Rounds 3–4. Cherry should be small and firm, not heavily stuffed. Fasten off leaving long tail for sewing. Make 6 cherries for a typical holly spiral; adjust number for your aesthetic.
Optional Cherry Variation :
For a slightly larger cherry, add one extra round of even sc at Round 4 (making 2 rounds even) before decreasing. If you prefer the cherry to have a bead core, thread a small 6–8mm bead onto the yarn before closing and stuff around it.
— Leaf (Make 3–6 for holly variant) :
Round 1 :
Ch 6, sc in 2nd ch from hook, hdc in next, dc in next, hdc in next, sc in last (5 sts along chain). Turn to work along opposite side.
Round 2 :
Sc in first (base), (hdc, dc, hdc) in center two stitches, sc in last (5)
Round 3 :
Sl st into next and work 1 sc around entire leaf edge to add firmness (5)
Round 4 :
Optional: For leaf vein, embroider central line with contrasting thread using backstitch from base to tip
Info :
Make 3–6 leaves depending on how many cherries you want clustered together. For a more stylized leaf, work the tip to a point by decreasing the final dc to a hdc and sc or by shaping with FLO rounds.
— Assembly & Embellishment :
Step 1 :
Shape the joined tube into a spiral by coiling it into the desired shape on a flat surface. Start at the top loop and coil outward so the bulges create even waves. Use pins to hold the shape while planning embellishments. For a tighter spiral, overlap slightly; for an open spiral, leave more space between bulges.
Step 2 :
Sew cherries and leaves onto the outer ridge at the points where bulges naturally create small pockets. For the sample, group cherries in clusters of two near the lower three bulges and secure leaves around them. Use the long tails left from cherries and leaves to stitch through the edging and tie off inside the tube.
Info :
For the green holly version, attach each cherry using a couple of tight passes through the base of the cherry and into the edging so they dangle slightly. If desired, attach a small piece of florist wire inside the seam before sewing cherry to give a little extra weight and a natural dangle; fold wire ends and hide inside the tube or wrap them in yarn.
Step 3 :
For the snowy white version, thread small beads and snowflake charms on headpins. Using the headpins, pierce the outer ridge and secure them by bending the pin and wrapping the short end with tiny stitches at the inside seam, or glue in place. Space charms evenly along three lower bulges, using 3–5 charms per ornament depending on preference.
Step 4 :
For the candy-cane version, attach the tassel to the bottom tip and finish the top loop by weaving in ends and ensuring it sits flat. For extra polish, bind the loop base with a wrapped yarn collar (wrap yarn around the base several times and tie securely).
Info :
If desired, lightly block and steam set the spiral: pin the coiled ornament to shape on a blocking board, spray lightly with water or set with steam, and allow to dry completely. This helps the spiral stay consistent and neat after hanging.
Finishing Touches :
Weave in all loose ends along the seam and edging. Trim ends close to the yarn after weaving to prevent unraveling. If you used cotton yarn, a touch of gel fabric glue on hidden tails prevents slipping over years. Inspect the ornament and add any additional stitch reinforcements where cherries or tassel join to ensure durability.
Care :
Hand wash gently in cool water for light cleaning, reshape while damp, and air dry. Avoid heavy agitation or machine washing to preserve shape and attached beads/charms.
These spiraled ornaments are a delightful combination of simple crochet construction and creative assembly that yield a stunning handmade decoration! Each segment is quick to make and the variations — snowy with charms, candy-cane with tassel, or holly with cherries — let you personalize every piece. With practice you'll be able to produce a handful in an afternoon and gift them to friends or hang them around your home for holiday cheer. 🧶🌟🎄