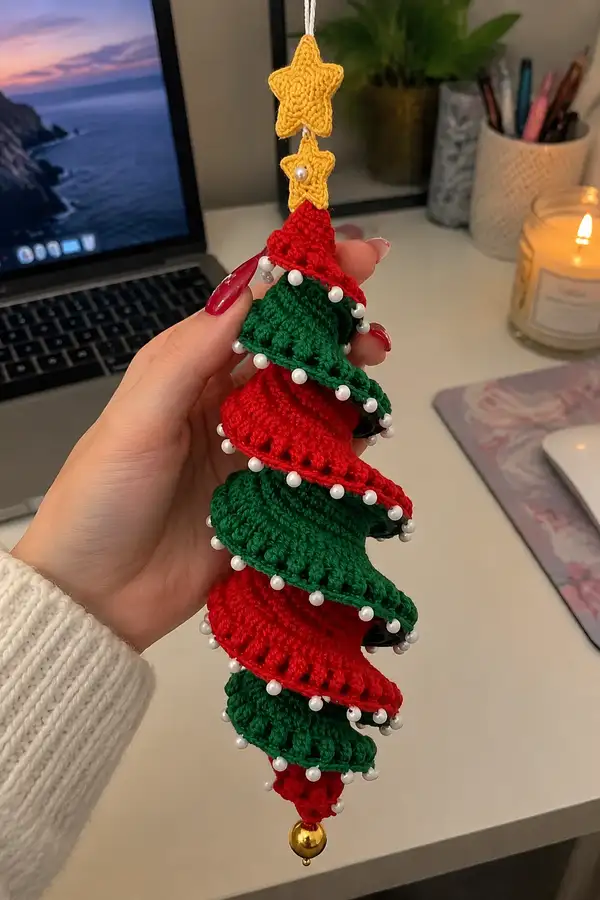
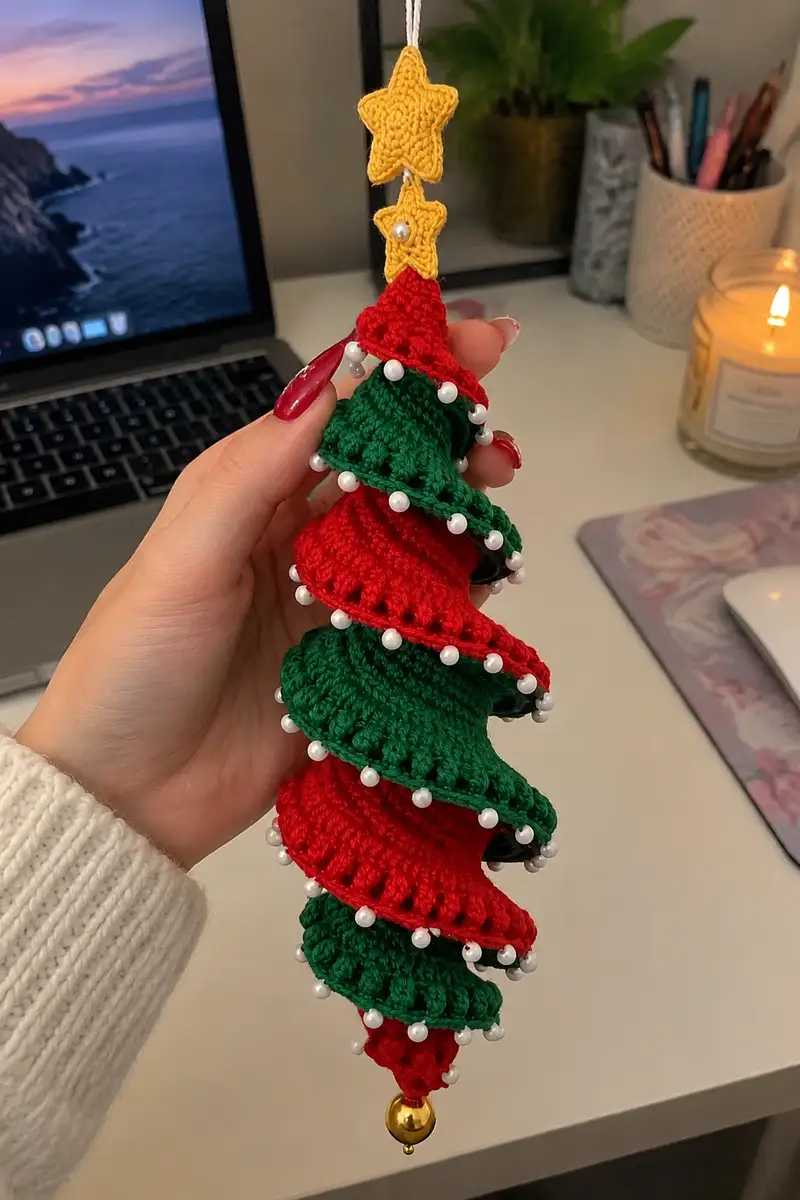
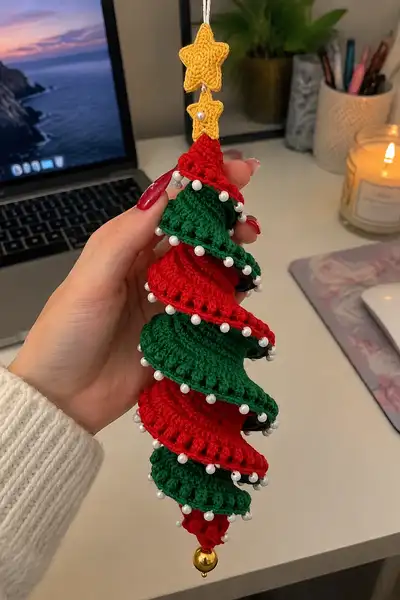
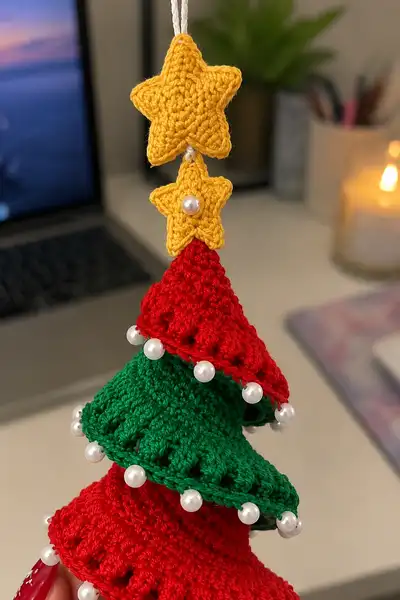
Create a festive spiral layered Christmas tree ornament with alternating red and green ruffles, pearl trim, stacked yellow stars and a jingling bell. This compact hanging decoration features cascading ruffled tiers, sewn pearl beads along each edge, and a tiny star topper —perfect for a tree, garland, or gift tag. Detailed stitch-by-stitch instructions make it easy to recreate the exact spiral effect and assemble the finished hanging ornament.
Progress Tracker
0% Complete
— Top Star (Large) :
Round 1 :
6 sc in magic ring (6)
Round 3 :
(1 sc, 1 inc) x 6 (18)
Round 4 :
(2 sc, 1 inc) x 6 (24)
Round 5 :
1 sc in each st (24)
Info :
This is the base circle for the star. Keep tension slightly tighter than your normal stitch so points will be neat. Do not fasten off.
Round 6 :
*ch 2, skip 1 st, (3 dc in next st), ch 2, sl st in next st* repeat 5 times to form five points (24)
Round 7 :
Working into each point: sl st into base of point, ch 1, (1 sc, 1 hdc, 2 dc, 1 hdc, 1 sc) in point apex, sl st to join. Repeat for all 5 points
Info :
Use stitch marker at the start of each point to keep track. The cluster (sc-hdc-2dc-hdc-sc) builds a rounded point — adjust the stitch heights if you prefer sharper points.
Round 8 :
Sl st to the center of a point, ch 1, 3 sc around the base of that point, sl st to center. Repeat around all points. Finish with a long tail for sewing to the cord.
Info :
Optional: Sew a pearl or bead to the center of this star with a small sewing needle to mimic the photographed accent. Secure the bead well by passing thread through several times and knotting on the wrong side.
— Small Star (Middle Accent) :
Round 1 :
6 sc in magic ring (6)
Round 3 :
(1 sc, 1 inc) x 6 (18)
Round 4 :
*ch 2, skip 1 st, (3 hdc in next st), ch 2, sl st in next st* repeat 5 times to form five small points (18)
Round 5 :
Into each small point: sl st, ch 1, 1 sc, 1 hdc, 1 sc, sl st to join. Fasten off leaving long tail for sewing (no stuffing) (18)
Info :
Sew a small pearl to the front center of this small star if desired; photograph shows one pearl on the small star. Use matching thread to avoid visible knotting.
— tier module (make 7, alternating colors red/green) :
Round 1 :
6 sc in magic ring (6)
Round 3 :
(1 sc, 1 inc) x 6 (18)
Round 4 :
(2 sc, 1 inc) x 6 (24)
Round 5 :
(3 sc, 1 inc) x 6 (30)
Round 6 :
(4 sc, 1 inc) x 6 (36)
Info :
Rounds 1-6 build the flat circle base. For higher or lower tiers, you may add or remove an increase round. These increments increase by 6 stitches per round because the pattern is repeated 6 times.
Round 7 :
(5 sc, 1 inc) x 6 (42)
Round 8 :
(6 sc, 1 inc) x 6 (48)
Round 9 :
1 sc in each st (48)
Info :
If you prefer a slightly domed tier, crochet Round 9 in FLO (front loops only) to create a subtle ridge that will help the ruffle stand out. Place a stitch marker at the first stitch of this round to track height when you finish.
Round 10 :
1 sc in each st BLO (48)
Round 11 :
(3 sc, 1 inc) x 12 (60)
Info :
Round 11 begins the ruffle increase. Each group adds one extra stitch per repeat; increasing evenly gives a smooth flared edge. Check your stitch counts after each increase round.
Round 12 :
1 sc in each st (60)
Round 13 :
(1 sc, 1 hdc, 2 dc, 1 hdc, 1 sc) in next st, skip 0 sts, repeat in next st across to form clustered ruffle shells (60 clusters; 60 stitches total but clusters worked into each stitch create a dense ruffle)
Round 14 :
Sl st in each stitch around to neaten edge, fasten off leaving long tail for sewing (60)
Info :
Use the long tail to gather and shape the bottom of this tier onto the cord; do not cut the tail short. Add a small felt disc to the inside of the tier if you want more stability and a perfect spiral shape when stacking.
— tier module notes and alternation :
Info :
Make seven tier modules total. Alternate colors as follows when making them: Topmost tier (Tier 1) = red, Tier 2 = green, Tier 3 = red, Tier 4 = green, Tier 5 = red, Tier 6 = green, Tier 7 (largest bottom) = red. This creates the pictured alternating color spiral. If you want a taller ornament, make additional tiers repeating this module.
Info :
For a slightly deeper ruffle, add one more increase round before Round 11 for tiers intended to be larger (example: do (7 sc, 1 inc) x 6 to reach 54 then continue). Keep math consistent when altering increases.
— Cord, Spacers, and Bead Attachment :
Round 1 :
Chain 40 (or desired hanging length + spare for knots) with chosen cotton cord or chain in yarn: ch 40 (40)
Round 2 :
Fold chain in half, join ends with tight overhand knot leaving loop for hanging, or slip stitch ends together and weave tail for hidden join
Info :
The pictured cord appears to be a braided cotton cord doubled for strength. You can use a crocheted chain (ch 40) or a pre-braided cord. Make the loop long enough for hanging on a tree branch.
Round 3 :
Insert cord through center of large star (use the long tail left on star). Slide the large star down the cord until it rests where you want the top to sit. Secure by stitching through star center with yarn tail and knotting around the cord.
Info :
Stack the small star below the large star separated by approximately 1 cm of cord; add a pearl bead between stars and secure with a knot. The small pearl shown sits between stars to mimic the photo accent.
Round 4 :
Thread the first (top) tier module onto the cord by folding the long tail under and threading the cord through the center of the tier module. Slide it down until it sits directly under the small star. Repeat threading for each tier in alternation colors, sliding them snug but not overly tight so the spiral can splay naturally.
Info :
When sliding tiers on, orient each tier so its ruffle edge faces outward (so pearls sewn later sit on the outside). If you want a spiral stacked look, slightly rotate each tier as you slide it down to the cord so ruffle shells spiral rather than stack directly on top of each other.
Round 5 :
Position tiers: after all seven tiers are threaded, tie a small knot below the bottom tier to stop movement. Leave 3-4 cm of cord beyond knot for bell attachment and decoration. Trim excess cord or tuck it into the knot and secure with fabric glue if desired.
— Pearl Bead Trim (work after all tiers are on the cord) :
Info :
You will sew pearl beads onto the outer edge of each ruffle. Place beads evenly: for tiers with 60 edge stitches use 20-24 beads spaced approximately every 2-3 stitches depending on bead size (photograph uses about 8-10 beads per tier if the tiers are smaller; adapt to your counts). Use a small sewing needle and strong beading thread.
Round 1 :
Thread beading needle with strong thread or fishing line. From inside the tier, bring needle out through the edge at the first ruffle 'valley', sew a bead on then insert needle back into the tier about 2-3 stitches along into the fabric. Pull tight enough for bead to sit snug against edge but not so tight to pucker (repeat across the circumference)
Round 2 :
Continue adding beads evenly around each tier. Tie secure knots on the inside of the tier after finishing each round of beads and weave ends into inner fabric. Repeat for all tiers. Fasten off and trim ends.
Info :
If beads are too large for your stitch spacing, place them at the larger ruffle openings only (where clusters create tiny holes). This is how the photographed beads sit; they are sewn near the shell edge rather than in every stitch.
— Bottom Tip Cone & Bell Attachment :
Round 1 :
With same color as bottom tier (red), make a small cone: 6 sc in magic ring (6)
Round 3 :
(1 sc, 1 inc) x 6 (18)
Round 4 :
1 sc in each st (18)
Round 5 :
(2 sc, 1 dec) x 6 (12)
Info :
Stuff lightly if you want a little weight at the base. Knot a small loop of cord through the cone's center before closing to secure the bell. The pictured base ends with a gold bell attached to the tip.
Round 6 :
(1 sc, 1 dec) x 6 (8)
Round 8 :
Fasten off leaving long tail. Insert cord loop through cone center, attach the small gold bell to the cord and tie a secure knot. Weave ends into cone.
Info :
If your bell has a loop, use a split ring or small jump ring to secure it to the cord loop for easier replacement. You can also use a threaded bead to cap the bell for a neat finish.
— Finishing and Assembly Guidance :
Info :
After beads and bell are attached, gently steam-block each tier with a light steam (do not press too hard) to help ruffles settle into a natural spiral. Pin the tiers on a flat surface in the desired spiral orientation until dry. This aligns edges and helps the spiral keep shape on the cord.
Info :
When sewing beads, reinforce with a second pass to ensure they stay secure on a heavily handled ornament. Weave all tail ends inside the tiers or trim very close after weaving to prevent fraying.
Info :
For a sturdier center, add a thin wooden skewer or cocktail stick down the cord before threading tiers (push the cord through the skewer hollow or bind them together). This keeps tiers from bunching and helps a vertical presentation. If using a skewer, wrap it with scrap yarn so tiers sit smoothly on the core.
Info :
Customization tip: switch pearls for colorful beads, or add tiny bells sewn along ruffle edges for sound. You can also make the ornament longer by adding more tiers or making each tier slightly larger (add more increase rounds).
This cheerful spiral tree ornament brings together playful ruffles, glossy pearl accents, and a joyful jingle at the bottom —a handmade gem for your holiday decor! Each tier adds movement and color, while the little star stack on top makes the piece feel finished and whimsical. Make one or a set for a lovely coordinating tree display or special gift. 🧶🎄✨