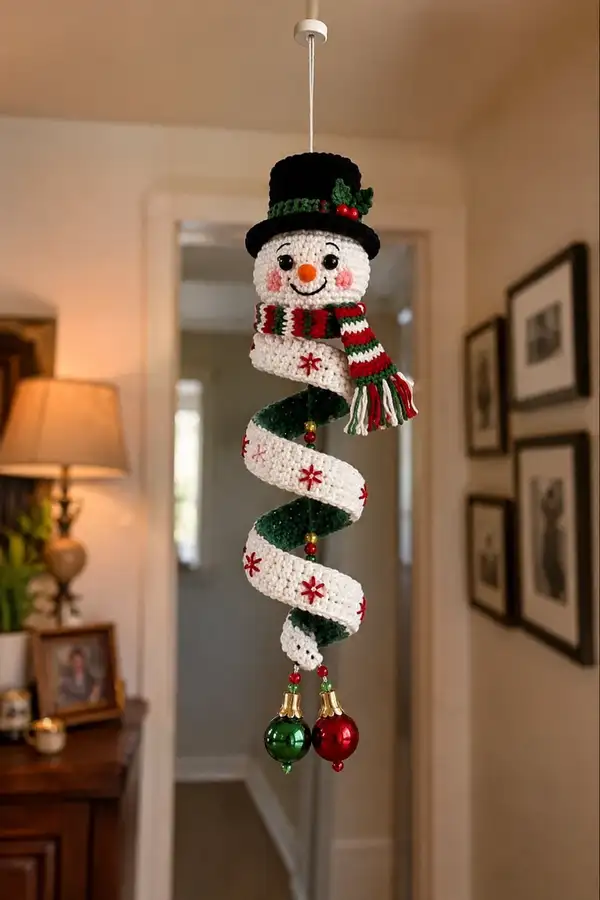
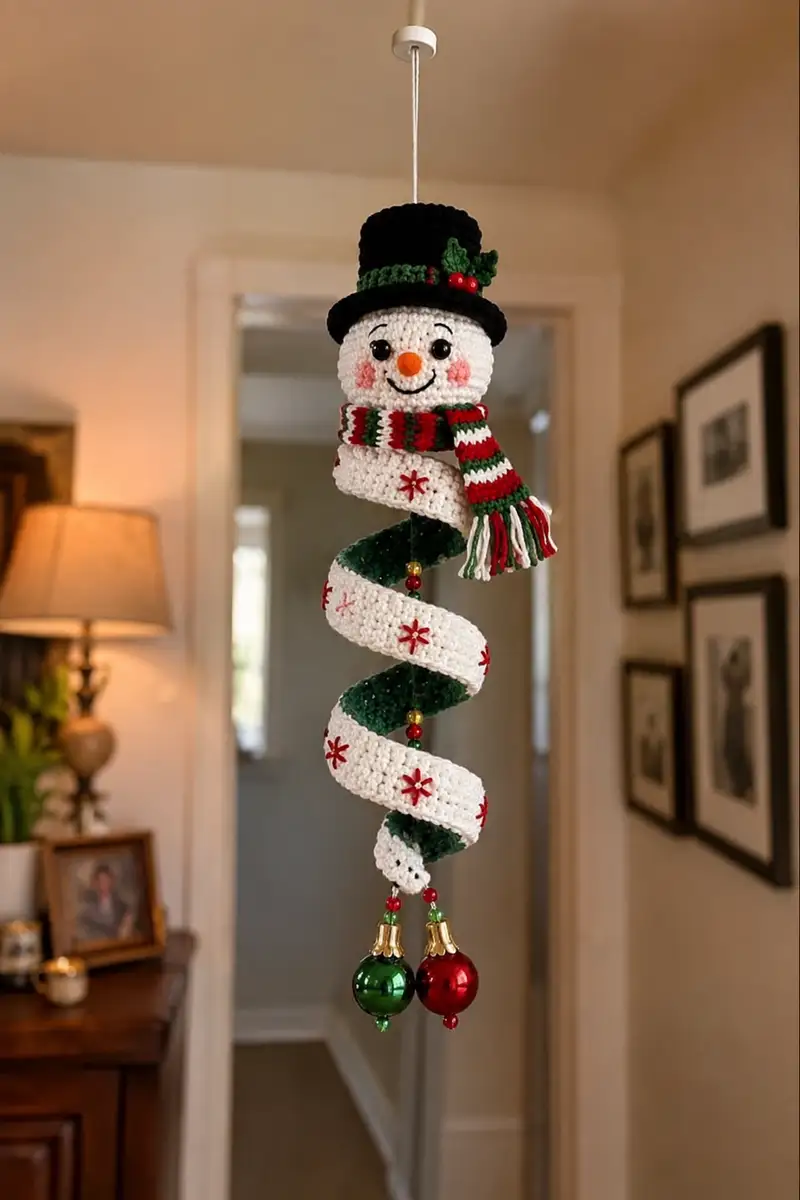
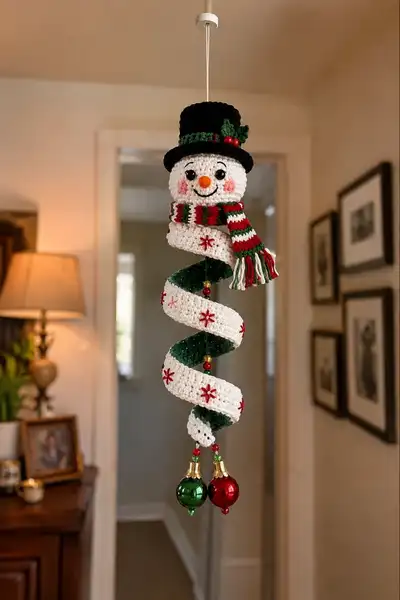
Make a charming hanging snowman spiral ornament with a crocheted head, jaunty top hat, striped scarf, and a long spiraled ribbon with embroidered snowflakes and dangling shiny baubles. This pattern includes detailed round-by-round instructions, color changes, and assembly tips to create a sturdy, decorative holiday piece. Perfect for hanging in a doorway or as a special handmade gift, with clear guidance for embroidery, beadwork, and shaping.
Progress Tracker
0% Complete
— Head :
Round 1 :
6 sc in magic ring (6)
Round 3 :
(1 sc, 1 inc) x 6 (18)
Round 4 :
(2 sc, 1 inc) x 6 (24)
Round 5 :
(3 sc, 1 inc) x 6 (30)
Round 6 :
(4 sc, 1 inc) x 6 (36)
Round 7 :
(5 sc, 1 inc) x 6 (42)
Round 8 :
(6 sc, 1 inc) x 6 (48)
Round 9-12 :
1 sc in each st (48)
Info :
Place safety eyes between rounds 12-13, approximately 10-12 stitches apart measured across the front for a friendly expression. Insert and lock backs before further stuffing.
Round 13-16 :
1 sc in each st (48)
Info :
Embroider small rosy cheeks by lightly sewing pink yarn across 2-3 stitches on either side of the lower eye line. Use a few short satin stitches to create soft circles.
Round 17 :
(6 sc, 1 dec) x 6 (42)
Round 18 :
(5 sc, 1 dec) x 6 (36)
Info :
Begin stuffing head firmly but not over-stuffed; use small tufts of fiberfill to avoid lumps and achieve a smooth dome. Continue stuffing as you work decreases to shape the bottom neck opening.
Round 19 :
(4 sc, 1 dec) x 6 (30)
Round 20 :
(3 sc, 1 dec) x 6 (24)
Round 21 :
(2 sc, 1 dec) x 6 (18)
Round 22 :
(1 sc, 1 dec) x 6 (12)
Info :
Fasten off leaving a long tail for sewing the head to the spiral attachment. Leave an internal loop of yarn to help anchor the hat later. Finish stuffing so head keeps its round shape.
— Nose (Carrot) :
Round 1 :
4 sc in magic ring (4)
Round 3 :
(1 sc, 1 inc) x 4 (12)
Round 4-5 :
1 sc in each st (12)
Round 6 :
(2 sc, 1 dec) x 3 (9)
Round 7 :
1 sc in each st (9)
Info :
Stuff lightly and shape into a tapered cone. Sew to the front center of the head between rounds 12-14 so the tip points slightly downward. Use orange yarn and embroider stitched lines for carrot texture if desired.
— Hat (Make 1) :
Info :
Hat worked in black with a small green band and tiny holly leaves. Work brim first in the round and then the crown. Use BLO on brim edge for a crisp fold if desired.
Round 1 (Brim) :
6 sc in magic ring (6)
Round 3 :
(1 sc, 1 inc) x 6 (18)
Round 4 :
(2 sc, 1 inc) x 6 (24)
Round 5 :
(3 sc, 1 inc) x 6 (30)
Round 6 :
(4 sc, 1 inc) x 6 (36)
Round 7 :
1 sc in each st (36)
Info :
Brim rounds (1-7) create a slightly flared base. Optionally change to a 3.0mm hook for these rounds for a neat brim edge. Fold brim upward and use a finishing round to define the edge.
Round 8 (Crown Start) :
Attach yarn to inner edge of brim, ch1, 1 sc in each st around (36)
Round 9-12 :
1 sc in each st (36)
Info :
At the end of round 12, change to green yarn for hat band: carry black inside or fasten off and join green. Work two rounds in green to form band, then switch back to black.
Round 13 :
Change to green. 1 sc in each st (36)
Round 14 :
1 sc in each st (36)
Round 15 :
Change to black. 1 sc in each st (36)
Round 16 :
(5 sc, 1 dec) x 5 + 1 sc (31)
Round 17 :
(4 sc, 1 dec) x 5 + 1 sc (26)
Round 18 :
(3 sc, 1 dec) x 5 + 1 sc (21)
Round 19 :
(2 sc, 1 dec) x 5 + 1 sc (16)
Round 20 :
(1 sc, 1 dec) x 5 + 1 sc (11)
Round 21 :
6 dec + 5 sc spaced (5)
Info :
Fasten off leaving a long tail. Lightly stuff the crown top if desired or leave flat to sit atop the head. Sew band holly leaves and red berry beads to one side of the hat using green and red yarn.
Round 22 (Optional Brim Edge) :
Attach yarn to brim outer edge and work 1 sc in each st BLO to create a defined lip (36)
— Holly Leaves (Make 2) :
Round 1 :
Ch6, 1 sc in 2nd ch from hook, hdc, 2 dc, hdc, sc in next ch, sl st to base. Fasten off (small leaf)
Info :
Make two leaves in green and sew to hat band with two small red beads or French knot stitches for holly berries.
— Scarf :
Info :
Scarf is a short striped rectangle wrapped around the snowman head. Change colors to create red/green/white stripes. Work in rows (foundation ch then turn) to create a flat rectangle, or work in joined rounds to avoid seams.
Row 1 (Foundation) :
Ch28, sc in 2nd ch from hook and across (27)
Row 2-4 :
Change color to red. Ch1, turn, 1 sc in each st (27)
Row 5-7 :
Change color to green. Ch1, turn, 1 sc in each st (27)
Row 8-9 :
Change color to white. Ch1, turn, 1 sc in each st (27)
Info :
Repeat stripe sequence until scarf measures about 10 cm (approx. 12-14 rows depending on tension). Fasten off and add fringe: cut 6 strands of each color 6 cm long and attach groups evenly across scarf ends using a lark's head knot.
— Spiral Ribbon (Long Strip) :
Info :
This is the most complex section and creates the long spiraling ribbon. Work a long flat strip in continuous rounds to create a two-sided ornament: white outer edge and green inner side. The strip will be about 180-220 cm long depending on desired spiral. The pattern below shows rounds to build width and many repeats to reach length; adjust counts for your gauge.
Round 1 :
With white, ch 40, join to work in the round being careful not to twist, ch1 (foundation tube method). 1 sc in each ch around (40)
Round 2 :
1 sc in each st (40)
Round 3 :
1 sc BLO in each st (40)
Round 4 :
Switch to green. 1 sc in each st (40)
Round 5 :
1 sc in each st (40)
Round 6 :
Switch to white. 1 sc in each st (40)
Info :
These six rounds form one color unit about 6 rows high which becomes the width of the spiral. Carry unused yarn along inside of tube or fasten off cleanly at color changes. Use tapestry needle to weave color joins inside.
Round 7-66 :
Repeat Rounds 2-6 eleven more times (66 rounds total) to build a long continuous tube. Each repeat adds approximately 6 rows of height; continue until total length meets desired spiral (aim for 180-220 cm). (40)
Info :
If you need a longer or shorter spiral, add or remove repeats. Keep stitch tension consistent to avoid wave distortions. For safety, periodically measure the strip against a ruler or wrapping form to plan bead placement.
Round 67 :
Fasten off leaving long tails for joining ends to form the spiral. Press gently with low steam if necessary, do not flatten the tube.
Info :
To create a flat spiral ribbon with visible white outer edge and green inner, you will open the tube lengthwise and sew one long side closed with invisible seam, then use a wire core to shape into spiral. Alternatively, you can skip opening and attach along central axis for a 3D spiral effect.
— Embroidered Snowflakes on Spiral :
Info :
Use red yarn to stitch simple six-pointed snowflakes spaced evenly around the white outer face of the spiral. Each snowflake uses 6 straight stitches radiating from a center point.
Step 1 :
Thread yarn needle with red. Bring yarn up through spiral outer face, make a small central knot on inside then bring up at center point of snowflake.
Step 2 :
Insert needle 6-8 mm away and pull through to create the first arm, go back to center and repeat 6 times around to make a star. Secure and weave ends inside tube.
Info :
Space snowflakes approximately every 6-8 cm along the long spiral. Add a tiny gold seed bead at center of each snowflake for sparkle if desired.
— Bead Core & Internal Support :
Info :
Use a length of floral wire or craft wire as the central core to maintain the spiral shape. Thread small beads onto the wire at intervals; beads will act as decorative separators between spiral loops and add weight to help the coil hang smoothly.
Step 1 :
Cut wire to desired spiral length plus extra to anchor at head and bottom. Bend 1 cm hook at top to attach the head suspension yarn and to prevent beads from sliding off.
Step 2 :
Slide beads (green, red, gold) onto wire at intervals of about 5-7 cm. After placing each bead, twist wire sharply to make a small kink so beads stay separated when spiral is coiled.
Info :
If using heavy ornament balls at the bottom, use thicker wire or add a second wire inside the tube for reinforcement. Cover wire ends with a final knot or bead cap before closing tube.
— Spiral Closure & Shaping :
Step 1 :
Open the tube lengthwise along one side with small scissors making a slit about 2-3 mm wide. Push the wire inside the tube carefully and center it along length.
Step 2 :
Sew the slit closed with whipstitch using matching yarn. Take small, even stitches and leave the stitch count consistent so the outer face remains smooth. Do not catch the wire with the needle; sew adjacent to it.
Info :
After closing, gently coil the strip around a dowel or free-form into a spiral shape, adjusting loops to be evenly spaced. Secure loops temporarily with pins, then anchor them by passing a strong thread through spiral centers and around the wire at each loop junction.
— Bottom Ornament Tassels (Make 2) :
Step 1 :
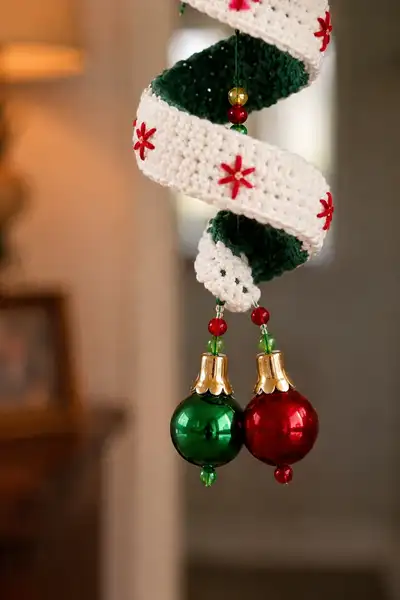
Cut two lengths of strong embroidery thread about 25 cm each. Thread beads in pattern (green, red, green small) then finish with a plastic ornament cap and the small shiny ornament ball. Secure with knot and a drop of glue inside ornament cap if needed.
Step 2 :
Attach tassels to the bottom center of the spiral by sewing the top loop of each tassel into the last 3-4 rounds of the spiral tube. Reinforce with extra thread passes for stability.
Info :
Ensure ornaments hang freely and symmetrical. Add small counterweights (tiny washer inside ribbon end) if the spiral tilts to one side.
— Assembly: Attaching Head, Hat & Scarf to Spiral :
Step 1 :
Thread strong yarn or fishing line through the top center of the spiral core and attach to the base of the snowman head (use the long tail left from head closing). Sew through several stitches of head round where the neck would be (rounds 21-23) and knot securely around the core.
Step 2 :
Position hat on head. Tuck hat brim slightly over the top of head rounds 9-12 and sew through the inner hat brim and head rounds 10-12 using mattress or ladder stitch. Anchor the hat band holly to the left side for a jaunty tilt.
Step 3 :
Wrap scarf around head between rounds 11-14. Sew the scarf ends to the back of the head and to the top of the spiral so the scarf appears to drape naturally where the spiral begins.
Info :
Before fully closing attachments, hang the partially assembled spiral from a hook to check balance. Adjust bead positions or add a small weight inside the first loop to keep the snowman upright when hanging.
— Face Embroidery & Final Touches :
Step 1 :
Use black embroidery thread to stitch a smiling mouth across 4-6 stitches under the nose. Use backstitch or split-stitch for a smooth curve. Place mouth between rounds 13-15 centered below nose.
Step 2 :
Add tiny embroidered eyebrows above each eye using two short satin stitches. Use the same black thread but keep stitches short to maintain a friendly expression.
Info :
Weave in all ends into the head and spiral inner tube at least 3-4 cm. Apply a small amount of glue inside ornament caps and around the top knot for security if desired. Hang by a loop of sturdy thread or ribbon attached to the wire hook at the very top.
— Optional Stabilizing Internal Stitches :
Info :
To fix spiral loop spacing permanently, run a length of strong thread through the centers of each spiral loop and around the wire, securing with small knots at each junction. This creates stable spacing for long-term hanging. Conceal knots inside tube.
— Size & Gauge Notes :
Info :
Using worsted weight yarn and a 3.5mm hook, head diameter should be approximately 7-8 cm across with final spiral roughly 180-220 cm long when uncoiled. Adjust hook size and number of rounds to scale up or down. Keep tension consistent.
This festive spiral snowman is a delightful addition to any holiday décor, combining classic amigurumi charm with a playful, spiraling ribbon that dances as it hangs. Each step of the process is an opportunity to add personal touches—different yarn colors, bead choices, or embroidered details—so every finished ornament is unique. I hope this pattern brings you the same joy it gave me while designing it; happy stitching and may your holidays be stitched with love! 🎄🧶