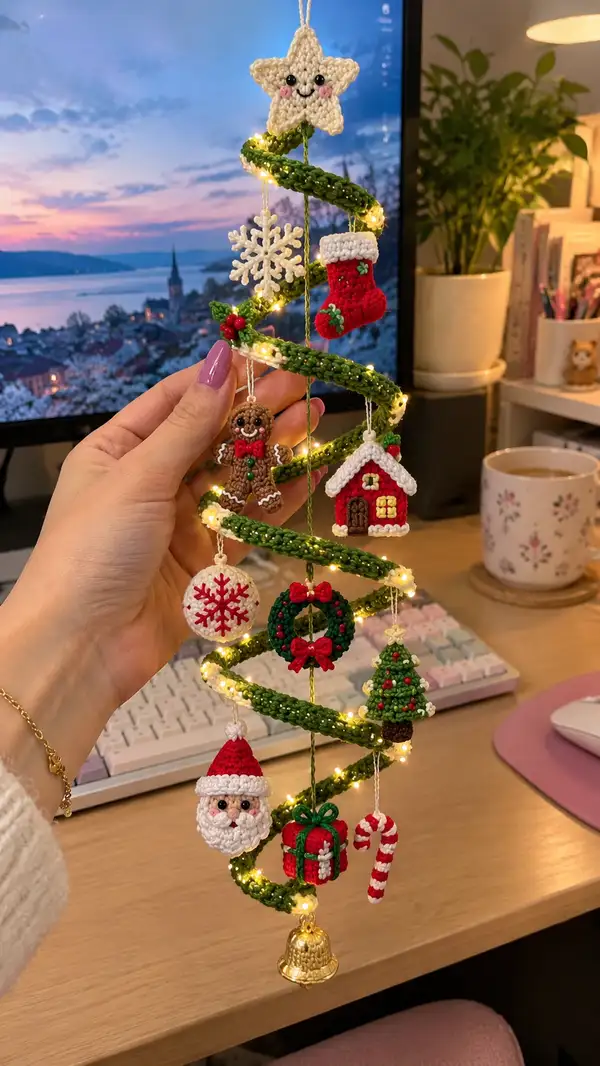
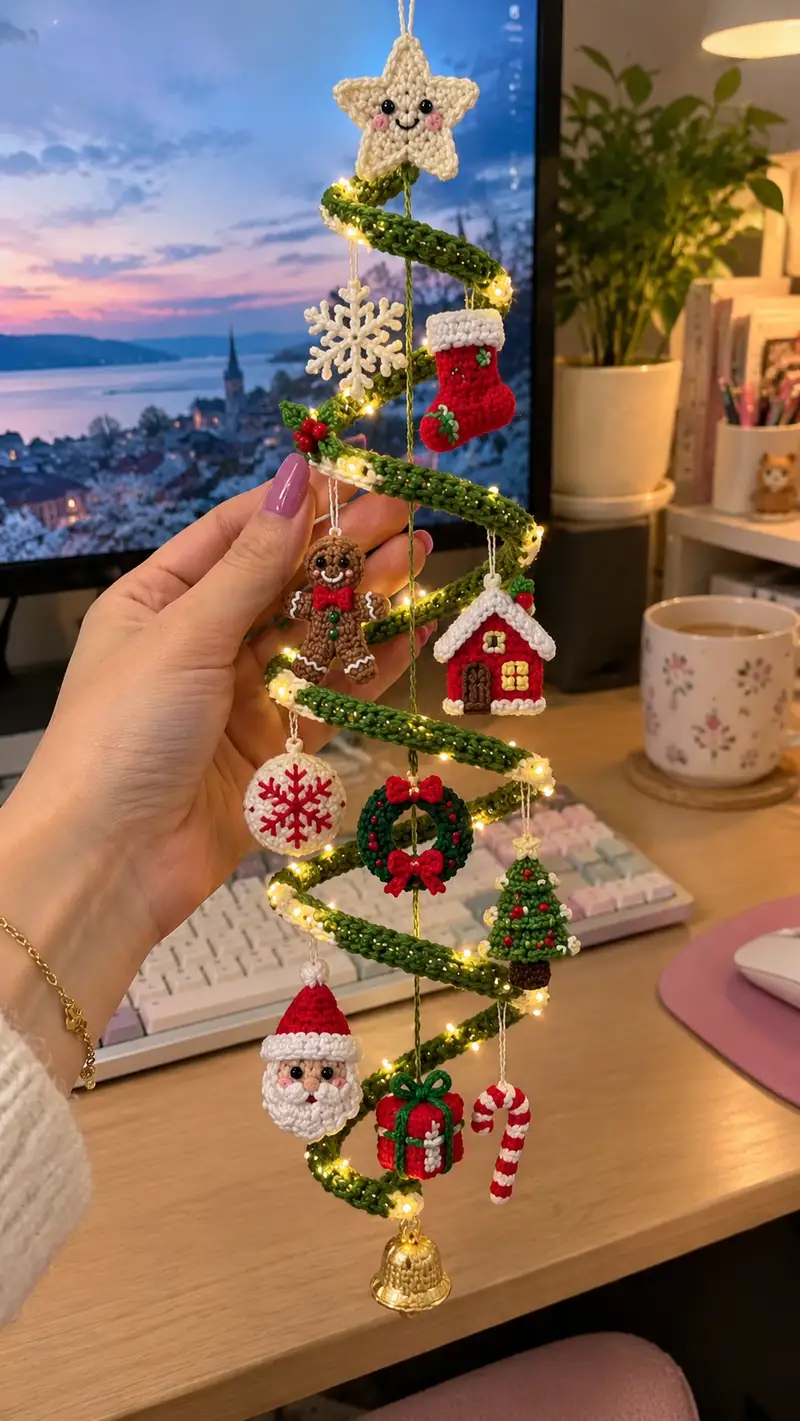
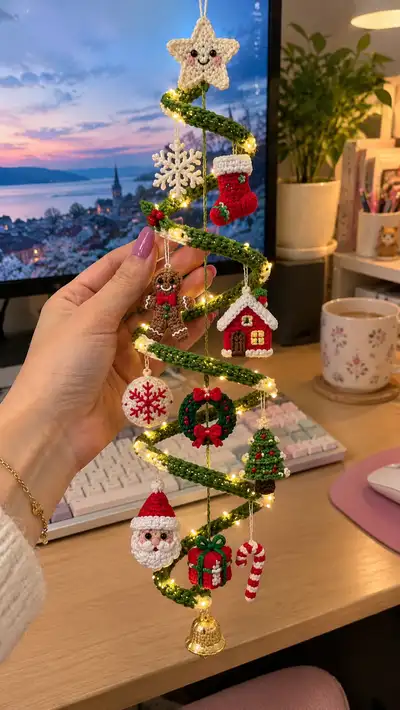
Create a dazzling hanging spiral decorated with tiny amigurumi holiday ornaments — Santa, gingerbread, house, wreath, stocking, bauble, snowflake, candy cane and more. This pattern teaches you to crochet a flexible spiral tree base, craft multiple miniature motifs, add tiny embellishments and attach micro LED lights for a cozy glow. Suitable for stitch-savvy crocheters who love detailed miniatures and seasonal decor.
Progress Tracker
0% Complete
— Spiral Base (crocheted tube to wrap as tree) :
Info :
This spiral is made as a long crocheted tube around a flexible wire armature that will be coiled into a spiral. Work a narrow tube lengthwise (approx. 65-80 cm depending on how tall and loosely you want the spiral) and then coil it. Use green fingering/sport cotton. Decide your finished spiral height and length before starting; photographed sample uses approx. 40cm height and a 1.2m tube wrapped into 5-7 coils.
Round 1 :
6 sc in magic ring (6)
Round 3 :
(1 sc, 1 inc) x 6 (18)
Round 4 :
(2 sc, 1 inc) x 6 (24)
Round 5 :
(3 sc, 1 inc) x 6 (30)
Info :
We are creating a slightly flattened tube with a 30-st circumference - this gives a good width for wrapping around the wire. If you'd like a thinner spiral, reduce final count to 24 by stopping increases earlier.
Round 6-60 :
1 sc in each st (30)
Info :
Work even for the full length of the tube until you reach desired tube length (photographed uses ~80 rounds of single crochet to reach a long tube). Mark every 10 rounds to keep track and prevent mistakes.
Round 61 :
(3 sc, 1 dec) x 6 (24)
Round 62 :
(2 sc, 1 dec) x 6 (18)
Round 63 :
(1 sc, 1 dec) x 6 (12)
Info :
Fasten off leaving a long tail. Optional: slip the wire armature through the tube before final closure. If you plan to wrap moisture or tape the wire, do that first. If threading the wire inside, carefully push the tube over the wire, then close ends by sewing the remaining opening closed using the tail.
Info :
Once tube is made and wire inserted, gently coil the wire into a loose spiral. Adjust spacing between coils to match the photo: about 4-6 cm between spirals near the top and slightly wider at bottom for a tapered tree silhouette.
Info :
Optional - add micro LED light string by weaving the thin copper wire lights along the outer edge of the spiral. Use small stitches to hold them in place every 2-3 cm. Test battery pack before final assembly.
— Santa Head :
Round 1 :
6 sc in magic ring (6)
Round 3 :
(1 sc, 1 inc) x 6 (18)
Round 4 :
(2 sc, 1 inc) x 6 (24)
Round 5 :
(3 sc, 1 inc) x 6 (30)
Info :
Switch to skin tone/beige yarn for Santa face at the end of Round 4 if you prefer hat and trim to be added later. Keep stitch marker at round start for orientation for facial features.
Round 6 :
(4 sc, 1 inc) x 6 (36)
Round 7 :
(5 sc, 1 inc) x 6 (42)
Round 8 :
(6 sc, 1 inc) x 6 (48)
Round 9-14 :
1 sc in each st (48)
Info :
Place 8mm safety eyes between rounds 11 and 12, spaced approximately 9-11 stitches apart for the photographed expression. If using embroidered eyes, mark placement with pins between the same rounds. Add small nose as 1 sc pouf or embroidered French knot between rounds 12-13.
Round 15 :
(6 sc, 1 dec) x 6 (42)
Round 16 :
(5 sc, 1 dec) x 6 (36)
Info :
Begin stuffing head firmly but not rock-hard; use small bits of fiberfill to shape the cheeks and forehead. Keep stuffing shallow near the top if hat will be sewn on.
Round 17 :
(4 sc, 1 dec) x 6 (30)
Round 18 :
(3 sc, 1 dec) x 6 (24)
Round 19 :
(2 sc, 1 dec) x 6 (18)
Round 20 :
(1 sc, 1 dec) x 6 (12)
Info :
Fasten off leaving a long tail for sewing. Finish stuffing fully and close the top using the tail through the remaining 6 stitches. Leave extra tail to sew hat and beard pieces to the head.
— Santa Hat :
Round 1 :
6 sc in magic ring (6)
Round 3 :
(1 sc, 1 inc) x 6 (18)
Round 4 :
(2 sc, 1 inc) x 6 (24)
Round 5-9 :
1 sc in each st (24)
Info :
Sew hat slightly to one side to create the slouchy Santa look. For the hat brim, change to white yarn and work a textured row using 1 sc in BLO around next round for a raised cuff.
Round 10 :
Change to white. 1 sc in each st BLO (24)
Round 11 :
1 sc in each st (24)
Round 12 :
Fasten off. Make a small white pom-pom by crocheting 6 sc in mr, close and stuff lightly, then sew to tip of hat. Sew hat to head aligning brim around round 9 of the head.
— Santa Beard & Mustache (worked in white, make beard and separate small mustache pieces) :
Round 1 (Beard motif) :
Ch 6, turn. Row 1: sc in 2nd ch from hook and in each (5). FO leaving a tail. Make 4 identical scallop strips.
Info :
We will create layered scallops for the full beard. Attach each scallop to lower face round 13-15 with increasing overlap so beard looks full and rounded. Trim and fluff slightly for a soft look.
Round 2 (Mustache, make 2) :
Ch 4. Row: sc in 2nd ch from hook and next two ch (3). Work 3 sc in last ch to create a slight curve, sl st back along other side (approx. 6 sts total). FO leaving tail and sew to cheeks near nose placement.
Info :
Sew the mustaches to the face first, then attach the scallop beard pieces under and around them. Add a small embroidered mouth using red yarn below mustache center.
— Gingerbread Person :
Head Round 1 :
6 sc in magic ring (6)
Round 3 :
(1 sc, 1 inc) x 6 (18)
Round 4-6 :
1 sc in each st (18)
Info :
Place tiny safety eyes between rounds 4-5 or embroider with black thread. Mark mouth with white or pink embroidery thread. Keep head size small to match gingerbread body.
Round 7 :
(1 sc, 1 dec) x 6 (12)
Info :
Fasten off head and set aside. Stuff lightly if desired. Body will be flat-shaped with a small 3D head sewn on top.
Body Round 1 (Flat body - working in brown)
Ch 7, join to form small ring with sl st. Round 1: 12 sc around (12)
Round 2 :
(1 sc, 1 inc) x 6 (18)
Round 3 :
1 sc in each st (18)
Round 4 :
(2 sc, 1 inc) x 6 (24)
Round 5-8 :
1 sc in each st (24)
Info :
We will shape arms and legs by folding and sewing the flat rounds. Add white icing trim using surface slip stitch or embroidery in wavy lines across arms and legs. Add small green/red seed bead buttons sewn to center of body.
Round 9-12 :
Decrease rounds to slightly taper bottom: Round 9: (2 sc, 1 dec) x 6 (18). Round 10: (1 sc, 1 dec) x 6 (12). Round 11: 6 dec (6). FO and leave tail for sewing.
Info :
Sew head to top center of body with the tail. Embroider smile and rosy cheeks using pink thread to match photo. Use tiny bows or beads as accent around neck.
— Mini Stocking :
Round 1 :
6 sc in magic ring (6)
Round 3 :
(1 sc, 1 inc) x 6 (18)
Round 4 :
1 sc in each st (18)
Round 5 :
Change to red. 1 sc in each st (18)
Round 6 :
Work 8 sc across to form foot base, then continue round shaping the heel: see shaping below. (18)
Round 7-11 :
1 sc in each st (18)
Info :
Fold flat at toe area and sew curve to make slight foot shape. Change to white yarn for cuff and work 2 rounds of 1 sc BLO to create raised cuff before adding decorative holly with small green leaves and red beads.
Round 12 (Cuff) :
Change to white. 1 sc in each st BLO (18)
Round 13 :
1 sc in each st (18). FO leaving tail to sew loop for hanging.
— Tiny Gingerbread House :
Base Round 1 :
6 sc in magic ring (6)
Round 3 :
(1 sc, 1 inc) x 6 (18)
Round 4-6 :
1 sc in each st (18)
Info :
We will build the house as a small box: make two identical rectangular panels for front and back then join sides to create box. Use red for walls, brown for door, white for roof trim and icing details.
Panel Making (front/back) :
Ch 7, Row 1: sc across (6). Row 2-5: ch1, turn, 6 sc (6) – make two panels.
Assembly Rounds :
Join panels by sc along edges using red yarn to form a small box; sc around bottom (6) and up other side to close. Add roof by crocheting a small triangle: Ch 8, Row 1: sc across (7). Row 2: dec at each end, sc across middle. Repeat until 1-2 sts remain. FO and sew as roof.
Info :
Embroider windows with yellow centers (tiny French knots) and a brown door. Add white scalloped icing along roof edges using slip stitch picot technique: *sl st, ch2, sl st in same st* for small scallops.
— Mini Wreath :
Round 1 :
Make a ring: ch 10, join with sl st to make a small loop. Round: 12 sc around loop (12)
Round 2 :
In each st: (sl st in next, 3 sc in next) x 6 to create scalloped greenery (30)
Round 3 :
Work 1 sc around to tidy shape (30)
Info :
Sew a small red bow made from red yarn: ch 8, sc across and cinch center with a small band. Attach tiny red bead berries to wreath front. Fasten off and leave hanging loop.
— Mini Bauble (white with red snowflake) :
Round 1 :
6 sc in magic ring (6)
Round 3 :
(1 sc, 1 inc) x 6 (18)
Round 4-6 :
1 sc in each st (18)
Round 7 :
(1 sc, 1 dec) x 6 (12)
Round 8 :
6 dec (6) FO leaving tail to close and embroider red snowflake on surface using stranded red embroidery yarn: simple cross lines and small branches.
Info :
To hang, make a small white loop with ch6 and attach to top. Add a tiny gold bead cap or wrap a small gold thread around the top for a metallic effect.
— Mini Christmas Tree Ornament :
Trunk Round 1 :
4 sc in magic ring with brown (4)
Trunk Round 2 :
4 sc (4) FO leaving tail to sew
Foliage Round 1 :
Switch to green. Ch 6, sl st to form small loop. Round: 8 sc around loop (8)
Round 2 :
(1 sc, 1 inc) x 4 (12)
Round 3 :
1 sc in each st (12)
Round 4 :
Make three overlapping scallop layers: For each layer ch 6 and in the stitch create picot/3 sc cluster to mimic branches. Repeat for 3 layers decreasing width toward top
Info :
Sew trunk to bottom of foliage and add tiny bead ornaments by sewing on red and gold seed beads. Add a tiny gold sequin star at top or stitch a small cross with yellow thread.
— Candy Cane :
Round 1 :
Ch 6. Row 1: sc in 2nd ch from hook and next 4 (5). FO. Make a second identical strip and sew together with red spiral embroidery over white base to create stripes. Bend slightly and sew into cane shape.
Info :
Alternatively, work a narrow tube of 6-8 rounds and then sew red spiral stripes around it to mimic candy cane stripes. Leave hanging loop at top.
— Snowflake (flat motif) :
Round 1 :
Ch 6, sl st to first ch to form ring. Round: ch3 (counts as dc), (2 dc, ch2, 3 dc) x 6 around, sl st to join (6 petals)
Round 2 :
On each petal work: sl st to center of petal, ch3 (counts as dc), 2 dc, ch1, picot (ch2, sl st) then 3 dc to complete. FO and block flat.
Info :
Use white mercerized cotton and lightly starch if you want a rigid snowflake. Add a tiny gold bead in center if desired and attach hanging loop.
— Small Present :
Round 1 :
6 sc in magic ring with red (6)
Round 3 :
(1 sc, 1 inc) x 6 (18)
Round 4-7 :
1 sc in each st (18)
Round 8 :
(1 sc, 1 dec) x 6 (12)
Round 9 :
6 dec (6) FO and close. Add green ribbon cross stitched around with a small bow made by tying a small ch loop and sewing in place.
Info :
Stuff lightly if you prefer a puffy present. For a tidy box, leave unstuffed and stiffen slightly with diluted glue inside.
— Tiny Gold Bell (dangling charm) :
Round 1 :
6 sc in magic ring with gold/yellow (6)
Round 3 :
1 sc in each st (12)
Round 4 :
(1 sc, 1 dec) x 4 then 4 sc (8) - adjust to shape (8)
Round 5 :
8 dec to close into a small bell shape, leave a small opening, sew in a tiny jingle bell inside or a small bead, close and attach small gold jump ring or thread loop for hanging.
Info :
A real miniature metal bell adds authentic sound. Sew securely and hide knots inside the bell for tidy finish.
— Ornament Hanging Cords and Loops :
Info :
Make hanging loops for each ornament by chaining 12-20 with matching yarn or using thin metallic thread. Attach loop to top of each ornament by sewing or pulling through a stitch and knotting tightly. For the photographed effect, use a double strand of white cotton for most ornaments and green cord for center line.
Round (Cord) :
Ch required length (12-18), FO. For stronger cords braid three short ch strands and knot ends. Hide ends into the top of the ornament with a few whipstitches.
Info :
For ornaments hung on the centerline, use a slightly longer cord so they reach the middle of spiral coils. For side-hung ornaments, use cords of graduated lengths (approx. 4-12 cm) to create layered depth as in the photo.
— Finishing Touches :
Info :
Sew dangling ornaments to spiral by slipping cords over the coil and securing at the top with a few hidden stitches to the tube (through inner wall). Add tiny pearls and red beads scattered across the spiral surface by sewing through the tube and knotting inside. Weave the micro LED string along spiral outer edge and fix lights with a few stitches every 3 cm. Tuck battery pack at top coil hidden behind star or top ornament.
Info :
For the star top (a 5-point star): ch 2, work 5 times: (sc, hdc, dc, tr, dc, hdc, sc) in each point separated by sl st in center. Make two identical star halves and sew together lightly stuffing a pinch to give slight 3D body. Attach a loop at top to hang the spiral from a hook or ceiling nail.
Info :
After assembly, hang the spiral and adjust coil spacing so ornaments don’t collide. Slightly steam-block flat motifs like snowflake and house roof edges to keep crisp. Check all sewn beads and small parts are secure, especially if gifting to family members who may handle it often.
This joyful miniature amigurumi spiral is a delightful blend of structure and tiny handcrafted details, bringing instant holiday cheer to any corner of your home. From Santa's fluffy beard to the tiny wreath and glowing lights, every stitch adds personality and charm. Make one as a keepsake, or create several in different colorways as thoughtful gifts 🎄🧶. Enjoy the cozy process and have fun customizing each ornament — happy crocheting! ✨