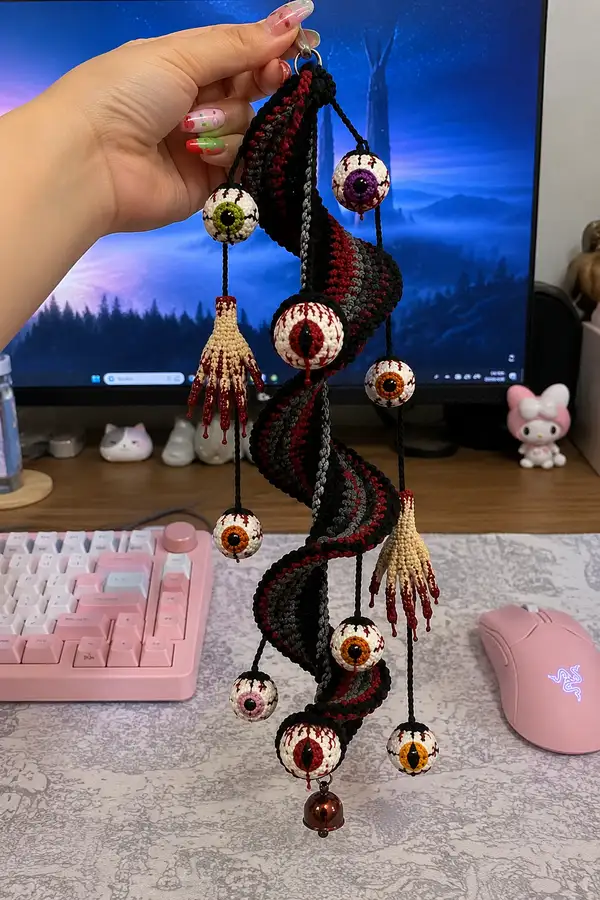
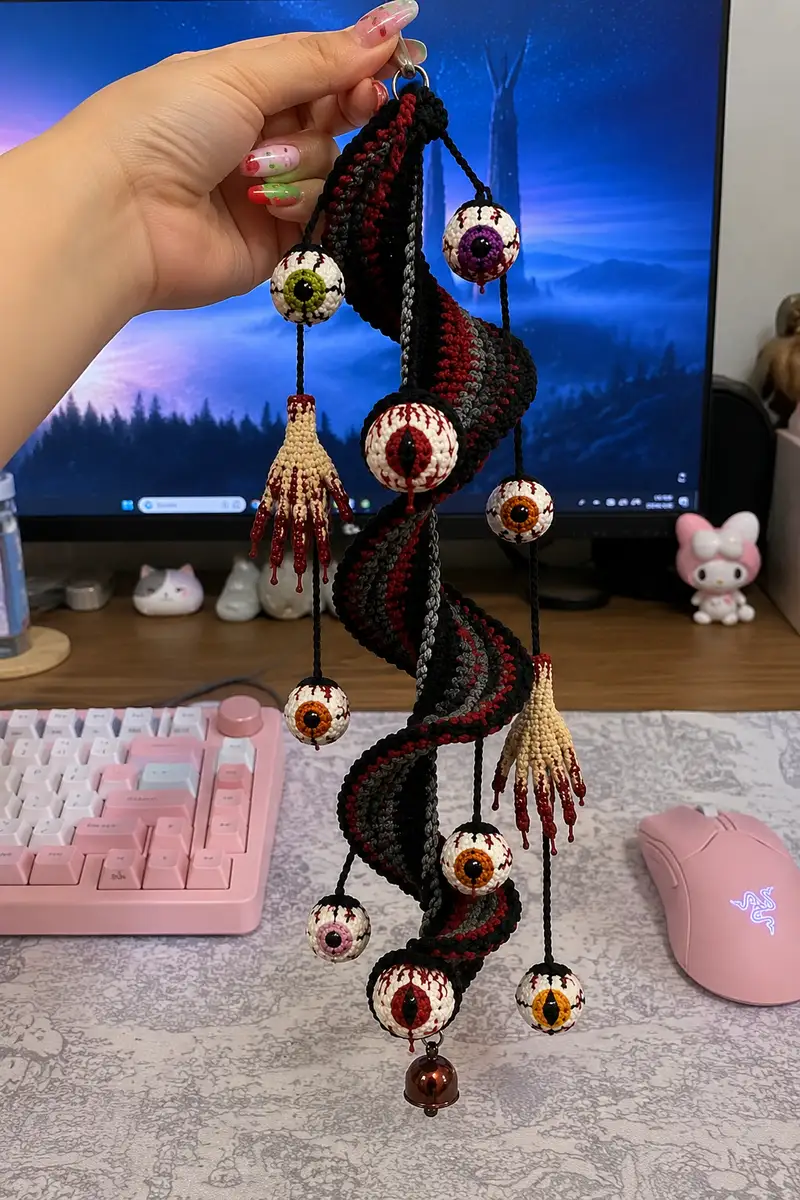
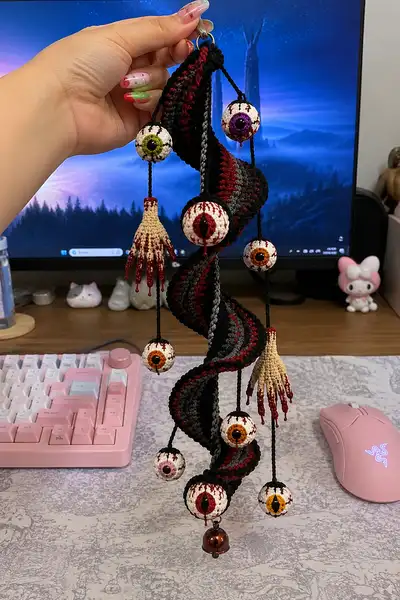
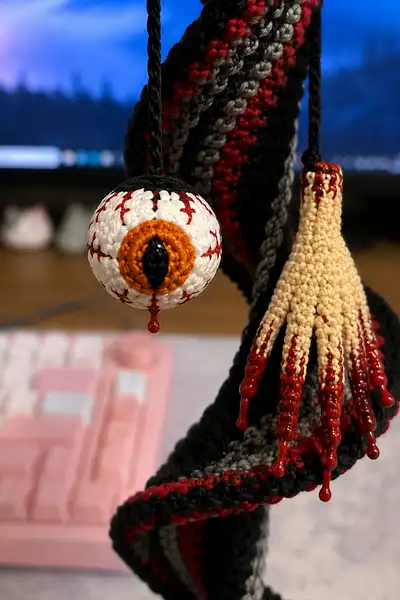
Create a dramatic Halloween spiral garland adorned with crocheted eyeballs, dripping severed hands, and a twisted striped spine. This pattern teaches you how to crochet tight spherical eyes with embroidered blood veins, delicate finger tubes finished with glossy drips, and a long twisted spiral ribbon in black, red and grey. The finished piece hangs as a haunted decoration complete with braided cords, beads and a small bell for a sinister jingle.
Progress Tracker
0% Complete
— Large Eyeball (focal eye - make 2)
Round 1 :
6 sc in magic ring (6)
Round 3 :
(1 sc, 1 inc) x 6 (18)
Round 4 :
(2 sc, 1 inc) x 6 (24)
Round 5 :
(3 sc, 1 inc) x 6 (30)
Round 6 :
(4 sc, 1 inc) x 6 (36)
Info :
Change to white yarn for sclera now if you started with a different color. Keep your tension tight to avoid visible stuffing later. Place a stitch marker at the first stitch and move it each round.
Round 7 :
(5 sc, 1 inc) x 6 (42)
Round 8 :
(6 sc, 1 inc) x 6 (48)
Round 9-14 :
1 sc in each st (48)
Info :
Work rounds 9-14 evenly to create the main girth of the eyeball. These rounds are where you will later embroider vein placement; use a soft pencil to mark top/bottom if desired. Begin light stuffing after round 10; add small amounts at a time until the sphere feels firm but not overstuffed.
Round 15 :
(6 sc, 1 dec) x 6 (42)
Round 16 :
(5 sc, 1 dec) x 6 (36)
Info :
Start stuffing more firmly now, making sure the shape is round. If you plan to insert a small bead or washer to weigh the eye, add it between rounds 14-16, centering at the lower hemisphere.
Round 17 :
(4 sc, 1 dec) x 6 (30)
Round 18 :
(3 sc, 1 dec) x 6 (24)
Round 19 :
(2 sc, 1 dec) x 6 (18)
Round 20 :
(1 sc, 1 dec) x 6 (12)
Info :
Fasten off leaving a 20-25 cm tail for sewing. Finish stuffing through the remaining opening then close using a tapestry needle and the long tail with an invisible decrease or ladder stitch to make a smooth finish. Hide ends inside the eye.
— Small Eyeball (standard size - make 4)
Round 1 :
6 sc in magic ring (6)
Round 3 :
(1 sc, 1 inc) x 6 (18)
Round 4 :
(2 sc, 1 inc) x 6 (24)
Round 5-7 :
1 sc in each st (24)
Info :
Small eyeballs are compact; begin light stuffing at round 5. These are the ones shown all along the spiral. Use the same white for sclera and switch to contrasting color for iris overlays later.
Round 8 :
(2 sc, 1 dec) x 6 (18)
Round 9 :
(1 sc, 1 dec) x 6 (12)
Info :
Fasten off with a 15-20 cm tail for sewing. Stuff firmly then close. Keep tails for attaching to braided cords later.
— Iris & Pupil Overlay (for each eye)
Round 1 :
4 sc in magic ring (4)
Round 3 :
(1 sc, 1 inc) x 4 (12)
Round 4 :
1 sc in each st (12)
Round 5 :
1 sc in each st (12)
Info :
Work iris in the color you prefer (orange, purple, green, pink). Keep the overlay flat. When complete, list top center of the eye and sew the iris to the sclera so its outer edge sits around rounds 11-13 of the large eye (or around the equator of a small eye). For a vertical pupil, embroider a narrow vertical slit later with black yarn; you can also crochet a small 6-8 stitch oval for a raised pupil.
Pupil (embroidered or crocheted) :
Make a small oval by crocheting 6 sc in an oval: ch 6, sc in 2nd ch from hook and across (5), 3 sc in last ch, continue on opposite side 5 sc, 2 sc in last (total 15) then fasten off leaving a tail for sewing. Alternatively, embroider a vertical black stitch directly through the iris.
— Eyeball Veins (Surface Embroidery on Sclera)
Info :
Use deep red or burgundy yarn or embroidery floss. Thread a yarn needle with a doubled strand and weave branching stitches from the lower hemisphere up over the surface, pulling slightly to create raised veins. Use long stitches that pass over several rounds for a realistic look. Add small scattered short stitches to emulate capillaries. Tie off inside the eye and trim close.
— Spiral Ribbon Base (long spiral strip)
Info :
This strip is worked in the round as a narrow tube that will be flattened and twisted to form the spiral. Work in alternating stripes: black main, thin red stripe, thin grey stripe, repeat. Final length is approximately 60-90 cm depending on desired spiral size. The tube width in the sample is 12 stitches around (creates a visually strong helix). Gauge: 12 sc circumference with DK yarn using 3.0mm hook yields a narrow but sturdy ribbon; adjust hook size to make tube tighter or looser.
Round 1 :
6 sc in magic ring with black (6)
Round 3-6 :
1 sc in each st (12)
Info :
These rounds set your tube circumference. If you desire a wider ribbon, increase at round 2 to 18 (9 inc) to make 18 sts total and proceed; adjust math accordingly. The sample uses 12 sts to create a tight ribbon that twists well.
Round 7-10 :
Switch to red yarn. 1 sc in each st (12)
Round 11-14 :
Switch to grey yarn. 1 sc in each st (12)
Round 15-18 :
Switch to black yarn. 1 sc in each st (12)
Info :
Repeat this color cycle (black 4 rnds, red 4 rnds, grey 4 rnds) until you reach your target length (roughly 200-280 rounds in total if each round equals one row length; below we provide grouping to reach a long strip). Keep a tidy join when changing colors: carry up to 2 rounds inside or fasten off for clean color edges.
Round 19-60 :
Continue pattern (black 4, red 4, grey 4) working 1 sc in each st (12) per round; this creates the striped tube. Continue until tube length reaches about 60-90 cm depending on yarn and hook.
Info :
When the tube is long enough, lightly block it into a flat ribbon: slice the tube by opening one seam (use scissors carefully) along one side approximately 10-15 cm from an end, or alternatively flatten by pinching and slip-stitching down the tube to create a long flat strip. The sample was flattened by slip-stitching one seam of the tube inside-out to create a flat ribbon that still maintained a slight 3D texture. If you cut the tube, you will need to overcast the raw edge with small stitches to prevent unraveling.
Round 61-90 :
If you prefer a spiral with more dramatic width, do an additional set of rounds repeating the stripe cycle until your ribbon reaches desired finished length. Aim for 180-220 rows total in the round to have enough length to twist into a tall helix. Keep ends tidy; finish last round in black and fasten off with long tail for assembly.
Info :
To form the spiral: hold both ends and twist to create a helix. Fold the strip into a loose twisted shape and use invisible stitches or a few anchor stitches behind the spiral to lock the twist at intervals where eyes and hands will be attached. You may also insert a flexible wire along the inside of the ribbon before flattening to give the spiral structure and help it hold shape. If inserting wire, center it and close the tube around it before flattening.
— Severed Hand (Make 2)
Round 1 :
6 sc in magic ring with beige/tan (6)
Round 3 :
(1 sc, 1 inc) x 6 (18)
Round 4 :
(2 sc, 1 inc) x 6 (24)
Round 5 :
1 sc in each st (24)
Info :
These rounds create the wrist/flared top. The hand will be worked downward into a cone that becomes the palm and fingers. Stuff the wrist area lightly; more stuffing will be added later in the palm if you want a fuller shape.
Round 6 :
(3 sc, 1 dec) x 6 (18)
Round 7 :
(2 sc, 1 dec) x 6 (12)
Round 8 :
1 sc in each st (12)
Info :
Working in the round, this narrows the cone before creating finger base. At the next round you will create 6 toe/finger tunnels (five fingers plus a partial thumb shape). Pin the base and plan finger spacing evenly around the palm: roughly 6 stitches per finger tunnel at this size.
Round 9 :
Ch 6, join into first ch to make finger tunnel foundation for Finger 1; sc 6 across, sl st into next base st; repeat around to make 6 small ch-6 loops spaced every 2 base stitches. (Creates 6 finger tunnels)
Info :
Each finger tunnel will now be worked as a small tube. Work each finger one at a time, stuffing lightly as you go. Keep a small amount of stuffing in the palm so the top of the fingers sit naturally in place when finished.
Finger (repeat for each finger) Round 1 :
Join yarn at the base of the selected finger tunnel, sc 6 evenly around the loop (6)
Finger Round 2-6 :
1 sc in each st (6) (work 5 rounds to lengthen finger)
Finger Round 7 :
1 sc in first 4 sts, dec across last 2 sts (5)
Finger Round 8 :
1 sc in each st (5)
Info :
After round 8, fasten off leaving a 20 cm tail for sewing and attaching the resin drip. Stuff finger tube firmly and shape slightly narrower at the tip. Repeat for all fingers. For a realistic stagger, vary finger lengths by stopping a finger after 4-6 even rounds before tapering.
Round (Palm closing) :
With all fingers attached and stuffed, pick up where you started at round 8 base and work 1 round sc around the palm base to tidy joins; if there is a small gap at the top, close with decreases: (1 sc, 1 dec) repeat until aperture closes neatly. Fasten off and weave in ends.
Info :
To create beaded/resin drips: attach small seed beads along finger tips with thread or apply small drops of clear jewelry resin colored with red pigment. Place beads/resin at the ends of fingers and allow to cure on a non-stick surface; if using resin, carefully shape the drop with a toothpick before curing to mimic tear-drop drips. Alternate beads and resin for variety.
— Braided Cord & Hanging Loops
Info :
Braid cords from three strands of black yarn or create a tightly twisted cord by chaining a length and slst back into chain for a rope effect. The sample uses a 6 mm chain-twisted cord about 8-12 cm long for each hanging piece. Attach them to a metal jump ring at the top and to eyeballs and hands on the bottom with a few secure stitches.
Cord (chain & twisted) :
Ch 60 (or until length desired), sl st into first ch to form loop, fasten off leaving tail for attaching. Alternatively, chain 90 and fold into a 3-strand braid and braid tightly for 30 cm; tie off ends and sew into place.
Info :
For secure hanging, pass the cord tail through the top of an eye or through a small loop inside the hand and sew repeatedly into internal rounds. Add a tiny bit of craft glue to the interior join for extra stability if desired.
— Small Decorative Accents (bell & beads)
Info :
Sew small beads to the fingertips and embroider extra blood droplets on the sclera with red floss. Add a small bronze bell to the bottom center of the spiral by attaching a jump ring through the last row of the spiral and sewing it down with several passes to prevent swinging off completely.
— Assembly & Placement Notes
Info :
Lay the spiral on a flat surface and place the eyeballs and hands roughly where they appear on the sample: three to five eyeballs staggered along the spiral at visual intervals and two hands hanging on separate cords. Use pins to temporarily secure positions while you step back and adjust. Sew each eyeball through several interior rounds into the spiral to secure—the long tail left when closing each eye is perfect for this. For heavy hands, reinforce attachment by sewing through the spiral core and around a small internal anchor (a bead or washer) before knotting and hiding the ends inside the wrist.
Info :
When sewing in place, ensure cords are aligned so that eyeballs hang freely without catching on ribbon edges. If you added wire to the ribbon core, wrap the cord around the wire and fix with stitches so the cord anchors are strong. Hide all tails inside the spiral or inside the eye/hand cavities to keep the outside neat.
Info :
Optional finish: once all pieces are attached, steam-block the spiral lightly or pin the spiral into the final shape and give a gentle hot-iron steam from a distance to relax the yarn and help the twist hold. Do not press directly on resin drips or beads.
— Cleaning & Care
Info :
Cotton and acrylic materials are spot-cleanable with a damp cloth. Avoid immersing the garland if resin drips are attached. Store flat or hung in a cool dry place to avoid flattening the spiral shape. If the spiral loses its twist, gently retwist and re-anchor at a few points with small stitches.
This spooky spiral garland pattern transforms simple yarn and small embellishments into a hauntingly beautiful hanging piece full of personality and detail. Each little eye and dripping fingertip brings the garland to life with texture, color and a touch of gore. Whether you hang it in a haunted corner, use it as a prop, or gift it to a horror-loving friend, this project is both satisfying to make and striking to display. 🧶🩸🔔