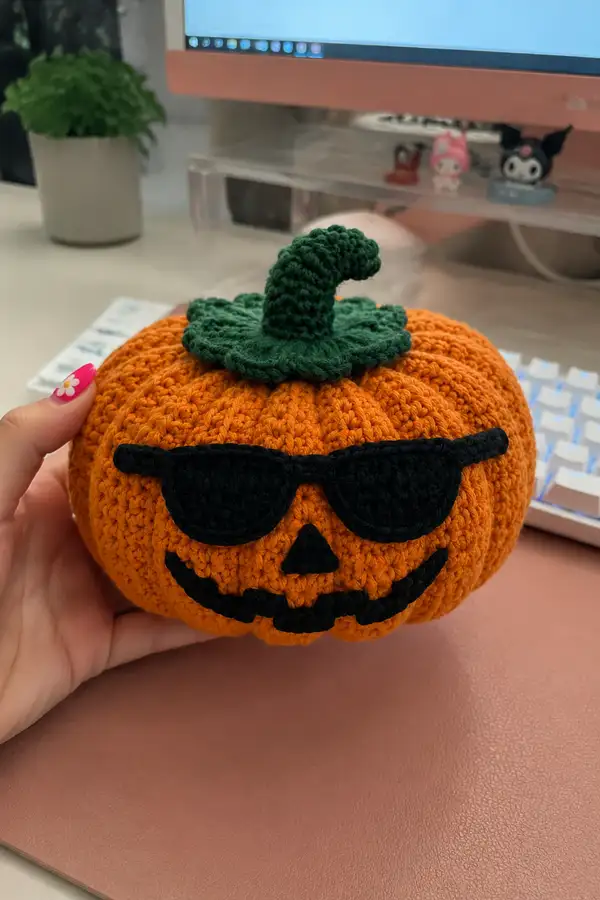
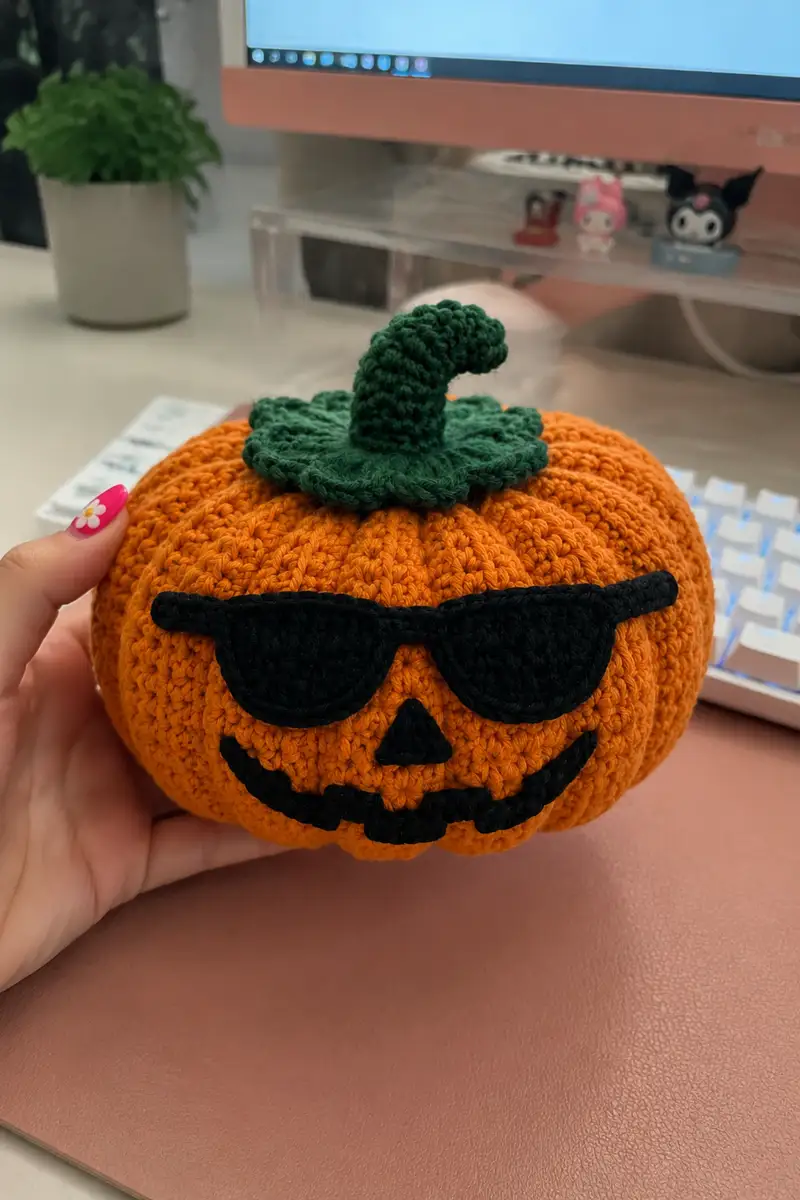
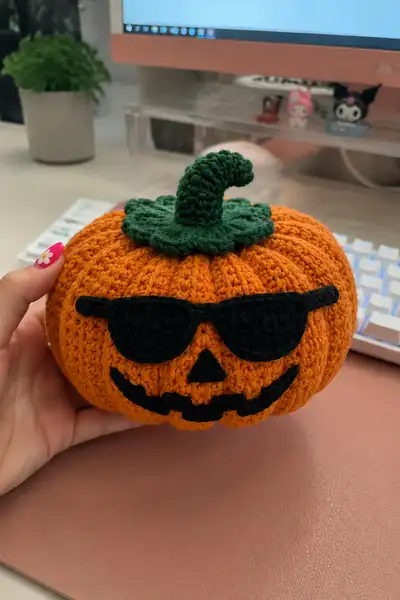
A playful, palm-sized amigurumi pumpkin dressed in cool sunglasses and a curly stem. This pattern recreates the textured vertical ribs, rounded pumpkin body, leafy topper and bold black appliqued face seen in the photo. Designed with clear round-by-round shaping, dedicated ridge formation, and simple appliques to make a charming seasonal decoration or gift.
Progress Tracker
0% Complete
— Head / Body (Pumpkin) :
Round 1 :
6 sc in magic ring (6)
Round 3 :
(1 sc, inc) x 6 (18)
Round 4 :
(2 sc, inc) x 6 (24)
Round 5 :
(3 sc, inc) x 6 (30)
Round 6 :
(4 sc, inc) x 6 (36)
Round 7 :
(5 sc, inc) x 6 (42)
Round 8 :
(6 sc, inc) x 6 (48)
Round 9 :
(7 sc, inc) x 6 (54)
Round 10 :
(8 sc, inc) x 6 (60)
Round 11-18 :
1 sc in each st around (60)
Info :
These rounds build the full circumference of the pumpkin. Work tightly, using a stitch marker to mark the first stitch of each round. The texture seen on the pumpkin in the photo is achieved by pairing these rounds with later ribbing; do not attempt surface slip stitch ribs yet — leave the surface clean for even stitchwork.
Info :
Place face appliques later between approximately Rounds 13-15. Measure across your piece to ensure the pumpkin height matches the photo: with 8 rounds of even 60-st rounds you'll reach a nicely rounded profile for a palm-sized pumpkin.
Round 19 :
(8 sc, dec) x 6 (54)
Round 20 :
(7 sc, dec) x 6 (48)
Round 21 :
(6 sc, dec) x 6 (42)
Info :
Begin stuffing lightly at the end of Round 20 and continue as you decrease from Round 21 onward. For this pumpkin, stuff moderately firm to keep the round sections crisp but still plush. Use small bits of fiberfill and press them into the centre with a stuffing tool or pencil tip for even distribution.
Round 22 :
(5 sc, dec) x 6 (36)
Round 23 :
(4 sc, dec) x 6 (30)
Round 24 :
(3 sc, dec) x 6 (24)
Round 25 :
(2 sc, dec) x 6 (18)
Round 26 :
(1 sc, dec) x 6 (12)
Info :
Do not close the final 6 completely if you plan to stuff more and add a stem base. Fasten off leaving a long tail for sewing if you will close now, or leave an opening to attach the leaf and stem later. If you wish to create a flatter top as in the photo, reduce firmly until 6 sts, then flatten the top and sew the opening closed by thread drawing across the top in a star pattern, securing a flat platform for the leaf.
Info :
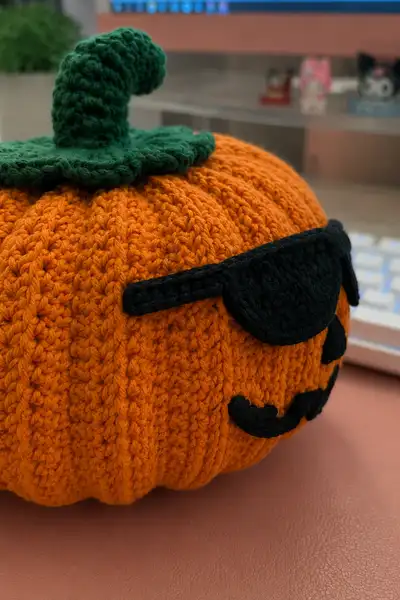
To get the pronounced vertical ribs visible on the finished pumpkin, you will add eight evenly spaced ridge cords. These cords are created separately and sewn from top to bottom after the main body is stuffed and closed. Place pins to mark eight equal sections (every 7.5 stitches for a 60-st round approximate) around the circumference before attaching the ribs.
— Ridges / Pumpkin Segments (Make 8) :
Info :
Each ridge is a narrow cord that will be sewn vertically from top to bottom. Make 8 ridges to match the natural pumpkin segments. Use the same orange yarn for continuity. Work in rows (not joined rounds) to create a slightly raised cord that sits on the surface. We provide the pattern for one ridge; repeat 8 times and pin evenly around the pumpkin for sewing.
Ridge Round 1 :
Ch 30, sc in 2nd ch from hook and across (29)
Ridge Round 2-4 :
Turn, ch1, 1 sc in each st across (29) — repeat for Rounds 2 and 3 to make a 3-row cord. Optionally do 4 rows for a thicker ridge (29)
Info :
After making each cord, fasten off leaving a long tail for sewing. Block slightly by pinning flat if desired so cords are even. Gently pinch each cord to give a rounded profile before sewing.
Ridge Assembly :
Pin the 8 ridge cords evenly around the pumpkin, aligning tops and bottoms. Sew each cord down its length to the pumpkin body with a whip stitch or backstitch using the long tail, pulling slightly as you go to create a defined groove when finished. Space each ridge approximately every 7-8 stitches around the widest part of the pumpkin (for a 60-st circumference). After sewing, gently press the stuffed pumpkin between your hands to shape the ribs into the final rounded segments.
— Stem (Make 1) :
Round 1 :
6 sc in magic ring with green yarn (6)
Round 2 :
Inc in each st around (12)
Round 3 :
1 sc in each st (12)
Round 4 :
(1 sc, inc) x 6 (18)
Round 5-8 :
1 sc in each st around (18)
Info :
These rounds form the stem base. Stuff lightly from Round 5 onward — the stem should be firm enough to hold shape but not rock-hard. If you want a poseable stem, insert craft wire or a pipe cleaner down the center before stuffing fully, leaving wire ends wrapped and covered with yarn tails.
Round 9 :
(2 sc, dec) x 6 (12)
Round 10-13 :
1 sc in each st around (12)
Info :
To create the curly, tapered look seen in the photo, from Round 11 onwards switch to working in BLO only for a subtle ridge on the stem. This helps the stem curl more easily when you shape it later.
Round 14 :
(1 sc, dec) x 4 then 1 sc in remaining 4 sts (8+4 = 12) — for shape (12)
Round 15-18 :
1 sc in each st (12)
Round 19 :
(1 sc, dec) x 4 (8)
Round 20 :
1 sc in each st (8)
Round 21 :
Dec evenly across if you want a tapered tip or continue 1 sc in each st to keep a blunt top (4-8 depending on desired look)
Info :
Fasten off leaving a long tail for sewing. Bend the stem gently to create a curl — the BLO rounds hold the curl better. If you inserted wire, wrap stem around a dowel or curl wire carefully to set it. Sew stem to the top centre of the pumpkin through the base rounds and into the body; weave the tail through several stitches and knot securely inside for stability.
— Leaf (Make 1) :
Round 1 :
6 sc in magic ring with green yarn (6)
Round 2 :
Inc in each st around (12)
Round 3 :
(1 sc, inc) x 6 (18)
Round 4 :
1 sc in each st around (18)
Round 5 :
(3 sc, dec) x 3 (15)
Round 6 :
1 sc in each st around (15)
Round 7 :
Work a scallop edge: *sl st, ch2, 3 dc in same st, ch2, sl st in next st* repeat around to create wavy leaf edge. Fasten off leaving long tail for sewing.
Info :
Pin the leaf flat on top of the pumpkin, slightly off-centre as in the photo, and sew through the base so it sits flat. The stem will be sewn through the middle of the leaf so the leaf sits beneath the stem like a collar.
— Sunglasses / Eyes (Make 2 halves + Bridge + Arms) :
Info :
The photo shows a pair of stylized black sunglasses that are appliqued to the pumpkin surface. We'll make two half-circle cups, a small bridge, and two thin arm strips. Assemble flat and sew in place. Work tight with smaller hook (3.0mm) if possible for crisp edges.
Eye Cup Round 1 :
6 sc in magic ring with black yarn (6)
Eye Cup Round 2 :
6 inc (12)
Eye Cup Round 3 :
(1 sc, inc) x 6 (18)
Eye Cup Round 4 :
(2 sc, inc) x 6 (24)
Eye Cup Round 5 :
1 sc in each st around (24)
Eye Cup Round 6 :
Fold the circle in half at the top and join by slip stitching 12 sts across the fold to create a semi-circle shape (12)
Info :
Make two identical semi-cups. For the slight straight horizontal bar seen in the photo, we create a thin strap that ties the tops of both cups together when sewing to the pumpkin, keeping them flush. Make strap pieces next.
Bridge Round 1 :
Ch 8, sc in 2nd ch from hook and across (7)
Bridge Round 2-3 :
Turn, ch1, sc across (7) — repeat for second row for thickness. Fasten off leaving long tail for sewing.
Arm / Temples (Make 2) Round 1 :
Ch 30, sc in 2nd ch from hook and across (29)
Arm Round 2-3 :
Turn, ch1, sc across (29) — make 2-3 rows for sturdiness. Fasten off leaving long tail.
Assembly :
Position both semi-cups on the pumpkin surface across Rounds 13-15 with a slight dip in the middle for the nose area. Pin bridge snugly between the inner curves so that the glasses appear joined. Sew straps to the top edges of the semi-cups and then sew the arm strips extending sideways along the pumpkin surface, matching the photograph where the temples lie flat along the side curves. Weave tails neatly on the inside.
Info :
When sewing the semi-cups, use small whip stitches along the curve edge only — do not pull too tightly; you want the glasses to sit slightly raised from the surface so they read as an applique, not a flattened patch. Pin first and check both sides for symmetry.
— Nose (Small Triangle Applique) :
Round 1 :
Ch 6, sc in 2nd ch from hook and across (5)
Round 2 :
Turn, ch1, dec, sc in next st, dec (3)
Round 3 :
Turn, ch1, dec, sc in remaining st (2) — fasten off leaving long tail for sewing as triangle nose
Info :
Center the nose between the eye cups approximately on Round 14-15 and sew in place securely. The nose should point slightly downward as in the photo.
— Mouth / Smile Applique :
Info :
The mouth on the photographed pumpkin is a curved series of black appliqued 'teeth' and negative space. We'll create a long strip with scalloped teeth and curve it when sewing. Work in rows for a 3D effect.
Mouth Base Row 1 :
Ch 50, sc in 2nd ch from hook and across (49)
Mouth Row 2-3 :
Turn, ch1, sc across (49) — repeat for a third row if you want extra thickness
Mouth Teeth Row :
On the last row, make scallops to emulate teeth: *sc 3, skip 1, 5 sc in next st for tooth, skip 1* across to create alternating teeth clusters. Fasten off leaving a long tail for sewing.
Info :
When sewing the mouth, curve the strip to match the natural curve of the pumpkin. Pin heavily to check curvature and stitch along the top and bottom edges to secure. Gently pull slight gathers at the center bottom to mimic the carved look.
— Finishing Touches and Texture Detail :
Info :
Weave in all tails neatly. Add a few surface slip stitches around the join between stem and leaf for a neat collar look. If you want deeper segment grooves, use worsted embroidery yarn and a yarn needle to couch an extra line over each ridge.
Info :
To give the pumpkin a flatter bottom so it sits stably, add a small circular base inside the bottom: ch 2, 6 sc in magic ring, then 1 sc rounds until diameter is ~2.5-3 cm, fasten off and sew to the inside bottom. This will help prevent rolling and keep it upright for display.
Info :
Lightly brush the pumpkin with a soft tool or dampen with steam and reshape if needed to soften any hard bumps from stuffing. Allow to dry fully before display.
This playful pumpkin brings seasonal charm and a modern attitude to your decor — from a curled stem to cool sunglasses and cheeky grin. Each carefully stitched rib and applique comes together to create a character that's fun to make and display. 🧶🎃 Whether you give it as a gift or keep it on your desk, it's handmade happiness in every stitch. Happy crocheting and enjoy making it your own! ✨