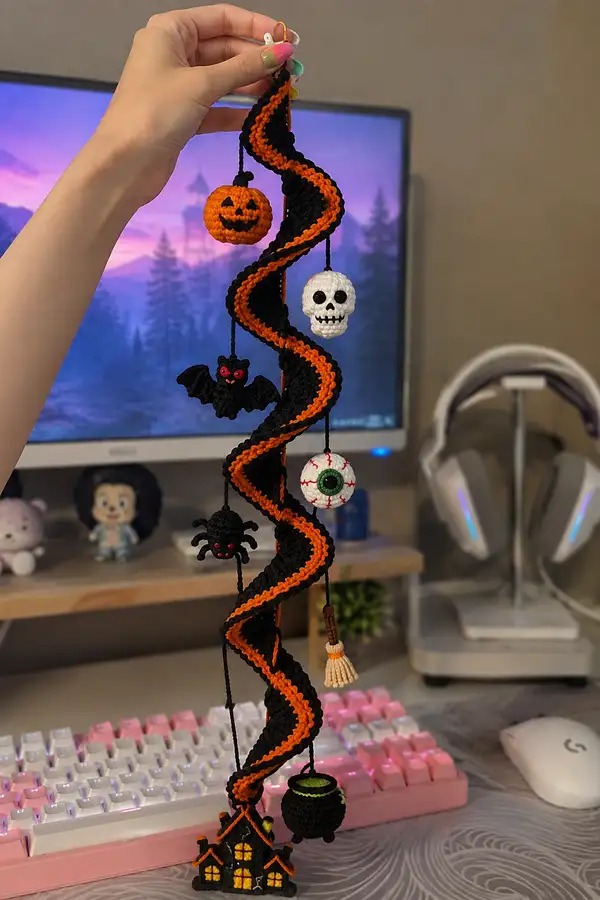
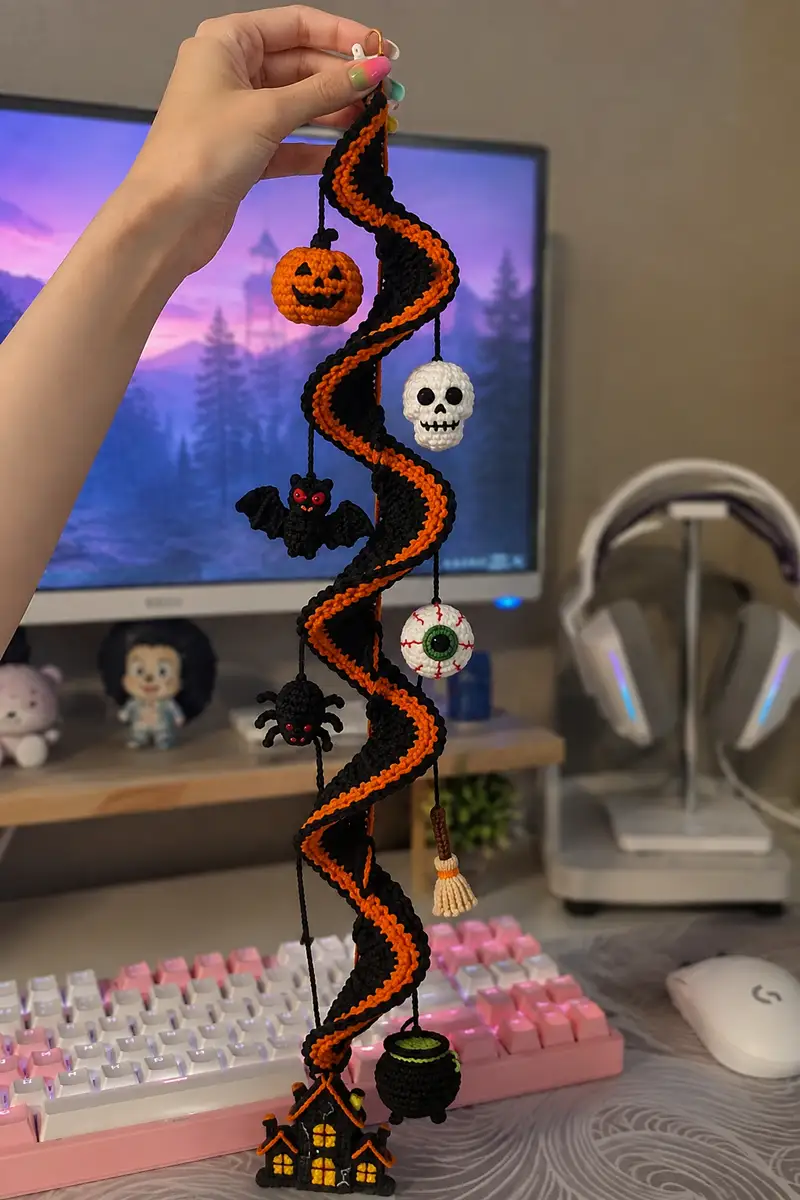
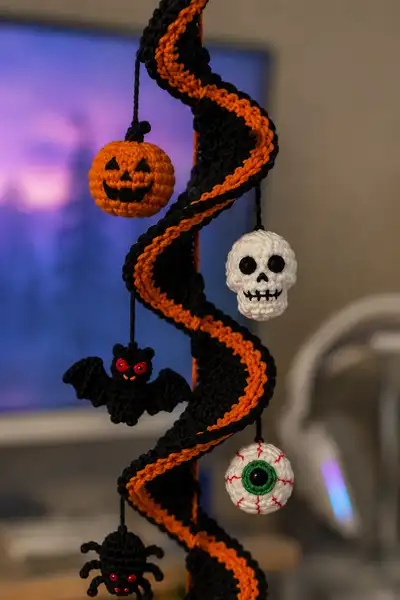
Create a spooky, swirled Halloween garland with dangling amigurumi charms — pumpkin, skull, bat, eyeball, spider, broom, cauldron and haunted house. This pattern features a long black spiral trim with an orange center stripe and multiple mini crocheted ornaments that hang at intervals. Perfect for mantel, doorways, or as a festive hanging mobile to celebrate the season with handmade charm.
Progress Tracker
0% Complete
— Spiral Ribbon (Main Structure) :
Info :
This spiral is worked as a long strip in the round (continuous rounds) that naturally twists into a spiral when blocked lightly and when a central cord is added. The strip is essentially a narrow tube worked around a central chain or cord to give body and allow the spiral to hold shape. Use black as the primary color and work an orange center stripe by alternating a short section of rounds in orange down the center of the tube. The strip below is worked at 30 sts per round to keep a consistent width; you can adjust the width by adding or removing chains in the foundation and maintaining multiples for the pattern repeats.
Round 1 :
Chain 30. Join with sl st to first ch to form a ring, taking care not to twist (30)
Round 2 :
1 sc in each ch around (30)
Round 3 :
1 sc in each st around (30)
Round 4 :
1 sc in each st around (30)
Info :
At the end of Round 4 you have established the base tube width. Going forward you will work continuous rounds in a spiral fashion; use a stitch marker to mark the first stitch of each round and move it up as you progress. To create the orange stripe, from Round 8 onward you will change color for the 6 center stitches of each round in alternating rounds (see Info entries before color-change rounds).
Round 5 :
1 sc in each st around (30)
Round 6 :
1 sc in each st around (30)
Round 7 :
1 sc in each st around (30)
Info :
Begin optional internal cord: place a length of heavy cotton cord or twisted scrap yarn through the center of your tube and anchor it at the top. This will give the spiral internal structure and something to sew charms onto if desired. You can also leave the tube empty to create a lighter, softer spiral.
Round 8 :
Change to Bright Orange for the center stripe: Sc 12 in black, sc 6 in orange, sc 12 in black (30)
Round 9 :
1 sc in each st around, maintaining color blocks. (30)
Round 10 :
1 sc in each st around (30)
Round 11 :
1 sc in each st around (30)
Info :
To emphasize the orange stripe you can work two consecutive rounds in orange for the 6 center stitches every 4 rounds (example: Rounds 8 and 12 both have orange center); this creates a bolder stripe without many ends to weave. Carry black yarn along the inside if you prefer to avoid too many ends.
Round 12 :
Sc 12 black, sc 6 orange, sc 12 black (30)
Round 13-16 :
1 sc in each st around (30)
Round 17 :
Increase slightly to shape the spiral curves: (4 sc, inc) x 5 = (25 + 5) 30 -> to add a subtle ruffle shift, work (4 sc, inc) x 6 (36)
Info :
Round 17 increases the width to help the strip curl into a spiral. The spiral shape forms when you alternate slight increases and even rounds; plan increases in 1-2 rounds every 12-16 rounds to encourage a flowing wave. If you prefer a tighter spiral, keep width at 30 sts and use fewer increases.
Round 18-21 :
1 sc in each st around (36)
Round 22 :
(5 sc, inc) x 6 (42)
Round 23-26 :
1 sc in each st around (42)
Info :
Work continuous rounds until your strip reaches the desired length. In the pictured sample the spiral strip is approximately 80-100 cm (32-40") long when relaxed; you can stop earlier for a shorter garland. Keep the orange center narrow (6-8 sts) and maintain the same location of the color blocks every round so the stripe reads clearly on the spiral.
Round 27-36 :
1 sc in each st around (42)
Round 37 :
(6 sc, inc) x 6 (48)
Round 38-48 :
1 sc in each st around (48)
Info :
If you are carrying yarn for color changes, occasionally run a tapestry needle inside the tube to reposition carried yarn to avoid bunching. If using many color changes, consider cutting and weaving ends as you go for neater results on the inside.
Round 49-60 :
1 sc in each st around (48). Continue working until your strip length is suitable to hang and to space charms comfortably (sample uses 58-62 rounds total for a long spiral).
Info :
Finish strip by leaving a 20-30cm tail of black yarn for attaching to hanging hardware at the top and for sewing down the starting edge. Optionally insert a thin wire along the internal cord now for a poseable spiral — wrap wire securely and crochet around it so no sharp ends are exposed.
— Pumpkin (Jack O' Lantern) :
Info :
Small round pumpkin with carved face embroidered in black. Use Bright Orange main color; work in the round as a sphere, then use contrasting black to embroider triangle eyes and a jack-o-lantern smile. Add a small black stem on top. Approx finished diameter: 3.5-4 cm (1.5")
Round 1 :
mr, 6 sc in mr (6)
Round 3 :
(1 sc, inc) x 6 (18)
Round 4 :
(2 sc, inc) x 6 (24)
Round 5 :
(3 sc, inc) x 6 (30)
Info :
Begin stuffing lightly after Round 6. Add more stuffing as sphere grows to keep shape even. For the pumpkin ridges, you will later embroider vertical lines using backstitch or chain stitch to suggest segments.
Round 6-9 :
1 sc in each st around (30)
Round 10 :
(3 sc, dec) x 6 (24)
Round 11 :
(2 sc, dec) x 6 (18)
Round 12 :
(1 sc, dec) x 6 (12)
Info :
Fasten off leaving long tail for sewing and closing. Stuff firmly but not overstuffed. Embroider eyes (two triangles), nose and carved mouth using black yarn and a yarn needle. Add a small stem: using black yarn, make a magic ring with 4 sc, 2 rounds total, then fasten off and sew to top center.
— Skull :
Info :
White skull with black sockets and stitched teeth. This skull is slightly elongated for a skull-like shape. Use white worsted yarn and embroider features with black. Attach as a hanging charm by a short black cord anchored in the top center.
Round 1 :
mr, 6 sc in mr (6)
Round 3 :
(1 sc, inc) x 6 (18)
Round 4 :
(2 sc, inc) x 6 (24)
Round 5 :
(3 sc, inc) x 6 (30)
Info :
Work rounds 6-12 to create a tall head: keep stitch count even for several rounds to allow vertical elongation. Place black safety eyes or embroider sockets between Rounds 7-8 about 6 stitches apart to achieve the pictured look. If using safety eyes, add them before stuffing is complete.
Round 6-12 :
1 sc in each st around (30)
Round 13 :
(3 sc, dec) x 6 (24)
Round 14 :
(2 sc, dec) x 6 (18)
Info :
Begin stuffing firmly to fill the skull but leave a little give to make sewing easier. Use polyester fill in small pinches to avoid lumps and ensure smooth shape for facial embroidery.
Round 15 :
(1 sc, dec) x 6 (12)
Round 17 :
Fasten off leaving a long tail for sewing. Attach a short length of black yarn at top by knot and use it to hang the skull on the spiral cord. Embroider eye sockets (small circles), a small triangular nose and a horizontal stitched mouth with vertical stitches for teeth with black yarn.
— Eyeball :
Info :
Round eyeball with white surface, green iris, black pupil and embroidered red veins. Use white for the main sphere and a 6mm black safety eye for the pupil for a glossy look; surround it with green yarn stitches for the iris. Approx diameter 3-3.5 cm.
Round 1 :
mr, 6 sc in mr (6)
Round 3 :
(1 sc, inc) x 6 (18)
Round 4 :
(2 sc, inc) x 6 (24)
Round 5 :
(3 sc, inc) x 6 (30)
Info :
Round 6-8 :
1 sc in each st around (30)
Round 9 :
(3 sc, dec) x 6 (24)
Round 10 :
(2 sc, dec) x 6 (18)
Round 11 :
Place 6mm black safety eye or embroider small black disc in center. Using green yarn, embroider a circular iris around the pupil by working surface slip-stitches or sewing an embroidered round with overlapping stitches. (18)
Info :
With a blunt-ended tapestry needle, embroider red veins in a few short stitches across the white surface. Stuff lightly before closing to keep eyeball perfectly round. Fasten off leaving a tail to make a hanging cord with a small braided loop.
Round 12 :
(1 sc, dec) x 6 (12)
Round 13 :
6 dec (6) — FO and leave long tail for hanging
— Bat (Make 2 Bodies; Make 2 Wings) :
Info :
Small bat composed of a round body/head (combined), two ears, two small sewn-on wings. Work body in black; eyes are small red beads or embroidered red French knots. Wings are worked flat and sewn to body seams. Finished wingspan approx 5-6 cm.
Body Round 1 :
mr, 6 sc in mr (6)
Body Round 3 :
(1 sc, inc) x 6 (18)
Body Round 4-7 :
1 sc in each st around (18)
Info :
Place tiny red safety eyes or sew red beads between Rounds 4-5, about 4-5 stitches apart. If using safety eyes, secure them before stuffing. Stuff lightly to make a plump little body.
Body Round 8 :
(1 sc, dec) x 6 (12)
Body Round 9 :
6 dec (6) - FO leaving long tail for sewing to wings. Add two small ears made by 4 sc in a magic ring, 2 rounds, then sew atop the head.
Wing (Make 2) Round 1 :
Ch 8, sc in 2nd ch from hook across (7). Turn to work in rows to shape wing scallop.
Wing Row 2 :
Ch 1, sc across (7)
Wing Row 3 :
Ch 1, (sc2tog, sc, sc2tog) — create scallop curve (5)
Wing Row 4 :
Ch 1, sc across (5) — FO leaving tail for sewing
Info :
Sew wings to the sides of the body aligning the top of the wing with the body seam and slightly flaring downwards. Use small stitches and hide the tails inside the body. Embroider small orange mouth or nose if desired.
— Spider :
Info :
Small round spider body with 8 short legs made from chained loops or short i-cord. Eyes are two red beads sewn on the front. Body diameter about 2.5-3 cm.
Round 1 :
mr, 6 sc in mr (6)
Round 3 :
(1 sc, inc) x 6 (18)
Round 4-5 :
1 sc in each st around (18)
Round 6 :
(1 sc, dec) x 6 (12)
Round 7 :
6 dec (6) — FO leaving a long tail for hanging and for attaching legs
Info :
Create 8 legs by making 8 short chains of 6 ch each; if you prefer a sturdier look, make short i-cords or crochet tubes. Sew legs evenly spaced around the body base, four pairs across from each other. Add two red bead eyes and secure with knots and a dab of fabric glue if desired.
— Broom :
Info :
Mini broom composed of a brown handle and a tassel head worked in tan/beige. Use a small tight hook for neat tassels. Approx length 4-5 cm.
Round 1 (Handle) :
ch 2, 6 sc in 2nd ch from hook (6)
Round 2-6 :
1 sc in each st around (6) — FO leaving long tail to create handle cord. Stuff lightly if desired.
Info :
For the broom head, make a bunch of short tassels: cut 10-12 pieces of tan yarn about 5 cm long, fold in half and attach under a small ring of brown yarn (approx 6 sc loop) using a lark's head knot. Trim evenly to shape. Wrap a short brown yarn around the top of tassels to secure and sew to the handle bottom.
— Cauldron :
Info :
Small black cauldron with a green rim and a slight rounded belly. Fill interior with light stuffing to hold shape and embroider green 'potion' rim. Attach to spiral with black cord from top.
Round 1 :
mr, 6 sc in mr (6)
Round 3 :
(1 sc, inc) x 6 (18)
Round 4 :
(2 sc, inc) x 6 (24)
Round 5-7 :
1 sc in each st around (24)
Info :
Switch to green yarn for the rim: work 1 round of sc in green around the top edge (24). Fold the last round inward slightly and whipstitch to form a visible rim. Leave an opening or fasten off leaving tail to sew onto spiral cord.
Round 8 :
With green, 1 sc in each st around (24) — FO and leave tail for attaching
— Haunted House Base :
Info :
This is a whimsical tiny haunted house base used to anchor the bottom of the spiral. Make a flat base rectangle, then add small roof and windows in contrasting yarns. Approx finished height 4-5 cm with base width ~4 cm.
Round 1 (Base Row 1) :
Ch 12. Sc in 2nd ch from hook and across (11)
Round 2 :
Ch 1, turn. Sc across (11)
Round 3 :
Ch 1, sc across (11)
Info :
Work 6 rows to create a flat base, then fold in half and single crochet seams along the sides to create a small house box. Add a roof by working triangular pieces and sewing them on. Embroider windows and door with yellow yarn for glowing windows.
Round 4-6 :
Ch 1, sc across (11) — After R6 fold and seam edges
Roof Triangle :
Ch 2; 3 sc in 2nd ch (3), ch1 turn; (inc, sc) across to create triangular shape; repeat until triangle reaches house width. Sew to top of house.
Info :
Embroider windows and tiny panes using yellow yarn: cross-stitch small squares in center panels. Sew the house to the bottom tip of the spiral securely so it anchors the weight of the entire garland.
— Assembly Prep & Hanging Cords :
Info :
Create hanging cords for each charm by using the long tail left after finishing each charm. Braid or twist 8-12 strands to make a strong cord about 8-12 cm long depending on placement and desired drop. Alternatively, make a short i-cord by crocheting a tight chain tube. Secure cords at top of charm by stitching through the top center stitches and knotting inside the charm for strength.
Round 1 :
Plan charm spacing: measure spiral length and mark positions along the inside edge or central cord every 8-12 cm. These marks are where you will sew the hanging cords. The photographed sample uses 7 charms spaced along the spiral.
Round 2 :
Attach charms by placing the ending knot of the hanging cord through the center of the spiral tube or by sewing the hanging cord to the inner cord of the spiral then wrapping and securing with a few extra stitches from the outside for stability.
Info :
To ensure the spiral holds shape, stitch the bottom seam of the strip closed and sew the base house securely. If using a wire core, bend and position it before finishing the top loop for hanging. Use a metal keyring or wooden bead at the top for an attractive hang point.
Finishing :
Weave in all ends. Block lightly by holding the spiral in shape and pinning briefly (do not wet if using acrylic yarn). Hang and check balance; move charm placements slightly if needed to ensure a pleasing drape.
This spooky garland transforms a simple strip of crochet into a playful Halloween display full of personality. Each charm adds character — from the grinning pumpkin to the glowing-eyed bat — and the contrasting black-and-orange spiral ties everything together. It’s a fun, satisfying project that makes an instant seasonal accent for your home. 🧶🎃✨ Hang it proudly and enjoy the smiles it brings! 👻