🧢 Beautiful ✨ Detailed πŸ’ Adorable

Spooky Phantom Amigurumi Pattern

Spooky Phantom Amigurumi Pattern
4.0β˜… Rating
3-5 Hours Time Needed
2.6K Made This
βœ‚οΈ

Beginner Friendly Level

Perfect for those just starting their crochet journey, with clear instructions and simple techniques

⏱️

Afternoon Project

Takes 3-5 hours, perfect for an afternoon or evening of relaxing crochet.

🧸

Cute Companion

An adorable friend to cherish, handcrafted with love to bring comfort and joy for years to come.

About This Spooky Phantom Amigurumi Pattern

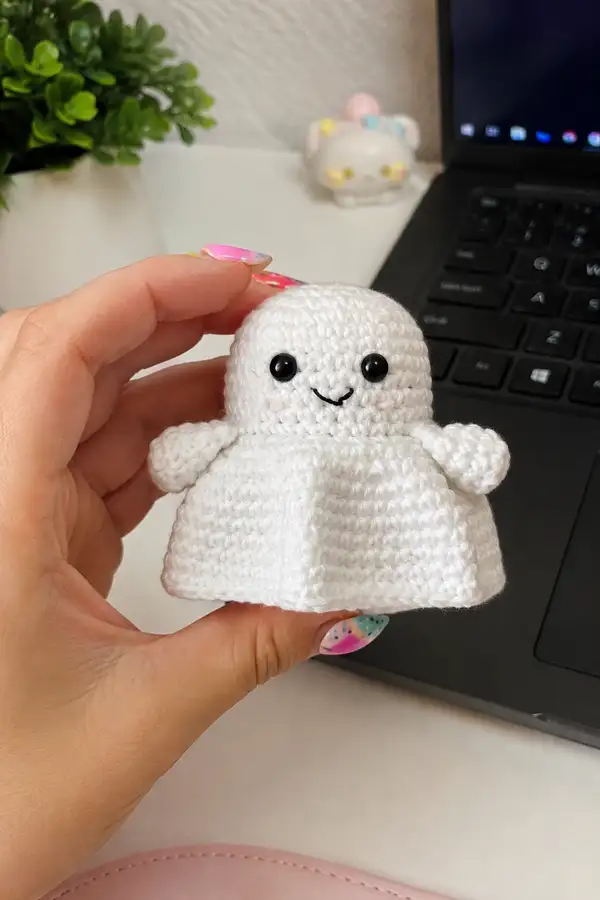
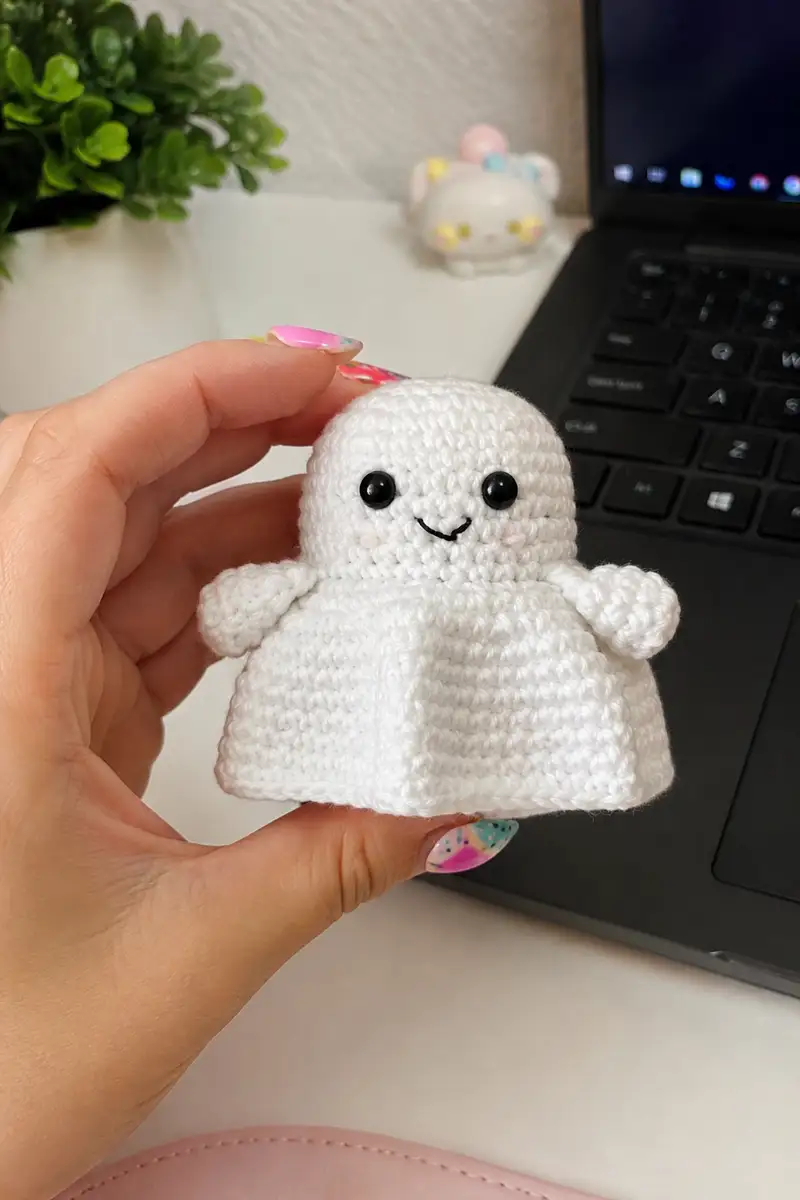
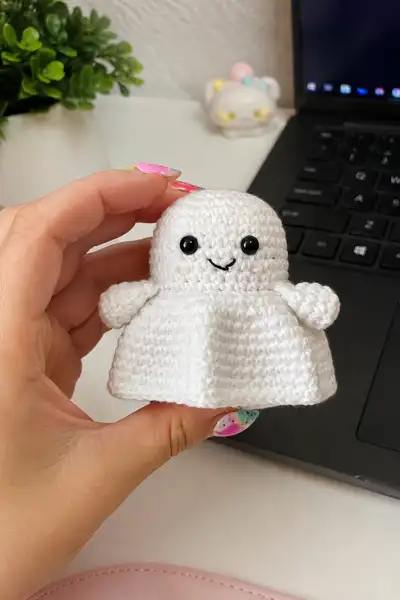
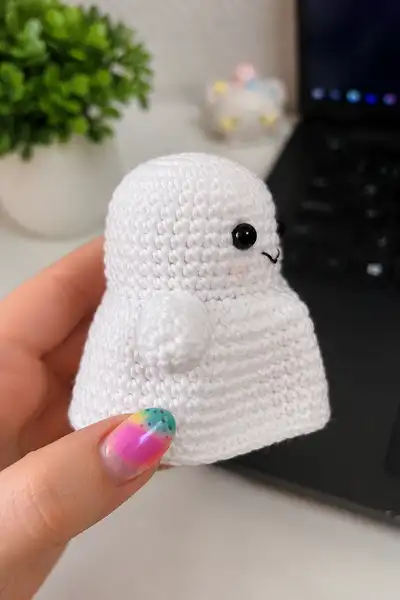
This pattern recreates the tiny spooky phantom shown: a white, rounded head flowing into a softly flared skirt, with little stub arms, black safety eyes and a stitched smile. The ghost measures palm-sized and uses simple rounds and increases to create a smooth dome and bell-shaped body. The final look is charmingly minimal - a soft, kawaii ghost that's quick to make and delightful to gift.

Spooky Phantom Amigurumi Pattern crochet pattern - detailed view of completed project

The pattern focuses on even tension and consistent stitch counts so the skirt flares uniformly and the head sits smoothly above it. Small, clear Info sections guide you through eye placement, stuffing, and neat assembly for a professional finish.

Why You'll Love This Spooky Phantom Amigurumi Pattern

I love this pattern because it captures personality in a few simple shapes β€” the round head, the gentle skirt pleats and tiny arms make a whimsical little friend. I especially enjoy how quick it is to make yet how polished the finished piece looks when tension is consistent and eyes are positioned carefully. This phantom looks great in groups or peeking from a shelf during spooky season!

Spooky Phantom Amigurumi Pattern step 1 - construction progress Spooky Phantom Amigurumi Pattern step 2 - assembly progress Spooky Phantom Amigurumi Pattern step 3 - details and accessories Spooky Phantom Amigurumi Pattern step 4 - final assembly and finishing

Switch Things Up

I absolutely loved designing this pattern because it offers so many opportunities for creative customization while maintaining a structure that's fun and manageable to crochet. The simple dome head and flared skirt are forgiving shapes that adapt easily to different yarns and hooks.

What I find most exciting is how you can personalize the phantom with tiny details: change eye size, embroider expressions, add little bows or a mini hat, or work the skirt longer for a dramatic flare. Try using sport weight yarn and a smaller hook to make a micro-ghost, or bulky yarn with larger hooks for a plush oversized friend.

I also like experimenting with subtle texture: work a few rounds in BLO to define a hem or add a decorative stitch row for a scalloped effect. This pattern is a great canvas for making the ghost truly your own.

Common Mistakes & How to Fix Them

βœ— Skipping stitch markers at round starts can cause misaligned features and uneven shaping; always mark your first stitch of each round βœ— Inconsistent tension between rounds creates lumpy or uneven surfaces; practice maintaining steady, even tension throughout the entire project βœ— Not stuffing gradually as you work causes difficulty reaching inside later; stuff sections as you complete them for best results βœ— Placing eyes too close to the seam or too high changes expression; place safety eyes between recommended rounds and test before securing βœ— Using too large a hook with amigurumi yarn causes stuffing to show through; choose a hook slightly smaller than the yarn label to create tight fabric βœ— Forgetting to fasten off and weave tails securely can lead to unraveling; leave long tails for sewing and weave back through several stitches βœ— Not counting stitches each round makes increases/decreases inconsistent; recount at the end of every round for accuracy

Spooky Phantom Amigurumi Pattern

Make a tiny, cuddly phantom amigurumi with a soft dome head, flared ghostly skirt and tiny stubby arms. This whimsical little ghost features shiny safety eyes and an embroidered smile for maximum charm. Perfect as a seasonal decoration, desk buddy, or a pocket pal to carry a touch of Halloween cuteness year-round. Clear step-by-step instructions are included for a neat, even finish.

Beginner Friendly 3-5 Hours

Materials Needed for Spooky Phantom Amigurumi Pattern

β€” Main Fabric

  • 01
    Worsted weight yarn (#4), approximately 60-80g in main color (White for phantom body)
  • 02
    10-15g in black or dark color for small details such as embroidered mouth
  • 03
    Small amount (5-10g) in pale pink for optional blush or cheek detail

β€” Tools Required

  • 01
    3.25mm (D) crochet hook for main work
  • 02
    2.75mm (C) hook for tighter details or optional smaller variations
  • 03
    Safety eyes 8mm (recommended) - two pairs (choose size 8mm for palm-sized toy)
  • 04
    Polyester fiberfill stuffing
  • 05
    Yarn needle for sewing and embroidery
  • 06
    Stitch markers (at least 3-4)
  • 07
    Scissors
  • 08
    Pins for assembly
  • 09
    Optional: small piece of felt to back eyes if desired
  • 10
    Optional: fabric glue for extra security with safety eyes (use sparingly)

Progress Tracker

0% Complete

β€” Notes & Gauge :

Info :

Gauge is not crucial for amigurumi but the sample measures approximately 9-10 cm (3.5-4 in) tall when worked with worsted weight yarn and a 3.25mm hook. Work tightly so stuffing does not show. Use a stitch marker to mark the first stitch of each round.

β€” Head :

Round 1 :

6 sc in magic ring (6)

Round 2 :

6 inc (12)

Round 3 :

(1 sc, 1 inc) x 6 (18)

Round 4 :

(2 sc, 1 inc) x 6 (24)

Round 5 :

(3 sc, 1 inc) x 6 (30)

Round 6 :

(4 sc, 1 inc) x 6 (36)

Round 7 :

(5 sc, 1 inc) x 6 (42)

Round 8 :

(6 sc, 1 inc) x 6 (48)

Round 9 :

1 sc in each st (48)

Round 10 :

1 sc in each st (48)

Round 11 :

1 sc in each st (48)

Round 12 :

1 sc in each st (48)

Round 13 :

1 sc in each st (48)

Info :

Place safety eyes between rounds 12-13 approximately 8-10 stitches apart depending on desired spacing. On this sample use 8-9 stitches apart for a wide, cute look. Mark the eye placement on round 13 with pins if desired before securing.

Round 14 :

1 sc in each st (48)

Round 15 :

(6 sc, 1 dec) x 6 (42)

Round 16 :

(5 sc, 1 dec) x 6 (36)

Info :

Begin stuffing the head lightly now to avoid lumps. Use small amounts of fiberfill and evenly distribute to keep a smooth dome. Do not overstuff β€” the head should be soft but hold shape.

Round 17 :

(4 sc, 1 dec) x 6 (30)

Round 18 :

(3 sc, 1 dec) x 6 (24)

Round 19 :

(2 sc, 1 dec) x 6 (18)

Round 20 :

(1 sc, 1 dec) x 6 (12)

Round 21 :

6 dec (6)

Info :

Fasten off leaving a long tail (approx 20-25 cm) for sewing. Finish stuffing through the small opening so the head is nicely rounded. Weave tail through remaining stitches to close, then run the tail out leaving enough to seam to the body opening. Set head aside.

β€” Body (Skirt) :

Info :

The skirt is worked from the top (neck opening) downward to create a bell-shaped flared base. You can work the body as a separate piece and then seam to the head. We recommend starting with a magic ring and increasing to a comfortable circumference; the pattern below builds a 60-stitch skirt with gentle pleats.

Round 1 :

6 sc in magic ring (6)

Round 2 :

6 inc (12)

Round 3 :

(1 sc, 1 inc) x 6 (18)

Round 4 :

(2 sc, 1 inc) x 6 (24)

Round 5 :

(3 sc, 1 inc) x 6 (30)

Round 6 :

(4 sc, 1 inc) x 6 (36)

Round 7 :

(5 sc, 1 inc) x 6 (42)

Round 8 :

(6 sc, 1 inc) x 6 (48)

Round 9 :

(7 sc, 1 inc) x 6 (54)

Round 10 :

(8 sc, 1 inc) x 6 (60)

Round 11 :

1 sc in each st (60)

Round 12 :

1 sc in each st (60)

Info :

Try the head opening against the top of the skirt at this stage. The neck of the head should fit into the top of the skirt with only a small seam. If the opening is too small, undo last round and increase once more evenly; if too large, decrease slightly when seaming.

Round 13 :

1 sc in each st (60)

Round 14 :

1 sc in each st (60)

Round 15 :

1 sc in each st (60)

Round 16 :

1 sc in each st (60)

Info :

Creating pleats:

To form the soft ridged pleats visible on the skirt, you will work occasional increase rounds spaced evenly around the round. The pattern below adds a small increase every 10-12 stitches to make 6 subtle pleats. Work increases symmetrically so pleats line up as you continue.

Round 17 :

(9 sc, 1 inc) x 6 (66)

Round 18 :

1 sc in each st (66)

Round 19 :

1 sc in each st (66)

Round 20 :

(10 sc, 1 inc) x 6 (72)

Round 21 :

1 sc in each st (72)

Round 22 :

1 sc in each st (72)

Info :

If you prefer a slightly stiffer skirt edge, work the next 2 rounds in BLO. This creates a subtle ridge that helps the skirt keep its shape and mimics the structured edge seen in the photo.

Round 23 :

1 sc in each st BLO (72)

Round 24 :

1 sc in each st BLO (72)

Round 25 :

1 sc in each st (72)

Round 26 :

1 sc in each st (72)

Round 27 :

(11 sc, 1 inc) x 6 (78)

Round 28 :

1 sc in each st (78)

Round 29 :

1 sc in each st (78)

Info :

At this stage the skirt edge is becoming wider. Decide how long you want the flared skirt to be. The sample shown has a relatively short skirt. Continue even rounds for more height or add further increase rounds every 6-8 rounds to increase flare.

Round 30 :

1 sc in each st (78)

Round 31 :

1 sc in each st (78)

Round 32 :

1 sc in each st (78)

Round 33 :

(12 sc, 1 inc) x 6 (84)

Round 34 :

1 sc in each st (84)

Round 35 :

1 sc in each st (84)

Info :

Optional: To create a gently rippled hem like the photo, you can alternate a round of increases with a few rounds of even stitching. This will create the soft wave and vertical ridges visible in the sample.

Round 36 :

(13 sc, 1 inc) x 6 (90)

Round 37 :

1 sc in each st (90)

Round 38 :

1 sc in each st (90)

Round 39 :

1 sc in each st (90)

Round 40 :

(14 sc, 1 inc) x 6 (96)

Round 41 :

1 sc in each st (96)

Round 42 :

1 sc in each st (96)

Info :

Measure skirt width by placing the head inside the opening. If the neck edge looks too open compared to the head base, you can decrease 6-12 stitches evenly around the topmost round before seaming to the head. The sample used 96 stitches and gathered slightly during seaming to create a snug neck fit.

Round 43 :

1 sc in each st (96)

Round 44 :

1 sc in each st (96)

Round 45 :

1 sc in each st (96)

Round 46 :

1 sc in each st (96)

Round 47 :

1 sc in each st (96)

Round 48 :

Fasten off leaving long tail for sewing. Weave tail through top round to slightly gather if necessary and prepare for seaming to head. Do not stuff the skirt β€” the ghost skirt is unstuffed and forms a soft bell.

β€” Arms (Make 2) :

Info :

Arms are small nub-like tubes attached near the top of the skirt/head seam. Make two identical arms. Work tightly and stuff lightly so they keep a rounded puff.

Round 1 :

6 sc in magic ring (6)

Round 2 :

6 inc (12)

Round 3 :

1 sc in each st (12)

Round 4 :

1 sc in each st (12)

Round 5 :

(2 sc, 1 dec) x 3 (9)

Round 6 :

1 sc in each st (9)

Info :

Stuff the arm lightly. The arms should be firm but not overstuffed; they are tiny and should look plump when attached. Leave a long tail for sewing (approx 15-20 cm).

Round 7 :

(1 sc, 1 dec) x 3 (6)

Round 8 :

1 sc in each st (6)

Round 9 :

1 sc in each st (6)

Round 10 :

Fasten off leaving long tail for sewing. Repeat to make second arm.

β€” Facial Embroidery & Details :

Info :

Use black yarn or embroidery thread and a yarn needle to stitch the mouth. The sample uses a small 'smile' approximately one stitch wide in the center between the eyes, worked with simple backstitch. Light pink chalk or blush can add soft cheeks under the eyes β€” dab lightly and seal with textile medium if desired.

Round 1 :

Place safety eyes securely (if using) and add small felt backing or glue for extra security. If embroidering eyes, use concentric satin stitch for small round eyes and add a small white highlight if desired.

Info :

When embroidering the mouth, pass the needle through from the back to the front to keep stitching tidy. Secure tails inside the head with a few tight stitches and weave in ends.

β€” Assembly :

Info :

Block the skirt lightly by pinning the hem to a flat surface and steam pressing from above (do not touch yarn with iron). This will help the skirt flare neatly for seaming.

Round 1 :

Seat the head into the top of the skirt opening to check alignment. Mark four cardinal points to guide seaming and ensure the face is centered before sewing.

Info :

Sew the head to the body using a mattress or whip stitch. Use the long tail from the head and topmost round of the skirt; pick up matching stitches around the neck and work evenly so the seam is smooth and the skirt hangs symmetrically.

Round 2 :

Attach arms at the side seam approximately 6-8 stitches below the head seam. Use your marked points to place arms level and mirror-symmetric. Sew through both arm base and body stitches several times for security.

Info :

Weave in all ends through several internal stitches and trim close to fabric. For extra durability, you can tie a small knot and stitch over it. If using safety eyes, ensure washers are firmly attached behind the eye while the head is not overstuffed to allow the washer to seat properly.

β€” Finishing Touches :

Info :

Apply a faint blush under the eyes with a cotton swab and a tiny amount of pink craft chalk if desired. Seal gently with fabric spray to help it stay. Optional: Add a tiny bow or accessory to one side of the head using scrap yarn or felt for personalization.

Round 1 :

Inspect the finished piece, smoothing any lumps and adjusting stuffing through the seam if necessary. Your spooky phantom is ready to display or to give as a sweet, slightly spooky gift!

Assembly Instructions

  • Attach head to body by inserting the neck portion into the body opening. Pin in place first, then sew securely using a whip stitch all around, keeping stitches even and firm to create a smooth neck seam.
  • Position eyes between rounds 12-14 of the head, approximately 8-9 stitches apart. Secure the safety eyes, add washers and check placement before permanently fastening the tail ends.
  • Attach arms at sides by aligning the arm base to the seam area 6-8 stitches below the head seam. Sew through both arm and body stitches using the long tail, making several passes for stability.
  • If the skirt hem is uneven, pin it flat and use steam blocking (or damp cloth method) to flare and even the hem before final assembly.
  • Weave all loose ends into the interior of the body, then trim close to the fabric to avoid visible tails. Double-check seams for gaps and reinforcing stitches.
  • Embroider a small smile under the eyes with black yarn using a backstitch. Keep the length of the stitch short and tidy to match the sample expression.

Important Notes

  • πŸ’‘Use stitch markers consistently at the beginning of each round to avoid counting errors and maintain proper shaping
  • πŸ’‘Stuff body parts gradually as you work rather than waiting until the end, especially for narrow openings like arms and neck
  • πŸ’‘For safety eyes, position and secure before stuffing head fully - they cannot be repositioned once locked in place
  • πŸ’‘Maintain consistent tension throughout the project; too tight creates stiff, small pieces, too loose creates floppy, holey fabric
  • πŸ’‘When sewing pieces together, use yarn slightly thinner than working yarn for neater, less visible seams
  • πŸ’‘Pin all pieces in position before final sewing to ensure proper placement and symmetry
  • πŸ’‘Work tightly enough that stuffing doesn't show through stitches; adjust hook size if necessary
  • πŸ’‘If you wish to make the phantom washable, use washable-safe glue for eyes (if using glue) and securely weave and knot sewn ends

This tiny phantom amigurumi brings classic Halloween charm in a compact, cuddly form. Each round of stitching builds a soft, neat dome and a gently flared skirt that looks delightful on shelves and desks. The small details β€” shiny eyes, stitched smile, and stubby arms β€” give this ghost sweet personality. πŸ§ΆπŸ’« Make a whole family of ghosts in different sizes and colors for a charming display. Happy stitching and enjoy sharing your spooky, handmade friend! πŸ‘»

You ask,

we answer.

FAQs

What is the finished size of this amigurumi?

Based on the specified materials and hook size, the finished piece will measure approximately 9-10 cm (3.5-4 in) in height. Using different yarn weights or a larger hook will proportionally change the final size.

Can I use different yarn weights for this pattern?

Yes! You can use any yarn weight, but remember to adjust your hook size accordingly (generally 1-2 sizes smaller than yarn recommendation for tight amigurumi fabric). Different weights will change the final size proportionally and may require adjusting increases to maintain proportions.

Do I need to use safety eyes or can I embroider them?

Both options work beautifully! Safety eyes give a professional look and are very secure, perfect for gifts. Embroidered eyes are ideal for toys for small children (no small parts) and allow more expression customization.

How much stuffing will I need?

For this size project, approximately 20-40 grams of polyester fiberfill should be sufficient. Stuff the head firmly but not overly tight, and only lightly stuff the arms (the skirt is left unstuffed).

Can I make the arms poseable?

Because the arms are tiny, adding wire is not recommended unless using thicker yarn and a larger arm core. For poseable limbs in larger versions, insert floral wire or pipe cleaners before stuffing, fold ends and wrap with yarn to avoid sharp edges.

What if my stitch count is off?

If you notice a counting error, it's best to unravel back to where the count was correct. Trying to compensate later often creates visible distortions. Using a stitch marker at round starts and counting at the end of each round helps prevent errors.

How do I prevent holes when stuffing?

Work with tight, consistent tension and use a hook slightly smaller than the yarn recommendation. When stuffing, add small amounts at a time and distribute evenly rather than pushing in large clumps.

Can I customize colors and details?

Definitely! Swap the white body for pastel shades, add a tiny hat, bow, or embroider patterns on the skirt. You can also adjust skirt length by adding or reducing even rounds or increase rounds for different flares.