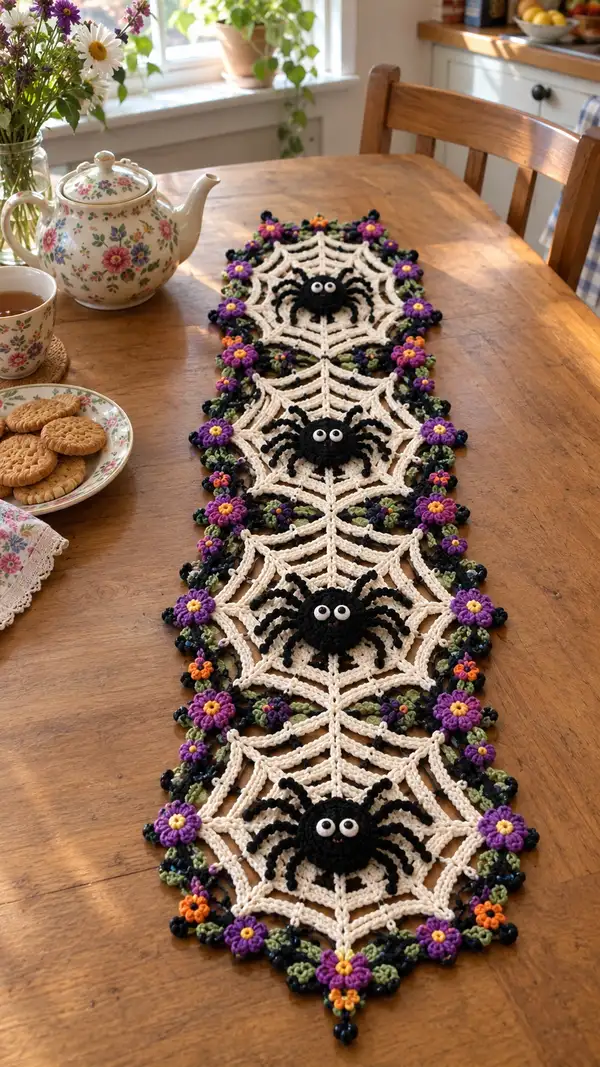
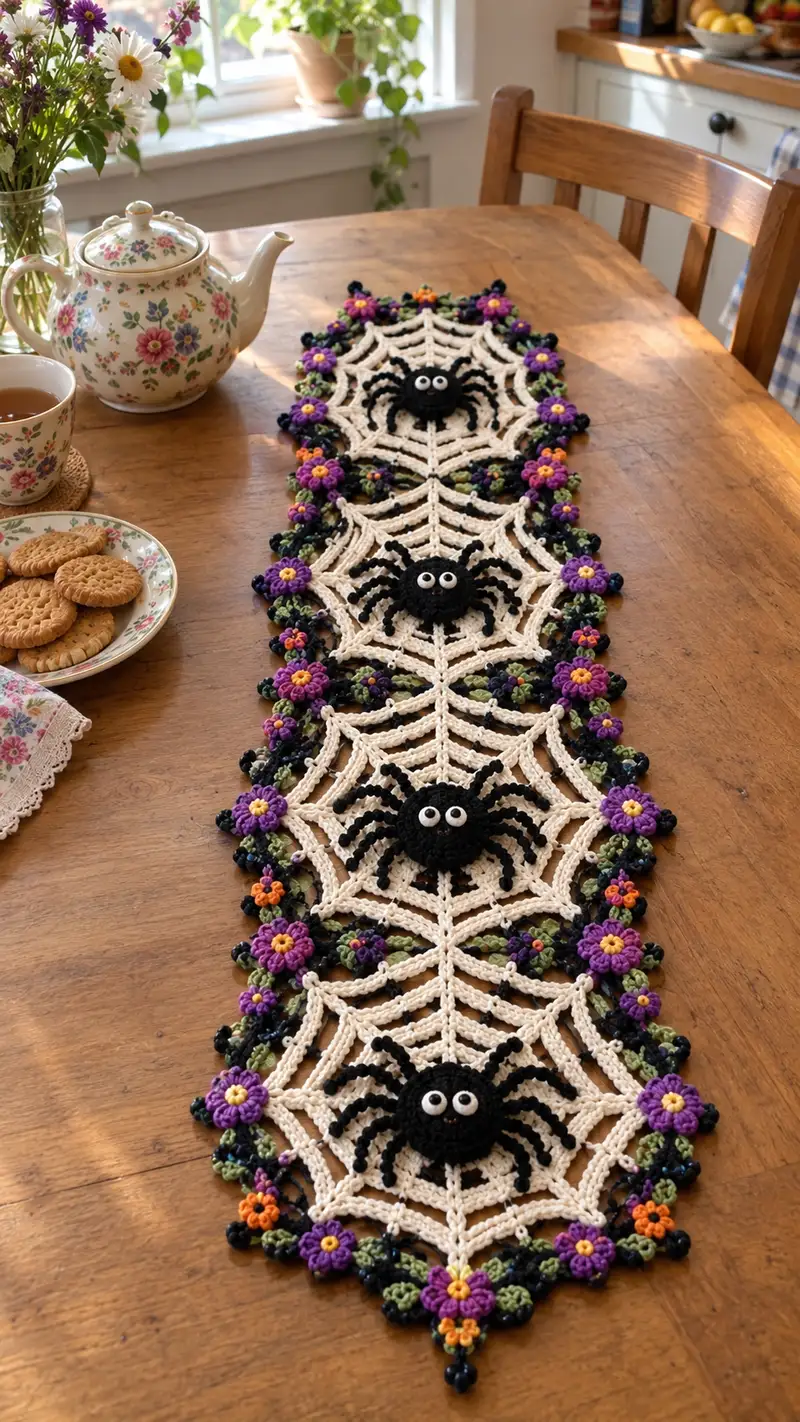
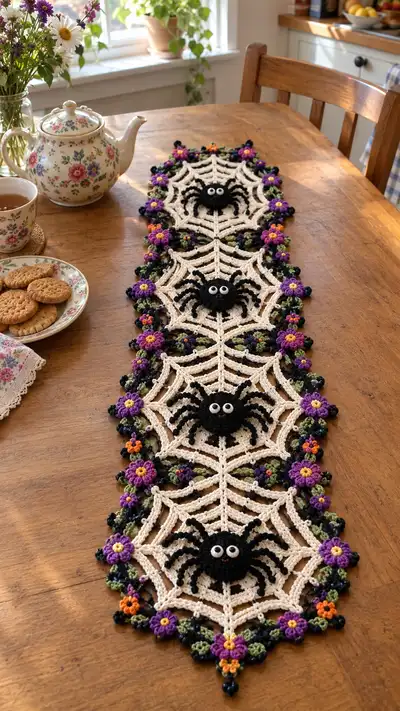
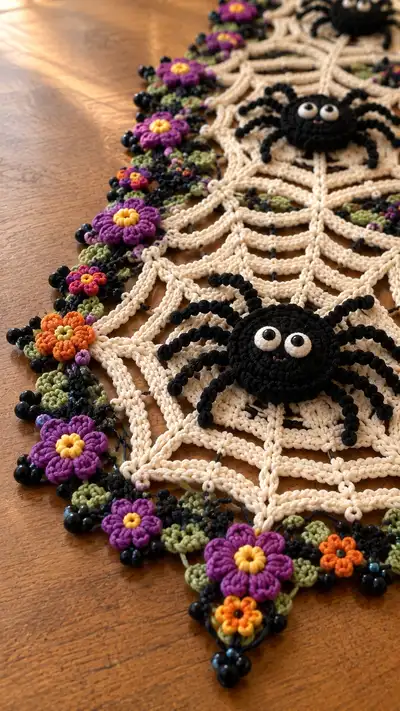
A charming Halloween table runner featuring three lacy spiderweb motifs connected in a long runner, each with a plump crocheted spider, beaded fringe and a colourful floral edge. Made in warm cream for the webs, deep black spiders, and accent florals in purple, orange and olive green. Decorative beads add a glossy finish while the delicate picot-style edges create a handcrafted heirloom look. Perfect for dressing a kitchen table or a mantel for the season.
Progress Tracker
0% Complete
— Notes & Overview :
Info :
This pattern is built from three identical spiderweb motifs joined in sequence, with three small stuffed spider bodies attached on top of each web, and a floral and beaded scalloped edging worked around the runner. Work each motif flat in rounds and join motifs using a join-as-you-go technique described later. Work with worsted cotton for a crisp lace effect. Use a smaller hook for spiders and flower details if you prefer tighter stitches.
Info :
To make a full runner: make 3 web motifs, 3 spider bodies, 24 spider legs (8 per spider), 36 large flowers (12 clusters repeated around), 48 small flowers, 36 leaves, plus beaded fringe elements as described. The pattern below gives full round-by-round instructions for each visible component.
— Web Motif (Make 3, each motif ~22 rounds) :
Round 1 :
mr, 6 sc into ring (6)
Round 2 :
Inc in each st around (12)
Round 3 :
(1 sc, inc) x6 (18)
Round 4 :
(2 sc, inc) x6 (24)
Round 5 :
(3 sc, inc) x6 (30)
Info :
These first 5 rounds build a small solid disc center to anchor the spokes. Keep tension even to create a flat centre.
Round 6 :
Ch6 (counts as tr+ch3), *tr in next st, ch3; rep from * around to create 6 spokes, sl st to top of starting ch (6 spokes)
Info :
The ch3 spaces between trebles become the central spokes of the web. Place a stitch marker in the top of each spoke for future reference.
Round 7 :
Join in ch-sp between spokes: *sl st into ch3 sp, ch5, sc into base of next spoke (the next tr), ch5; rep from * around, sl st to join (6 large loop pairs, 30 chs counted)
Round 8 :
In each ch5 loop: (sc, hdc, 3 dc, hdc, sc) making a scallop that will form the first ring of webbing. Work this shell into each ch5 loop around (6 shells)
Info :
Work shells consistently; these shells create points at the outside of the small web center. Keep shells in the loops formed previously — they set the spacing for later rounds.
Round 9 :
Ch3, dc in top of next shell center, ch5, sk to next shell center, dc in next shell center; rep to build connecting chains between shells producing 6 chain-bridges and 6 dc anchor points
Round 10 :
Build the first full web ring: into each chain-bridge [sl st, ch7, sl st] with sl st anchors into dc points to create 6 larger loops (6 loops)
Round 11 :
Into each large loop: *(sc, ch3) x6, join with sl st to create 6 small loops within each large loop; rep around (36 small loops)
Info :
At this stage you have the core spokes and first two rings of webbing. Use stitch markers in every 6th small loop to maintain symmetry for later joining and spider placement.
Round 12 :
Work radial web lines: Attach yarn at the center of a spoke, ch12, sl st to the ch of the opposite spoke forming the first long arch; repeat for each of 6 spokes to mirror a star pattern (6 long chained arches)
Round 13 :
Reinforce arches with sc: Into each ch12 arch work (sc in every 3rd ch) to create a raised cord effect — about 4 sc per arch depending on tension (approx. 24 sc total)
Round 14 :
Ch7 along each radial arch between spokes, sl st to next anchor to add secondary loops (6 per ring, forming more web lines)
Round 15 :
Into each ch7 loop: work (sc, hdc, 3 dc, hdc, sc) to make larger outer shells (6 shells)
Info :
These shells and loops define the octagonal (or hexagonal depending on tension) outline of each motif. Keep an eye on uniformity so joining later is neat.
Round 16 :
Ch5 between outer shells and sl st to next shell base to create 6 chain segments around (this spaces the web edge)
Round 17 :
Into each ch5: work (sc, ch3, sc) to create small picot-like loops around edge (12 loops)
Round 18 :
Work a final anchoring round: 1 sc in each st and in each picot loop around to even out edges (counts vary by tension; expect around 60–72 sc)
Round 19 :
Optional decorative outer cord: *ch8, sl st into next sc to create chain scallops around; rep around and fasten off leaving long tail for joining (approx. 12 chain scallops)
Info :
Block this motif flat now using pins and steam or wet block to get an even shape. Repeat to make three identical motifs before joining.
— Spider Body (Make 3; roughly 10 rounds each) :
Round 1 :
With black yarn: mr, 6 sc in ring (6)
Round 2 :
Inc in each st (12)
Round 3 :
(1 sc, inc) x6 (18)
Round 4 :
(2 sc, inc) x6 (24)
Round 5 :
1 sc in each st around (24)
Info :
These rounds form a neat flat disc that will sit on top of the web. Keep stitches tight and even so the disc sits flat. We will make spider legs separately and attach later.
Round 6 :
(3 sc, inc) x6 (30)
Round 7 :
1 sc in each st around (30)
Round 8 :
(3 sc, dec) x6 (24)
Round 9 :
(2 sc, dec) x6 (18)
Round 10 :
(1 sc, dec) x6 (12)
Info :
Stuff barely — a thin flat pad is ideal so the spider sits slightly raised without rounding too much. Finish stuffing lightly before closing, and fasten off leaving long tail for sewing to the web motif.
— Spider Eyes & Embroidery :
Round 1 :
With white yarn, mr, 6 sc in ring (6)
Round 2 :
Inc in each st (12); fasten off leaving tail to sew onto the black body
Info :
Sew two white eye discs to the top of the black spider body, add two tiny black beads or french knots in the centre for pupils. Alternatively use 6–8mm safety eyes inserted before closing the disc (if the piece is decorative only).
— Spider Legs (Make 8 per spider; 24 legs total; each leg uses approx 6 mini rounds) :
Leg Construction 1 :
Attach black yarn at edge of spider body where leg will join. Ch14 (for curled leg length), sl st into each ch back along chain to create a thick cord (13 sl sts) and fasten off leaving tail for sewing (this creates a single leg cord)
Info :
For the curled, beaded look seen in the photo, work sl sts back along the chain and use a smaller hook for tighter curl. Alternatively you can make legs using a small i-cord or a surface crocheted cord to achieve a tidy rope-like leg.
Leg Construction 2 :
Optional bobble tip: At leg tip, make 3 sc in same st, ch2, sl st to form a small bobble; this creates the knot-like foot dot visible in the photos
Info :
Sew legs evenly around the spider body: place 4 legs on each side in symmetric positions. Use the stitch markers placed around the spider disc (every 3rd stitch) as guides to space the 8 legs evenly.
— Web Joining & Runner Assembly :
Info :
Arrange three blocked web motifs end-to-end with the tips pointing outwards. Join motifs with join-as-you-go: line up the edge picot loops of adjacent motifs and use a sl st through paired loops through both layers to join discreetly. Leave the centre join between each motif neat and flat to give a continuous web spine down the runner.
Join Round 1 :
With right side up, position motif A and motif B with edges touching. Insert hook through picot loop on A and corresponding loop on B, sl st to join; repeat along the entire seam at every picot (approx. 12 joins per seam)
Info :
Use the same cream yarn for joining for an invisible seam; weave ends into the nearest web structure after joining for security. Block the joined runner long and flat to eliminate ripples at the seams.
— Floral Cluster Motif (Large Flower — Make ~24) :
Round 1 :
With yellow: mr, 6 sc in ring (6)
Round 2 :
Inc in each st (12); sl st to join, fasten off yellow, join orange/purple for petal round
Info :
These little centres will be stacked under the petal round for contrast. Make as many centers as needed as you build the scalloped edge around the runner.
Round 3 :
With petal colour (purple typical): *ch2, 5 dc in next st, ch2, sl st in next st to anchor petal; rep around to make 6 full petals (6 petals)
Round 4 :
Sl st into base of each petal and make an edging picot: (sc, ch3, sl st in same st) around petals to create textured flower look; fasten off leaving tail to join to edge
Info :
Sew or join these flowers around the outer edge of the web motifs, using the picot edge stitches as the anchor points. Mix purple, orange and yellow centres for the layered colourful look.
— Small Flower (Accent — Make ~48) :
Round 1 :
mr, 6 sc in ring (6)
Round 2 :
*ch2, 3 dc in next st, sl st in next st; rep around for 3 little petals (3 clusters)
Info :
These tiny flowers sit in clusters between leaves and larger flowers; make many and join them as you create the scalloped edge.
— Leaf (Make ~36) :
Round 1 :
With olive green: ch6, hdc in 2nd ch from hook, dc in next, tr in next, dc in next, hdc in last; fasten off (leaf shaped cord)
Info :
Make leaves in small pairs and attach them at the base of the flowers to replicate the little olive leaf clusters seen in the border.
— Scalloped Edge & Beaded Fringe (Working Around Runner Edge) :
Round 1 :
With black or contrast thread: Join at a picot point on outer edge, *ch3, sc in next picot, ch5, sc in next picot; rep around to prepare anchors for flowers and beads (approx. anchors equal to number of outer picots)
Round 2 :
Attach flowers and leaves: Align each large flower to a ch5 anchor and slip stitch through flower tail and anchor to attach; place small flowers and leaves into adjacent anchors and secure with sl st and small stitches
Info :
Arrange flower clusters symmetrically along both sides of the runner. The motif in the photo repeats a pattern of one larger purple flower with small orange accent and leaves on either side—mimic this arrangement for a balanced look.
Round 3 :
Beaded fringe points: At each tip corner of the runner, string three small black beads onto a length of black yarn (about 12cm), fold yarn in half, ladder stitch through the outermost picot loop and fasten securely so beads dangle. Repeat at each point and at select points between larger flowers (approx. 12–18 bead clusters)
Info :
When adding beads, either pre-string them onto the yarn tail before final attaching, or use a beading needle. Try to hide yarn tails by threading them back into the web and weaving them in to secure.
— Edge Finalizing & Decorative Cord :
Round 1 :
Work a final round of 1 sc in each visible edge stitch around the entire runner to tidy joins and unify the border (counts vary; expect 200–260 sc total)
Round 2 :
Optional crocheted cord: Ch6, sl st along edge every 3 stitches to form a twisted cord look; fasten off and weave ends
Info :
At this stage the runner is assembled. Block the whole runner again to ensure all motifs lie flat and that the scallop edge is even. Use lots of pins, steam gently and let dry fully before removing pins.
— Assembly: Attaching Spiders to Webs :
Info :
Place each stuffed spider body over the centre of each web motif and baste in place with long running stitches through the web and into the spider tail. Make sure the spider sits centered on the web spokes. Sew securely with the long tail left when finishing the spider body.
Attach Legs :
Sew each leg base evenly around the spider disc: Use pins to position legs in pairs (four left, four right). Whip stitch the leg tails through the disc and the web to anchor each leg; secure with multiple passes and weave ends in.
Info :
Make the legs slightly curved and stagger their lengths (front and back legs slightly longer) to mimic the natural playful curve shown in the photo. Add a tiny dab of fabric glue on the base of each leg if you want extra security for a decorative-only runner.
— Finishing Touches :
Info :
Make tiny embroidery mouth: with a length of pink yarn, embroider a small crescent under the eyes for a friendly expression. Add glue-set beads for eyes if you prefer a glossy look. Trim and weave all tails neatly into the runner structure so nothing shows on the surface.
Info :
Give a final blocking and press, trim any stray fibers, and enjoy your decorative runner. Store flat or lightly rolled to preserve shape.
This Spider Web Table Runner brings playful charm and handcrafted detail to any table — a perfect seasonal showpiece! Carefully crocheted webs, plump spider bodies and colourful floral edging combine to make a runner that's both whimsical and elegant. Blocking and beading lift each motif to heirloom quality, and the join-as-you-go assembly keeps everything tidy. 🕷️🧶 Let this runner be the centrepiece of your autumn décor or a cosy conversation starter at your next gathering. Happy stitching! 🎃