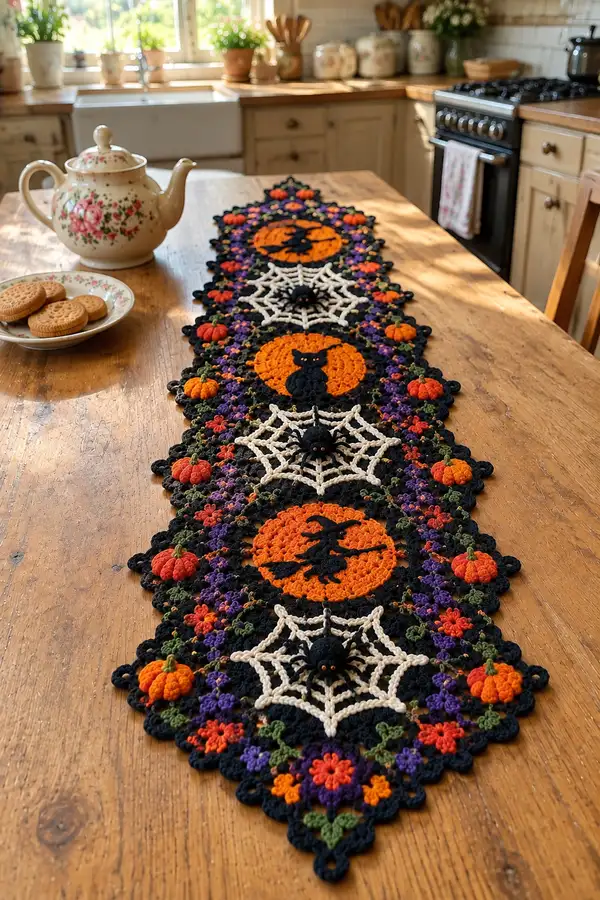
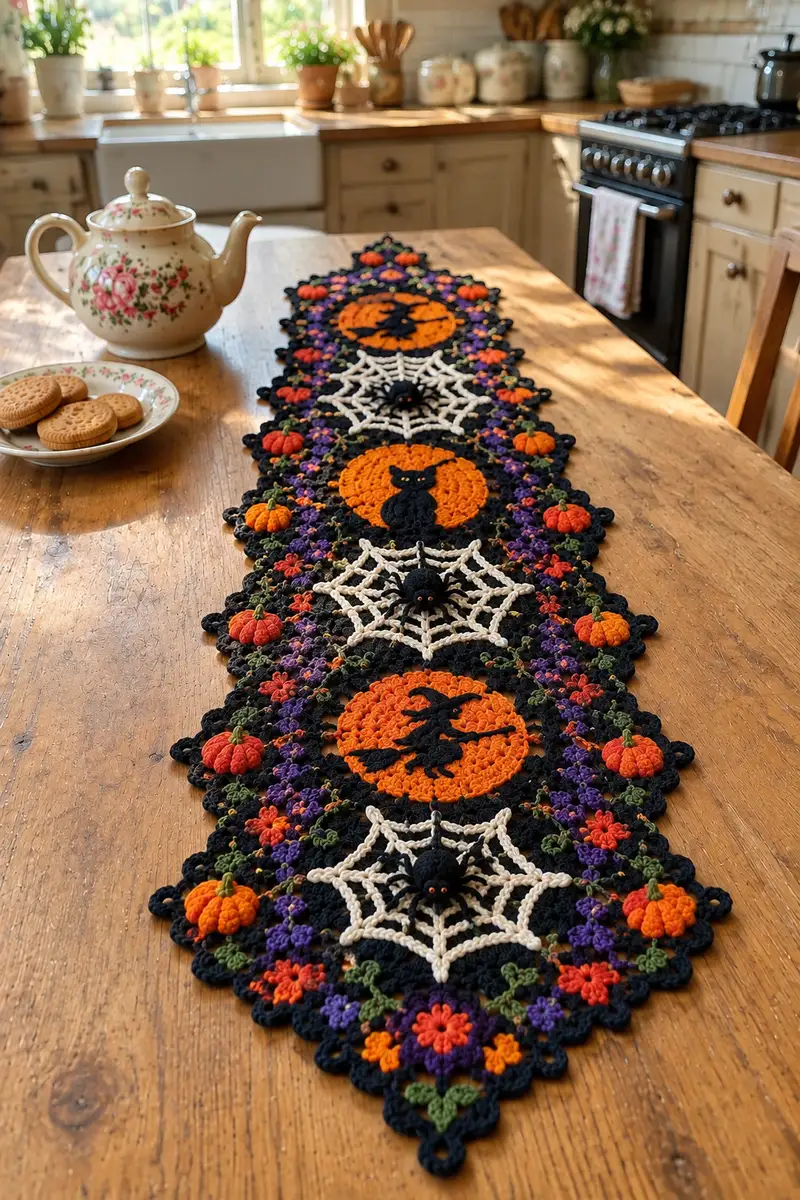
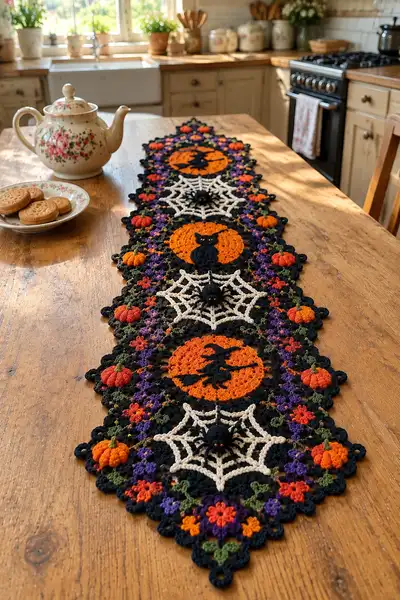
Create a striking Halloween table runner full of mini pumpkins, crescent moon cat silhouettes, raised spiderwebs with 3D spiders, and clusters of tiny flowers. Worked in contrasting autumn shades against a black lacey background, this runner is rich with texture and seasonal charm. The modular motifs join into a long, scalloped runner perfect for a dining table or sideboard.
Progress Tracker
0% Complete
— Overview :
Info :
This pattern is modular. You will make three central moon-with-cat discs, two spiderweb motifs with 3D spiders, and a repeating floral/pumpkin connector border. The instructions below include the exact stitch-by-stitch rounds to make each motif and the 3D elements. Work motifs in any order, block flat elements before final joining, and sew 3D pieces on after final layout. All rounds are worked continuously unless instructed to join; use stitch marker for round start.
— Materials & Gauge :
Info :
Gauge is flexible for decorative runner; central moon discs are approximately 10.5cm (4.25in) across when worked with 3.5mm hook and worsted yarn. Adjust hook to suit your tension. Block all flat motifs to match when joining.
— Cat Moon Disc (make 3) :
Round 3 :
(1 sc, inc) x 6 (18)
Round 4 :
(2 sc, inc) x 6 (24)
Round 5 :
(3 sc, inc) x 6 (30)
Round 6 :
(4 sc, inc) x 6 (36)
Round 7 :
(5 sc, inc) x 6 (42)
Round 8 :
(6 sc, inc) x 6 (48)
Info :
Change to bright orange yarn at the end of round 8 if you began with black or vice versa. Keep tension even so disc lies flat. Use stitch marker at round start.
Round 9 :
1 sc in each st (48)
Round 10 :
1 sc in each st (48)
Round 11 :
1 sc in each st (48)
Info :
At rounds 9-11 you are building the thickness of the moon. If you want a slightly raised rim, work rounds 10-11 in BLO to create a subtle edge.
Round 12 :
(6 sc, dec) x 6 (42)
Round 13 :
(5 sc, dec) x 6 (36)
Round 14 :
(4 sc, dec) x 6 (30)
Info :
Fasten off leaving long tail for sewing the cat silhouette in place. Block flat before applique to keep shape consistent between discs.
— Cat Silhouette Applique (make 3) :
Info :
Cat silhouette is worked flat in black on top of the orange disc. Work on 3.5mm hook. The shape is an elongated oval body with two ears and a tail worked last. Stitch counts are approximate; fit silhouette to disc visually and sew down with small whipstitches.
Round 1 :
In black, ch 10, sc in 2nd ch from hook and across, 9 sc (9) — base chain for body
Round 2 :
Ch1, turn, sc across 9 (9)
Round 3 :
Ch1, turn, (sc 3, inc) at center, sc to end — increase in center to create slight body bulge (10)
Round 4 :
Repeat round 3 shaping evenly to form a slight oval; sc across maintaining 10 sts
Round 5 :
Ch1, fold short edges together and sl st to close one short edge to form rounded head portion (work 4 sl st across)
Info :
Form ears by adding tiny triangular flaps: at top corners ch3, sl st to body to create ear points; secure with small stitches. Tail is a separate chain-stitched tube worked as follows.
Round 6 :
Tail: ch 18, join to tail base with sc into base of body, then work sc around tail chain with 2 sc in end stitch to form small tube, sl st back to body and fasten off leaving tail for shaping (tube approx 16-18 ch long)
Info :
Sew the cat silhouette centered over the moon disc leaving negative space around the ears and tail. Use small invisible stitches along the edges and secure tail with a couple of extra stitches to the disc so it lays flat.
— Spiderweb Motif (make 2) :
Round 1 :
With black yarn, 6 sc in mr (6)
Round 3 :
(1 sc, inc) x 6 (18)
Round 4 :
1 sc in each st (18)
Round 5 :
Ch5, sl st in next 3rd st to create chain loop, *ch5 sl st in next st* repeat around to create 6 loops (6 loops)
Info :
These chain loops will be the anchors for the cream web overlay. Work them loosely so the overlay can be crocheted through. Place marker at each loop stitch to keep counts correct.
Round 6 :
Fasten off black; join cream yarn at any loop top. *Ch6, sc in base of next loop, repeat around to create radial chain spokes (6 spokes)
Round 7 :
Work web rounds in cream: join to first chain, *(1 dc, ch2, 1 dc) into chain space across each radial to form a laddered web arc; sl st into next spoke base* repeat to finish 6 arcs
Round 8 :
Continue web shaping: in each arc work (ch3, sl st at arc mid, ch3) to create a thicker web frame; fasten off and weave ends
Info :
Block web flat. The web should be raised above the black background; you will sew the 3D spider in the center after assembly. If you prefer, work one extra web round to enlarge the web for a more open look.
— Spider (3D) (make 2) :
Round 3 :
(1 sc, inc) x 6 (18)
Round 4 :
(2 sc, inc) x 6 (24)
Round 5 :
1 sc in each st (24)
Round 6 :
(3 sc, inc) x 6 (30)
Round 7 :
1 sc in each st (30)
Info :
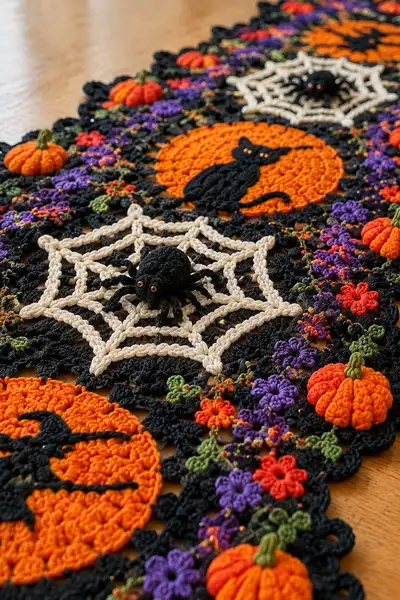
At round 7 the spider body is near its largest circumference. If you want a slightly more oblong abdomen, add a round of increases here: (4 sc, inc) x 6 = 36 sts. The example in the photo has a slightly elongated abdomen so we will continue to round 8 as below.
Round 8 :
(4 sc, inc) x 6 (36)
Round 9 :
1 sc in each st (36)
Round 10 :
(4 sc, dec) x 6 (30)
Round 11 :
(3 sc, dec) x 6 (24)
Info :
Begin stuffing lightly but firmly. The spider should be plump but not overstuffed so it sits naturally on the web. Use small tufts of fiberfill and shape with your fingers to avoid lumps.
Round 12 :
(2 sc, dec) x 6 (18)
Round 13 :
(1 sc, dec) x 6 (12)
Round 14 :
6 dec (6) - close partially and leave long tail for sewing (6)
Info :
Fasten off leaving tail. Pull closed but leave a small round opening for sewing the spider to the web. We will add legs separately and embroider or attach tiny safety eyes now or after sewing to the web.
— Spider Legs (make 8 per spider) :
Round 1 :
With 2.75mm hook and black yarn, ch 10 (or 8 for shorter legs), sc in 2nd ch from hook across (9 sc) — this forms a flat tube base for leg
Round 2 :
Work in BLO: sc in each st BLO (9) to make raised ridge if desired
Round 3 :
Slip stitch back along chain to base to create a twisted, rope-like leg; fasten off leaving long tail for sewing
Info :
Sew four legs to each side of spider abdomen symmetrically. Use small whipstitches from the base of leg to the body and secure with extra stitches. You may insert floral wire if you want poseable legs — tape wire tips before inserting to protect yarn.
— Mini 3D Pumpkin (make 8 or as desired) :
Round 1 :
With orange yarn and 3.0mm hook, 6 sc in mr (6)
Round 3 :
(1 sc, inc) x 6 (18)
Round 4 :
(2 sc, inc) x 6 (24)
Round 5 :
1 sc in each st (24)
Round 6 :
(2 sc, dec) x 6 (18)
Round 7 :
(1 sc, dec) x 6 (12)
Round 8 :
6 dec (6) - do not fasten off; leave long tail for gathering (6)
Info :
Stuff lightly. Pull the long tail to gather the top slightly and form the plump pumpkin shape. To create ridges, use a length of contrasting thread or yarn and wrap around the pumpkin from top to bottom multiple times (6-8 ridges) then secure and knot inside. Add a small green stem by working 6 sc in mr with green yarn, 2 rounds, fasten off and sew to top.
Round 9 :
After gathering and shaping, secure the bottom with a few sl sts and weave tail through center to stabilize
— Flower Cluster Module (make many) :
Round 1 :
With purple yarn, ch5, join to form ring, (ch2, 9 dc) into ring, join (9 petals)
Round 2 :
Switch to red for tiny accent flowers: ch4, *(sl st into next st, ch4) 3 times across cluster to add small 3-d buds* repeat around
Round 3 :
Change to green and work 6 tiny leaf loops: ch4 sl st to disc base to create leaf loops as desired, fasten off
Info :
Clusters are decorative and worked as tiny motifs to be sewn into the black connecting lace around the main discs. Make a mixture of purple and red clusters to match photo spacing. Use small satin stitches to attach clusters when laying out runner.
— Black Lace Connector Motif (make many to join) :
Round 3 :
(1 sc, inc) x 6 (18)
Round 4 :
(2 sc, inc) x 6 (24)
Round 5 :
1 sc in each st (24)
Round 6 :
Ch6, sl st in 3rd st to form loop, *ch6 sl st in next st* repeat to make 8 external loops (8 loops)
Round 7 :
Work scalloped edge: in each loop work (3 dc, ch2, 3 dc), sl st to next loop base; repeat to create decorative scallop (8 scallops)
Info :
These black connector motifs form the edging and the joining points between central motifs; they are intentionally open to allow flowers and pumpkins to be sewn into the gaps. Make enough connector motifs to frame the full runner length — for the pictured runner you will need approximately 18–22 connector motifs depending on spacing.
— Joining and Border Rounds :
Round 1 :
Lay out motifs in desired sequence: alternate Moon-Cat discs with Spiderwebs and connector motifs between. Arrange pumpkins and flower clusters into the loops of the black connector motifs before joining.
Round 2 :
Join motifs using whipstitch or single crochet join: if using sc join, with black yarn and 3.5mm hook, join two motif edges by working sc through both edge stitches around the joining seam for a flat seam.
Round 3 :
For decorative scalloped border, after all motifs are joined, work one round of black around the outer edge of the assembled runner: *(sc in next 3 sts, ch3, skip 1, sc in next 4 sts)* repeat to create a consistent scallop.
Info :
When joining, keep tension even. Pin motifs with tapestry pins onto a blocking mat to ensure the runner stays symmetrical. Sew 3D pumpkins and spiders on after joining so they sit on top of the lace and web elements.
— Finishing Details & Embellishment :
Info :
Sew spiders to centers of cream webs with a few secure stitches through the center of the web. Attach pumpkins within black loop anchors with a few small stitches through their undersides. Stitch small flower clusters into surrounding spaces using embroidery thread if desired for extra contrast. Add tiny french knot seeds in amber yarn for eyes or pumpkin seeds for extra texture.
Round 1 :
Weave in all tails with tapestry needle and trim. Lightly steam-block the entire runner on a low setting to relax stitches and flatten motifs. Do not press directly on 3D elements—place a damp cloth between iron and project if steaming.
Info :
Optional: apply a small dab of fabric glue on the underside of 3D elements to further secure if runner will be handled frequently. Avoid hot glue as it can be bulky and show through the stitches.
— Notes on Customization :
Info :
Change color palette to match your decor — e.g., swap purple for teal and orange for rust for a different autumn palette. To make a shorter runner, work fewer repeats of the central motif set; to lengthen, add repeats and matching connector motifs.
This festive runner brings Halloween charm to any table with layered textures, bright moons, and playful 3D spiders and pumpkins. Each motif is a small victor of color and stitchwork, coming together to create a statement piece that's both spooky and sophisticated. Working modularly makes the project approachable in sessions and perfect for gifting or holiday decorating. 🧶🕷️🎃