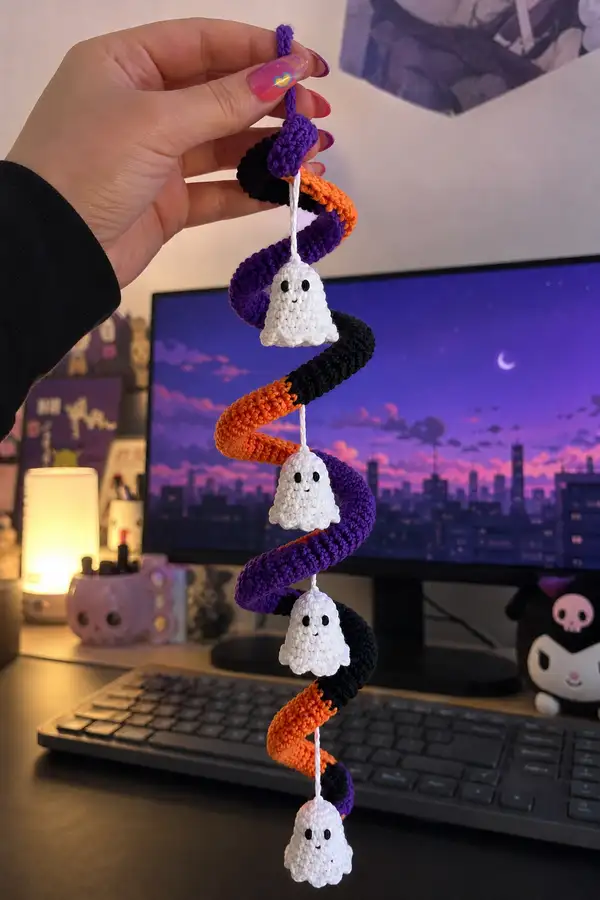
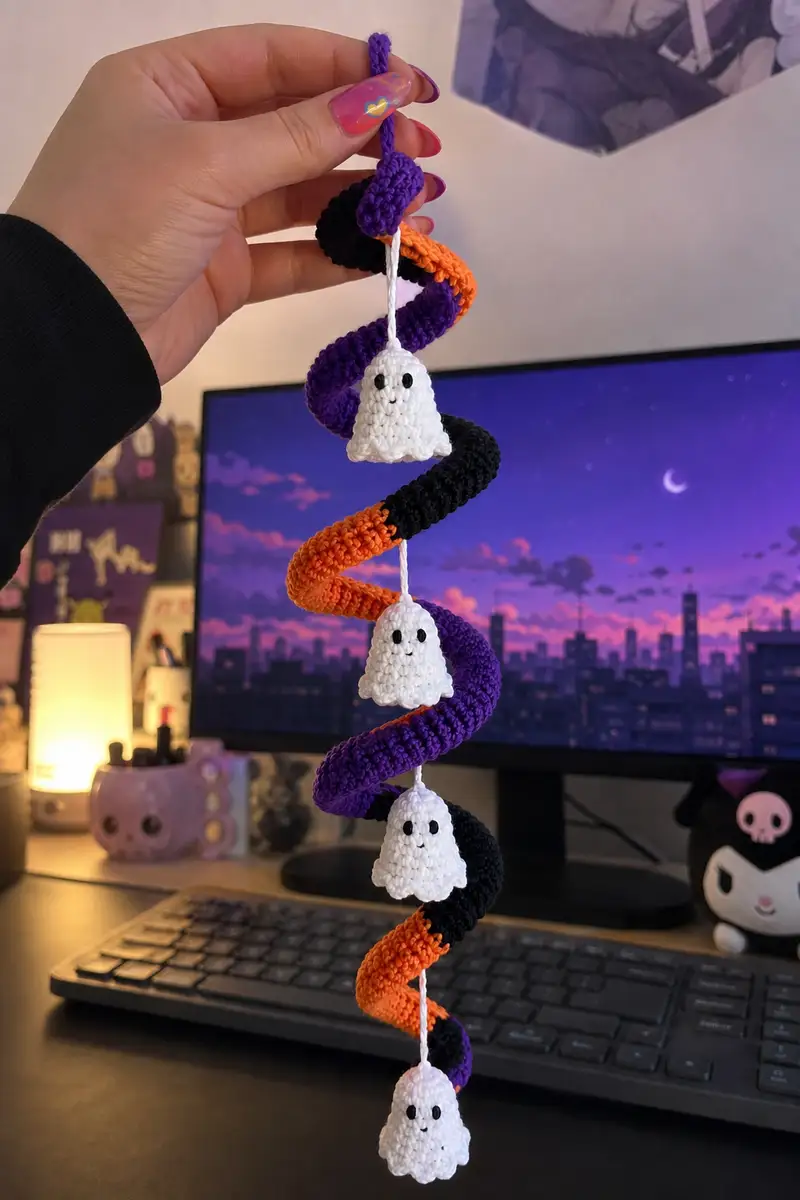
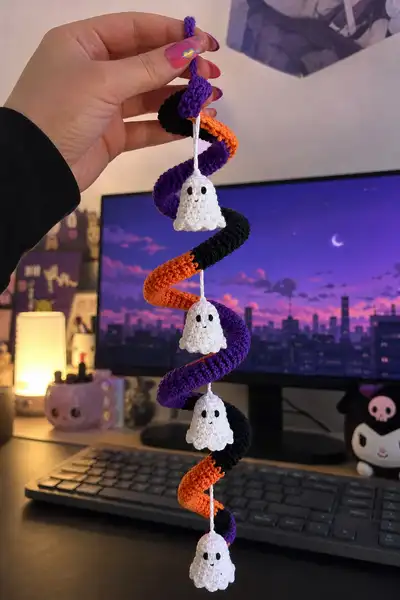
Create a whimsical Halloween spiral garland with three dangling amigurumi ghosts, perfect for doorways or party decor. This pattern uses bright purple, orange, black and crisp white yarn to build a corkscrew tube that twists into a spiral with tiny scalloped ghosts hanging from a central cord. The finished garland is lightweight, cheerful, and great for gifting or seasonal decoration.
Progress Tracker
0% Complete
— Spiral Tube (Main Corkscrew) :
Info :
This spiral is made as a long crocheted tube worked in continuous rounds, then twisted around a central cord to form the corkscrew. Work tightly to avoid gaps; keep stitch count steady at 24 sts after the increases. Change color every 8 rounds to match the color blocks seen in the photo. Use a stitch marker to identify the first stitch of each round. Core option: place a thin cotton cord or macrame cord along the center as you work for stability and to thread the ghosts later.
Round 1 :
6 sc in magic ring (6)
Round 3 :
(1 sc, inc) x 6 (18)
Round 4 :
(2 sc, inc) x 6 (24)
Info :
At this point you have a 24-stitch circumference tube. Place a stitch marker at the first stitch and work in continuous rounds (do not join) so the spiral fabric stays smooth. If using a core cord, lay it beside your work and tunnel a few rounds over it, or thread it through the center as you go.
Round 5-12 :
1 sc in each st (24) — Work 8 rounds in purple for the first color block (24)
Info :
Change to orange yarn before starting Round 13. Fasten off purple by leaving a 6-inch tail to weave in later, or carry it inside the tube. For a neat color transition, change color on the stitch before the marker.
Round 13-20 :
1 sc in each st (24) — Work 8 rounds in orange for the second color block (24)
Info :
Change to black yarn before Round 21. Keep tension consistent. If carrying yarn inside the tube, twist the color bobbins occasionally to prevent tangling.
Round 21-28 :
1 sc in each st (24) — Work 8 rounds in black for the third color block (24)
Info :
Continue alternating colors every 8 rounds to create the long striped spiral seen in the photo: purple, orange, black, purple, orange, black, etc. The entire tube in the sample has approximately 12 color blocks (96 rounds total for colors). You can make your garland shorter or longer by changing the number of blocks.
Round 29-36 :
1 sc in each st (24) — Work 8 rounds in purple (24)
Round 37-44 :
1 sc in each st (24) — Work 8 rounds in orange (24)
Round 45-52 :
1 sc in each st (24) — Work 8 rounds in black (24)
Info :
If you prefer smaller color blocks, switch every 4-6 rounds; larger blocks create the bold look in the photo. Keep track of how many rounds you complete in each color to ensure a balanced spiral when you twist it.
Round 53-60 :
1 sc in each st (24) — Work 8 rounds in purple (24)
Round 61-68 :
1 sc in each st (24) — Work 8 rounds in orange (24)
Round 69-76 :
1 sc in each st (24) — Work 8 rounds in black (24)
Info :
At regular intervals stop and lightly stuff the tube with a thin layer of polyester filling. The spiral in the photo is lightly padded — not stiff. Stuffing should be even and not overfull to keep the tube flexible enough to twist.
Round 77-84 :
1 sc in each st (24) — Work 8 rounds in purple (24)
Round 85-92 :
1 sc in each st (24) — Work 8 rounds in orange (24)
Round 93-100 :
1 sc in each st (24) — Work 8 rounds in black (24)
Info :
Decide how many total color blocks you want; the sample uses 12 blocks (96 rounds). If you want a shorter garland, stop earlier. If extending, keep repeating the 8-round color sequence. Leave a final tail of about 20 cm in the last color for finishing.
Round 101 :
1 sc in each st (24) — last round in chosen color to finish (24)
Info :
Create a small finishing cone at the top so the hanging loop blends neatly. To form the top cone, we will slightly decrease over the next few rounds so the cord anchoring will be neat and hidden.
Round 102 :
(3 sc, dec) x 6 (18)
Round 103 :
(2 sc, dec) x 6 (12)
Round 104 :
(1 sc, dec) x 6 (6)
Info :
Fasten off leaving a long tail for sewing. If using a cord core, insert the cord into the tube until the top cone covers the knot. Use the long tail to sew the cone closed around the cord core to hide the end and secure the cord.
Round 105 :
Weave the top tail through the remaining 6 stitches and pull tight to close. Secure with several whip stitches and weave tail in (6)
Info :
Forming the spiral: Gently twist the tube into a corkscrew shape by holding top fixed and rotating the bottom so the tube wraps in a loose spiral. If you used a cord core, the spiral will hold naturally. If you want a more rigid spiral, insert a thin floral wire or wire-run through the cord core and shape.
Round 106 :
Create the hanging loop: With contrast color or last color yarn, create a 12-ch chain, join ends by sl st to form a loop, then sl st around the top cone area for 6 rounds to secure the loop. Fasten off and weave ends in.
Info :
Trim and tuck all color change tails neatly into the tube with a yarn needle. If you carried colors, anchor floats every 6-8 rounds to prevent long loose strands inside the tube.
— Ghost (Make 3 identical) :
Info :
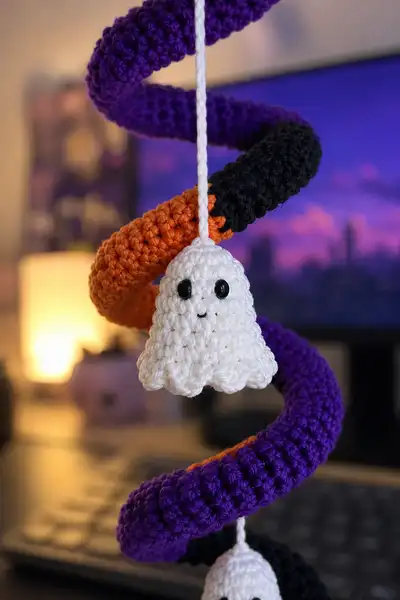
Each ghost is crocheted from the top down beginning with a magic ring that becomes the top head where you will later attach the hanging cord. The ghost is bell-shaped with a scalloped hem. Work tightly for a neat fabric; the ghost in the photo measures roughly 3.5-4 cm tall using worsted weight yarn and 3.25mm hook.
Round 1 :
6 sc in magic ring (6)
Round 3 :
(1 sc, inc) x 6 (18)
Round 4 :
(2 sc, inc) x 6 (24)
Info :
At the top (Round 1) keep the tail long — you will use a short tail or a loop to attach the hanging cord through the top. You can thread the hanging cord through the center of Round 1 before closing all tails. Place a removable marker at the first stitch to keep track of rounds.
Round 5-12 :
1 sc in each st (24) — Work 8 rounds to build the upper head height (24)
Info :
Position safety eyes between Rounds 8-9 about 6 stitches apart (count across the front center for symmetry). Insert eyes now and secure backs before continuing; if you prefer embroidered eyes, do the embroidery after stuffing.
Round 13-16 :
1 sc in each st (24) — Continue body rounds to form a bell shape (24)
Info :
Lightly stuff the interior at this stage, but keep stuffing minimal so the ghost hangs softly. Stuff so the top has a little roundness and the bottom flares naturally.
Round 17 :
1 sc in each st (24)
Round 18 :
1 sc in each st (24)
Info :
To create the scalloped hem, we will work shells into each group of 4 stitches so the ruffle looks evenly spaced. Ensure you have 24 stitches so shells can repeat 6 times across the round.
Round 19 (Scallop) :
*sc in next st, skip next st, 5 dc in next st, skip next st* repeat around — 6 scallops total (worked into every 4th stitch anchor) (24 anchors)
Info :
Work the 5-dc shells into every fourth stitch for consistent scallops. Each shell is anchored to a single stitch; you will still have 24 anchor stitches for the next round.
Round 20 :
1 sc in each anchor stitch around, working into the top of each shell to secure (24)
Round 21 :
(sc in next 2 sts, inc) x 6 (30)
Info :
Round 21 gives a little extra flare under the scallops so the hem ruffles outward like the photo. This creates small scalloped foot points and gives more visual fullness.
Round 22 :
1 sc in each st (30)
Round 23 :
1 sc in each st (30)
Info :
Stitch the tiny mouth here using black embroidery thread or thin black yarn: a small curved line between the eyes, using a few tiny stitches. Do this before final stuffing so the piece sits naturally.
Round 24 :
Dec shaping to slightly taper the top for hanging: (4 sc, dec) x 6 (24)
Round 25 :
(3 sc, dec) x 6 (18)
Round 26 :
(2 sc, dec) x 6 (12)
Info :
Leave a long tail from Round 1 or the fasten-off tail to attach the hanging cord. Thread the cord through the center top (Round 1 area) before you fully close the last round. If using a thin cord for the vertical string, feed the cord from top through the center so the ghost hangs centered.
Round 27 :
(1 sc, dec) x 6 (6)
Round 28 :
6 dec (3) — Fasten off leaving long tail to sew. Stuff lightly and close the top hole by sewing around the remaining stitches and pulling tight to secure around the hanging cord, then weave in tail.
Info :
Repeat the above Ghost section to make 3 identical ghosts. Keep the stitch counts consistent. Thread each ghost on the central white cord (or small cotton rope) at the chosen positions before you secure the spiral tube into its corkscrew shape.
— Hanging Cord & Assembly Prep :
Round 1 :
Chain 60 (or desired length for spacing) to create a central hanging cord, or cut cotton cord to equal length. The sample uses approximately 55-65 cm of cord to space three ghosts along the spiral.
Info :
Decide vertical spacing before securing: the sample spaces ghosts roughly 8-10 cm apart. Thread the cord through the top loop, down to where the top ghost will hang, and use a few stitches to anchor it inside the spiral tube at the top to stop it sliding. Slide each ghost down the cord and knot above and below each ghost or catch with a few hand stitches to secure position.
Round 2 :
To join ghosts: slide ghost 1 to top position and tie a small overhand knot under the ghost (hidden inside the ghost top) or sew a couple of whip stitches through the top of the ghost to cement placement. Repeat for ghosts 2 and 3 at chosen spacing.
Info :
Before finalizing the spiral, thread the cord through the tube if you used a separate macrame cord core. If you used the cord as the core while crocheting, you only need to anchor it at top and bottom. Test-hang the spiral and adjust spacing as needed.
Round 3 :
Secure bottom of cord: knot the cord and sew into the bottom cone of the tube or tie to a small anchor stitch. Trim cord leaving a short tail or add a small decorative knot or bead if desired to weight the bottom slightly.
Info :
If your spiral tends to slide, whip-stitch the ghosts to the spiral at one or two discreet points using a matching color yarn through the tube and into the ghost top; this secures them in place without visible stitches.
This Spooky Spiral Garland brings playful Halloween charm to any space with its corkscrew tube and tiny scalloped ghosts! The bright purple, orange, and black sections combine with delicate white ghosts for an eye-catching hanging decoration. Each step of the pattern gives you opportunities to personalize spacing, colors, and expression on the ghosts. 🎃🧶 Enjoy the rhythmic rows and see the garland come to life as you twist it into place — happy crocheting and have fun displaying your spooky creation! 👻