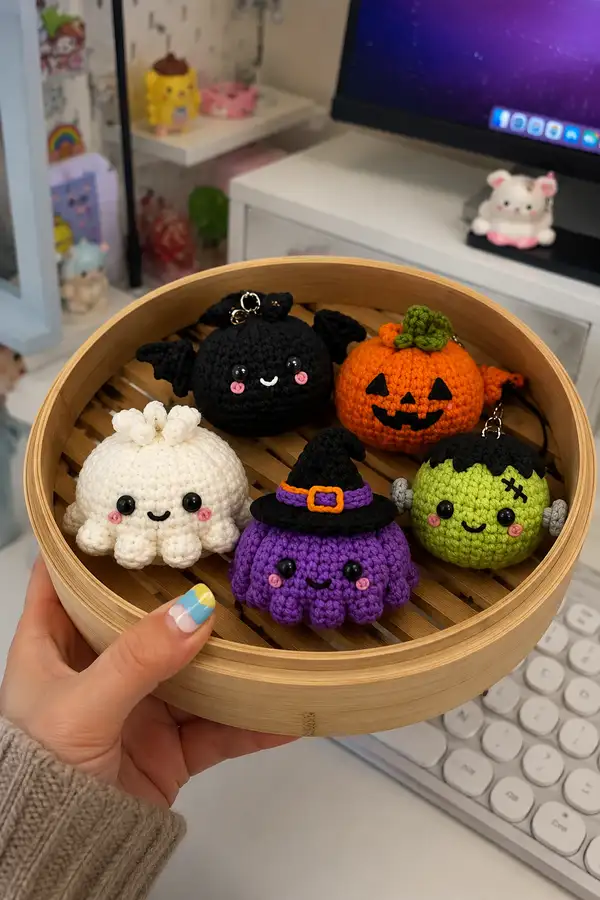
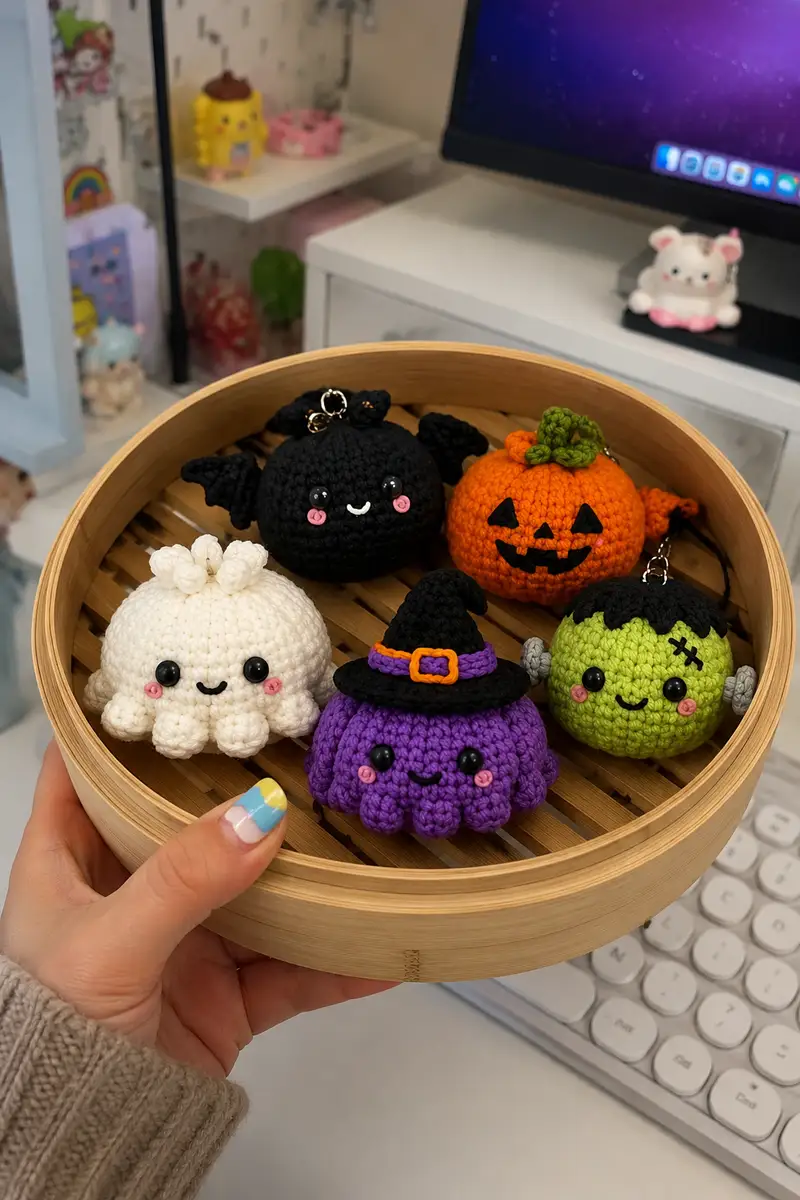
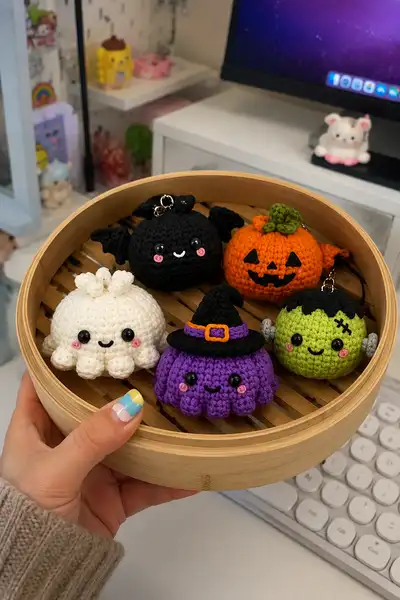
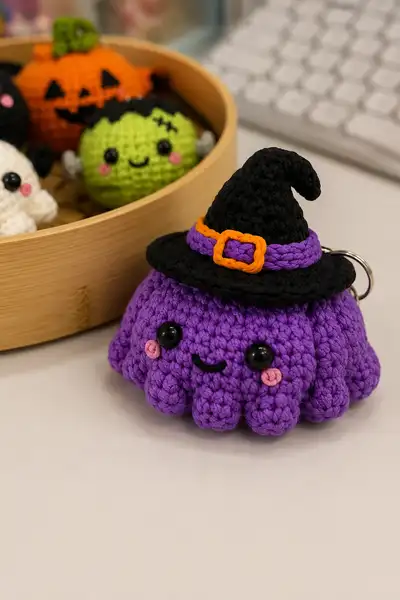
Make a set of adorable Halloween jelly/octopus amigurumi keychains inspired by the photo. This pattern teaches you how to crochet the round, scalloped jellies and a collection of little seasonal accessories — witch hat, bat wings, jack-o-lantern face, ghost pom-poms and Frankenstein bolts. Each piece is worked in single crochet with clear step-by-step rounds, assembly tips and finishing details so you can create charming, pocket-sized plushies perfect for gifts or keychains.
Progress Tracker
0% Complete
— Overview & Tips :
Info :
This pattern describes the jelly/octopus base and several accessory variations shown in the photos: witch hat, bat wings, jack-o-lantern pumpkin top, ghost pom-poms, and Frankenstein bolts. Work all rounds in continuous spiral unless noted. Use a stitch marker to mark the first stitch of each round and move it up as you go. Measurements: finished jelly is roughly 7-9 cm (about 2.5-3.5 inches) tall including hat variation, depending on yarn and hook tension. Eyes: 8 mm safety eyes sit nicely between the specified rounds; smaller or larger eyes change the expression.
— Head (Main Dome) :
Round 1 :
6 sc in magic ring (6)
Round 3 :
(1 sc, 1 inc) x 6 (18)
Round 4 :
(2 sc, 1 inc) x 6 (24)
Round 5 :
(3 sc, 1 inc) x 6 (30)
Round 6 :
(4 sc, 1 inc) x 6 (36)
Round 7 :
(5 sc, 1 inc) x 6 (42)
Round 8 :
(6 sc, 1 inc) x 6 (48)
Info :
At this point the dome is roughly at the widest point. Choose eye placement: for 8mm safety eyes place them between rounds 12-14 and about 10-12 stitches apart depending on desired facial spacing. Mark the locations with pins or stitch markers before securing eyes.
Round 9-12 :
1 sc in each st (48)
Round 13 :
(6 sc, 1 inc) x 6 (54)
Round 14 :
1 sc in each st (54)
Info :
Insert safety eyes now between rounds 12-14. Place them so they look centered on the dome; tighten backs securely. If embroidering eyes later, mark centers with pins instead.
Round 15-18 :
1 sc in each st (54)
Round 19 :
(7 sc, 1 dec) x 6 (48)
Round 20 :
1 sc in each st (48)
Round 21 :
(6 sc, 1 dec) x 6 (42)
Info :
Begin stuffing the dome firmly but not overly tight. Use small amounts of stuffing and push into the crown to keep shape and avoid lumps. Keep the top slightly rounded rather than flat.
Round 22 :
1 sc in each st (42)
Round 23 :
(5 sc, 1 dec) x 6 (36)
Round 24 :
1 sc in each st (36)
Round 25 :
(4 sc, 1 dec) x 6 (30)
Round 26 :
(3 sc, 1 dec) x 6 (24)
Info :
Stuff more as you decrease to keep the dome full but still soft. The stuffing should fill out the scalloped section later — avoid overstuffing that makes sewing scallops difficult.
Round 27 :
(2 sc, 1 dec) x 6 (18)
Round 28 :
(1 sc, 1 dec) x 6 (12)
Info :
Fasten off leaving a long tail for joining the dome to the scalloped bottom. We will not close this top completely if you prefer to add a keyring stem through the crown—see assembly notes for keyring attachment. If closing, weave the tail through the remaining 6 sts and pull tight to close then knot and weave in end.
— Body Base / Scalloped Skirt (Attach to Dome) :
Info :
For the scalloped-bottom jelly, we join a skirt to the finished dome. The skirt is worked around a base ring that fits the dome opening. If you closed the dome, create a small opening at the base with a few unraveled stitches or work an identical base separate and sew together. This pattern assumes you have a gap around the bottom to work the skirt in one continuous join.
Round 1 (Skirt Join) :
Join yarn at the bottom edge evenly and work 1 sc in each st around (count should equal the last even round before decreases; if dome ended at 48 sts, work 48 sc) (48)
Round 2 :
1 sc in each st (48)
Round 3 :
(5 sc, 1 inc) x 8 = (works to create slight flare) (56)
Round 4 :
1 sc in each st (56)
Info :
We will create 8 scallops (petals) evenly spaced around the skirt. The strategy is to work a small strip for each petal and then shape it with increases and decreases to form a rounded lobed petal. Place 8 stitch markers every 7 stitches to identify petal bases.
Round 5 :
Prepare petals: (7 sc) x 8 across the round keeping markers at the start of each 7-stitch segment (56)
Info :
Each petal will be worked into its 7-stitch segment using rounds of repeated decreases/increases. Work petals in continuous spiral but think of them as sections. If you prefer, you can work each petal separately and slip stitch between petals. The counts below assume 8 petals of 7 base stitches each.
Petal Set (repeat for each petal) — Petal Round 1 :
Into next 7 sts: (2 sc, inc, 2 sc, inc) — creates a gentle peak (9) — continue to next petal (you are working around so continue pattern 8 times)
Petal Round 2 :
Into petal area: (1 sc, inc, 3 sc, inc, 1 sc) (11) — repeat for each petal
Petal Round 3 :
Into petal area: (2 sc, inc, 5 sc, inc, 2 sc) (13) — adds roundness to petal top
Info :
After Petal Round 3 the petals should be starting to puff out. Adjust tension or number of increases if some petals look larger. Keep stuffing lightly from inside the dome while shaping the petals so the skirt sits full and rounded.
Petal Round 4 :
Into petal area: (2 sc, dec, 5 sc, dec, 2 sc) (11) — repeat for each petal
Petal Round 5 :
Into petal area: (1 sc, dec, 3 sc, dec, 1 sc) (9) — repeat for each petal
Petal Round 6 :
Into petal area: (dec, 5 sc, dec) or (1 sc, 1 dec, 5 sc, 1 dec, 1 sc) depending on how full you want the petal (7) — repeat for each petal
Info :
Fasten off after completing petals, leaving a long tail if you prefer to sew the final edge down or tidy from inside. Weave ends inside the dome for a clean finish. The finished skirt should have 8 round lobes resembling the scallops in the photos.
— Face & Embellishments :
Info :
Facial features in the photos are simple: safety eyes, a stitched smile, and small spiral blush circles for cheeks. Place eyes between rounds 12-14 on the dome. Leave about 8-12 stitches between eyes depending on expression. Use black embroidery yarn or thin stranded cotton for mouth and detail stitching.
Eyes :
Insert 8 mm safety eyes between Rounds 12-14, spacing them 9-11 sts apart. Secure with washers.
Cheeks :
With blush pink yarn, embroider two small spiral knots (or sew on tiny crocheted circles) one stitch below and slightly outward from each eye. For a tiny crocheted rose: ch 4, sl st into 1st ch to form ring, 6 sc into ring, pull tight, fasten off leaving tail to sew on.
Mouth :
Using black yarn and a yarn needle, embroider a simple U-shaped smile centered 3-4 stitches below the eyes. Use small stitches for a neat look and weave ends securely inside.
— Witch Hat (Optional Accessory):
Info :
The witch hat is made in two parts: the crown and the brim. Work the crown top-down then add the brim separately and sew them together. Colors: Black crown, purple band, orange buckle. Attach the hat to the dome by sewing a few stitches to the top or add a small tab to slide onto a keyring.
Crown Round 1 :
6 sc in magic ring (6)
Crown Round 2 :
6 inc (12)
Crown Round 3 :
(1 sc, 1 inc) x 6 (18)
Crown Round 4 :
(2 sc, 1 inc) x 6 (24)
Crown Round 5-8 :
1 sc in each st (24)
Crown Round 9 :
(3 sc, 1 inc) x 6 (30)
Crown Round 10-13 :
1 sc in each st (30)
Crown Round 14 :
(4 sc, 1 dec) x 5, 1 sc (25)
Info :
Start shaping the point by doing occasional decreases and working fewer even rounds. For a floppy witch hat tip, do not stuff the crown; instead let it remain soft and bendable.
Crown Round 15 :
(2 sc, 1 dec) x 6 (18)
Crown Round 16 :
(1 sc, 1 dec) x 6 (12)
Crown Round 17 :
6 dec (6) — finish narrow tip and leave long tail for sewing (6)
Brim Round 1 :
With black yarn, ch 36 (or make a circle of desired diameter to fit the dome). Join with sl st to form ring being careful not to twist.
Brim Round 2 :
1 sc in each ch around (36)
Brim Round 3 :
(3 sc, 1 inc) repeat around to flare (45)
Brim Round 4 :
1 sc in each st (45)
Brim Round 5 :
Working in FLO: 1 sc in each st to create a neat edge (45)
Hat Band :
With purple yarn, ch long enough to wrap around crown base twice (~34 ch). Join ends and sew band onto crown base overlapping slightly. For buckle: with orange yarn, ch 8, sl st into 1st ch to form rectangle, sc around 8-10 times to thicken then sew to front of band.
Info :
Sew crown to brim by matching the crown base to the inner circle of the brim. Sew securely with matching yarn and weave in ends. Attach hat to top of dome using a few slip stitches or stitch into crown of dome. Optionally attach keyring through a small loop sewn to the top of the crown.
— Bat Wings (Optional) — Make 2 :
Wing Round 1 :
6 sc in magic ring (6)
Wing Round 3 :
(1 sc, 1 inc) x 6 (18)
Wing Round 4 :
1 sc in each st (18)
Wing Round 5 :
(3 sc, 1 inc) x 4 + (2 sc) = (22)
Wing Round 6 :
Work shaping rows to create 3 lobes: *sc 4, dec, sc 3, inc, sc 4* across and shape tip with a few decreases. Final approximate count 20-22
Wing Round 7 :
Finish edge with sl st around to neaten, fasten off leaving tail for sewing.
Info :
Sew wings to the back upper sides of the dome, slightly angled upward. Place in line with eye level or just behind. For a poseable wing, insert a short length of floral wire inside the wing before stuffing and then bend to shape.
— Pumpkin Top (Optional Pumpkin Variation) :
Pumpkin Body Round 1 :
6 sc in magic ring (6)
Pumpkin Round 2 :
6 inc (12)
Pumpkin Round 3 :
(1 sc, 1 inc) x 6 (18)
Pumpkin Round 4 :
(2 sc, 1 inc) x 6 (24)
Pumpkin Round 5 :
(3 sc, 1 inc) x 6 (30)
Pumpkin Round 6-10 :
1 sc in each st (30)
Pumpkin Round 11 :
(3 sc, 1 dec) x 6 (24)
Pumpkin Round 12 :
(2 sc, 1 dec) x 6 (18)
Info :
Stuff pumpkin moderately firm. To create ridges on the pumpkin you will sew in a contrasting heavier yarn from top to bottom around the pumpkin, pulling slightly to form grooves. Make a small green stem separately (see next) and sew to top.
Pumpkin Stem :
With green yarn: ch 6, sc in 2nd ch from hook and next 4 ch (5), turn and sc back across (5), continue for 6 rows to create a short rectangle then roll and sew top closed; attach to top of pumpkin and add small leaf if desired.
Pumpkin Face :
Cut small triangles from black felt or embroider with black yarn to form eyes and mouth. Sew or glue to pumpkin front. For embroidered triangle eyes, use satin stitch or small sc shapes in black yarn.
— Ghost Mini (Optional White Jelly Variation) :
Ghost Base Rounds 1-8 :
Follow Head Rounds 1-8 using white yarn to reach 48 sts then work Rounds 9-12 even (48).
Ghost Scallop Rounds :
Work 8 scallops as in the Scalloped Skirt section but make petals slightly smaller: use 6-st base segments with only 3 shaping rounds to create a puffier tiny skirt. Final petal counts around 7-9 each.
Ghost Top Detail :
Add three tiny puff knots on the crown: ch 6, make 4 small sc clusters into ch, pull up and secure to create little bubbly puff. Sew into place on top center of ghost as decorative tuft.
Info :
Ghosts are very forgiving — embroidered eyes or small safety eyes both look cute. For safety with small children, embroider eyes instead of using safety eyes.
— Frankenstein Details (Optional Green Variation) :
Frankenstein Top 1 :
Work Head Rounds 1-12 with green yarn and change to black for hair top in Round 13 (Info below).
Info :
To make the hairline jagged like the photo, change to black yarn and work 1 sc BLO for one round to create a ridge then sc across alternating short peaks: sc 2, ch1, skip 1, sc 4 across the front to create triangular hair tips. Sew small grey bolt discs to the sides later.
Bolt (Make 2) :
With grey yarn: 6 sc in magic ring (6), inc x6 (12), 1 sc rounds 2-3 (12), fold small rectangle, run running stitch across to create bolt shape, fasten off leaving tail to sew. Attach bolts symmetrically at side rows aligning with eye level.
Stitch Scar :
Use black embroidery floss to make 2-3 little diagonal stitches on the forehead. Anchor ends inside the head and knot securely.
— Small Details: Cheeks and Spiral Roses :
Rose Circle (tiny cheek) :
ch 4, sl st into 1st ch to form ring, ch 1, 6 sc into ring, pull tight to form small circle, sl st, leave tail and sew to face. Alternatively embroider a spiral swirl with pink yarn using a single strand and small whip stitches.
Info :
Adjust cheek position relative to eyes for expression: closer to eyes for a surprised look, slightly lower and outward for a shy smile. Make left and right cheeks symmetrical by measuring stitches between centers.
— Keyring Attachment & Finishing :
Keyring Loop :
Insert a small metal eye pin or create a crochet tab: ch 6, sl st back along chain to make a cord, fold tab and sew securely to the top center of the dome (through the crown). If using a hat, attach tab to hat crown and then sew hat to dome so the keyring hangs through the hat top.
Info :
For secure attachment for daily use, sew the yarn tab or metal eye pin through several rounds of stitches into the head and knot/wrap with extra yarn. Weave ends inside and hide them in stuffing. Test the hardware before gifting to make sure it holds.
— Finishing Touches :
Info :
Weave in all ends neatly into the dome. Trim any extra yarn tails. Add a small dot of fabric glue to felt faces or glued-on decorations for extra security if desired. For more sparkle, add a tiny sequin or bead to the hat buckle, but sew on carefully to avoid choking hazards if gift for a child.
This delightful Halloween jelly set combines simple amigurumi techniques with playful seasonal details to create a charming collection of tiny friends. Each jelly can be customized with different accessories and colors to reflect your favorite spooky characters. I love how quickly the basic dome comes together and how satisfying the scalloped skirt is to shape. 🌙🧶 Make a few for a themed gift set or keep one for your own bag charm — happy stitching! 🎃