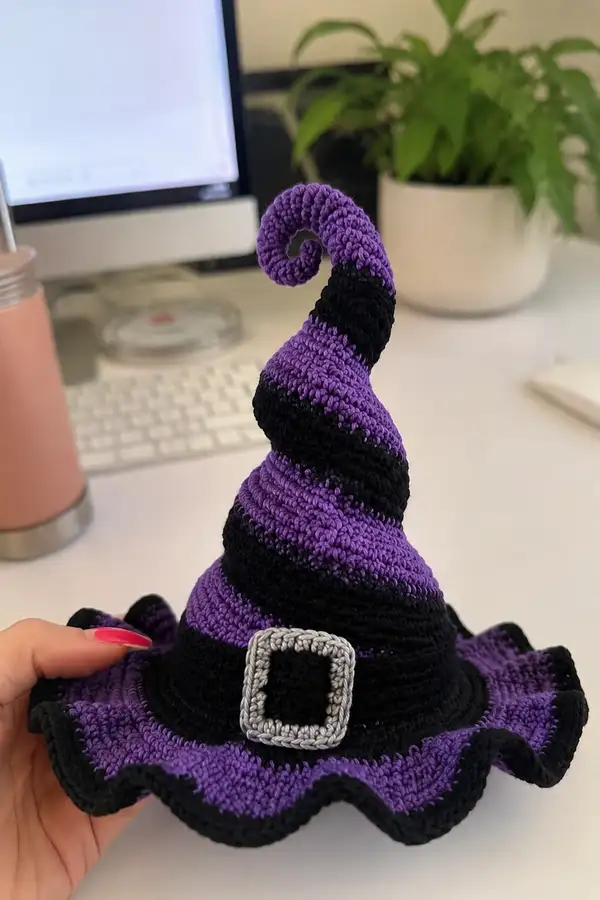
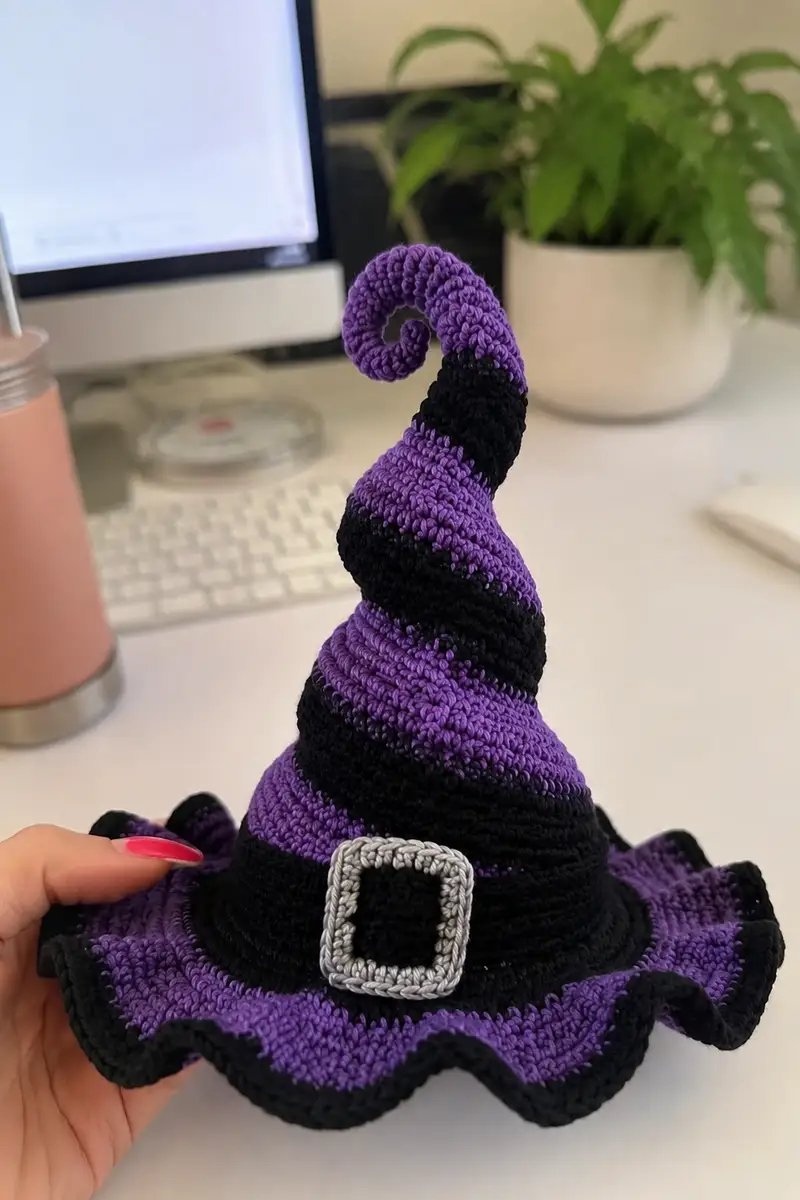
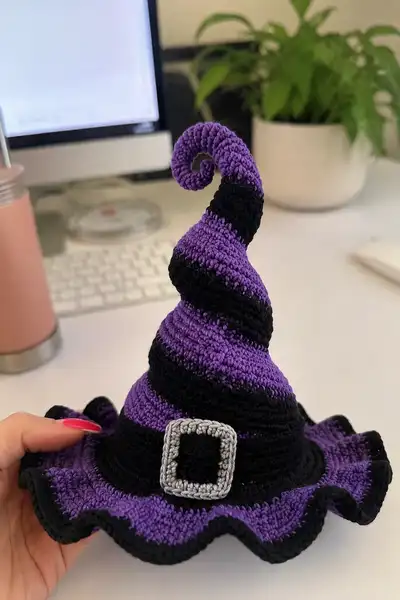
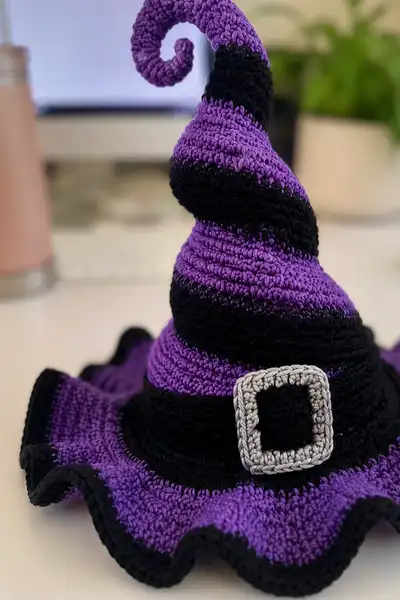
Make a delightfully twisted purple-and-black witch hat with a whimsical curled tip and ruffled brim. This small amigurumi-style hat features bold spiral stripes, a contrasting black brim edge and a neat silver buckle. Designed to sit as a decorative prop, topper, or tiny wearable for dolls—it's full of personality and texture. Clear, step-by-step instructions guide you through shaping, color changes, and finishing touches.
Progress Tracker
0% Complete
— Crown (Cone) :
Round 1 :
6 sc in magic ring (6)
Round 3 :
(1 sc, 1 inc) x 6 (18)
Round 4 :
(2 sc, 1 inc) x 6 (24)
Round 5 :
(3 sc, 1 inc) x 6 (30)
Round 6 :
(4 sc, 1 inc) x 6 (36)
Round 7 :
(5 sc, 1 inc) x 6 (42)
Round 8 :
(6 sc, 1 inc) x 6 (48)
Round 9 :
(7 sc, 1 inc) x 6 (54)
Round 10 :
(8 sc, 1 inc) x 6 (60)
Info :
At this point the crown has a base circumference of 60 sts. This makes a narrow, tall cone. Decide whether your stripes start here or slightly higher; the sample alternates stripe blocks roughly every 3-5 rounds for a bold spiral effect. Carry unused yarn inside or fasten off and rejoin for crisp stripes.
Round 11-15 :
1 sc in each st (60) — work 5 rounds in Purple (main color) to begin the first stripe block (Rounds 11-15 = 5 rounds)
Info :
Change to Black yarn now to make the black stripe. To change color cleanly, finish the last loop of the previous round with the new color and pull through. Carry small floats inside if they won’t show on the finished piece.
Round 16-18 :
1 sc in each st (60) — work 3 rounds in Black for a narrow stripe (Rounds 16-18)
Info :
Alternate stripe thickness to match the pictured hat: the purple blocks are typically 4-6 rounds; black blocks 2-3 rounds. I list a sample stripe schedule here, but feel free to adjust for visual preference.
Round 19-23 :
1 sc in each st (60) — Purple 5 rounds (Rounds 19-23)
Round 24-26 :
1 sc in each st (60) — Black 3 rounds (Rounds 24-26)
Round 27-31 :
1 sc in each st (60) — Purple 5 rounds (Rounds 27-31)
Info :
Keep stitch markers at the start of each round so stripes align as you work in continuous rounds. If you prefer visible spiral wrap, work in continuous (not joined) rounds without turning and shift joins at the end of stripe blocks slightly to create a spiral appearance.
Round 32-42 :
1 sc in each st (60) — continue even in the chosen stripe pattern until the crown measures approximately 9-11 cm from the base (this sample used rounds 32-42 to extend the tall cone)
Info :
Now we begin gentle tapering. The hat pictured tapers slowly so it keeps a tall, witchy silhouette. We will alternate decreases with even rounds to preserve a smooth taper and keep stripes aligned.
Round 43 :
(8 sc, 1 dec) x 6 (54)
Round 44 :
1 sc in each st (54)
Round 45 :
(7 sc, 1 dec) x 6 (48)
Round 46 :
1 sc in each st (48)
Info :
Keep following your stripe color schedule as you decrease — don't change the stripe rhythm abruptly. If a color change falls mid-decrease round, fasten off and rejoin to keep edges neat.
Round 47 :
(6 sc, 1 dec) x 6 (42)
Round 48 :
1 sc in each st (42)
Round 49 :
(5 sc, 1 dec) x 6 (36)
Round 50 :
1 sc in each st (36)
Round 51 :
(4 sc, 1 dec) x 6 (30)
Round 52 :
1 sc in each st (30)
Round 53 :
(3 sc, 1 dec) x 6 (24)
Round 54 :
1 sc in each st (24)
Round 55 :
(2 sc, 1 dec) x 6 (18)
Round 56 :
1 sc in each st (18)
Round 57 :
(1 sc, 1 dec) x 6 (12)
Round 58 :
1 sc in each st (12)
Info :
We have reached a narrow tube (12 sts). The hat pictured has a long tapered tube to form the curled tip. Instead of closing this small circle, continue working even rounds to build the length of the tube that will be curled. This is the moment to decide whether to insert wire later for structure.
Round 59-72 :
1 sc in each st (12) — work 14 rounds even to create a long narrow tube for the curled tip (Rounds 59-72)
Info :
For a stable curled tip, leave a long tail when you finish the tube and insert a length of flexible craft wire or a pipe cleaner through the center before final coiling. If you prefer a purely crocheted coil, work additional short-row increases on the outside edge to bias the tube (advanced technique) — this pattern uses the wire/coiling method for predictable results.
Round 73 :
Fasten off leaving a long tail (approx. 30-40 cm) for sewing to the brim base or for finishing if you choose to coil the tip directly onto the crown. Set the crown aside for now.
— Brim (Ruffle) :
Info :
Work the brim directly onto the base of the crown by joining at the bottom round (Round 10 of the crown where circumference was 60 sts). Join with a standing sc or slip stitch and work outward. The brim is constructed with progressive increases to create a wide, flowing ruffle.
Round 1 :
Join Purple at base and 1 sc in each st around (60) — (Make sure crown base is aligned; place a stitch marker at your join)
Round 2 :
(4 sc, 1 inc) x 12 (72) — distribute repeats evenly; each repeat uses 5 sts from previous round
Round 3 :
(5 sc, 1 inc) x 12 (84)
Round 4 :
(6 sc, 1 inc) x 12 (96)
Round 5 :
(7 sc, 1 inc) x 12 (108)
Round 6 :
(8 sc, 1 inc) x 12 (120)
Info :
These progressive increases expand the brim evenly and create a gentle slope. If your brim is too small or large, adjust the number of increase repeats or rounds. Keep tension consistent across rounds to avoid ripples at the join.
Round 7-10 :
1 sc in each st (120) — work 4 rounds even to stabilize brim
Round 11 :
1 sc in each st (120) — prepare for ruffle sequence
Round 12 :
(1 sc, 1 inc) x 60 (180) — this creates the first dramatic ruffle; repeat count = previous round/2
Round 13 :
(1 sc, 1 inc) x 90 (270) — build ruffle depth; this increases to a full, wavy edge
Info :
The ruffle sequence uses repeated (1 sc, inc) rounds to multiply the stitch count quickly and produce the flowing wavy brim you see in the photo. If you prefer a gentler wave, stop after one (1 sc, inc) round and transition to an edging instead.
Round 14 :
1 sc in each st BLO (270) — work a smoothing round in the back loops to create a defined ridge before edging
Info :
Change to Black yarn for the outer border now to match the picture. Working the border in black creates the strong contrast that defines the final edge.
Round 15 :
Join Black and 1 sc in each st around (270)
Round 16 :
Using a slightly smaller hook if needed, work an edge round to firm up the ruffle: (3 sc, skip 1) x 67 + 1 sc to finish (approx 270 → 201) — if your stitch math doesn't divide evenly, adjust the final repeat so the round finishes neatly; the intent is to slightly tighten the outer edge for a wavy silhouette
Info :
Another approach for a neat edge is to work a single round of sc in BLO (to keep stitches tight) and then 1 round of reverse single crochets or slip stitches to create a crisp black rim. Choose the edging you prefer; both look great.
Round 17 :
Fasten off and weave in ends. If desired, block the brim lightly to shape the waves: pin gently in wavy pattern on a padded surface and mist with water, then allow to dry.
— Buckle :
Info :
The buckle is created separately in silver/gray yarn as a square frame and sewn to the black band at the crown base. You will make a small looped frame and a black insert if you wish to mimic the photo. The buckle shown measures roughly 3 x 3 cm when using DK/sport yarn and a 3.0mm hook.
Round 1 :
Make a small foundation chain of 8 ch. Row 1: sc in 2nd ch from hook and across (7)
Round 2 :
Ch 1, turn, sc across 7 (7)
Round 3 :
Repeat Row 2 until you have a small rectangle approx 7 x 7 sts (work 6 rows total including first) — you now have a 7x7 square of sc
Round 4 :
Fold square into a tube and slip stitch short edges together to make a small hollow rectangle; press flat and sew closed leaving a hole in the center (you can also create a frame by crocheting a small donut by MR method if preferred)
Round 5 :
Edge frame: join silver yarn around the outer edge and sc around to create a neat frame border; aim to make the outer edge slightly thicker than the inner square so the buckle reads as metallic (approx 28 sc around depending on your tension)
Info :
The buckle can also be made by crocheting a small ring and then sewing a small black square center onto it. If you prefer an easier option, stitch a square of silver yarn around a small piece of black felt, then hot-glue or stitch it in place.
Round 6 :
Fasten off leaving a long tail for sewing. Use mattress stitch to sew buckle to the black band around the crown base (see assembly section). Secure tightly and weave in ends.
— Support & Curled Tip Finishing :
Info :
The curled tip is formed from the long tube you made earlier (Round 59-72 of the crown). Insert flexible wire or pipe cleaner to make it poseable and coil it from the tip inward. If you prefer a soft coil without wire, coil the tube and tack it in several places with whip stitches using matching yarn.
Step :
Insert a length of flexible wire: push wire through the center of the narrow tube from the base toward the tip, leaving about 1-2 cm of wire protruding at the base so it can be wrapped or bent and hidden inside the crown. Do NOT thread wire beyond the tip; leave the wire end folded in to avoid sharp points.
Step :
Start coiling the tube by curling the tip tightly in toward the cone. Coil the tube into a spiral of your desired diameter. As you coil, tack the coil to itself and to the cone at 4-6 evenly spaced spots with small whip stitches so the spiral holds its shape.
Info :
If your wire is visible or shows through stitches, tuck it deeper or wrap with a small piece of yarn before inserting. For a fully crocheted curl (no wire), you can use the short-row bias method: make tiny increases on the outer side of the tube every few rounds to create curvature, but this is advanced and not required here.
Step :
Weave in any remaining tails and make neat joins at color changes. Use a needle to stitch down any loose ruffle peaks so the brim sits nicely.
Info :
To help the brim keep a stiff shape, apply a very light coating of diluted fabric stiffener or a glue mixture (50/50 white glue and water) to the underside only, then shape and air dry. Alternatively, insert craft felt or cardboard inside the brim (cut to fit) between two rounds as a hidden stiffener when assembling.
Final :
Give the entire hat a gentle steam/press without touching the steam nozzle directly to the yarn (if yarn is heat-safe). Adjust the curl and ruffles until you love the silhouette. Your striped spiral witch hat is complete!
— Tips & Techniques :
Info :
Keep tension tight on the cone and crown to avoid gapiness; for the ruffle you can relax tension slightly to encourage flow. Use stitch markers to mark the start of rounds and the centerline if you plan to place the buckle exactly opposite a seam or join. Always weave in ends long enough to bury through several stitches and cut close.
This playful witch hat brings a touch of spooky charm to any season! Each stripe and ruffle adds personality while the curled tip gives a whimsical, photo-ready silhouette. With careful color changes and a few finishing tricks, you can create a durable little treasure that looks professionally finished. I hope this pattern brings you joy as you stitch your own twisty witch hat — share photos and enjoy the compliments! 🎃🧶