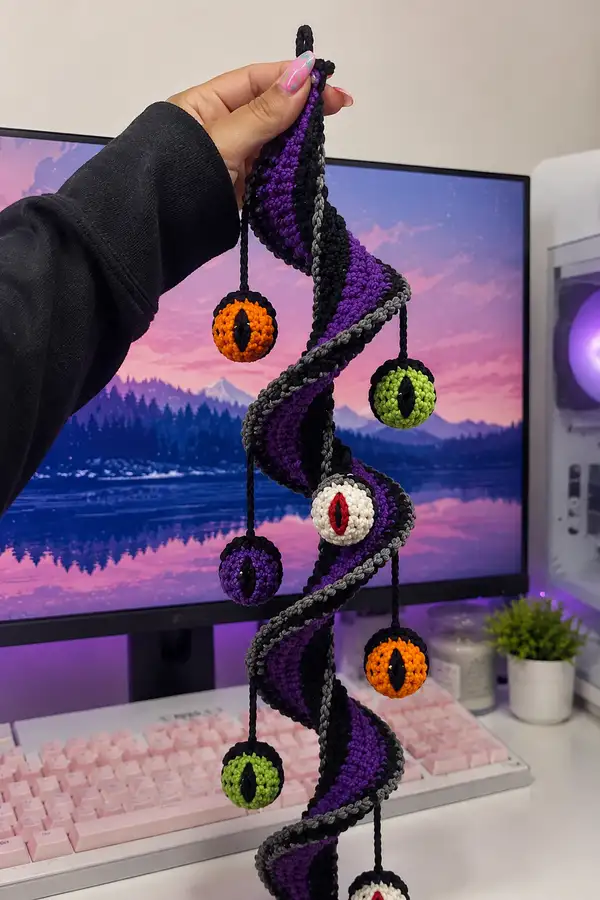
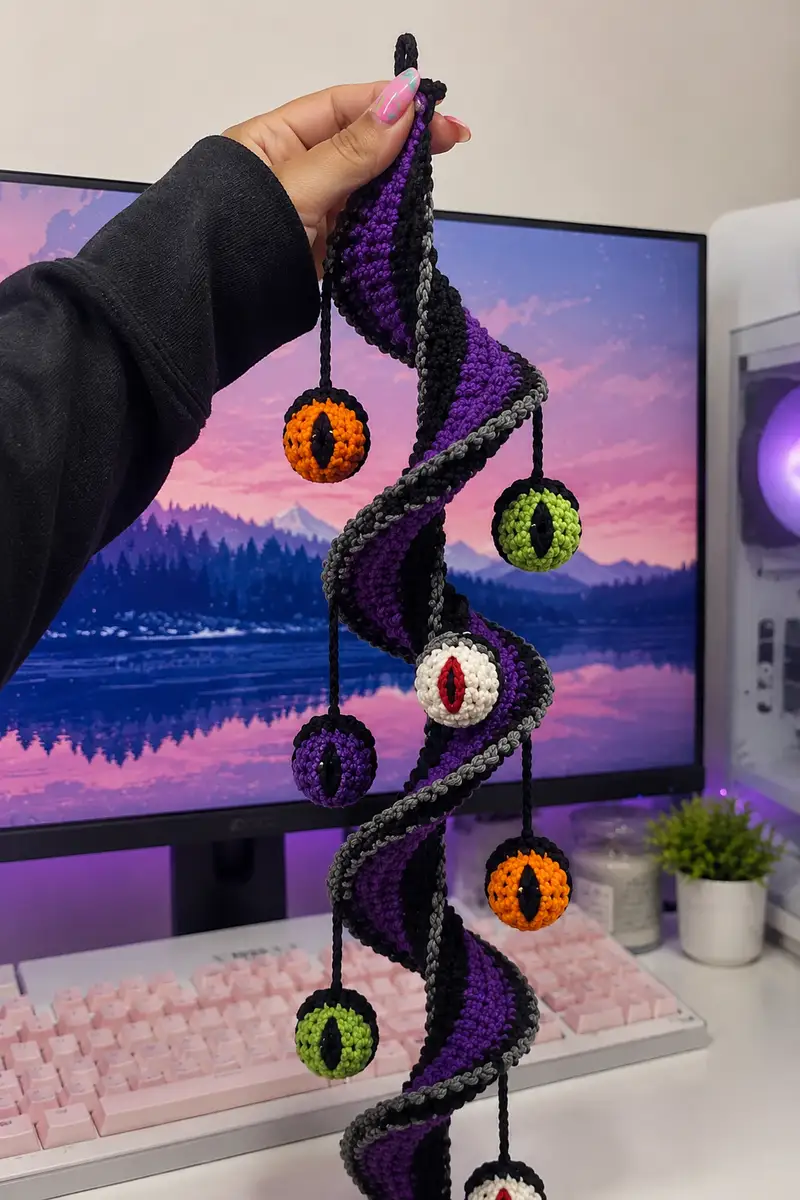
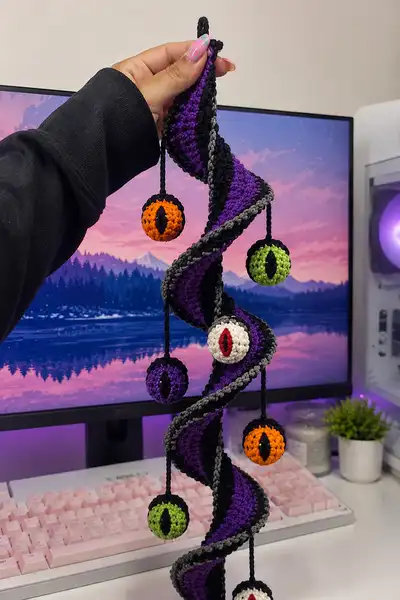
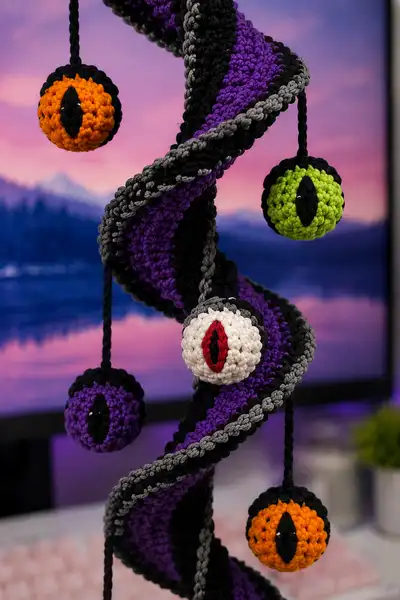
Create a striking Halloween spiral garland decorated with dangling, slit-pupil eyeballs. This decorative pattern uses bold color blocks — purple, black, grey and pops of neon orange, green and white — to form a long twisted ribbon with multiple crocheted eyeballs suspended on cords. The finished piece hangs beautifully as a doorway decoration, wall accent, or spooky mobile for seasonal decor. Clear step-by-step instructions cover the long spiral body, braided edge, cords and detailed spherical eyeballs.
Progress Tracker
0% Complete
— Materials & Gauge :
Info :
Gauge is not critical for this decorative garland but aim for tight single crochet so the stuffing of eyeballs does not show through. If you substitute yarn, adjust hook size down one to two sizes for amigurumi spheres.
— Overview :
Info :
This project is made from three main components: the long spiral ribbon (worked as a long continuous strip in rounds), a braided grey edge with slipped stitches to lock the helix, and small crocheted eyeballs (spherical amigurumi) that hang on cords. The spiral strip is color blocked: a central panel in purple (approx 20 sts wide) flanked by black panels (approx 12 sts each). You will work the strip in joined rounds (a continuous tube-like rectangular strip) with occasional shaping increases and decreases on alternating sides to encourage a gentle twist when blocked. After the strip is completed, add the grey braided trim to one side and a narrow black border to the other to create the crisp two-color edge visible in the images.
— Long Spiral Strip (make 1 long strip) :
Round 1 :
Foundation: ch 44, join with sl st to first ch to form a ring. (44)
Info :
This chain width gives a comfortably wide ribbon (44 sts). The center panel is 20 sts (purple) and each side panel 12 sts (black). If you want a narrower or wider spiral, change foundation ch in multiples of 4 to keep proportions.
Round 2 :
Ch 1, sc in same st and in each ch around, join with sl st to first sc (44)
Round 3 :
Change to purple at the start of the round (Info: change while working last pull-through of join). Ch 1, sc in next 12 sts in black (carry black inside or fasten off), sc in next 20 sts in purple, sc in last 12 sts in black. Join. (44)
Info :
We will maintain 44 sts on most rounds. Color changes: work the last pull-through of the stitch before the color change with the new color to create a neat join. Carry the unused color along the inside if you prefer not to cut but trap floats every 6-8 sts.
Round 4 :
Ch 1, 1 sc in each st around (44)
Round 5 :
Ch 1, sc around (44)
Round 6 :
Repeat Round 5 (44)
Info :
Begin gentle shaping to encourage a spiral twist: every 8th round perform an edge decrease on the left edge and an edge increase on the right edge. These should be performed on opposite sides to slightly bias the strip. The increases and decreases are balanced so stitch count remains 44 but cause a slow lateral drift of fabric.
Round 7 :
Ch 1, sc in first 3 sts, inc in next st, sc next 36 sts, dec over last 4 sts (work dec finishing over last two stitches), join. (44)
Round 8 :
Ch 1, sc in each st (44)
Round 9 :
Ch 1, sc in each st (44)
Round 10 :
Ch 1, sc in first 4 sts, inc in next st, sc across next 35 sts, dec over last 3 sts (44)
Info :
Every set of shaping rounds should be subtle – do not over-increase or decrease or you will create bulky corners. The goal is a gradual bias that makes the strip curl into a spiral when blocked. Keep stitch count consistent and symmetrical across color panels.
Rounds 11-16 :
Ch 1, 1 sc in each st around (44) — maintain colors: first 12 sts black, next 20 sts purple, final 12 sts black; join at end of each round. (44)
Round 17 :
Ch 1, sc in first 5 sts, inc in next st, sc in next 33 sts, dec across last 2 sts (44)
Round 18 :
Ch 1, sc around (44)
Rounds 19-24 :
Ch 1, 1 sc in each st (44)
Info :
At this point you should have 24 rounds. The strip begins to develop a slight bias; lay it flat occasionally and view from various angles. If one side is curling too aggressively, skip the next shaping round and continue even rounds until the bias reduces slightly.
Round 25 :
Ch 1, sc in first 6 sts, inc in next st, sc next 35 sts, dec last 3 sts (44)
Round 26 :
Ch 1, sc around (44)
Rounds 27-32 :
Ch 1, sc in each st (44)
Round 33 :
Ch 1, sc first 7 sts, inc next st, sc next 34 sts, dec last 4 sts (44)
Rounds 34-40 :
Ch 1, sc around (44)
Info :
Continue the shaping pattern (one round of subtle edge inc/dec every 6-10 rounds) for approximately 70-80 rounds total to reach desired length. The photos show an approximately 55-75cm long spiral — adjust your total rounds to achieve your desired final length. The sample instructions continue to round 80; stop earlier if you have reached the length you want.
Rounds 41-48 :
Ch 1, sc in each st (44)
Round 49 :
Ch 1, sc first 8 sts, inc next st, sc next 33 sts, dec last 4 sts (44)
Rounds 50-56 :
Ch 1, sc around (44)
Round 57 :
Ch 1, sc first 9 sts, inc next st, sc next 32 sts, dec last 4 sts (44)
Rounds 58-64 :
Ch 1, sc around (44)
Round 65 :
Ch 1, sc first 10 sts, inc next st, sc next 31 sts, dec last 4 sts (44)
Rounds 66-72 :
Ch 1, sc around (44)
Round 73 :
Ch 1, sc first 11 sts, inc next st, sc next 30 sts, dec last 4 sts (44)
Rounds 74-80 :
Ch 1, sc around (44)
Info :
Your long spiral strip is now complete at 80 rounds. If you want a shorter or longer garland, adjust total rounds in multiples of the shaping repeat. Fasten off and weave all ends except leave the main working tail on one end for attaching the braided edge. Lay the strip on a flat surface and gently twist into a helix shape to test how it will look once edged. The purple should form the visible center panel as shown in the photos.
— Braided Grey Edge (attach to one long side) :
Info :
The braided grey edge is worked as a narrow slipped-stitch braid that is sewn/worked along one side of the spiral to stiffen and accent the twist. The braid is crocheted separately then worked into the edge with slip stitches to lock the spiral shape. Work enough length to match the spiral edge — approximately equal to the strip circumference times your spiral turns (match to 80 rounds length).
Round 1 :
With grey yarn, ch the length needed to match one side of your strip; for the sample chain 80 (or chain to match measured length). (80)
Round 2 :
Ch 1, sc in 2nd ch from hook and in each ch across, turn. (79)
Rounds 3-5 :
Ch 1, sc across (79)
Info :
To create the braided look, fold the narrow strip lengthwise and use sl st across alternating loops: you can also work one round of sc BLO to form a visible ridge before folding. The sample worked the braid flat then twisted it slightly while attaching.
Round 6 :
FO leaving long tail for attachment. Pin along the chosen side of the spiral with the braid slightly offset so it sits proud of the curve.
Attachment :
Use the long tail to whip stitch the braid to the spiral edge, inserting the needle through the outermost black loops and through the braid every 6-8 stitches. Pull gently to make the spiral hold shape. Secure ends and weave tails neatly on the inside/back of the ribbon.
Info :
If you want more stiffness, insert thin wire inside the braid before final stitching and tuck ends inside the stitches so they are not visible.
— Narrow Black Border (work directly onto other long side) :
Round 1 :
Attach black yarn to the opposite edge with a sl st every 3-4 stitches, then ch 1 and work 1 sc in each st along edge to create a narrow border. Work evenly to cover any exposed raw edges. (approx 80 sc)
Rounds 2-3 :
Ch 1, sc around in each st to reinforce the edge. FO and weave ends. (80)
Info :
This black border gives the crisp outline seen in the photos. Together with the grey braid these two edges keep the ribbon curled into a spiral when the piece is hung.
— Hanging Loop & Cord Anchors :
Round 1 :
At the top end of your spiral, attach black yarn on the inside top and ch 25 (or length you want for hanging). Join to form a loop with sl st and FO. Use this as your hanger.
Info :
For a clean look, use a chain made from 2 or 3 strands held together if you want a thicker hanger. Knot and weave the tail through several inside stitches so the hanger is secure.
— Hanging Cord (make 6 or as many eyeballs as you want) :
Round 1 :
Using black yarn, ch 30 (or length to position eyeballs along spiral). FO leaving long tails for attachment to eyeball and for tying to spiral edge. (30)
Info :
Measure and cut cord lengths to position eyeballs at varying points along the spiral (top, mid, lower). The photo shows cords of varying lengths for a staggered effect. You can create a small loop at the top of each cord before sewing to the ribbon edge or simply sew the top of the cord into the border edge with several secure stitches.
— Eyeball (Make 6) :
Info :
Each eyeball is crocheted in rounds as an amigurumi sphere. The sample eyeballs are worked in six colors: orange, green, purple, white/cream and another orange/green pair. For each eyeball, make the spherical body then add a small black vertical pupil applique by crocheting a narrow oval and sewing it to the sphere surface. Work one eyeball in full detail below; make 6 total, changing main color as desired.
Round 1 :
With main eyeball color (e.g., orange), mr, 6 sc in mr (6)
Round 3 :
(1 sc, inc) x 6 (18)
Round 4 :
(2 sc, inc) x 6 (24)
Round 5 :
(3 sc, inc) x 6 (30)
Round 6 :
(4 sc, inc) x 6 (36)
Round 7 :
(5 sc, inc) x 6 (42)
Round 8 :
(6 sc, inc) x 6 (48)
Info :
At rounds 7-8 the eyeball reaches a good diameter for a small ornament. Continue working even rounds if you want a larger eyeball. The sample uses rounds up to 14 even-rounds before decreasing to create a plump sphere roughly 3.5-4.5 cm diameter depending on yarn/hook.
Round 9-12 :
1 sc in each st around (48)
Round 13 :
(6 sc, dec) x 6 (42)
Round 14 :
(5 sc, dec) x 6 (36)
Info :
Start stuffing the eyeball firmly but not overly so. Use small amounts of fiberfill, push into tight crevices with a blunt yarn needle or stuffing tool to avoid lumps.
Round 15 :
(4 sc, dec) x 6 (30)
Round 16 :
(3 sc, dec) x 6 (24)
Round 17 :
(2 sc, dec) x 6 (18)
Round 18 :
(1 sc, dec) x 6 (12)
Info :
Fasten off leaving a long tail for sewing the top of the eyeball to the cord. Securely close the opening by threading the tail through the 6 center stitches and pulling tight. Weave tail inside to hide it. Note: before fully closing, ensure the pupil applique positioning is decided as you may need access to shape the sphere slightly.
— Pupil Applique (Make 6, one per eyeball) :
Round 1 :
With black yarn, ch 6, sc in 2nd ch from hook and next 3 ch, 3 sc in last ch, continue working on opposite side of foundation chain: sc next 4 ch, 2 sc in last ch. Join to form an oval. (12)
Round 2 :
Ch 1, sc in each st around to deepen the oval, keep stitches snug. (12)
Round 3 :
Optional: (sc, inc) x 6 (18) for slightly larger pupil if needed to match eyeball scale. FO leaving a long tail for sewing.
Info :
Place the pupil centrally on the eyeball. Use a few mattress stitches around the perimeter to fasten it down flat. Slightly flatten the pupil by pulling the stitches taut so the slit shape is visible. The sample images show a vertical almond-shaped slit centered on the sphere; sew the top and bottom securely to maintain the shape.
— Red Inner Iris Accent (optional for white eyeball) :
Round 1 :
With red yarn, ch 6, sc across into a small oval of 6-8 sc as needed to fill vertical slit center. FO leaving tail for sewing. Place over pupil center and stitch down for the red inner look on the white eyeball only.
Info :
For the white eyeball in the center of the photo, a narrow red oval layered under the black pupil creates the dramatic vertical look. For colored eyeballs (orange/green/purple) leave the pupil black only.
— Attaching Cord to Eyeball :
Round 1 :
Thread the long tail of the cord through the top center of the eyeball (where you fastened off). Whip stitch through a few rounds of stitches, go around 5-6 times to secure. Tie a small knot inside the sphere for extra security, then weave end through internal stuffing and trim.
Info :
Test the security by gently tugging the cord. If using for display in a high-traffic area, add a dab of fabric glue into the stitch area and allow to dry to prevent slip. For children's toys, avoid glue and use extra thread stitches instead.
— Finishing & Assembly :
Info :
Decide eyeball placement before permanently sewing cords into the spiral. Lay the spiral helix flat, mark approximate attachment points with pins. The sample uses six eyeballs staggered equally down the length with two on the top half, one centered mid, and three toward the lower half for visual balance.
Step :
Sew each cord top into the black border edge using a needle and the cord tail: pass the needle under the border stitches and stitch back and forth through the border and cord top 6-8 times to lock in place. Tie a secure knot and bury ends into the spiral interior through several stitches.
Info :
Make small variations in cord length so the eyeballs hang at different heights for a dynamic look. Trim any excess cord and weave ends in tightly. If you want them removable, tie a small slip knot to a sewn-in loop on the spiral edge instead of sewing directly.
Step :
Block the whole spiral lightly by pinning the braid and the opposite border to a foam board in the desired helix shape. Use steam or a mist of water to set the yarn (if yarn label allows) and let dry overnight. This helps the spiral hold its twist and gives a polished look.
Info :
Weave in all loose ends on the inside/back side of the garland to maintain a tidy front face. For extra durability, run a row of small whip stitches along the underside of the braid to ensure it won’t separate with handling.
— Optional Variation: Add Small Bells or Beads :
Info :
You can thread a small bell or bead onto the cord before attaching an eyeball to add sound and weight. Secure with a knot above and below the bead so it doesn't slide. This is purely decorative and optional.
Final Check :
Inspect every eyeball, ensure pupils are stitched flat, cords are secure, braid is sewn down, and hanger loop is reinforced. Hang your garland and adjust spacing if needed for the best visual balance.
This spooky spiral garland blends playful Halloween color with crafty detail to create a standout seasonal decoration. Every crocheted eyeball and twist of the ribbon adds personality and charm that makes it a conversation piece. You’ll love watching it gently sway with its dangling eyes — perfect for porches, dorms, or party decor. 🧶👁️✨ Happy crafting and have fun making your own spooky twist!