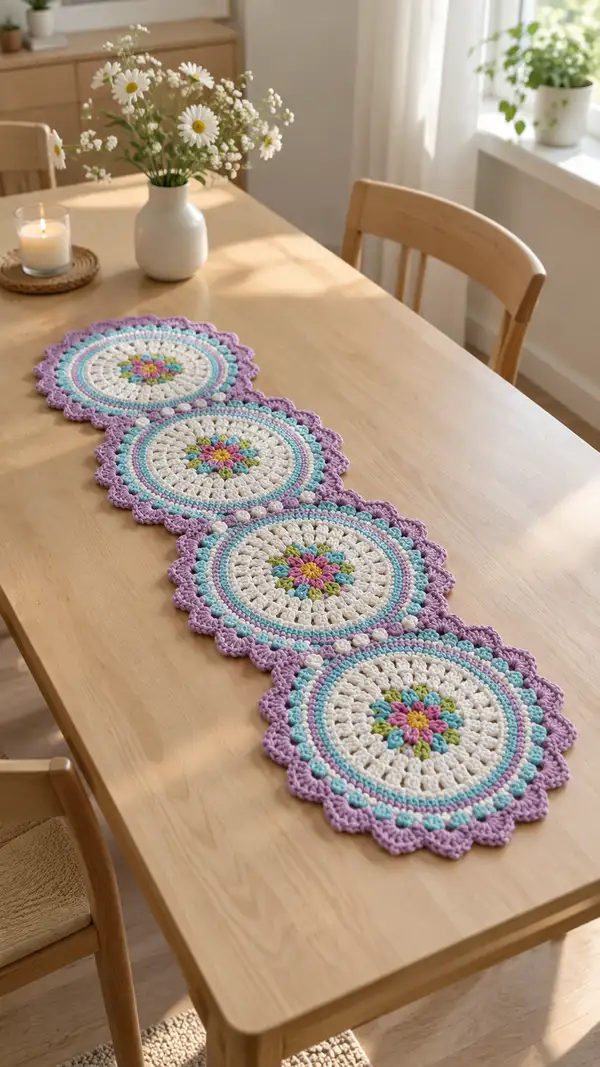
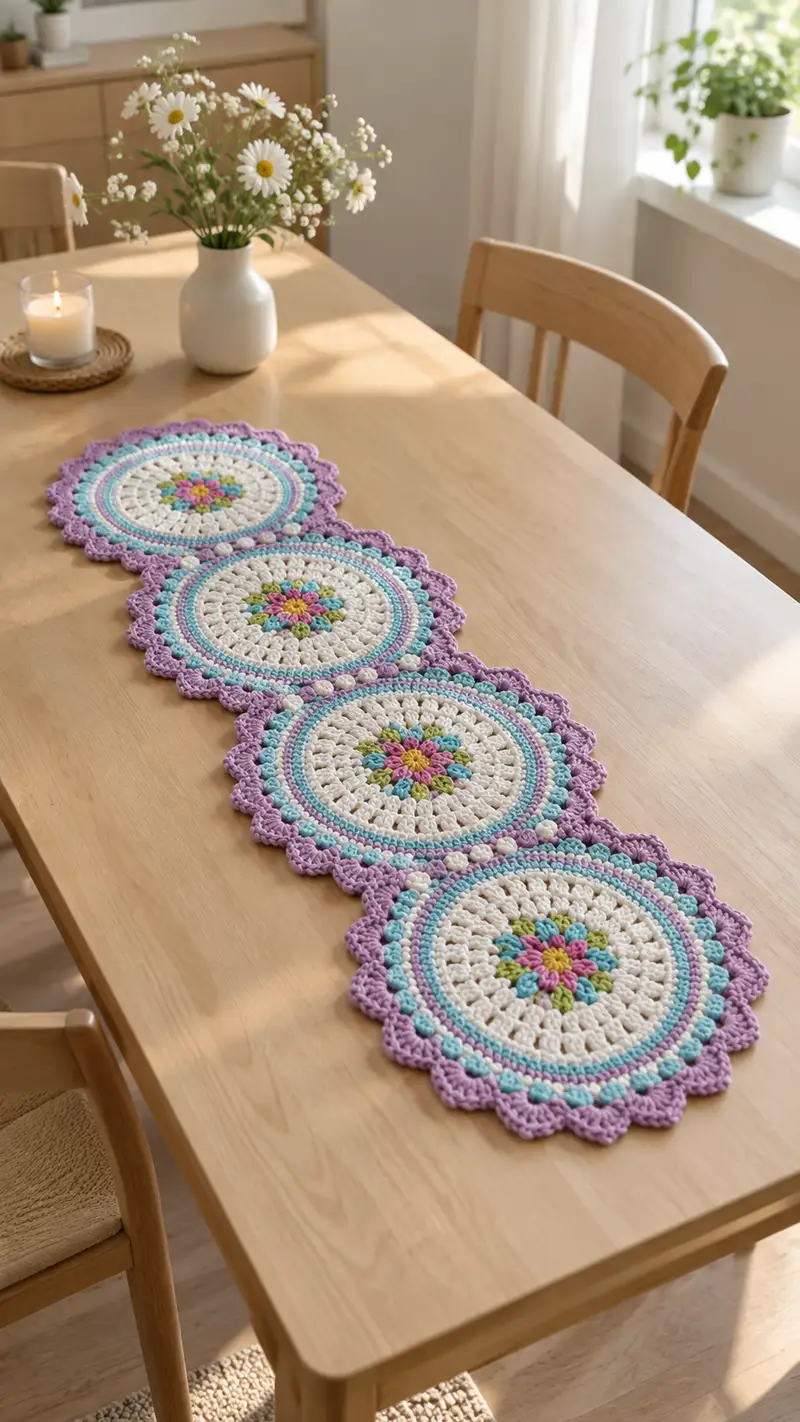
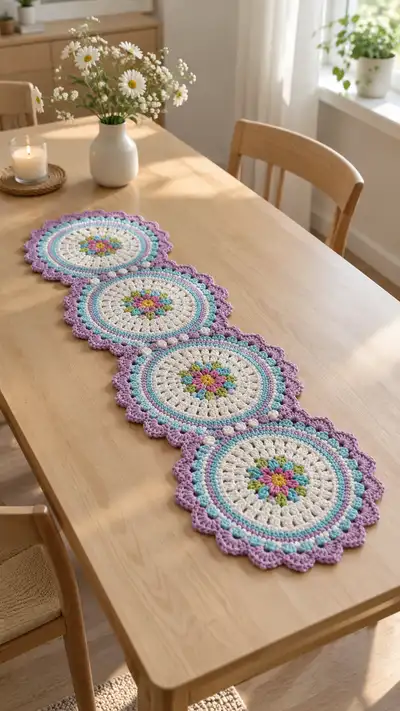
A lovely four-motif crochet table runner made from round floral medallions joined in a row. Each motif features a multicolor flower center, creamy lace rounds, turquoise bobble accent and a soft lavender scalloped edge. The finished runner creates a delicate, vintage-inspired accent perfect for dining tables, buffets or as a decorative centerpiece.
Progress Tracker
0% Complete
— Notes & Gauge :
Info :
Gauge is not critical for table runner proportions, but for reference: 12 rounds of motif measures approximately 10.5" (26.5 cm) across using worsted cotton and 4.0 mm hook. Each finished round motif (as pictured) is approximately 11-12" (28-30 cm) diameter. Make a small test motif to confirm size and tension.
Info :
Throughout this pattern the phrase 'Make 4' means create four identical round motifs and join them in a straight line. When repeating rounds across motifs the stitch counts shown are the count per motif round. Use stitch markers to mark round starts to keep motifs perfectly round.
— Motif (Make 4 identical motifs) :
Round 1 :
With color Yellow (flower center): Make a magic ring, ch2 (counts as first dc), work 11 dc into the ring, pull ring tight, sl st to top ch2 to join (12 dc) (12)
Info :
Keep your tension slightly loose in the very first round to avoid the center puckering. The ch2 counts as the first dc in all dc-start rounds in this pattern.
Round 2 :
Change to Leaf Green: ch2, 1 dc in same st, *ch2, 2 dc in next dc*; rep from * around to create 12 small ch2 spaces between dc pairs; sl st to top ch2 to join (24 dc, 12 ch2 spaces)
Round 3 :
Change to Bright Pink (petal color): *Into each ch2 space work (sc, hdc, 3 dc, hdc, sc)*; work the 12 shells around without skipping spaces, join with sl st to first sc. Total stitches this round: 12 shells x 7 sts = 84 (84)
Info :
These shells form the visual flower petals. Work the shell stitches into the chain-2 spaces from Round 2. When you slip stitch to join, keep your seam tidy by not pulling too tightly.
Round 4 :
Change to Cream (main background): ch1, 1 sc in each stitch around across all shells (84 sc) (84)
Round 5 :
(7 sc, inc) x 12 — Work evenly around: 7 sc, 1 sc inc in next stitch; rep total 12 times; join (96)
Info :
Mathematically: (7+1)*12 = 96. This round expands the medallion to a more open lace field to frame the petals. Place a stitch marker at the start of the round.
Round 6 :
1 sc in each st around (96) (96)
Round 7 :
Change to Turquoise: *3 sc, make a bobble in next st*; rep from * around so that you have (3 sc + bobble) repeated 24 times (96 sts total). Join with sl st (96)
Info :
Bobble instruction: Yarn over, insert hook in indicated st, yarn over and pull up loop (3 loops on hook); repeat 4 more times (working a total of 5 partial loops into same stitch), yarn over and pull through all 6 loops, ch1 to secure bobble. Alternately use a 5-dc popcorn for the bobble if you prefer a different texture.
Round 8 :
1 sc in each st around in Turquoise to anchor bobbles (96)
Round 9 :
Change to Cream: (8 sc, inc) x 12 — work 8 sc, 1 inc; rep to create 108 sts (108)
Round 10 :
1 sc in each st around (108)
Round 11 :
(9 sc, inc) x 12 — work 9 sc, then inc; rep around to create 120 sts (120)
Info :
These regular increase rounds keep the circle flat. If the motif starts to ruffle, remove one increase evenly around the next round; if it begins to cup, add an increase evenly instead. Keep increases in groups of 12 so the floral symmetry aligns.
Round 12 :
1 sc in each st around (120)
Round 13 :
Change to Aqua: *4 sc, puff stitch in next st*; rep around so you have 24 puff stitches and 24 groups of 4 sc, totaling 120 sts (120)
Info :
Puff stitch: Yarn over, insert hook in stitch, yarn over and pull up loop; repeat 3 more times (total 4 partial loops), yarn over and pull through all 5 loops on hook, ch1 to close the puff. Keep the loops even for uniform puff height.
Round 14 :
1 sc in each st around in Cream to stabilize texture (120)
Round 15 :
(10 sc, inc) x 12 — work 10 sc then inc; rep to increase to 132 sts (132)
Round 16 :
1 sc in each st around (132)
Round 17 :
1 sc in each st BLO around to create a subtle ridge (132)
Info :
Working in BLO (back loops only) on this round gives a defined ridge that helps the final scallop sit neatly. Place marker at start of each round to maintain correct stitch counts through textured rounds.
Round 18 :
Change to Turquoise: (5 sc, popcorn) x 22 — work 5 sc then a popcorn in next st; rep 22 times for a total of 132 sts (132)
Info :
Popcorn stitch: Work 5 dc in same stitch; remove hook from last loop, insert hook into first dc of the 5-dc group, grab loop back with hook and pull through to close popcorn. Alternatively, use a 5-dc cluster and sl st to close.
Round 19 :
1 sc in each st around in Cream (132)
Round 20 :
(11 sc, inc) x 12 — work 11 sc then inc; rep to increase to 144 sts (144)
Round 21 :
1 sc in each st around (144)
Round 22 :
Change to Cream: Work a decorative shell round: *sc in next 2 sts, work (2 dc, ch1, 2 dc) in next st (shell), sc in next 2 sts*; rep around. Each shell occupies 6 sts; with 144 sts you will create 24 shells evenly spaced around. Join (144)
Info :
To ensure shells are evenly placed, count groups: 144 / 24 = 6 stitches per shell group. Work shells into the single stitch indicated; the surrounding sc will keep the shell spaced consistently. This forms the base for the scalloped edge.
Round 23 :
1 sc in each st around in Cream (144)
Round 24 :
Change to Turquoise: *2 sc, bobble in next stitch, 2 sc*; repeat across each 6-st group so you have one bobble centered over each shell (24 bobbles). Total sts remain 144 (144)
Info :
These turquoise bobbles create the small repeating accent visible near the outer edge in the photo. Place them centered on each shell group for a rhythmic look.
Round 25 :
1 sc in each st around in Cream to tidy the bobbles and secure (144)
Round 26 :
Change to Lavender: Preparation round for scallops — ch1, sc in each st around (144)
Round 27 :
Start scalloped edge: *sk next 2 sts, in next st work (sc, hdc, 3 dc, hdc, sc) (this forms a large scallop); sk next 2 sts, sl st in next st to anchor*; rep around for a total of 24 scallops. Count-wise: each scallop uses 5 working stitches and 2 skipped stitches per 7-st segment across 24 repeats = 168? To keep the math consistent, distribute the sl st anchors across every 6 stitches: work *sc in next st, (5 dc in next 4 sts worked as cluster across the following 4 sts), sc in next st* across the 24 shell anchors so you form 24 scallops (use even spacing, see Info).
Info :
Scallop spacing can be adapted to your tension: the pictured scallop count is 24 around each motif. If your stitch count shifts slightly, increase or decrease the number of sc between scallop shells so you still have approximately 24 scallops for an even look. Use the underlying shell markers from Round 22 to guide scallop placement.
Round 28 :
In Lavender: Fasten scallops by working 1 sc in each stitch and anchor across scallop bases (maintain 144 anchors), sl st to join. Smooth any small gaps with extra sc as needed (144)
Round 29 :
Finishing scallop ridge: *In each scallop work (sl st in top of scallop, ch3, sl st)* to create tiny picot-like ridges atop each scallop. Rep 24 times. This round is decorative — total stitch count follows previous anchors (144)
Info :
If you prefer a fuller scallop, work an additional round of Picot-Edging: *sc, picot, sc* across scallop arc. The photo shows a softly rounded scallop with subtle picot ridges; adapt per your preference.
Round 30 :
Secure last color changes: weave in ends leaving 6" (15 cm) tails if you plan to use join-as-you-go when connecting motifs. Do not fasten off entirely if join-as-you-go is your method (leave working tail attached), otherwise fasten off and weave ends fully before joining.
Round 31 :
Blocking prep: If finishing motif separately, damp-block the motif now by pinning it flat to 11-12" diameter and allow to dry to set scallops and bobbles. If joining as-you-go later, blocking after joining the full runner is acceptable.
Round 32 :
Final tidy pass: With a contrasting small needle, weave tail ends through 6-8 stitches and trim close to work. Ensure all bobbles and puffs are anchored by back-weaving in the adjacent round to keep texture stable.
Round 33 :
Make 4 motifs total repeating Rounds 1-32 for each motif. Keep them identical by counting precisely and using the same yarn sequence for each color round. After making four motifs proceed to joining and final runner border instructions below.
Info :
Each completed motif measures approx 11-12" diameter. Space and tension between motifs will determine final runner length; with four motifs joined in a line your runner length will be approximately 44-48" not including extra border width. Adjust number of motifs to length desired.
— Joining Motifs & Runner Assembly :
Info :
There are two recommended joining methods: 1) Join-as-you-go (JAYG) during the final scallop rounds of the second, third and fourth motifs; or 2) Sew motifs together after all are completed using mattress stitch or whip stitch. The photo shows a neat, slightly inset join with small connecting bobbles — JAYG gives the cleanest result.
Join Step 1 (JAYG option) :
When making motif #2 (the one adjoining motif #1), on Round 28 (scallop anchor round) instead of working single crochet into every scallop anchor, work single crochet into 3 of the 6 anchors then join by sl st to the corresponding motif #1 scallop anchor, continuing the scallop across the seam. Repeat across the touching arc joining scallop-to-scallop. This will create small, subtle connectors of sl st and sc that mimic the photo's flat seam.
Info :
Practical tip: Place the first motif flat on your work surface and align motif #2 directly above it when joining. Use pins or locking stitch markers to hold scallops aligned. Work slowly — count scallop anchors on both motifs and join corresponding anchors consistently.
Join Step 2 (Sewing option) :
Block motifs flat. Pin motifs together with scallops aligned, then using matching cream yarn and a yarn needle sew through the scallop base stitches with an invisible mattress stitch or small whip stitch. Make 6-8 secure passes per scallop anchor for a stable join. Finish by weaving tails into motifs.
Round 34 :
Once all motifs are joined in a row (either JAYG or sewn), work a small connecting ridge along the inner seam on the runner: With Cream, join at the seam point and work 1 rnd of sc across the seam area bridging the two motifs to hide sl st joins and tidy the seam (work 1 sc in each existing stitch across seam), continue around entire runner borders where motifs meet to even out the surface.
Info :
This tidy ridge gives the look of a unified runner instead of four separate circles. If you used JAYG you may only need 1 round; sewn joins may require 2 rounds to even the seam surface.
Round 35 :
Optional center row accents: With Turquoise, work a decorative reverse single crochet (crab stitch) along the inner long seam between motifs for a subtle finished look. Work 1 round crab stitch along seam only, not around the exterior edge.
Info :
Crab stitch is worked left-to-right (reverse sc). It creates a corded ridge that protects seams and gives a handmade polished edge to the runner center.
— Final Unified Edge (Runner Border) :
Round 36 :
With Lavender, join at any outer edge point and work 1 round of 1 sc in each st around the entire outside perimeter of the joined motifs to unify edges (total sts will equal the sum of the outer stitches of all motifs; maintain even tension). Join with sl st.
Round 37 :
Change to Turquoise: For a tidy accent row work *3 sc, skip 1* around entire outer edge, join with sl st. This small scalloped decrease creates an even rhythm for the outer scallops to sit nicely (counts will follow the previous round's stitch number).
Round 38 :
Change to Lavender: Work a wide scallop shell around the whole runner edge to mirror single motif scallops — *sk next 2 sts, in next st work (sc, hdc, 3 dc, hdc, sc), sk next 2 sts, sl st*; repeat around. Adjust spacing slightly at motif joins to keep scallops even.
Info :
The final border wraps the four circles into a visually continuous runner. Stretch and pin while working to make sure scallops on different motifs align. The join areas may need small adjustments where two outer arcs meet; add or remove an anchor sc to keep scallops even.
Round 39 :
In Lavender, work a finishing picot-round for delicate detail: *sc in each scallop, ch3, sl st into top of scallop center*; rep across all scallops for a refined finished look. Fasten off and weave in ends cleanly.
Round 40 :
Blocking: Wet-block or steam-block the entire joined runner. Gently pin edges and scallops into shape so the runner lays flat; allow to dry fully to set the shape. This step is essential for a professional flat finish and crisp scallops.
Info :
Starching: If you desire a stiffer table accent, apply a fabric stiffener or diluted white glue solution while pinning and allow to dry. Keep a clean towel underneath to protect your work surface. The pictured runner has a soft but stable drape — light blocking is sufficient.
Round 41 :
Finishing touches: Weave in all loose ends, trim tails close to the fabric, and if desired add small non-slip pads under each motif to protect surfaces. Re-check bobbles and puffs for security and reinforce with a small hidden stitch if any feel loose.
Info :
Optional embellishment: For seasonal decoration you can add small felt flowers or embroidered leaves onto the central cream rounds using embroidery thread; stitch through the backs so embellishments sit flat and secure on a tabletop.
Finishing this runner is such a satisfying, mindful project — each floral medallion comes together with bright centers, creamy textured rounds, and a delicate lavender scallop that frames your table beautifully. The turquoise bobble row adds playful rhythm along the design, and the join-as-you-go or sewn seam methods both yield a professional finish. Lay it across your table and enjoy the soft handmade charm it brings to everyday moments. 🌼🧶