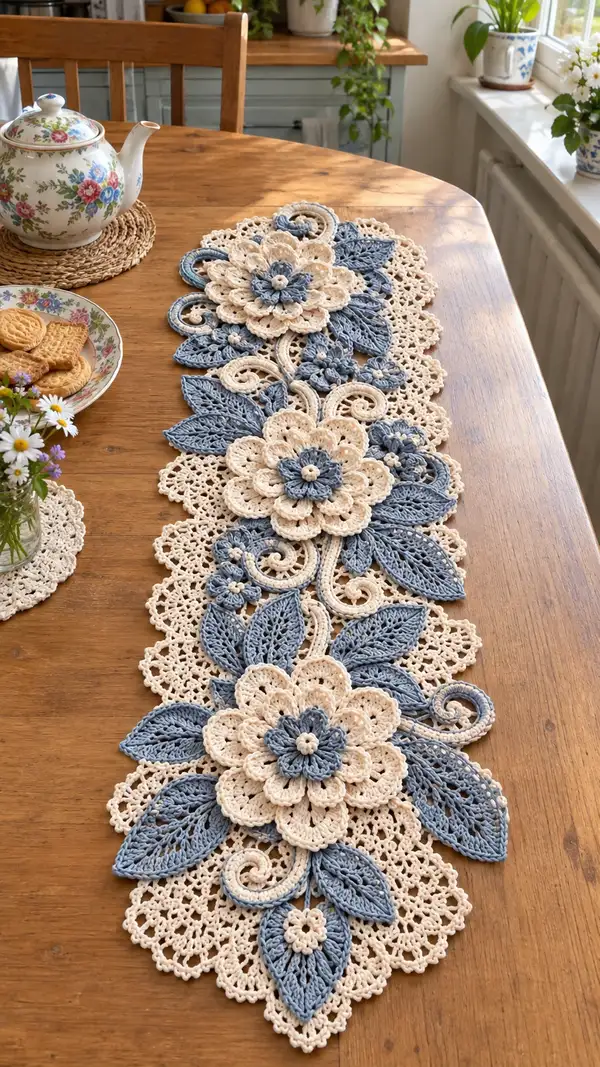
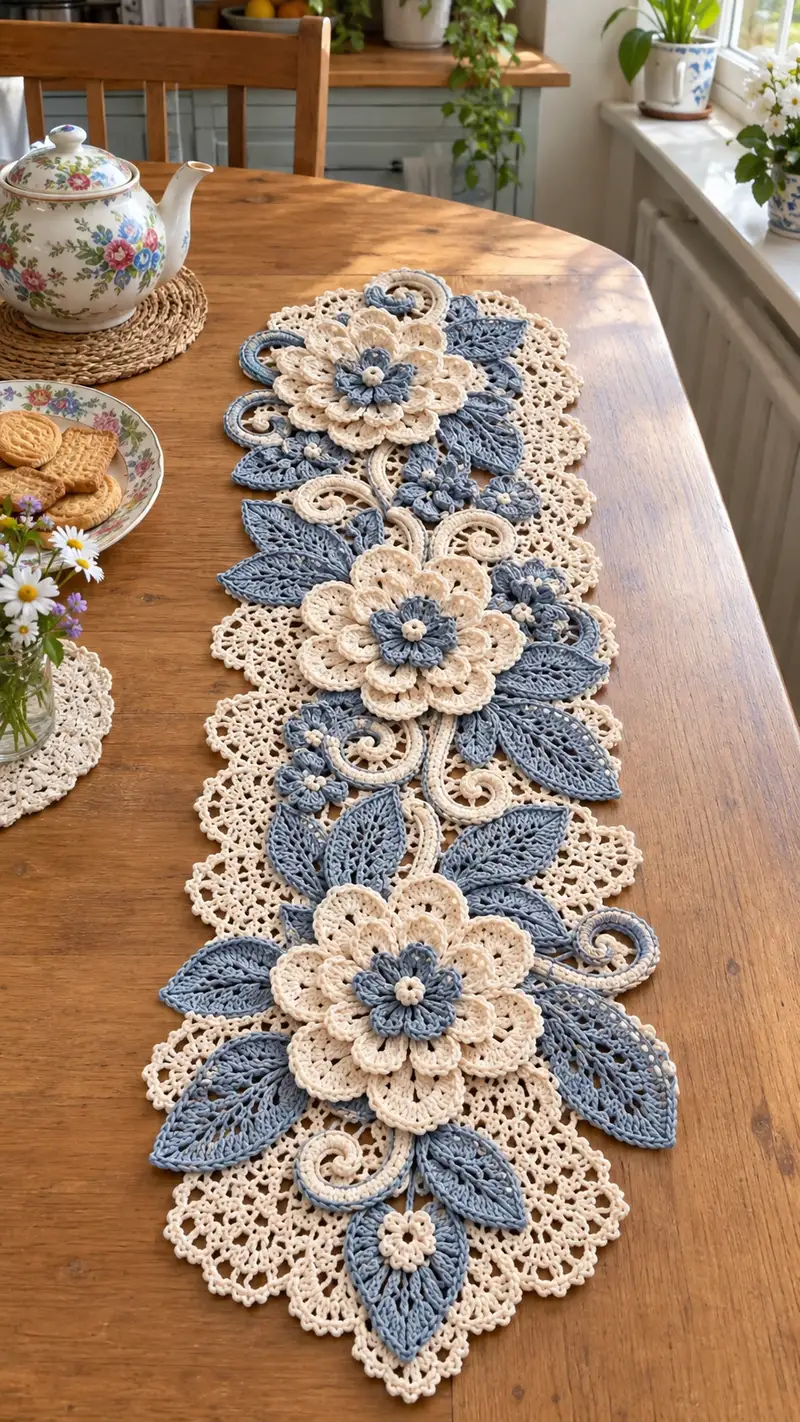
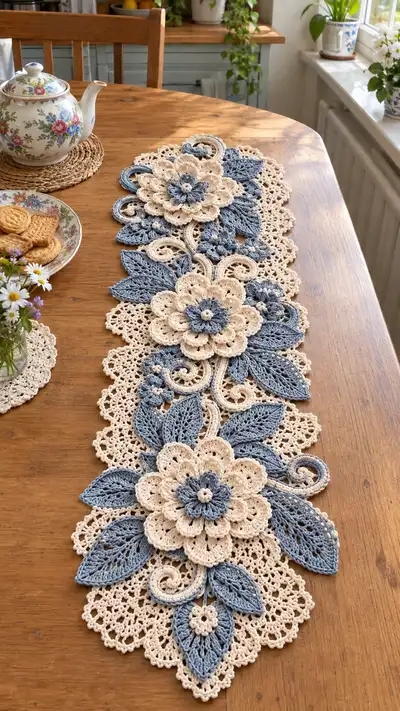
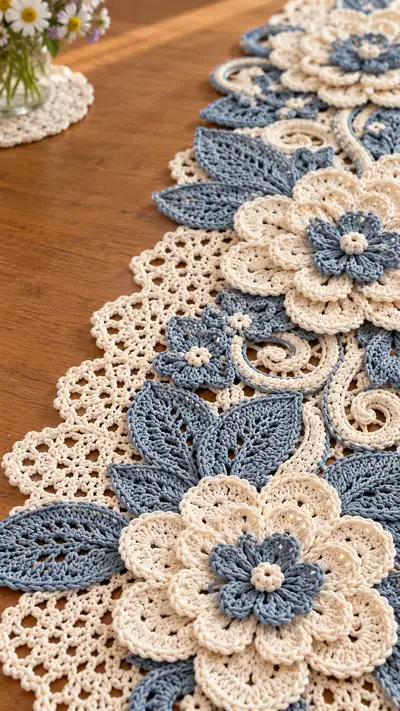
Create a stunning floral lace table runner featuring layered 3D flowers, delicate leaf motifs, and scrolling tendrils in two soft colors. This pattern uses cotton yarn for crisp stitch definition and a vintage-inspired look. Works beautifully as a centerpiece on dining or console tables and is built from modular motifs joined with a lacy ground. Detailed instructions guide you through each petal, leaf, spiral and join for a polished finished piece.
Progress Tracker
0% Complete
— Pattern Overview :
Info :
This pattern is constructed from modular motifs: Large layered flowers (3), medium filler flowers, elongated leaves, spiral tendrils and a lacy ground motif that acts as the background. All motifs are made separately and joined-as-you-go. Work with mercerized cotton for crisp stitch definition and block each motif before assembly. Use the 3.0mm hook as standard unless your gauge is loose; adjust down 0.25-0.5mm to tighten fabric.
Info :
Abbreviations: sc=single crochet, dc=double crochet, tr=treble, ch=chain, sl st=slip stitch, BLO=back loops only, FLO=front loops only. Numbers in parentheses at the end of rounds indicate total stitches or petals as appropriate.
— Large Layered Flower (Make 3) :
Round 1 :
With dusty blue, make a magic ring, ch1, 8 sc in ring. Pull tight. (8)
Round 2 :
Inc in each stitch around (2 sc in each st) — 8 inc (16)
Round 3 :
*(1 sc, inc) repeat* around (1 sc, inc) x8 (24)
Round 4 :
*2 sc, inc* x8 (32)
Info :
Center base completed. You will now build the first petal round using chain arches to shape petals. Keep a stitch marker at start of each round.
Round 5 :
Ch3 (counts as first dc), *skip 1 st, work 5 dc in next st, skip 1 st, sl st in next st; rep from * around to form 8 small petals. (8 petals)
Round 6 :
Switch to cream. Join with sl st at base of any petal. Ch3, work (2 dc, ch2, 3 dc) into same sp to make a shell, *sl st into next petal base, ch3, (3 dc, ch2, 3 dc) into next petal base; rep around.* (8 shell petals)
Round 7 :
Ch1, sc in each dc and ch space around to even the edge. Work 3 sc in each ch2 space to anchor. (approx. 88 sc - counts will vary by tension)
Info :
Stuffing note: These flower motifs are flat layers; do not stuff. Press lightly while blocking. If adding bead centers, secure beads after assembly. Add a small picot edge if desired for a finished look.
Round 8 :
Work a petal overlay: Join dusty blue at any petal base. ch3, (tr, ch2, tr) in same sp, *skip to center of next shell and work (tr, ch2, tr) to create 8 taller petals; sl st to join.* (8 tall petals)
Round 9 :
Ch1, sc around each tall petal edge, placing 5 sc in each ch2 space and 1 sc in each tr to create an even scallop. Fasten off and weave tail. (approx. 120 sc overall around three layers)
Info :
Create a small center bobble cluster: With cream, make 5 sc into magic ring, ch1, pull tight, join. Round 11 (center finishing) will attach bobble to flower center.
Round 11 :
Join bobble cluster to center of flower with sl st through central ring and through a few central stitches. Sew securely with tapestry needle. Repeat for all three large flowers.
Info :
Flower finishing: Block each flower flat. Pin petals gently outward to produce a layered 3D effect. Use light steam or spray starch if you prefer a more rigid look.
— Medium Floral Motifs (Make 6-8) :
Round 1 :
With dusty blue, magic ring, ch1, 6 sc in ring. (6)
Round 3 :
(1 sc, inc) x6 (18)
Round 4 :
Change to cream. *Ch4, sl st into next st; rep around to create 6 loops for small petals.* (6 loops)
Round 5 :
Into each loop: work (sc, hdc, 3 dc, hdc, sc) to form fuller petals. Fasten off and weave ends. (6 petals)
Info :
Use these medium motifs as linkers between large flowers and leaves. Place them so they help bridge gaps in the lace ground.
— Small 5-Petal Flowers (Make 10-12) :
Round 1 :
With dusty blue, ch5, sl st in first ch to form ring, ch1, 10 sc in ring. (10)
Round 2 :
*(ch4, sl st in next st)* x5 to create 5 chain loops. (5)
Round 3 :
In each loop work (sc, hdc, 3 dc, hdc, sc) to create small petals. Fasten off, weave tail. (5 petals)
Info :
Small flowers are used as decorative fillers. Pin them onto the lace ground when arranging motif layout. They provide center points for tiny bobbles or tiny cream picot centers.
— Elongated Leaf Motif (Make 12-16) :
Round 1 :
With dusty blue, ch12. Row 1: sc in 2nd ch from hook and across to last ch, sc in last ch, rotate and work along opposite side of foundation chain: sc in each ch back to beginning (approx. 22 sc). Join with sl st to first sc. (22)
Round 2 :
Ch2 (counts as hdc), hdc in same st, *skip 1 st, (2 hdc, ch2, 2 hdc) in next st as central eyelet; skip 1 st; rep across creating 3-4 central eyelets depending on length; end with 2 hdc in last st. Join.* (approx. 26 sts)
Round 3 :
FLO: Ch1, sc in each st around to create a raised rim. (approx. 26 sc)
Round 4 :
Ch3, *dc cluster in central eyelet: (2 dc, ch1, 2 dc) in each ch2 eyelet; sl st into next st; rep.* This forms a decorative open vein. Fasten off. (leaf segments: 3-4)
Info :
To create the raised vein look: after blocking, run a line of running stitch with matching yarn along the central column on the wrong side and pull gently to create a slight curve. Alternatively, use a single crochet ridge in BLO along the midline during Round 3.
Round 6 :
Edging: With cream, join and sc around the leaf edge placing 3 sc in tip to round it neatly. Fasten off and block. (approx. 36 sc)
— Small Leaf Pair and Mini Filler Leaves :
Round 1 :
With cream, ch8, sc across, sc back across opposite side (approx 14 sc). Join. (14)
Round 2 :
Ch1, sc in each st BLO to create a defined edge, sl st to join. Fasten off. (14)
Info :
These tiny leaves tuck under flower heads and in gaps on the lacy ground. Make extra — placement options will vary by your desired runner length.
— Decorative Spiral Tendril (Make multiple long and short curls) :
Round 1 :
With cream, ch30 (length varies for long tendrils; make ch18 for short). Row 1: sc in 2nd ch from hook and each ch to end, do not turn. (29)
Round 2 :
Ch3, 3 dc in first sc, sl st in next sc, *3 dc in next sc, sl st in next; rep across.* The fabric will curl naturally; use more dc clusters for a tighter spiral. Fasten off and block lightly to set curl. (approx 14 clusters)
Info :
Vary the number of chains and cluster spacing to create both tight and loose curls — these add a whimsical flourish between flowers and leaves.
— Lace Ground Motif: Fan/Doily Module (Make 10-14) :
Round 1 :
With cream, ch6, join to form ring. Ch3 (counts as dc), work 24 dc into ring. Join. (24)
Round 2 :
Ch1, *sc in next 3 dc, ch5, skip 2 dc; rep around yielding small chain loops for lacy ground. (approx 8 ch5 loops)
Round 3 :
Into each ch5: work (sc, hdc, 7 dc, hdc, sc) to create fan petals around central disk. Join and fasten off. (8 fans)
Round 5 :
Reverse join: With cream, pick up between fans and create a bridging mesh by working ch7 spaces connected by sc in fan tips, creating a scalloped outer border. This border will become the edge that shows along the table when runner is placed. Fasten off after a neat picot edging. (sc and ch counts vary by join spacing)
Info :
Block each ground motif to the recommended size. Arrange motifs alternating orientation so scalloped edges create a continuous border when joined.
— Assembly: Join-As-You-Go (JAYG) and Motif Layout :
Info :
Layout: Place three large layered flowers lengthwise with two medium flowers and cluster of leaves between them. Use lace ground fan modules to create backing and fill gaps. Place small flowers in crevices for visual balance. Pin everything before joining.
Round 2 :
Start joining from a central flower: With a tapestry needle or slip stitch join, align the edge stitches of the flower and a ground motif. Use sl st to join through corresponding sc on each motif: sl st through motif A then motif B, repeating to create a neat seam. Work 1 sl st per 2-3 sc to maintain flexibility. Continue working outward from center. (joining sequence varies by placement)
Info :
When joining leaves, place the leaf edge under petals and also sl st into the ground motif at 3-4 strategic points along leaf base. Secure with a few sewing stitches using matching yarn if needed to keep leaves laying flat.
Round 4 :
For spiral tendrils: tack the base of each spiral into a junction between a petal and the ground motif with a small number of invisible whip stitches worked from back to front and back to back, then take 1 or 2 visible joining sl sts on top for additional security. (few tacking stitches)
Info :
Use mattress stitch or whip stitch with tapestry needle to close any small gaps. For stronger joins where the runner will be handled frequently, add two passes of joining — first pass by sl st for alignment, second pass by whip stitch for strength.
— Edging and Final Scallop :
Round 1 :
With cream, join at an outermost picot point. Ch1, sc in each visible outer picot around, placing 3 sc in deeper scallop points. (st count depends on runner width)
Round 2 :
*(Ch5, sl st into next sc) to create small loops all around; into each ch5 loop work (sc, hdc, 3 dc, hdc, sc) to form an outer scallop.* Fasten off. (scallop count will match number of outer picots)
Info :
For a refined edge, add a final round of tiny picots: *ch3, sl st in base* placed at 3-4 points inside large scallops. This gives the runner a delicate lace trim and makes the edge visually light.
— Finishing Flower Centers and Small Details :
Round 1 :
Create small bobble centers for large flowers: With cream, ch4, 6 sc into ring, pull tight, join with sl st. Make 3-6 small single bobbles around center by working 3 dc in same st, sl st to base and finish. Sew into flower centers. (6 sc center)
Round 2 :
For very small center dots: use a French knot-like technique with yarn and tapestry needle: wrap yarn around needle twice then pull through at the center to make a raised dot, anchoring from the wrong side. Apply a tiny bead if desired with glue for extra definition.
Info :
Work all centers carefully and sew them so threads go through multiple petal layers and under the flower to prevent movement. Hide tails on the underside of runner and weave them through several stitches.
— Blocking and Stiffening :
Info :
Wet block each motif individually: dampen, pin to blocking board to desired shape using rust-proof pins. For petals, pin edges slightly outward to emphasize layered look. Allow to dry fully. Lightly starch or apply fabric stiffener diluted 1:3 with water for a firmer runner; test on spare motif first.
Round 2 :
Final assembly: After blocking and finishing centers, sew any final loose ends and reinforce joins with small whip stitch passes. Press lightly with steam (do not overheat) and re-pin if any scallops need reshaping. Trim stray threads and glue tiny beads if applied to centers. Your runner is complete.
Info :
Care: Gentle hand-wash in cool water with light detergent. Re-block to shape and air dry flat. Avoid machine washing to preserve delicate joins.
This floral lace table runner brings a vintage-inspired elegance to any table, combining layered 3D flowers with delicate leaves and lacy mesh for a handcrafted centerpiece. The modular construction allows you to customize size and layout, while the precise rounds and join-as-you-go instructions ensure a polished finish. I hope this pattern inspires slow, satisfying maker time at your table—each motif is a small celebration of stitches. 🧶🌸✨