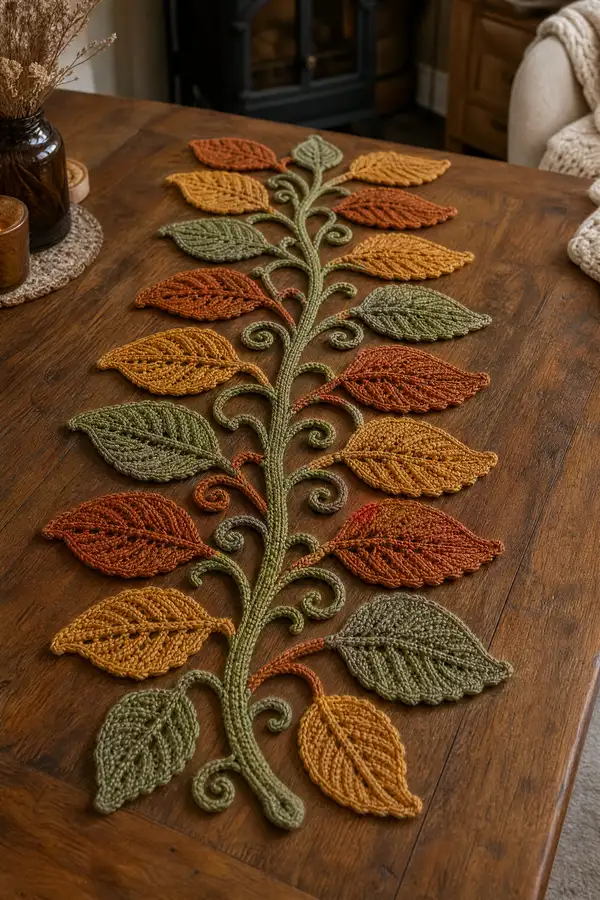
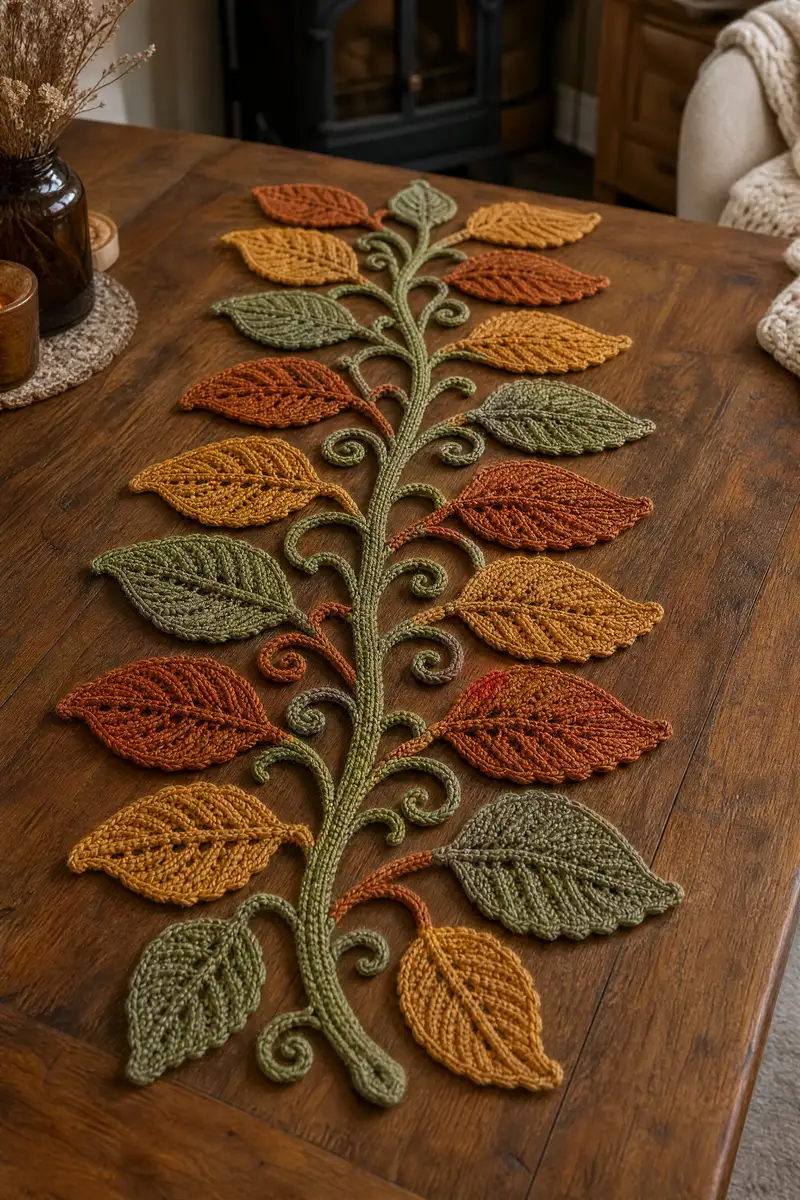
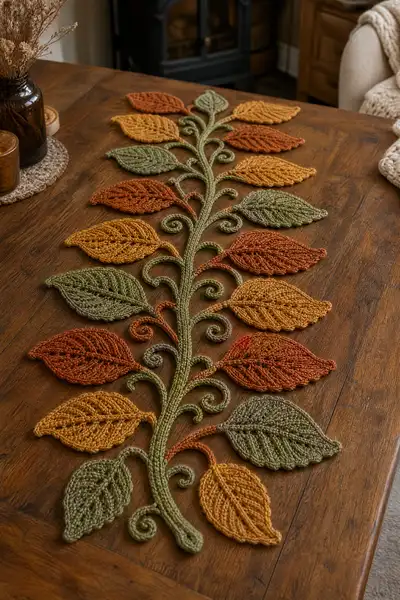
Create a stunning autumn-inspired table runner featuring a long central crocheted vine with delicate curled tendrils and layered leaves in warm fall colors. This pattern recreates the textured, ribbed stem and lacy leaf motifs shown, perfect for seasonal decor. The runner is worked in modular pieces: a tubular central vine, multiple leaf motifs in two sizes, curled tendrils and an elegant finishing edge. Display it down a dining table or across a console for instant cozy, handmade charm.
Progress Tracker
0% Complete
— Notes & Overview :
Info :
This runner is constructed modularly: work a long tubular central vine (the 'stem'), make curled tendrils and two sizes of leaves, then arrange and sew the leaves onto the stem. All pieces are crocheted flat or in rounds and blocked before assembly. Use the same hook throughout for consistent gauge unless noted. The stem is worked in the round as a narrow tube to support appliqued leaves.
Info :
Gauge is not critical for overall length but important for consistent look: 24 sts in sc rounds = approx 3.5-4cm circumference for the tube; adjust hook if necessary. Sample finished runner shown is approximately 36-42 inches (90-105 cm) long and 10-12 inches (25-30 cm) wide at its widest leaf spread, using worsted weight yarn and a 3.5mm hook.
— Central Vine (Tube) :
Round 3 :
(1 sc, inc) x 6 (18)
Round 4 :
(2 sc, inc) x 6 (24)
Info :
At this point the tube is 24 stitches around – this is the steady circumference used for the stem. If you prefer a slightly thinner stem, stop at round 3 (18 sts) and follow the even rounds accordingly; adjust stitch markers to the new count.
Round 5-14 :
1 sc in each st (24)
Info :
Work these rounds steadily to establish a smooth tube. Use a stitch marker in the first stitch of each round. If you prefer a ridged cord, work 1 sc in each st BLO for two or three rounds (see decorative options below).
Round 15 :
1 sc in each st BLO (24)
Round 16-20 :
1 sc in each st (24)
Info :
Continue working even rounds. The length of the stem is determined by the number of even rounds – the sample stem is 76 rounds in total (including increases). Add or subtract rounds to reach the desired finished runner length. Place markers where leaves and tendrils will attach as you go (use the photo as guide: leaves appear in pairs spaced about 6-9 rounds apart).
Round 21-40 :
1 sc in each st (24)
Round 41-60 :
1 sc in each st (24)
Info :
Every 6-8 rounds stop to plan leaf placement. Use removable stitch markers to note the rounds that will align with the base of each leaf. For symmetry, plan leaves in mirrored pairs across the stem (left and right) and leave space for curled tendrils between leaf pairs.
Round 61-76 :
1 sc in each st (24)
Info :
When desired length is reached, finish the tube by decreasing to close or leave open to slip stitch through for a flat finish. For the sample, we decreased slightly to taper the end and finished with a small curl worked separately and sewn on.
Round 77 :
(6 sc, 1 dec) x 3 around (21)
Round 78 :
(5 sc, 1 dec) x 3 around (18)
Round 79 :
(4 sc, 1 dec) x 3 around (15)
Round 80 :
(3 sc, 1 dec) x 3 around (12)
Round 81 :
(2 sc, 1 dec) x 3 around (9)
Round 82 :
(1 sc, 1 dec) x 3 around (6)
Info :
Fasten off leaving a long tail to sew the final tip closed. Reinforce the end with a couple of whipstitches to prevent unraveling. If you prefer a clean loop end for hanging, stop decreases at round 12 and slip stitch around then finish.
— Large Leaf (Make 8) :
Info :
Each large leaf is worked flat from a central spine and uses increases and textured rows to create ridged veins. Make 8 large leaves in assorted colors (rust, deep orange, mustard).
Round 1 :
Ch 12, sc in 2nd ch from hook and in each ch across (11)
Round 2 :
Ch 1, turn, inc in first st, 1 sc in next 3 sts, (hdc, dc) in next st (center point), 1 sc in next 3 sts, inc in last st (15)
Round 3 :
Ch 1, turn, inc, 1 sc in next 4 sts, (hdc, dc, hdc) in center st, 1 sc in next 4 sts, inc (19)
Round 4 :
Ch 1, turn, 1 sc in first 2 sts, (inc, 1 sc) x 4 across side to center, sl st in center top, repeat mirrored back across other side to produce a pointed tip (23)
Info :
The center top is created by a post stitch cluster to mimic the raised vein. Work deliberately at the center to keep symmetry; the sl st anchors the highest point of the leaf.
Round 5 :
Rotate work, ch 1, 1 sc in each st around the whole leaf edge working small increases at the base to create a slightly rounded shape (approx 28)
Round 6 :
Ch 2 (counts as hdc), turn, BLO hdc across the right side edge to create a ribbed vein, sl st into center top, continue BLO hdc down left side symmetrically (28)
Round 7 :
Ch 1, turn, (1 sc, inc) across base for a shaped stem base then 1 sc in each st around edge to tidy (28)
Round 8 :
Ch 1, work cable-like lines: *sl st to next st, fpdc around next st, sl st next* across the right half to create raised veins; mirror across left half (28)
Info :
Raised veins are formed by working front post double crochet (fpdc) and slip stitch combinations. If you prefer less texture, substitute fpdc with hdc in same positions. Keep counts even by matching each side of center spine identically.
Round 9 :
Ch 1, sc in each st (28)
Round 10 :
Ch 1, work 1 sc in next 2 sts, (inc, 1 sc) x 8 across to widen the outer edge slightly (36)
Round 11 :
Ch 2, turn, BLO hdc in each st across to emphasize the upper ridged texture (36)
Info :
At rounds 10-11 you create extra width and surface texture so leaves have a natural cupped appearance. Block leaf flat after finishing to open the lacy sections and set the shape.
Round 12 :
Ch 1, sc around edge evenly, decreasing 4 sts spaced around the base to create a tapered join (32)
Round 13 :
Ch 1, 1 sc in each st (32)
Round 14 :
Ch 1, make 4 picot edging points across the tip area for decorative points: *(ch 3, sl st in 3rd ch from hook) skip 4 sts, sc in next 4 sts* repeat once (32)
Round 15 :
Ch 1, sc across base 6 sts, then work 6 sctog decreases to narrow joinpoint (26)
Round 16 :
Ch 1, sc in each st (26)
Round 17 :
Ch 1, sc in next 4 sts, change to stem color in last sc to create an attached base tab (leave long tail for sewing) (26)
Info :
Fasten off leaving a 40-50cm tail for sewing to the stem. Weave the tail through the base tab and secure on the back of the leaf. Make 8 large leaves in assorted colors. Block each leaf flat, gently steam or wet-block to open textured veins. Place pins to maintain shape while drying.
— Small Leaf (Make 8) :
Info :
Small leaves are a quicker, narrower variation to fill gaps and create layered effect. Make 8 in olive and mustard tones.
Round 1 :
Ch 10, sc in 2nd ch from hook and across (9)
Round 2 :
Ch 1, turn, inc in first st, 1 sc in next 2, (hdc, dc) in center, 1 sc in next 2, inc in last st (13)
Round 3 :
Ch 1, turn, 1 sc in each st across right side to tip, sl st at tip, mirror back across left side (approx 17)
Round 4 :
Ch 1, FPdc down the center spine across right side and left to create a raised central vein (17)
Round 5 :
Ch 1, sc in each st around edge (17)
Round 6 :
Ch 1, sc across base 5 sts, decrease 3 sts evenly at base to shape tab for sewing (14)
Round 7 :
Ch 1, sc remaining sts, change to stem color in last sc to create a short base tab, fasten off leaving tail (14)
Info :
Small leaves are intentionally flatter than large leaves. Block flat and pin to set shape. Use the long tail to sew a snug, invisible attachment point to the stem later.
— Curled Tendrils (Make 10 small curls + 6 medium curls) :
Info :
Tendrils are short spirals worked in a chain foundation then worked back with multiple stitches into each chain to create a curl. Make several in stem color and a few in rusty brown for contrast.
Round 1 :
Ch 20, sl st in 2nd ch from hook and each ch across to create a flat cord (18)
Round 2 :
Ch 1, turn the chain and work 3 sc in each ch across to create a tight spiral when the cord is coiled (54)
Info :
Coil the piece into a spiral and tack with a few whipstitches at the base to hold the curl. For shorter tendrils ch 12 and place 3 sc in each ch (36 sts) then coil. For medium curls ch 28 and 3 sc per ch (84 sts) for a looser, larger spiral.
Round 4 :
Fasten off leaving tail for sewing. When sewing, insert tail through the center of the coil and stitch a few times to secure the spiral to the stem.
— Decorative Ribbed Curls (Optional) :
Round 1 :
Make an I-cord style chain: ch 30, join to first ch with sl st to make a loop, then sc in BLO around the loop for 6 rounds so the tubing forms a flexible cord. Fasten off and coil to create larger scrolls for focal points.
Info :
These ribbed curls serve as ornamental spirals along the stem and can be sewn at intervals where the leaves do not overlap. They help the runner look natural and airy.
— Leaf Vein Embroidery & Surface Detail :
Info :
For deeper veins, embroider a satin-stitch center vein down the middle of finished leaves with contrasting yarn using a yarn needle. Work small ‘V’ shaped vein stitches off the center for a more natural textured look. Use the embroidery to enhance depth after blocking.
Round 1 :
Using yarn needle and yarn tail, bring tail from leaf base up through the center, run the tail along the central axis and tack down at intervals with tiny stitches to create a raised central vein. Repeat on both sides of the midrib with shorter stitches to mimic leaf veins.
Info :
Use a color one or two shades darker than the leaf to make veins visible. Avoid thick embroidery that will distort the leaf; keep stitches small and even.
— Assembly & Placement :
Info :
Block all leaves and tendrils before assembly. Lay the central stem flat on your work surface and pin it down. Arrange large and small leaves in mirrored pairs across the stem, alternating colors for a natural look. Leave small gaps for tendrils to curl out and create interest.
Round 1 :
Attach leaves by bringing the base tab of the leaf to the surface of the stem at the chosen round position. Thread a tapestry needle with the long tail and sew through several stitches of the stem and leaf base, using ladder stitch or whipstitch for a nearly invisible join. Make sure each leaf is oriented so the tip points outward from the stem.
Round 2 :
Sew tendrils by anchoring the tail to the stem with a few stitches at one end and then using a few hidden stitches through the coil base. For extra security, sew around the base of the coil twice and tack the first loop to the stem so the curl sits upright.
Round 3 :
After sewing all leaves and tendrils, check both sides for symmetry. Add small filler leaves or adjust spacing as needed. Weave in all ends through the interior of the stem to hide tails and prevent unraveling.
Info :
Use blocking pins to nudge leaves into a slightly cupped profile and keep edges flat. If the runner has a tendency to roll under at the edges, add a single round of sc along the exposed seam of some leaves to weigh the outer edge gently.
— Finishing Edge & Optional Border :
Round 1 :
With stem color, work sc around the exterior seam of the stem where leaves are attached, picking up the stem and small base tabs of leaves to create a neat joining ridge. Work approximately 1 sc every 2-3 stitches along each leaf join (this is a decorative stabilizing round).
Round 2 :
Ch 1, sc around the outermost leaf edges in a contrasting color for subtle definition: *1 sc in next 2 sts, picot in next st (ch 3, sl st in 3rd ch)* repeat across leaf tips where desired. Fasten off and weave tails.
Info :
If you want the runner to lie extra flat, add an interfacing strip under the stem: place a narrow strip of fusible interfacing beneath the stem and gently press at low heat per manufacturer instructions. Test on a scrap first for your yarn fiber type.
— Care & Blocking :
Info :
To block, mist leaves with water or steam lightly then pin to shape on a blocking mat. Allow to dry overnight. Avoid harsh heat on acrylic yarn — use minimal steam. Spot wash only and lay flat to dry when needed.
Info :
When storing, roll gently and place in a breathable bag to avoid crushing leaves. Re-block if the runner becomes distorted after packing or use.
— Pattern Summary & Counts :
Info :
Central Vine: 83 rounds (including increases and decreases) at 24 sts typical circumference; adjust as desired for length. Large Leaf Template: 18 rounds each (make 8). Small Leaf Template: 7 rounds each (make 8). Tendrils: 3-4 rounds each depending on length (make 10 small, 6 medium). Decorative rib curls: variable (optional).
Info :
Total pieces for the sample runner: 1 central vine, 8 large leaves, 8 small leaves, 10 small tendrils, 6 medium tendrils, and 4 larger ribbed curls (optional). This yields approximately 120+ rounds across the whole project depending on how many repeats you work for vine length and extra details.
Info :
Adjust quantity and spacing of leaves to make a longer or shorter runner. For a table runner that spans a longer table, increase vine rounds by 12-24 rounds for each added 10-12cm of length and add additional leaf pairs spaced every 6-8 rounds.
This Central Vine Table Runner brings a warm, handmade accent to any table or console — a perfect seasonal touch that mixes structure and delicate detail. The modular build lets you personalize colors and spacing while the textured leaves add craft-forward charm. I hope you enjoy blocking, arranging, and sewing each leaf into place — it’s a rewarding slow-craft project that adds instant seasonal magic to your home. 🧶🍂