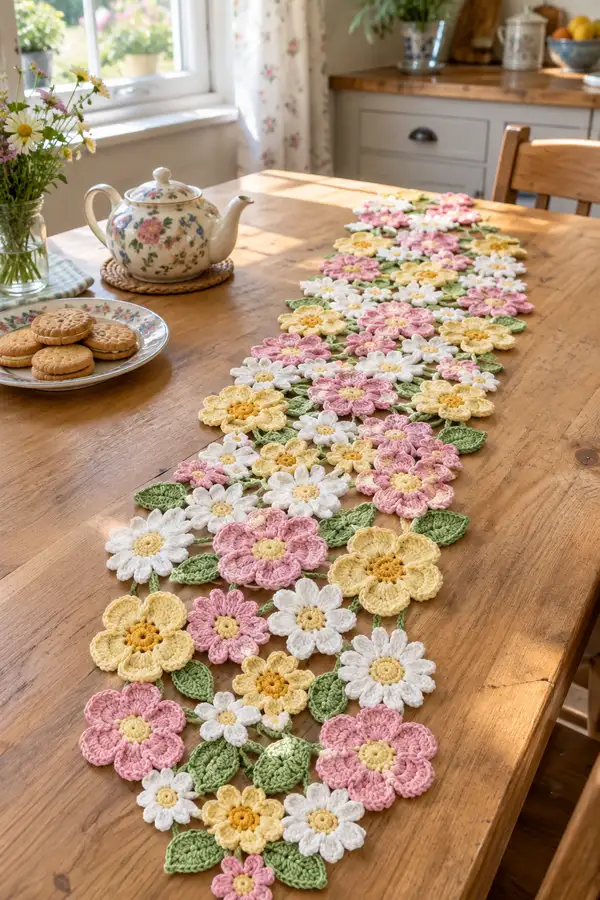
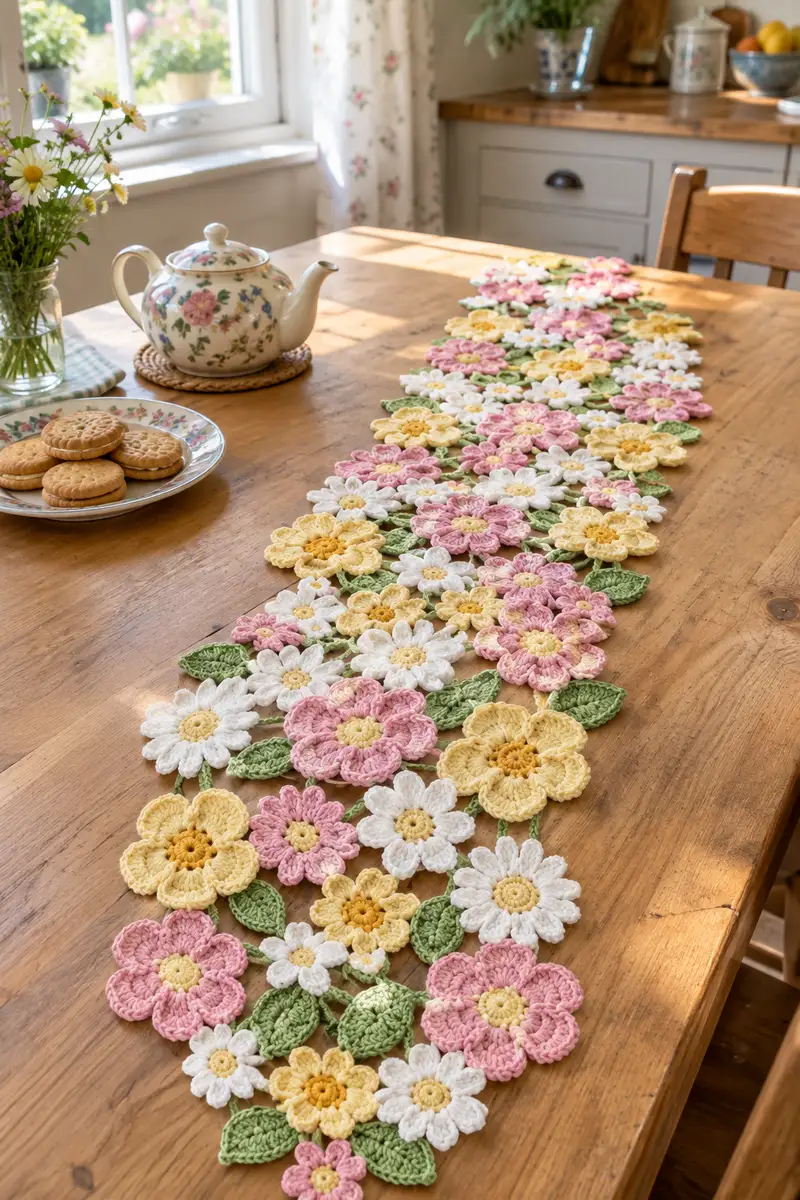
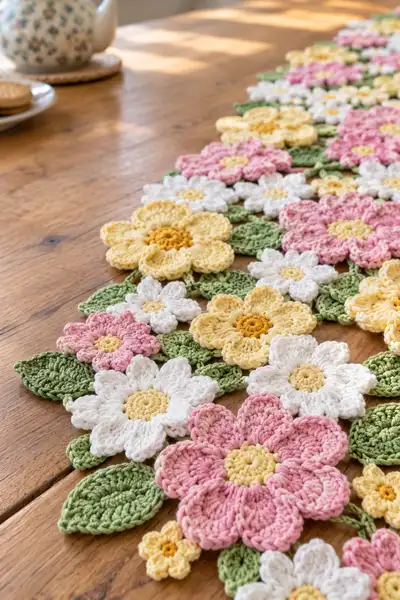
Create a charming spring-inspired table runner made from joined crochet flowers and leaves in soft pastels. This long floral runner features layered petals, textured centers and leafy sprigs, designed to drape beautifully down a dining table. The pattern uses modular motifs so you can scale length and width easily, and includes step-by-step shaping, joining and finishing tips to make assembly simple. Perfect for brightening a kitchen, dressing a sideboard, or gifting to someone who loves cottage-style decor.
Progress Tracker
0% Complete
— Materials & Gauge :
Info :
Gauge is not critical for this modular runner, but using a 3.5mm hook with worsted cotton should yield flowers approximately 8-10cm (3-4in) across for the larger motifs. Modify hook size if your motifs come out larger or smaller. Work tightly enough that petals hold shape without folding.
— Large Layered Flower (Make 12-16 for runner) :
Round 1 :
6 sc in magic ring (6)
Round 3 :
(1 sc, inc) x 6 (18)
Round 4 :
(2 sc, inc) x 6 (24)
Info :
This 24-stitch round will serve as the base for six large petals. Place a stitch marker at the last stitch of this round to mark beginning of petal placement if working in joined rounds.
Round 5 :
Work petals: *Sc in next st, hdc in next st, 3 dc in next 2 sts, hdc in next st, sc in next st; skip 0 sts to align* Repeat from * to * 6 times to create 6 petals. (Base used: 24 sts consumed)
Round 6 :
Sl st into base of first petal to close round. Ch1, sc evenly around the center base between petals (24 sc). (24)
Info :
When making petals, keep the tension of the treble/double clusters consistent so petals sit at similar heights. Gently block petals with pins to flatten and shape before making the textured petal round.
Round 7 :
Change to second color (petal color) if desired: join with sl st to back of a petal. Ch2 (counts as hdc), work 2 hdc around outer edge of each petal, then picot point: (ch2, sl st into same st) to give slight scallop. Repeat around for 6 scalloped petal edges. (approx 36 hdc across petals)
Round 8 :
Work texture round: *fpdc around post of 2nd dc of petal cluster, bpdc around post of 1st dc to create a ribbed fold; sl st to next petal base* Repeat across each petal for all 6 petals (6 fpdc + 6 bpdc pattern cycles).
Info :
Use front-post and back-post stitches to create a 3D petal ridge. If you're unfamiliar, insert your hook from front to back around the post of the specified stitch for fpdc; the bpdc is worked from back to front around the post. Practice on a scrap petal first.
Round 9 :
Edge round: join with sl st to base, ch1, sc evenly around each petal outer edge placing 6-7 sc along each petal edge to smooth shape. Total stitch count will vary slightly but aim for approximately 42 sc (approx 7 sc per petal). (approx 42)
Round 10 :
Finish: sl st into next st and fasten off. Weave in end. Pin and steam-block petal edges flat if needed.
Info :
These large flowers are layered: after making the petal round you will add a shallow second ring (optional) to raise the center or add an additional smaller petal layer for depth. See 'Layering' round below if you want a more dimensional bloom.
Round 11 :
Optional inner petal ring (for extra depth): join contrasting color into the center back loop space between petals, ch2, *(3 dc, ch1, 3 dc) into same space to form a small shell; sl st into next base space* - repeat 6 times to create 6 small shells. (6 shells)
Info :
Placement :
Pin the small shell ring so it sits slightly under the main petals and sew with small whip stitches to secure. This adds a second tier and makes the flower fuller when joined to other motifs.
— Medium Flower (Make 18-22 for runner) :
Round 1 :
6 sc in magic ring (6)
Round 3 :
(1 sc, inc) x 6 (18)
Round 4 :
(2 sc, inc) x 6 (24)
Round 5 :
Ch1, sc in next st, [ch3, sl st in same st] to make a small loop; *sc in next 3 sts, make loop (ch3, sl st in same st)* Repeat until you have 6 loops around the center to serve as petal anchors. (24 base sts with 6 loops)
Info :
These loops create defined petal anchors for the medium flower. Keep loops consistent in size by using the same number of chains for each petal base.
Round 6 :
Work petals into the chain loops: *Into each ch-3 loop: sc, hdc, 3 dc, hdc, sc* Repeat around for 6 petals. Fasten off and weave ends. (petal count: 6)
Round 7 :
Slip stitch around the base between petals for a neat back, making 24 sl st evenly to secure petals. (24)
Info :
Optional: add a decorative picot on each petal tip for a dainty finish: at petal tip ch2, sl st into last dc to form a picot. Add uniformly to all petals for symmetry.
— Small Daisy (Make 18-24 for runner) :
Round 1 :
6 sc in magic ring (6)
Round 3 :
(1 sc, inc) x 6 (18)
Round 4 :
Ch2, *in next st: (hdc, 3 dc, hdc) to form a small rounded petal; sl st into next st to anchor* Repeat around for 9 petals (work into every other st so base fits 9 petals). (9 petals)
Info :
Small daisies look best with crisp white petals and small yellow centers. Keep petals slightly flatter by using hdc and dc cluster rather than tall trebles.
Round 5 :
Finish edge: sc around base between petals (18 sc). Fasten off and weave in tails. (18)
— Tiny Flower / Bud (Make 20-28 for filler) :
Round 1 :
6 sc in magic ring (6)
Round 3 :
Fold over: *sl st into next 2 sts then ch2, (2 dc, ch2, sl st into same space)* Repeat 6 times to give tiny textured petal bumps. Fasten off. (6 bumps)
Info :
These tiny buds are great to tuck between larger motifs and fill gaps. Work them in the same color as flower centers for continuity.
— Leaf (Make 40-60 for runner) :
Round 1 :
Ch8, sl st into 2nd ch from hook and hdc in next. Work 1 hdc in next, 2 dc in next two sts, 1 hdc in next, sl st in next, then working on opposite side of chain: hdc in next, 1 hdc in next, 2 dc in next two sts, hdc, sl st into last. Fasten off. (leaf length = ch8 base)
Info :
For fuller leaves, use ch10 base to make a slightly larger leaf. To create a curved shape, work the outer edge in BLO so it folds naturally when blocked.
Round 2 :
Alternate leaf: mr, ch1, 6 sc in ring, do not fasten off; ch6, sl st into center of leaf ring to create a short stem tail then fasten off. (6 center sc with ch stem)
Info :
Make leaves in two sizes and mix them to create a natural, organic runner edge. Block them on a curve to make them sit nicely beneath petals.
— Leaf (Detailed Symmetrical Version) :
Round 1 :
Ch11, sc in 2nd ch from hook, hdc in next, dc in next 3, tr in next 3 (or 2 if you prefer shorter), dc in next 2, hdc in next, sc in last, rotate and work back along opposite side: hdc, sc, sl st into base to close. Fasten off. (leaf length formed from ch11)
Info :
Use the longer leaf when you need dramatic overlap. Mild blocking will flatten the spine; a tiny bit of starch spray will help leaves keep their shape on the table.
— Joining Sprig (chain link used to join motifs) :
Round 1 :
Ch15, sc into 3rd ch from hook to make a small loop, ch3, sl st into a stitch on motif A to join, ch6, sl st into motif B to anchor. Continue creating short chains and sl st anchors to form sprigs linking 2-4 motifs. Fasten off.
Info :
Sprigs are worked separately and used to visually connect flowers. Adjust chain lengths to create longer or shorter stems. Weave ends invisibly under nearest leaf or petal for a tidy finish.
— Center Embellishment (Golden Centers) :
Round 1 :
5 sc in magic ring (5)
Round 3 :
1 sc in each st (10)
Info :
Sew these small golden centers into the flower centers with a few whip stitches. They add warmth and definition. For a raised center, use tiny amounts of stuffing inside the ring before closing, but keep it very flat.
— Assembly & Layout Guidance :
Info :
Before joining, lay out your motifs on a large flat surface or blocking mat. Arrange a mix of large, medium, small flowers and leaves to mimic the staggered pattern in the reference photo. Alternate colors and sizes so the composition reads naturally from each end.
Round 1 :
Begin joining with a short chain sprig: attach sprig to back of large flower A (sl st into the backing round between petals), ch6, sl st into back of medium flower B. Make 2-3 sprigs per large flower linking to surrounding smaller flowers and leaves. Continue working outward across your layout forming a single continuous line of motifs. Fasten off at each sprig anchor and weave ends through backing stitches. (variable)
Info :
When joining two flat motifs, insert your tapestry needle threaded with matching yarn and use whip stitch or mattress stitch to create an invisible seam. For decorative joins, use chain loops and slip stitch anchors so you can see the delicate chain stems between blooms.
Round 2 :
Edge finishing: once initial joins are complete, add small filler buds and leaves into gaps by sewing or slip-stitching them into edges. Use short ch-4 sprigs as tiny stems and sl st into leaf base or petal junctions. This helps the runner read as a single continuous piece. (variable)
Info :
Work gradually from one end to the other, checking symmetry and fullness. Pin sections as you go, and do not permanently stitch until you’re satisfied with the visual balance across the entire runner.
— Alternative Joining (Continuous Join-As-You-Go) :
Round 1 :
When making a motif, instead of fastening off after the final edge round, arrange the new motif adjacent to a finished motif, insert hook into a predetermined anchor stitch on the finished motif and sl st to join, then continue working the final round of the new motif while joining at each anchor point with sl st. Repeat to build the runner continuously.
Info :
Join-as-you-go saves sewing time and creates very tidy seams. Plan anchor points on each motif while laying out to keep spacing consistent—e.g., join every 3rd or 4th stitch around the petal base depending on motif size.
— Blocking & Finishing :
Info :
After assembly, gently steam-block the whole runner on a padded surface, pinning petals and leaves into their final positions. Use a small amount of steam from a distance—do not press the iron directly onto the cotton yarn. Allow to dry fully before removing pins and using on your table.
Round 1 :
Weave in all ends using a yarn needle, tuck ends under several stitches and trim. If desired, apply a light fabric stiffener to leaves only to keep them flat.
Info :
Store runner flat or loosely rolled between tissue to protect the petals. Avoid heavy items on top of the runner to maintain the 3D petal shapes.
Finishing this runner is truly satisfying — each blossom and leaf comes together to form a warm, cottage-style centerpiece full of texture and color. Pinning and joining motifs is a relaxing, meditative part of the process, and the final steam-blocking step brings everything into crisp, gentle bloom. Layer it down your favorite table for instant spring charm and watch the light catch the petals. 🌸🧶✨