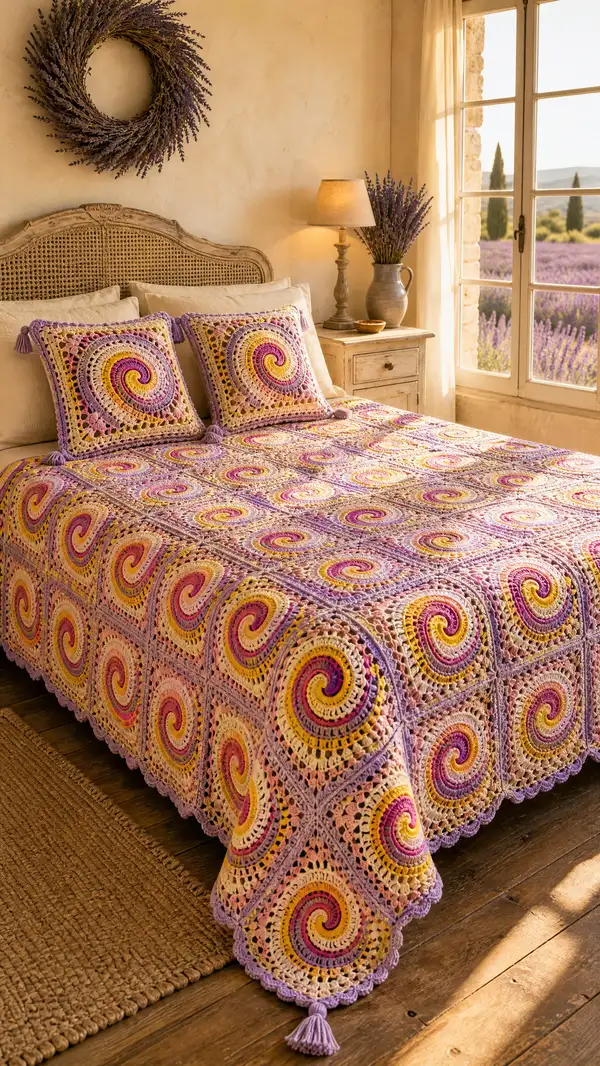
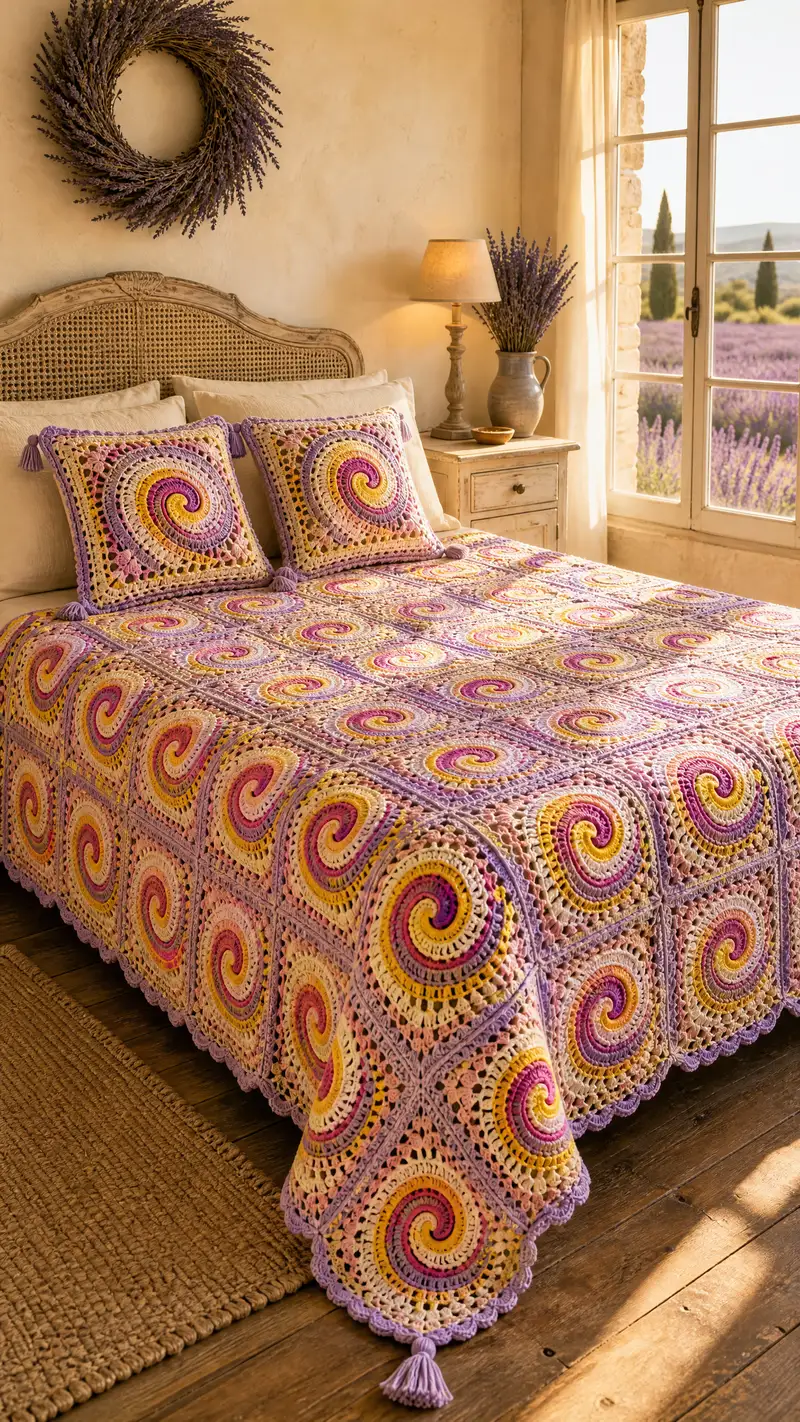
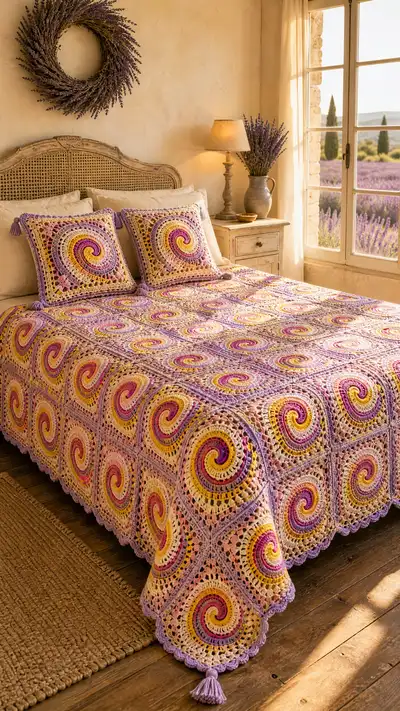
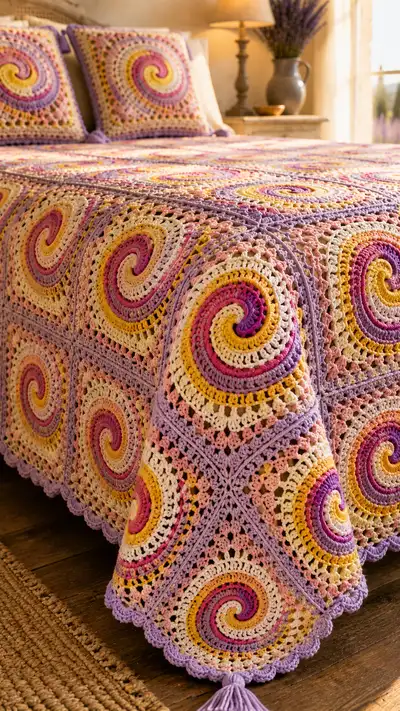
A warm, sunlit bedspread made from repeating sunburst spiral granny squares in soft lavender, blush, golden yellow and cream. This pattern creates textured swirls that transition to lacy square borders, joined to form a generous bedspread with scalloped edge and tassel corners. Detailed color-change and join-as-you-go instructions let you customize scale and palette so you can make a bedcover to cherish.
Progress Tracker
0% Complete
— Notes and Overview :
Info :
This pattern describes one Sunburst Spiral Granny Square motif worked in rounds and then joined to make a bedspread. The motif uses multiple color changes to achieve the sunburst spiral effect, transitions into square-forming rounds and finishes with a decorative lacy frame. The instructions assume you are comfortable reading round-by-round counts and changing color at the end of rounds. Gauge and motif size: approximately 12.5" (32 cm) square unblocked when worked with worsted weight yarn and 4.0mm hook; adjust hook for your tension and desired block size. Make required number of motifs to achieve desired bedspread dimensions: for a queen bed 6 x 7 motifs (42 motifs) is a guideline — adjust for exact fit.
Info :
Color legend: A = deep magenta (inner spiral highlight), B = golden yellow, C = cream/neutral, D = soft rose/pink, E = lavender (outer frame). You may substitute shades according to your palette, maintaining contrast for the spiral definition. Carry colors up where indicated or fasten off and weave in ends. Blocking after each motif improves join accuracy.
— Sunburst Spiral Motif :
Round 1 :
With color A, make a magic ring. Work 12 dc into the ring. Join with sl st to first dc if you prefer joined rounds or continue in a continuous spiral without joining. (12)
Info :
I recommend working the first 6-8 rounds in a continuous spiral for a smooth swirling look. If you prefer distinct round joins, sl st to close and ch 1 to begin next round.
Round 2 :
Change to color B at the end of the round. (if working joined: sl st to last dc, fasten off A and join B). Work (1 dc, inc) x 6. (18)
Round 3 :
With color B, (2 dc, inc) x 6. (24)
Round 4 :
Change to color C. (3 dc, inc) x 6 (30)
Info :
To keep the spiral readable, use the change to a contrasting color on this round so the curve begins to show. Carry previous color up the inside on the backside or weave in end securely.
Round 5 :
With color C, (4 dc, inc) x 6. (36)
Round 6 :
Change to color D. (5 dc, inc) x 6. (42)
Round 7 :
With color D, (6 dc, inc) x 6. (48)
Round 8 :
Change to color E. (7 dc, inc) x 6. (54)
Info :
By this round you have a broad circular disc. The spiral curvature is created by choosing different stitch heights in alternating rounds when you want more texture — for example, replace a full dc round with hdc in the next round for subtle ridge lines. Continue increases until you have enough rounds for the spiral's central curl; the counts above produce a broad base for the next transformation into a square.
Round 9 :
With color E, work 1 dc in each st around (54). (54)
Round 10 :
Change to color A. Work 1 dc in each st around (54). (54)
Info :
To emphasize the spiral curl, the next two rounds use alternating dc and hdc. Use the preceding color changes to mark subtle shifts in the swirl colorway. If you prefer a more tightly defined spiral center, substitute hdc for dc on round 10.
Round 11 :
With color A, work (1 hdc in first st, 1 dc in next st) rep around to create slight texture variation. (54)
Round 12 :
Change to color B. Work 1 dc in each st around (54). (54)
Info :
Now we begin squaring off the motif. You will form four corners evenly spaced around the disc. To do this reliably, divide 54 by 4 = 13.5 so corners will be placed roughly every 13 or 14 sts — use a combination of 13 and 14 stitch gaps to space corners evenly. Mark placement with stitch markers at the end of this round exactly where corners will go.
Round 13 :
With color B, *dc in next 13 sts, (dc, ch2, dc) in next st (corner)*, repeat from * to * three more times, then dc in remaining sts to finish the round aligning last corner at the start point. After completing corners you will have 4 corner ch-2 spaces and a total stitch count of 58 (approx — corners add 4 ch-2 spaces and two dcs each adding 8 extra stitches to 54 = 62 actual worked elements but dc counts maintain as laid out). When working corners, count resulting dcs: 54 existing dc plus 8 additional dc placed as corner clusters = 62 dc positions (62)
Info :
If the math above looks unfamiliar, here's a simpler approach: place 4 corner clusters spaced as evenly as possible around current round spacing; you will be inserting 2 extra dcs (the corner 'dc, ch2, dc' contributes two dc) for each corner, increasing total dc count by 8. Mark the ch-2 spaces with contrasting markers to identify corners for subsequent rounds.
Round 14 :
Change to color C. Working into each dc and ch-2 corner: (dc in each dc around until ch-2 space, work (dc, ch2, dc) in corner). After round complete you should have an approximate worked stitch count of 70 including corner dcs. (worked elements 70)
Round 15 :
With color C, work 1 dc in each st and (dc, ch2, dc) in each corner ch-2 space. This expands square shape; worked elements approx 78. (approx 78)
Info :
From now on consider the motif as a square grid with four marked corner ch-2 spaces. We will build layers of shells and granny clusters between corners, working even rows that maintain spacing. If you need exact stitch counts for seaming, measure blocked motif to determine final stitch counts since openwork rounds involve ch-sps that change element counts.
Round 16 :
Change to color D. In each side between corners work the following repeat: *skip next dc, 3 dc cluster in next st (triple cluster worked as (dc, ch1, dc) cluster), ch1, sk1, rep across side*. At each corner work (dc, ch2, dc). This produces a decorative cluster row and continues to square the motif. Worked elements vary due to ch-1 spaces.
Round 17 :
With color D, work 1 sc in each dc and sc in each dc of the previous clusters to anchor them. At each corner work sc, ch2, sc. This creates a firm foundation for the lace rounds. (count will vary based on cluster placement; treat as anchoring round).
Round 18 :
Change to color E. Working into anchors: *ch3 (counts as dc), sk next dc, (dc, ch1, dc) in next sp or stitch, ch1*, rep across each side. At corners work (dc, ch2, dc). This begins an openwork shell pattern. (work elements variable)
Info :
These rounds convert the circle into a square shape by building out corners. Do not stress about absolute single-stitch counts here — openwork uses chain spaces; instead focus on creating four symmetrical corners and consistent shells along sides. Use stitch markers to mark midpoint of each side to keep sides even.
Round 19 :
With color E, *(3 dc shell) in each ch1 or ch2 group along side, ch1 between shells; at corners work (3 dc shell, ch2, 3 dc shell)*. This is a shell round that widens sides and strengthens corners. Keep shells consistent to achieve square sides.
Round 20 :
Change to color C. Work 1 sc in each dc and 1 sc in each ch-sp around. At corners work sc, ch2, sc. This firm round prepares motif for the next decorative rows. (anchoring round)
Round 21 :
With color C, work a decorative open granny-like round: *ch3 (counts as dc), 2 dc in next ch-sp, ch2, skip next shell, (3 dc) in next ch-sp*; at corners work (3 dc, ch2, 3 dc). This produces a lacy grid suitable for visible joins. The motif is now visibly square with a spiraled center and a lacy frame.
Info :
This is a good point to stop for wet blocking. Pin motif to square shape, aligning corners and flattening spiral center so it looks centered. Blocking evens stitch length, makes joining easier and tidy. Repeat for each motif before joining if you prefer precise seams.
Round 22 :
Change to color B. Work a ridge round in FLO (front loops only): 1 sc in each st BLO on previous round to create a raised ridge that outlines the square. Work sc in each dc and sc in chain spaces as needed; at corners work sc, ch2, sc. (anchoring ridge)
Round 23 :
With color B, work 1 dc in each st around to smooth edges and prepare for final decorative frame. (worked elements variable)
Round 24 :
Change to color D. Work a lacy picot-like round: *ch3, skip next 2 sts, sc in next st, ch3* across each side. At corner spaces work ch3, sc in corner ch2, ch3 to keep corners open. This gives small airy arches around motif.
Info :
If you prefer fewer color transitions, you can combine rounds and omit some color changes at Rounds 22-24. The color changes here are recommended for the multi-hued, watercolor-like look in the sample bedspread.
Round 25 :
With color E, work 1 sc evenly around the motif to prepare for join-as-you-go seams. Count stitches and mark the four corner sc for later alignment. This sc round produces a neat edge for mattress stitch or JAYG joining.
Info :
Motif complete. Each finished motif will measure roughly 12-13" (32-33 cm) square before joining when using worsted yarn and 4.0mm hook. Make the required number of motifs for your bedspread. For a queen bed photograph (approximately 78" x 80") you will need about 6 motifs across and 7 motifs down (42 motifs) depending on motif size and desired overhang.
— Variation: Large Motif Extension (Optional) :
Round 26 :
Change to color A. Work *(ch3, sk next 2 sts, (3 dc) in next ch-sp, ch1) rep across each side. At each corner work (3 dc, ch3, 3 dc)*. This extends the square for a larger motif; repeat additional shell rows until desired square size reached. Each double-shell row increases side width by ~1/2" depending on yarn.
Round 27 :
With color A, sc in each dc and sc in each ch-sp; corner sc, ch3, sc. This evens the extended rows and anchors them for joining. (anchoring round)
Info :
Add as many extension repeats as needed to reach your preferred motif measurement. Extending motifs will reduce the number of motifs required across the bedspread but increases yarn consumption and weight.
— Join-As-You-Go (JAYG) and Assembly :
Info :
You may seam after blocking using mattress stitch or join-as-you-go. JAYG is described below for joining motifs while you crochet the final round of each motif so seams are integral and tidy. Decide whether you will join as you go onto the bedspread (recommended for faster assembly) or join after all motifs are blocked and made.
Round 28 :
To JAYG join motif to an adjacent motif: work motif up to the final sc round (Round 25). On final sc round, when you reach a side where another motif already sits, work sc into your motif and then into the corresponding sc of adjacent motif as follows: sc in next stitch of current motif, sl st into corresponding sc of neighbor, pull up loop and complete sc by drawing yarn through both loops — this creates a joined sc. Repeat across the side until the corner. At corners work sc into current motif, sl st into corner sc of neighbor, and complete. Continue around remaining sides not joined in normal sc. (join-as-you-go round)
Info :
When joining edges, keep tension consistent so joined seams lie flat and do not pucker. Use blocking pins to align edges before joining. Work joins on RS so that the join sits as desired. For a more visible seam, use slip stitch joins; for a flatter seam, use sc-through-both-loops or mattress stitch after blocking.
Round 29 :
After motifs are joined in rows, join rows together by JAYG or by sewing using a yarn needle with a whip stitch or mattress stitch. When joining vertically, align corner ch-2 spaces and side centers to avoid rotational mismatches in the spiral direction. Ensure spirals all face the same direction (for cohesive visual flow) before final locking of joins.
Info :
If you prefer a secondary decorative seam, you can work a single crochet ridge in a contrast color across the joins to highlight the grid pattern. In the pictured bedspread, a lavender ridge accentuates the frame between squares.
— Bedspread Layout and Counts :
Info :
Sample layout for queen: make 6 across x 7 down = 42 motifs. Adjust layout for double/full or king by adding or removing columns/rows. Keep symmetry by centering full motifs; you may also make half-motifs or border filler pieces if you prefer to avoid partial motifs: alternative is to create a crochet border that drops down over the bed edges.
Round 30 :
When connecting last motifs, weave in ends generously on the WS and block entire assembled bedspread heavily: spray lightly and pin edges square, allow to dry overnight. Blocking helps flatten joins and sets scalloped edges neatly.
Info :
Always check that all spiral centers are oriented the same direction before permanent joining. If a motif is rotated incorrectly, seam will look mismatched. Rotate motif physically to match neighbor and pin in place before final join.
— Outer Scalloped Border (example 12 rounds) :
Round 31 :
With color E, join yarn to any outer edge point with sl st. Work 1 round sc evenly around entire bedspread, placing 3 sc in each corner to turn. This evens the edge and prepares for scallops. (sc count variable — even spacing recommended so that scallops align with square centers below).
Round 32 :
Change to color D. *Ch3 (counts as dc), sk next 2 sc, 5 dc in next sc (shell), sk next 2 sc, ch1, sl st into next sc;* repeat around. This forms a shell placement every 6-7 sc; adjust spacing to create evenly sized scallops. At corners work extra shells to maintain flow. (decorative shells)
Round 33 :
With color D, work sc in each st and 3 sc across each shell to anchor shells. At corners work 5 sc for bulk. (anchoring round)
Round 34 :
Change to color C. Work *ch5, skip 2 sc, sc in next sc* around to create spaced picot arches between shells. At corners ch5, sc in corner sc. (decorative arches)
Round 35 :
With color C, work a firm sc round into each sc and into each ch-sp to prepare for final scallop edging. (anchoring round)
Round 36 :
Change to color B. Work final scalloped edge: *in each ch5 arch work (sc, hdc, 3 dc, hdc, sc) to form full scallop;* in shell positions work (sc, 5 dc, sc) to maintain symmetry around corners. Repeat around entire blanket. This produces a regular scalloped edge similar to the photographed bedspread.
Info :
If your bedspread is large, you may prefer to work fewer border repeats to reduce yarn usage. Always maintain corner shaping by increasing stitch clusters at each corner so border lies flat.
Round 37 :
With color E, weave in ends neatly along WS. Trim ends after weaving and block once more to set scallops. (finishing round)
— Tassels & Corner Embellishments :
Info :
Tassels are optional but recommended for a polished, romantic look. Use matching lavender or a combination of E and D for tassels shown in photograph. Make tassels with 40-60 strands depending on desired fullness and trim evenly. Attach to corners by threading loop through corner ch-2 or corner shell and tying securely. Add a small round wrap to hide knot for professional finish.
Round 38 :
Tassel construction: wind yarn around a 4" wide piece of cardboard 30-40 times (or desired length). Tie a tight wrap with 6" strand near top to form a head. Cut across bottom, comb strands gently and trim evenly. Wrap a small length of yarn around the head 1/4" down to create a neat neck and secure with knot. Attach to corner by looping the tassel head through corner opening and sewing twice through head with yarn tail for extra security.
Info :
For a subtle look attach single tassels to main corners; for a more decadent look attach 2 smaller tassels to each corner. Make sure tassels hang freely and do not catch on bedding sheets.
— Matching Pillow Shams (two motifs each) :
Round 39 :
Make two matching square motifs per sham using the same color sequence described above but stop at Round 25. Block each motif to exact square measurement. (2 motifs per sham)
Round 40 :
To make a pillow sham: make two motif panels for front and back OR make one motif front and a plain sc square back. For a two-panel sham, join three sides of the two motifs together with sc through both loops leaving one side open for insert. Work a small sc edging around the opening and insert pillow form. Slip stitch the final edge closed or add a zipper sewn on the inside.
Info :
To create sham with tassels in each corner as pictured, attach tassels to the four visible corners of the front panel only. For extra durability sew through tassel head to the body of the motif with a few passing stitches.
Round 41 :
Optional sham flange: work 1 round sc around sham perimeter, then one round of small scallops (sc, hdc, 3 dc, hdc, sc) spaced evenly; attach tassels if desired. This matching detail ties the shams to the bedspread aesthetics.
Info :
If you want zippered shams, allow 1/2" seam allowance for zipper and sew zipper on the WS after joining the three sides; then finish outside edge with sc round to hide zipper seam.
— Adjusting Size & Yardage Guidance :
Round 42 :
To make a larger bedspread, increase motif count or enlarge each motif with additional shell rounds (see Round 26 extension). Keep track of yarn usage per motif by making a gauge swatch of one motif to determine grams per motif and multiply by planned motif count.
Info :
Sample yardage approximate per motif when using worsted yarn: 70-90g per finished 12" motif depending on number of rounds and heavy border usage. Multiply by number of motifs and add 20% for joins and border. For a queen sample with heavier borders and shams plan for 1800-2400g total yarn across all colors combined.
Round 43 :
To scale down to a throw, make 4 x 5 motifs (20 motifs) for approximately 50" x 60" (depending on motif). To scale to king bed, add an extra column and row and possibly make larger motif sizes by adding shell repeats as described in Round 26.
Info :
When changing motif size through additional shell repeats, maintain the same number of rounds for join and edge so seams remain consistent. Keep corner ch-2 spacing consistent across all motifs to make JAYG easier.
— Finishing Touches and Care :
Round 44 :
Weave in all ends using yarn needle. For any visible color-change tails, thread through a few stitches of the motif back and forth to secure. Trim ends close to work but leave a small nodule to avoid unravelling.
Round 45 :
Washing/blocking: hand wash cold or machine wash on gentle in a mesh bag to protect tassels; reshape and dry flat. Avoid tumble drying for long-term color and fiber stability.
Info :
Rotate bedspread occasionally to even wear and sun exposure. If tassels begin to matt, comb gently and re-trim to restore shape. Replace or re-make tassels easily as they are simply sewn in and can be removed for washing if desired.
Round 46 :
Pattern variations: create alternate colorways — cooler ocean tones, autumn hues, or monochrome with one highlight color. Spirals read differently depending on contrast; for a bolder spiral keep high-contrast inner colors.
Info :
When designing your own palette, lay out motif color order prior to working to ensure consistent visual rhythm across the spread. You can create a gradient across the bed by adjusting inner spiral color choices systematically across columns or rows.
Round 47 :
Maintenance tips: if seams begin to loosen over time hand-stitch over the join with matching yarn and mattress stitch. Re-blocking rarely damages joins if care is taken to support tassels and edges.
Info :
This completes the complete motif construction, joining and finishing instructions to recreate the Sunburst Spiral Granny Square Bedspread. Use the stepwise rounds above with attention to tension, blocking and color placement to achieve a bedspread closely resembling the photo.
This Sunburst Spiral Granny Square Bedspread brings together swirl centers, soft pastels and lacy frames for a timeless, romantic bedcover. Each motif is a mini-work of art and they come together to form a statement piece that invites touch and rest. Making this spread is a rewarding, meditative project — the spirals are mesmerizing and the scalloped border a satisfying finishing touch. 🧶💜 Add tassels for charming detail and share your finished creation proudly. Happy stitching and cozy nights ahead! 🌙✨