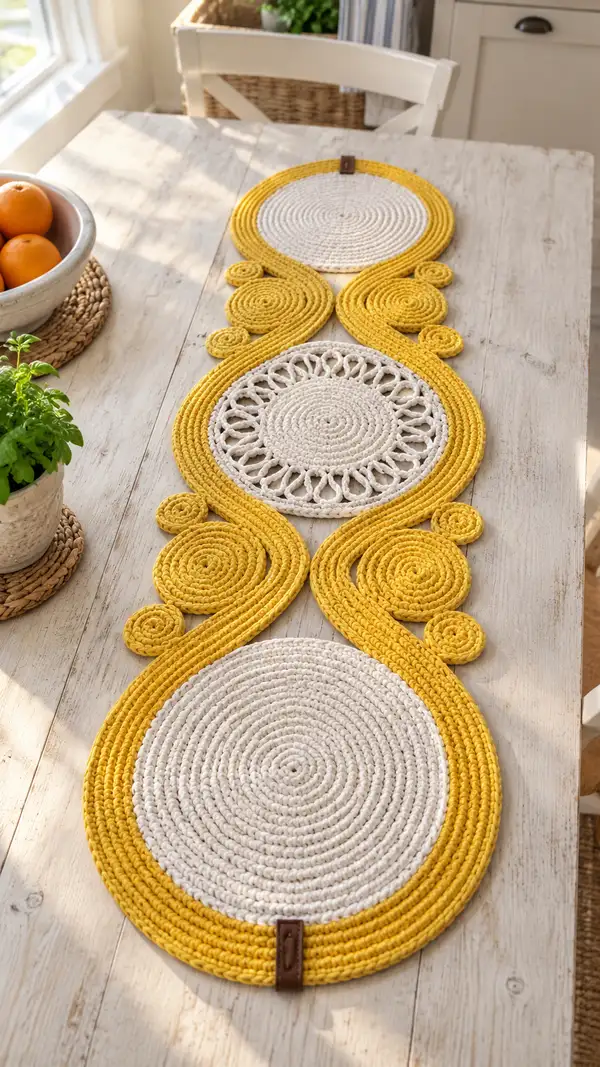
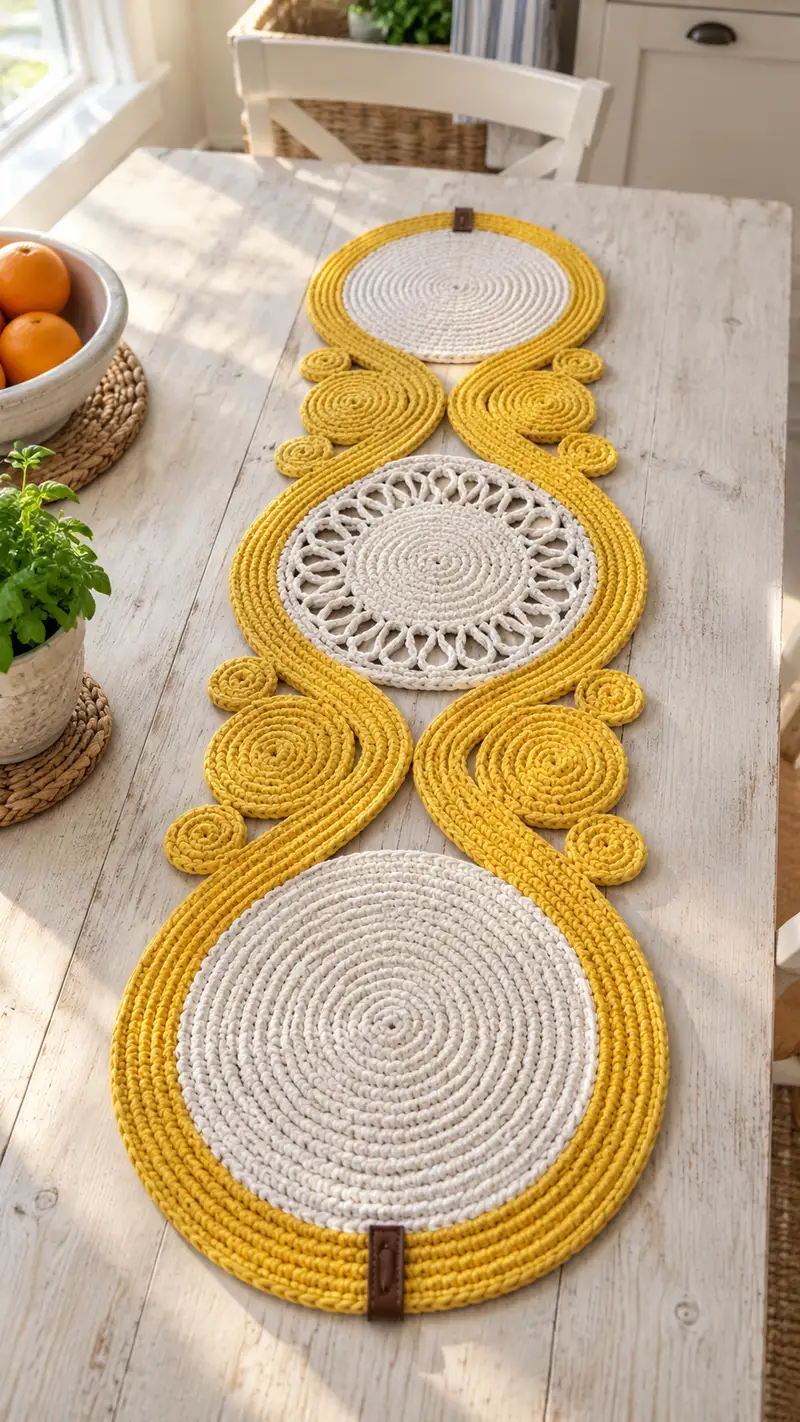
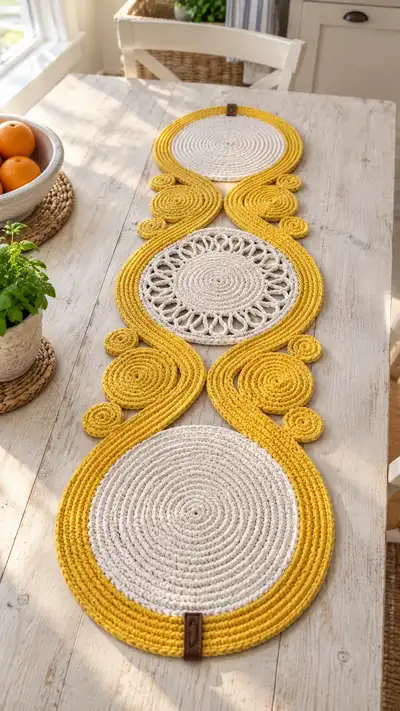
A bright, modern table runner featuring three large braided circles connected by elegant swirling ropes and playful spiral motifs. Worked in bulky cotton rope in warm mustard yellow and soft cream, this runner combines solid rounds and an open lace central medallion for a textured, handmade centerpiece. The design lies flat and is ideal for a rustic or contemporary kitchen table. Finished look includes stitched seams and optional leather tabs for a polished finish.
Progress Tracker
0% Complete
— Solid Round Placemat (Make 2 identical) :
Round 1 :
6 sc in magic ring (6)
Round 3 :
(1 sc, inc) x 6 (18)
Round 4 :
(2 sc, inc) x 6 (24)
Round 5 :
(3 sc, inc) x 6 (30)
Info :
Work tightly but not so tight the rope cannot lie flat. Using a larger hook can make a looser fabric and produce a flatter round. Measure diameter periodically.
Round 6 :
(4 sc, inc) x 6 (36)
Round 7 :
(5 sc, inc) x 6 (42)
Round 8 :
(6 sc, inc) x 6 (48)
Round 9 :
(7 sc, inc) x 6 (54)
Round 10 :
(8 sc, inc) x 6 (60)
Info :
At this point the disc will be roughly 7-8 inches depending on yarn. Continue increases to reach desired diameter. For the sample runner, work to Round 20 then add a two-round yellow border.
Round 11 :
(9 sc, inc) x 6 (66)
Round 12 :
(10 sc, inc) x 6 (72)
Round 13 :
(11 sc, inc) x 6 (78)
Round 14 :
(12 sc, inc) x 6 (84)
Round 15 :
(13 sc, inc) x 6 (90)
Round 16 :
(14 sc, inc) x 6 (96)
Round 17 :
(15 sc, inc) x 6 (102)
Round 18 :
(16 sc, inc) x 6 (108)
Info :
If using bulky t-shirt yarn, each round adds a noticeable diameter; stop when your round measures approximately 11-12 inches across for a generous placemat. The sample solid placemats were worked to R20 before color change.
Round 19 :
(17 sc, inc) x 6 (114)
Round 20 :
(18 sc, inc) x 6 (120)
Info :
Fasten off cream color if you plan to add a mustard border. Weave in the tail to the wrong side or carry to next round if doing a color join.
Round 21 :
Join Mustard Yellow with sl st to any stitch; ch1, 1 sc in each st around (120)
Round 22 :
1 sc in each st around (120)
Round 23 :
1 sc in each st around BLO to create a firm edge (120)
Info :
Finish by slip stitching to first sc, fasten off leaving a long tail for joining to the runner assembly. Use this tail for sewing points later.
— Lace Medallion Circle (Make 1) :
Round 1 :
6 sc in magic ring (6)
Round 3 :
(1 sc, inc) x 6 (18)
Round 4 :
(2 sc, inc) x 6 (24)
Round 5 :
(3 sc, inc) x 6 (30)
Info :
Work the inner circle a touch smaller than the solid rounds so the lace ring sits inside the mustard frame. Aim for about 8-9 inches across before starting the lace edge.
Round 6 :
(4 sc, inc) x 6 (36)
Round 7 :
1 sc in each st around (36)
Round 8 :
1 sc in each st around (36)
Round 9 :
Switch to Cream if not already. ch4, skip next sc, sl st in next st - work this ch4 loop pattern evenly around to create 12 ch-loops. Adjust spacing to create 12 loops (12 loops)
Info :
The ch4 loop round creates the openwork. You can make loops larger (ch5) for a looser lace, or smaller (ch3) for a denser look. Count loops as you go so you have an even number for later stitches.
Round 10 :
Into each ch4 loop: (sl st, ch1, 3 dc, ch1, sl st) to form petal-like arches (work into each loop around)
Round 11 :
1 sc in each st between petals to tidy the round and fill gaps (36)
Round 12 :
1 sc in each st around (36)
Info :
Now join a mustard yellow two-round border similar to the solid placemat to frame the lace. This allows the lace circle to be set into the yellow ring for the runner's alternating look.
Round 13 :
Join Mustard Yellow with sl st, ch1, 1 sc in each st around (36)
Round 14 :
1 sc in each st around (36)
Round 15 :
(1 sc, inc) x 12 (48)
Round 16 :
(3 sc, inc) x 12 (60)
Round 17 :
1 sc in each st around (60)
Round 18 :
1 sc in each st around BLO to create a ridge (60)
Info :
Work rounds 15-18 to expand the lace circle outward so it matches the diameter of the solid placemats when nested inside the mustard frame. Sample ended with 60 stitches giving a similar diameter to the solid discs after their yellow border.
— Long Swirl Connector (Make 2, mirror pieces) :
Info :
The long swirls are constructed as flat crocheted ropes worked in rows and then coiled into the flowing S-shape seen in the sample. Each swirl is essentially a wide, slightly tapered crocheted rope that is shaped and sewn on. For each swirl you will work a long strip approximately 84-96 inches in length (before coiling) depending on runner length required. Below is a row-by-row rope instruction; repeat rows to reach the needed length.
Row 1 :
Using Mustard, ch 8. Work 1 sc into 2nd ch from hook and across (7 sc). Turn (7)
Row 2 :
Ch1, 1 sc in each st across (7)
Row 3 :
Repeat Row 2 for 6 rows more to create a thin rope foundation (7)
Info :
For a wider rope increase chain foundation or use 2 sc in ends to make edges plump. Keep tension even for consistent width. Use stitch markers every 12-16 rows to mark length progress.
Rows 4-20 :
Ch1, 1 sc in each st across (7) - repeat to build length until piece measures approximately 3-4 inches wide when folded and 20-24 inches long
Info :
To create the subtle taper and bulges that form the swell of the swirls, increase by 1 sc at the beginning and end of select rows: e.g., Row 21: ch1, inc, 5 sc, inc (9). Use increases every 6-10 rows where the swirl needs to puff slightly.
Rows 21-80 :
Continue working even rows, adding intermittent edge increases to create gentle curves and bulk. End when total uncoiled length for one swirl is approximately 90 inches (this will be manipulated into an S shape and sewn down). Fasten off leaving long tails for sewing.
Info :
When coiling the strip into the S shape, pin into position onto a flat surface. Use small whip stitches with the long tail to tack the rope at intervals (every 1/2 to 1 inch) to hold the coil shape. Sew to the edge of the round placemats where indicated in assembly steps.
— Small Spirals (Make 6) :
Round 1 :
6 sc in magic ring (6)
Round 3 :
1 sc in each st around (12)
Round 4 :
(2 sc, inc) x 4, (3 sc, inc) x 2 to create slight oblong shape (18)
Round 5 :
1 sc in each st around (18)
Info :
These small spirals are then sewn flat to the swirl strip as decorative bobbles. You can make them more raised by working an additional round of sc circumference then tacking in a spiral with whip stitch on the wrong side.
Round 6 :
(3 sc, inc) x 4 + 2 sc (22)
Round 7 :
1 sc in each st around (22)
Round 8 :
Fasten off leaving long tail for sewing. Coil gently and tack in place on swirl with invisible stitches so spirals look embedded in the larger S-shape.
Info :
Make 4 medium spirals and 2 smaller ones for the sample layout. The smallest diameter sample was achieved by stopping at Round 3 or 4 for two of the spirals.
— Decorative Inner Looping (Lace detail for one solid disc if desired) :
Info :
Optionally you may add looping stitches inside a solid circle to mimic the center lace medallion seen in the picture. Work chains attached to inner rounds and secure with single crochet to create open petal shapes.
Round 1 :
Find a row approximately 6-8 rounds out from the center of a solid disc. Attach cream color with a sl st.
Round 2 :
*Ch6, skip 3 sts, sl st in next st; rep from * around to create even loops. Adjust ch length so you have 12 loops.
Round 3 :
Into each loop: (sl st, ch1, 3 dc, ch1, sl st) forming lace arches. Fasten off and weave tails.
Info :
These details help balance the runner visually if you have two solid discs and one lace disc. Make sure loop spacing is even by counting stitches and using stitch markers as needed.
— Edge Finishing and Topstitch :
Round 1 :
With Mustard, join to any outer round point and work 1 sc in each st around entire runner assembly once to tidy seams and ensure a uniform edge. Work slowly around curves.
Round 2 :
Optional: 1 sc in BLO for a shallow ridge (this gives a hand-finished look and reinforces the edge)
Info :
At joins where two pieces meet, work through both layers with each sc to securely bind them. Use a longer yarn tail and whip stitch for heavy rope to avoid bulky knots.
Round 3 :
Weave in all ends on the wrong side. If desired, topstitch along the seam line with cotton thread for a decorative finish and extra strength.
Info :
Add leather tags at the outermost solid discs and hand-sew with strong thread as a final design accent. Ensure tabs are evenly centered on each end disc.
— Assembly and Shaping Notes :
Info :
Lay out all three discs on a flat surface spaced approximately 2.5-3 inches apart (this is the sample spacing). Position the two long swirl connectors along each side, forming an S-shape between discs. The swirls should mirror each other to create symmetrical flows.
Info :
Sew the outer edge of each disc to the inner edge of the adjacent swirl using the long tail left from the border round. Use a yarn needle and whip stitch through both layers. Sew at 1/2-inch intervals for a secure seam. After attaching all pieces, reinforce joins by working a sc round through both layers as described above.
Info :
Glue is not recommended for primary joins but may be used sparingly to tack down tails before finishing stitches. If you need to block, lightly steam with a cloth over the runner and pin shape on a flat surface until cool.
Info :
Throughout the pattern, adjust measurements by adding or subtracting increase rounds in the discs or repeating more rows in the swirl strips. The pattern is modular and forgiving: you may lengthen the runner by adding an extra disc and two swirls.
Finishing this runner is such a satisfying moment — watching the three discs, swirls, and small spirals come together into a harmonious centerpiece feels like arranging a table with sunshine. The mustard and cream balance modern color with cozy texture, and the sewn joins make it sturdy and practical. 🧶 I love adding a small leather tag for a designer touch, and this project makes a wonderful handmade gift or a bright update for your home. Enjoy every stitch and show it off at your next gathering! 🌞