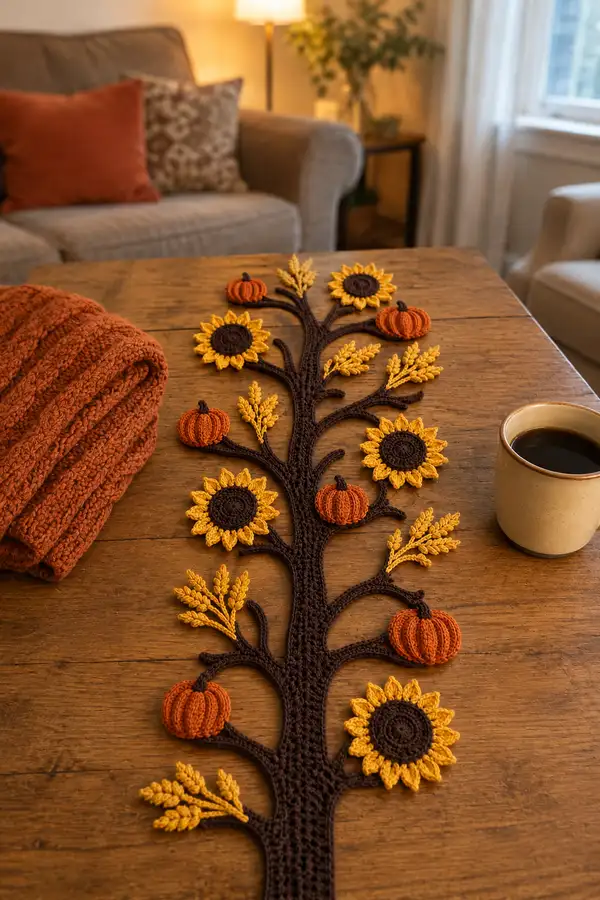
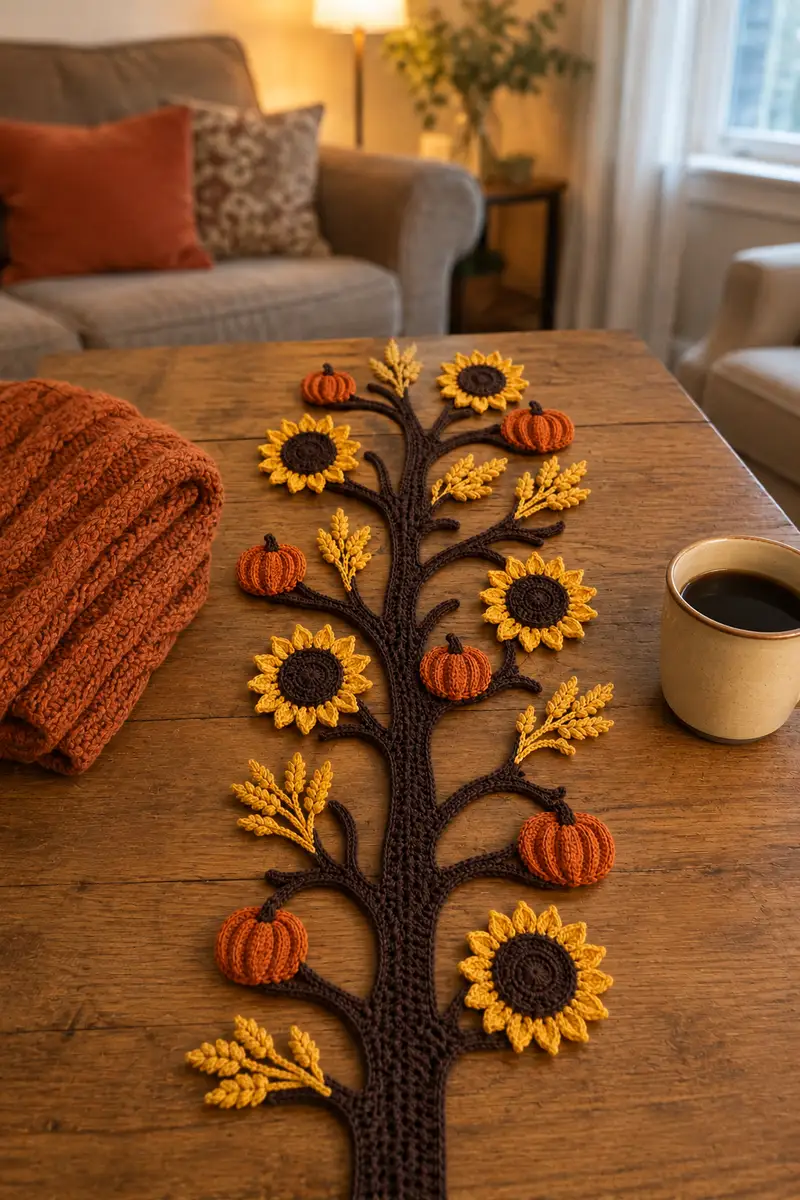
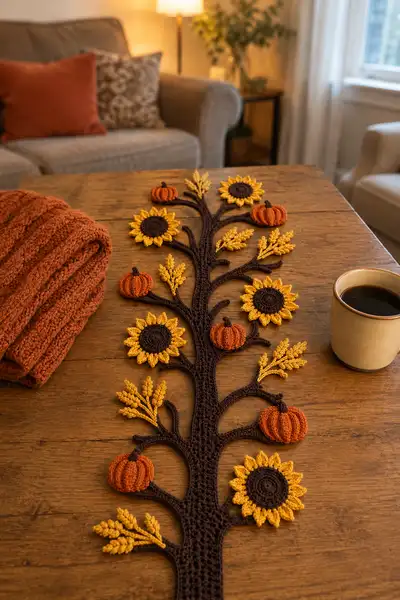
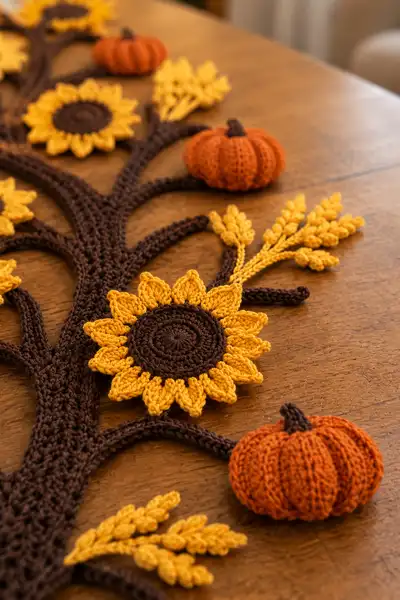
Create a warm, autumnal centerpiece with this Sunflower and Wheat Tree Table Runner pattern. The design features a braided tree trunk with branching stems, bright golden sunflowers, delicate wheat stalks, and plump pumpkins in rich orange. Perfect for seasonal decor, this runner lays flat on your table and adds handcrafted charm to any cozy room.
Progress Tracker
0% Complete
— Trunk and Main Branch Base :
Round 1 :
6 sc in magic ring (6)
Round 3 :
(1 sc, inc) x 6 (18)
Round 4 :
(2 sc, inc) x 6 (24)
Round 5 :
(3 sc, inc) x 6 (30)
Round 6 :
(4 sc, inc) x 6 (36)
Round 7 :
(5 sc, inc) x 6 (42)
Round 8 :
(6 sc, inc) x 6 (48)
Info :
We are creating a round tube which will be flattened later to form a long trunk. Work tightly for a firm base. Place a stitch marker at the first stitch of the round and move it each round.
Round 9-20 :
1 sc in each st (48)
Info :
Continue working in continuous spiral — do not join rounds. After Round 20 the tube will be long enough to begin flattening for the base. Back-loop-only rounds can be used later for a subtle ridge effect; add those where noted.
Round 21-40 :
1 sc in each st (48)
Info :
At rounds 24, 28, 32 and 36 we will create branching points. Mark positions on the trunk where branch stems will be attached. Each branch begins with ch stitches worked out from a designated round; read Branch instructions for specifics.
Round 41 :
(6 sc, dec) x 6 (42)
Round 42 :
(5 sc, dec) x 6 (36)
Info :
We begin a subtle taper to make the trunk lay slightly flatter toward each end. Keep tube length consistent — this shaping creates a natural-looking base for branches.
Round 43-56 :
1 sc in each st (36)
Round 57 :
(4 sc, dec) x 6 (30)
Round 58-64 :
1 sc in each st (30)
Info :
Leave a long tail at the end of Round 64 — this will be used to sew the opening closed neatly once the trunk has been flattened and blocked. Do not fasten off yet.
Round 65-72 :
1 sc in each st (30)
Info :
To flatten the tube into a trunk shape: pinch the tube along its length and using the tail from Round 64, whip stitch the sides together through corresponding loops to form a flat trunk strip that maintains an illusion of rounded volume.
Round 73-80 :
After flattening, work 1 sc evenly around the outer edge of the flattened trunk strip (work into both thicknesses) to create a neat outer edge; approximate stitch count will be 60-72 depending on flattening (adjust to keep even).
Info :
Take time here to shape the long trunk: measure desired final length on your table and block lightly with pins. This flattened trunk will serve as the base for branches. Use a tail to secure and weave into the body; fasten off when satisfied.
— Branch Stem Construction (Make 8-10) :
Info :
Branches are crocheted as slender cords worked from trunk attachment points. Each branch is worked separately and sewn into place. Chain lengths vary depending on where they attach — pictured branches range 22-48 ch for long branches and 10-18 ch for short twigs.
Round 1 :
Attach brown yarn at a marked stitch on trunk edge using sl st, ch 22 (or desired length), turn and sc back into each chain starting from 2nd ch from hook (21 sc). Fasten off leaving long tail for sewing (21)
Round 2 :
For thicker branch: rejoin at base, sc evenly around the chained cord working into both loops of chain and along the base to create a tube — typically 1 sc per chain = 21 sc (work in continuous spiral)
Round 3 :
1 sc in each st BLO to create a subtle ridge (21)
Round 4 :
For T-junctions or small forked twigs, ch 8, sl st back to trunk join and sc along ch to create a forked twig; fasten off and weave tail (8)
Info :
Sew corded branches into the trunk opening using the long tail. Arrange each branch so it flows outward; pin into place before sewing to check spacing between sunflowers and pumpkins. Branches may be curved gently after sewing by blocking.
— Sunflower Motif (Make 6) :
Round 1 :
With dark brown yarn: 6 sc in magic ring (6)
Round 3 :
(1 sc, inc) x 6 (18)
Round 4 :
(2 sc, inc) x 6 (24)
Round 5 :
(3 sc, inc) x 6 (30)
Info :
Center should be a flat disc approximately 30 sts. Fasten off dark brown and join golden yellow in any stitch for petal rounds. Use the dark center to anchor petals with slip stitches if desired.
Round 6 :
Join golden yellow. *Ch 2, (2 dc, ch 1, 2 dc) in next st, sl st in next st* around to create a ring of raised petal bases. You will get approximately 15 petals depending on spacing (approx 30 petals bases / 2 = 15)
Round 7 :
Petal formation: In each ch-1 space from previous round work: (sc, hdc, 2 dc, hdc, sc) to form full petal. Repeat in each space around (15 petals)
Round 8 :
Slip stitch behind petals into center border to neaten and shape petals outward; fasten off leaving long tail for sewing.
Info :
Block each sunflower flat by pinning petals to desired shape; steam lightly or wet-block and let dry. Use the long tail to sew sunflower centers to trunk branches, centering the dark brown disc on branch ends or flat branch areas.
— Small Sunflower Variation (Make 2-3) :
Round 1 :
With dark brown yarn: 6 sc in magic ring (6)
Round 3 :
Join golden yellow. In each st around: *sc, ch 2, sc in same st* repeat around to create small petals (12 petals)
Info :
These smaller sunflowers are ideal for tight branch tips. Use fewer petals for a compact look and sew in place with a tight whip stitch into trunk or branch cord.
— Pumpkin Motif (Make 5) :
Round 1 :
With orange yarn: 6 sc in magic ring (6)
Round 3 :
(1 sc, inc) x 6 (18)
Round 4 :
(2 sc, inc) x 6 (24)
Round 5-6 :
1 sc in each st (24)
Round 7 :
(2 sc, dec) x 6 (18)
Round 8 :
(1 sc, dec) x 6 (12)
Info :
Stuff pumpkin firmly with polyester fiberfill before final decreases. The pumpkin is shaped like a squat sphere — use small amounts of stuffing at a time to avoid lumps.
Round 10 :
Fasten off leaving a long tail. Close the hole tightly with the tail and weave through the bottom to stabilize.
Round 11 :
To create ribs: Thread a length of yarn (approx 40-60 cm) through a tapestry needle. Insert the needle from bottom center to top center; then bring it down around the pumpkin and insert back through bottom center. Repeat creating 6-8 evenly spaced vertical ribs, pulling slightly to indent each rib. Knot at the bottom and weave tail inside.
Round 12 :
Make a small stem: With dark brown, ch 4, sc back along chain (3), sl st to base, fasten off leaving tail. Sew stem at top center of pumpkin.
Info :
Adjust the tightness of ribs to taste — tighter pulls give more pumpkin segment definition. Make pumpkins slightly different sizes by varying initial increases (for a larger pumpkin: increase to 30-36 before stuffing).
— Wheat Stalk (Make 8-12) :
Round 1 :
With golden yellow, ch 30 (or desired stalk length). This chain will be the central stem.
Round 2 :
Working back along chain: sl st into 2nd ch from hook and into next 4 ch (create a slight base). For the first grain, ch 5, dtr cluster into base: in next ch, *yarn over twice, insert, yarn over, pull through 2, yarn over pull through 2, yarn over pull through 2* forming a long stitch; sl st back into main chain. Repeat along the stem forming clusters: ch 5, dtr cluster into alternating ch positions along the chain. Aim for 8-12 grain clusters per stalk.
Round 3 :
Once all clusters are made, sc into final chain tip to secure. Fasten off leaving a long tail for sewing.
Info :
Wheat clusters are formed from elongated stitches (dtr or long dc) that are clustered and then secured with a sl st to create a raised grain. After making a set, lightly steam-block so clusters curl slightly and resemble wheat ears.
— Small Leaf Sprig (Make 8) :
Round 1 :
With golden yellow, ch 12. Turn, sc in 2nd ch from hook and next 3 ch (4 sc). Ch 2, turn and work 2 hdc, sl st into next st to create a small leaf. Repeat on other side of initial chain to create symmetrical leaf pairs. Fasten off leaving tail to sew.
Info :
These small leaf sprigs fill gaps and are attached near sunflower bases or branch tips. Make them slightly curved by pinning and steaming into shape before attaching.
— Assembly and Placement :
Info :
Layout your trunk on the table and arrange branches, sunflowers, pumpkins and wheat stalks before sewing. Take a photo of your layout for reference. Placement in the original photo: three large sunflowers spaced along the top half, three smaller on the lower half, pumpkins filling concave spaces and wheat stalk clusters near sunflower pairs.
Round 1 :
Pin a sunflower center over a chosen branch tip. Using long tail from sunflower, sew through trunk and branch with a whip stitch, making sure center lies flat and petals are evenly spread. Use invisible ladder stitch on the back of the sunflower to hide the join.
Round 2 :
Sew pumpkins at junctions or on short branch tips by placing the pumpkin base onto the trunk and stitching around the bottom with short whip stitches through the trunk and into the pumpkin base. Reinforce by adding cross stitches inside the pumpkin bottom if needed for stability.
Round 3 :
Sew wheat stalks in small clusters (2-3 per cluster) at branch groupings to mimic the photograph. Use short stitches and hide tails inside trunk using the yarn needle.
Round 4 :
Attach small leaf sprigs near sunflower bases and along branches to add fullness. Use the long tails to tuck stitches into the trunk to secure, then weave in ends on the inside of the trunk layer.
Info :
When attaching elements, ensure the runner remains flat. If a pumpkin or sunflower causes bulk, flatten lightly with pins and add a few stitches that anchor the applique closer to the trunk to keep a low profile for table use.
— Finishing Touches and Edge Treatment :
Round 1 :
Using brown yarn, work a neat sc border all around the outer edge of the trunk and around any branch edges to give a finished look. Work evenly; expected stitch count will vary (keep one sc per visible stitch for continuity).
Round 2 :
Optional: Add a second decorative round in FLO with hdc for a raised rope effect along the trunk edge.
Info :
Weave all ends into the trunk layer, trimming any excess. Lightly block the finished runner on a flat surface with pins to set shape; do not saturate pumpkins. Steam-block petals and wheat stalks only.
— Alternate Embellishments and Size Adjustments :
Info :
To enlarge the runner: extend trunk rounds and add more branch attachments. To reduce size: stop trunk rounds earlier and scale down sunflower petals by working fewer petal repeats. You can also swap yarn weight and hook size for larger or smaller results — remember to adjust counts slightly for balance.
Round 1 :
Optional Beading: Sew a few small wooden beads into sunflower centers or along pumpkin stems for rustic detail. Attach beads with strong thread and knot securely on the back side inside the trunk.
Info :
For dishwasher-safe protection of table surfaces, add felt pads beneath bulky elements or position runner so three-dimensional pieces avoid direct contact with fragile dinnerware.
This Sunflower and Wheat Tree Table Runner is a beautiful way to celebrate autumn with yarn and creativity! The layered sunflowers, delicate wheat stalks, and tiny pumpkins come together to create a handmade centerpiece you'll be proud to display. The process of crocheting each motif and arranging them on the trunk is both meditative and rewarding—perfect for cozy afternoons. 🧶🍂 Add this runner to your home or gift it to someone who loves seasonal charm. Happy crocheting! 🎃