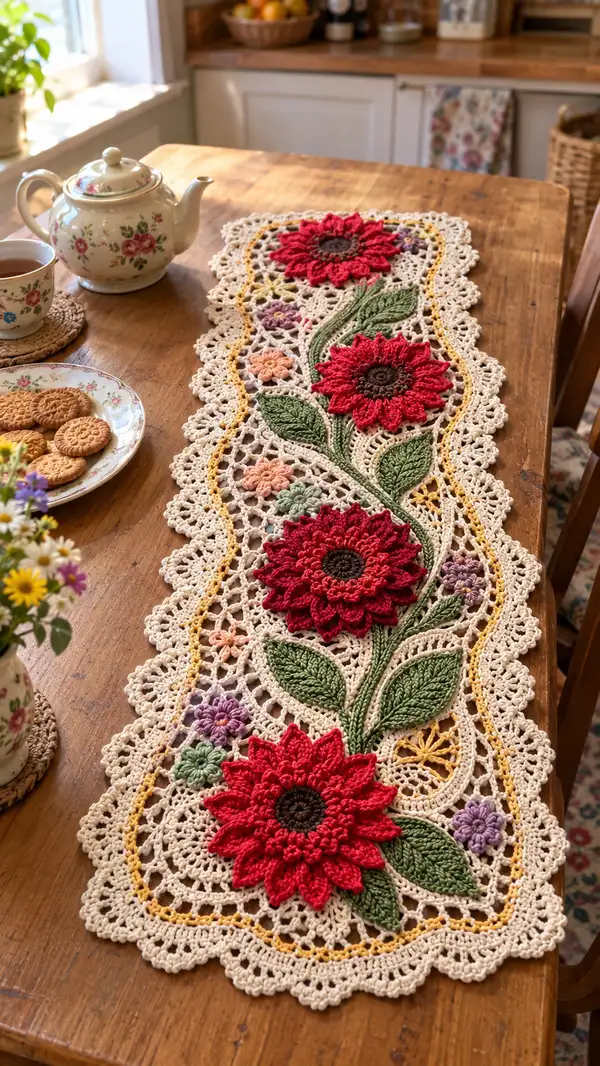
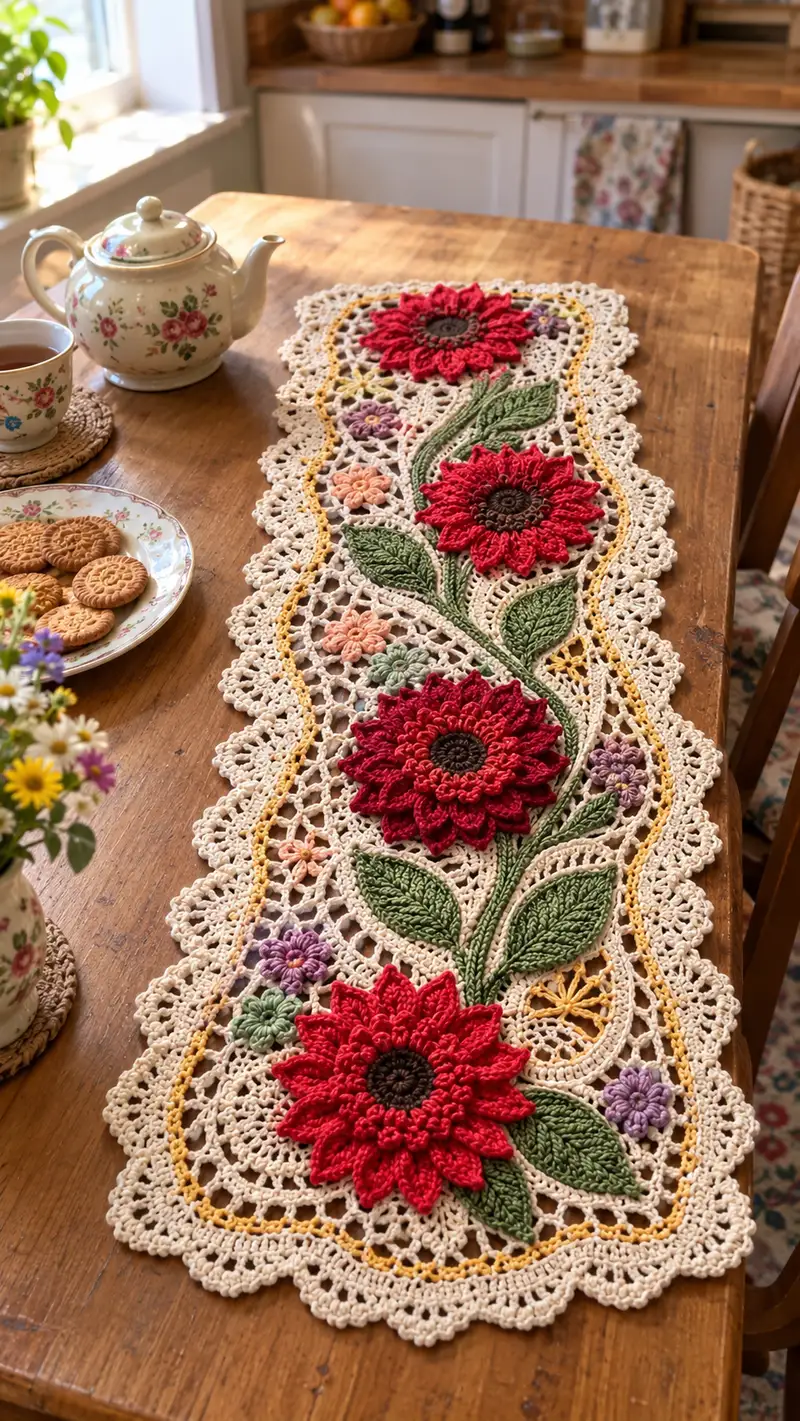
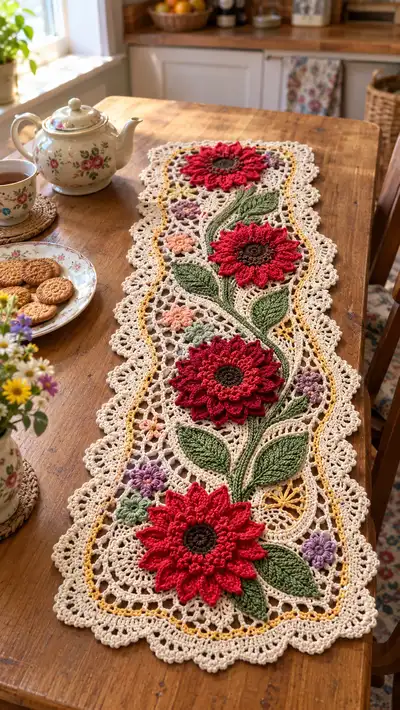
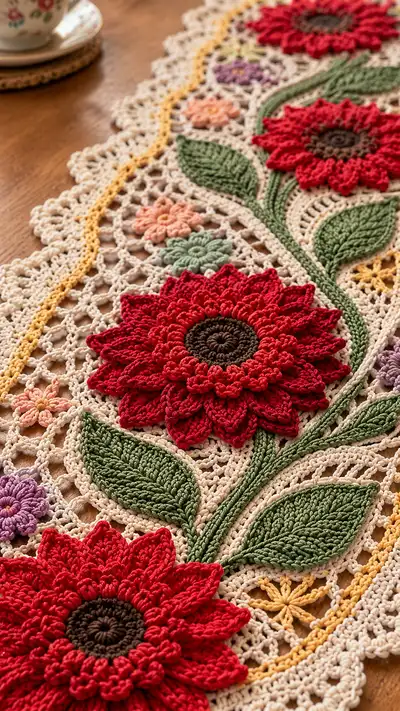
A vintage-inspired lace table runner featuring three large layered sunflowers, sculpted leaves, delicate little blooms and a scalloped filet lace background. Worked in multiple colors with raised petals and textured leaves to create a stunning centerpiece. Designed to lay flat on a dining or console table, this runner combines crochet surface shaping with motif-join techniques for a heirloom finish. Detailed instructions guide you through motif construction, joining, and the final scalloped edging.
Progress Tracker
0% Complete
— Materials & Gauge :
Info :
Gauge is flexible for decorative runner, but for reference the mesh ground should measure approximately 2.5cm per 10-mesh repeat when using a 3.5mm hook with DK cotton. Adjust hook size to achieve a flat, even mesh. The finished runner as photographed measures roughly 90cm long x 24cm wide; you can add or remove mesh repeats to lengthen or shorten.
— General Notes :
Info :
Work in rows for the lace ground. Most floral and leaf elements are made separately then sewn or crocheted into position. Use blocking heavily: pin each motif to final shape before joining. For raised elements, use a slightly smaller hook to increase density and definition. Abbreviations used: see list above. When color changing, finish stitch to last yarn over, yarn over with new color and complete stitch to create clean joins.
— Large Sunflower (Make 3; work each one individually) :
Round 1 :
Using dark brown, make a magic ring. Ch1, work 8 sc into ring; pull tight and sl st to first sc (8)
Round 2 :
Inc in each st around (16)
Round 3 :
(1 sc, inc) x8 (24)
Round 4 :
1 sc in each st (24)
Info :
These center rounds create a relatively flat disk. Keep tension even; center will sit slightly recessed beneath the petal layers. We will create textural rings next using post stitches and puff cluster rounds.
Round 5 :
Change to a slightly lighter brown if desired. *Ch2 (counts as hdc), (hdc, ch1, hdc) in next st* around to create picot-like ridges; sl st to first hdc (24 clusters)
Round 6 :
Working in FLO of previous round, sc in each stitch and in each ch-1 space (48) — this establishes a broader surface for petal foundation
Round 7 :
Ch1, *(sc, ch2, tr3 cluster over next 3 sts, ch2, sc) in each of 8 sections* — place clusters evenly to make 16 small raised stitches that will anchor the inner petal ring (work carefully to keep spacing)
Info :
Fasten off brown center leaving a 20cm tail for sewing. If you prefer a thicker center, add two more rounds in brown using alternating dc and ch1 spaces to build height.
Inner Petal Round A - Round 8 :
Join red to one anchor point with sl st. Ch3 (counts as dc), work 2 dc in same anchor, *sk next anchor, (3 dc in next anchor)* around to form 8 small dc clusters (24 dc total). Sl st to top of beg ch3
Round 9 :
1 sc in each dc and in chain spaces around (24)
Round 10 :
Work petal foundation: *(ch3, 3 tr in next st, ch3, sl st at base to create a loop petal) x 8* — each petal base sits on a 3-dc cluster
Info :
Use a smaller hook (3.0mm) for these petal rounds if you want crisp petal edges. Keep the sl st anchor tight so petals stand up from the center.
Round 11 :
Working into each petal loop: *(sc, hdc, 3 dc, hdc, sc) into loop; sl st to next petal base* around to shape full rounded petals (8 large petals, each 8 sts wide)
Round 12 :
Ch1, *FLO: sc in next 4 sts, (3 sc in next st) to create slight increase at petal tip* repeat around to refine shape (approx 64 sts total)
Inner Petal Layer Info :
At this stage the first petal layer is slightly ruffled; block flat with petals curved up slightly for a natural look. This layer will be the lower petal ring; we will add a second, larger outer petal layer that sits behind.
Outer Petal Foundation - Round 13 :
Join red at the base between two inner petals. Ch5 (counts as tr + ch2), *(tr, ch2, tr) in base space between petals, skip to next base; repeat around making 16 tr clusters separated by ch2 spaces* Sl st to join (32 tr spaces)
Round 14 :
Into each ch2 space: *(ch3, 5 tr in same ch2 space, ch3, sl st back into same space) — big puff petals created. Repeat around to form 16 outer petals* Fasten off, weave ends
Round 15 :
With hook held behind petal round, pick up loop from back and work a row of sc around petal bases to neaten join (approx 96 sc) — this creates a dense ridge which helps petals sit from the lace ground
Info :
Make sure outer petals are staggered relative to the inner petals so the flower appears full. Block each flower flat with pins, curving petals slightly upward. Repeat the above full sequence to make three sunflowers, varying red hue slightly if desired for depth.
— Small Cluster Flowers (Make 8-10 in pastel shades) :
Round 1 :
Using peach or lavender, ch4, join to form ring. Ch1, work 6 sc into ring; sl st to first sc (6)
Round 2 :
(1 sc, inc) x3 (9)
Round 3 :
*Into each st: (ch3, sl st) to form a tiny petal; repeat around for 9 mini petals* Fasten off and weave ends (no stuffing needed)
Info :
Make several small flowers in varying sizes by changing the starting ring and increasing to 7 or 8 petals for visual interest. These are used as filler accents in the mesh ground.
— Sculpted Leaf (Make 6 or as desired) :
Round 1 :
Using olive green, ch12. Row1: sc in 2nd ch from hook, sc across (11)
Round 2 :
Ch1, turn, sc in next 4 sts, hdc in next 3 sts, dc in next 2 sts, hdc in last st, sc in final (11) — shaping begins
Round 3 :
Ch1, turn, sc dec over first 2 sts, sc across to last 2 sts, sc dec (9)
Round 4 :
Ch1, turn, work 3 sc evenly across center, FLO: work 1 row of sc in back loops only to create a midrib ridge (9)
Round 5 :
Using contrasting olive shade, work surface slip-stitch rib down center: starting at base, sl st in each st along center line to tip then return on opposite row to base (this creates a raised vein)
Round 6 :
Edge the leaf with picot trim: sc evenly around leaf edges, *(sc, ch3, sl st at base of ch3) every 4 sts* to mimic serration. Fasten off leaving long tail for sewing
Info :
Pin leaves to blocked shape and steam lightly to set. Position leaves under flower bases so they peek from behind or alongside the stem for a natural composition.
— Curved Stem (Make 1 long stem per runner; branches optional) :
Round 1 :
With olive green, ch120 (adjust for runner length to run between flowers). Row foundation: sc in 2nd ch from hook across (119)
Round 2 :
Ch1, turn, sc across in BLO to create a ridge (119)
Round 3 :
Using surface crochet: working on RS, carry spare green yarn along underside and work surface sl st forming a twin-cable look by making two parallel surface lines 2-3 stitches apart; anchor stem to mesh ground later
Info :
Stem can be constructed as a long crocheted strip or by working surface slip-stitch directly on the mesh ground. If making a separate stem, leave long tails to sew in place and curve the stem before blocking to set shape.
— Lace Ground Panel (Work one long central panel to accept motifs) :
Round 1 - Foundation Row :
Using cream, ch (chain multiple of 10 + 6) to desired length. For photographed runner chain 220 (220+6 =226) — this will create the long rectangle
Round 2 :
Row1 (RS): dc in 4th ch from hook and in each ch to end, turn (approx 224 dc)
Round 3 :
Row2 (WS): Ch3, *skip 2 sts, (sc in next st, ch5) repeat across to create chain-5 mesh anchors*. End with sc in last dc. Turn
Round 4 :
Row3 (RS): Join cream into each ch5 space: *(dc, ch2, dc) in ch5 space to make small arches; ch3 between clusters when space is wide* Repeat across. This begins the open filet mesh which will form the lattice ground (width approx 24cm)
Info :
Work in rows for the entire ground; the mesh uses repeating chain spaces to create cells where motif joins will be made later. Measure often and block the ground flat before joining motifs to keep everything even.
Round 5 :
Row4: Ch4 (counts as tr), *sk next arch, (tr, ch2, tr) in next arch* across to create vertical lacy bars. Turn
Round 6-12 :
Repeat Row2-Row5 twice to build mesh height, creating consistent chain spaces every 4 rows. After 12 rows the mesh should be airy but has enough density to support sewn motifs (repeat pattern: chain-5 cell row, arch row, vertical bar row, arch row).
Info :
Place markers at approximate flower positions before building entire length: mark centers for three sunflowers to be spaced evenly along runner. This will guide where to sew stems and leaves later.
Round 13 :
Work a row of single crochet across entire top and bottom edges to create a neat joining edge (approx 224 sc). This gives a firm surface to attach border scallops later.
Round 14-20 :
Continue repeating the mesh block pattern until the panel reaches the desired width for motif placement (approx 20-28 cm). The total number of mesh repeats will depend on yarn and tension; aim for a depth that allows petal overlap without crowding.
Info :
If you prefer modular construction, crochet several rectangular mesh panels and join them later with slip-stitch seams. Keep edges blocked straight for a clean join.
— Joining Motifs to Mesh Ground :
Round 1 :
Pin mesh ground flat and position sunflowers where marked. Place leaves and small filler flowers around each sunflower as in the photograph or to taste. Ensure petals do not overlap excessively.
Round 2 :
Sew centers first: using long brown tail, ladder stitch center to mesh by aligning center disk to the mesh cell beneath and whip stitch through the dense sc row at the flower base (approx 12-16 secure stitches). Keep stitches hidden between petals.
Round 3 :
Attach outer petal ring by sewing through the sc ridge built in Round 15 of flower construction. Use small neat stitches and pin petals into slightly curved position to maintain dimension. Work around entire flower making 24-30 whip stitches for security.
Info :
For a less visible seam, use a thin yarn or embroidery thread that matches the flower color and stitch through back loops only so stitches sink behind petals. Secure each motif at multiple anchor points: center, two opposite petal bases, and at least 4 perimeter points.
Round 4 :
Sew stems into place by aligning the crocheted strip/stem over the mesh and using small whip stitches along the stem ridge. Curve stems gently and secure every 1-2 cm to prevent sagging.
Round 5 :
Sew leaves with long yarn tails: position under petals or next to stems. Use a mattress or invisible stitch at the base and several securing stitches along the midrib to hold leaf shape. Add small stitches at leaf tip if needed.
Info :
Place filler small flowers in empty mesh cells, catching a few mesh threads to anchor them. Avoid over-sewing; small flowers should appear to sit on the surface but be secure enough for gentle handling.
— Decorative Inner Yellow Border (worked on top of mesh) :
Round 1 :
With mustard yellow, join with sl st at one long edge about 4 mesh rows from edge. Ch1, sc evenly into top of mesh arches along one long side (approx 110 sc)
Round 2 :
Ch3, *sk 1 sc, (5 dc cluster) in next sc, sk 1 sc, ch2* repeat along to create a wavy, ribbon-like accent. Sl st to end. Repeat on opposite long side and both short ends.
Info :
This mustard ribbon helps visually separate the floral middle from the outer scalloped edge. Keep stitch tension looser than background to allow slight undulation; block after joining.
— Outer Scalloped Lace Border :
Round 1 :
With cream, pick up along outer mesh edge and sc evenly across to create a firm foundation (approx 230 sc total around full runner). Turn corners with additional sc to keep a square corner.
Round 2 :
*Ch5, skip 3 sc, sl st in next sc* repeat around to form chain-looped foundation for scallops. Space loops evenly. Sl st to join.
Round 3 :
Into each ch5 loop: *(sc, hdc, 5 dc, hdc, sc)* — work a full scallop. Make sure each scallop uses the same stitch count to keep edge even.
Round 4 :
Second scallop row for depth: work *(picot, sc, picot) across the top of each scallop, placing picots at every 2nd dc to create lacy points* Fasten off and weave ends.
Info :
Pin scalloped edge carefully on blocking board and steam lightly. Use pins at each scallop peak for an even, wave-free finish. If your runner sags, add an extra row of sc or smaller hook to firm up the foundation row.
— Finishing Touches :
Round 1 :
Weave in all ends using a yarn needle, making sure ends are passed back through several stitches to secure. Clip excess close to work but not so short that ends slip out later.
Round 2 :
Block the entire runner: spray with water or steam gently and pin to dimensions on a blocking board. Shape petals and scallops as desired, allowing to dry completely before removing pins.
Info :
If you prefer the motifs to be removable for washing, consider sewing them with small removable stitches (use contrasting thread) so they can be unpicked for cleaning. Otherwise secure stitching is recommended for daily use.
Round 3 :
Final inspection: check for any loose stitches, reinforce sewn joins with 2-3 additional passes if necessary, and trim stray fibers.
Info :
For a longer runner, add additional mesh repeats in the central ground and space the flowers evenly; for a shorter runner, reduce mesh repeats but maintain border proportions for balanced look.
This floral lace table runner transforms a simple table into a seasonal showpiece with layered sunflowers, sculpted leaves, and delicate lace edges. The combination of airy mesh and three-dimensional petals feels both vintage and fresh, perfect for a sunny kitchen table or an elegant dining display. Each motif is a joy to make, and joining them into the lace ground gives a deeply satisfying finish. Enjoy the mindful stitching, blocking, and the slow reveal as your runner comes together. 🧶🌻