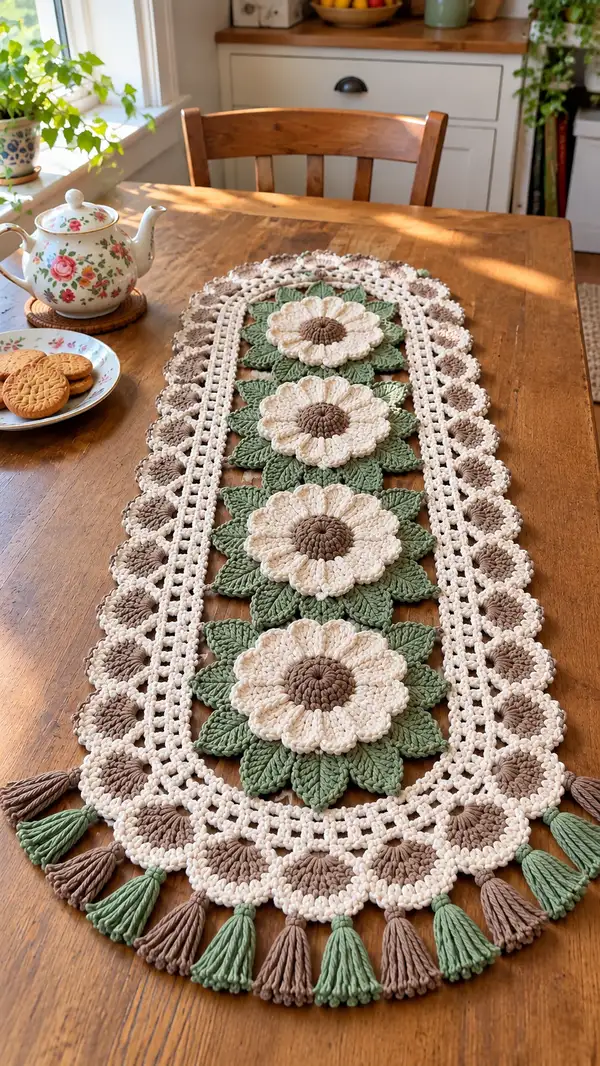
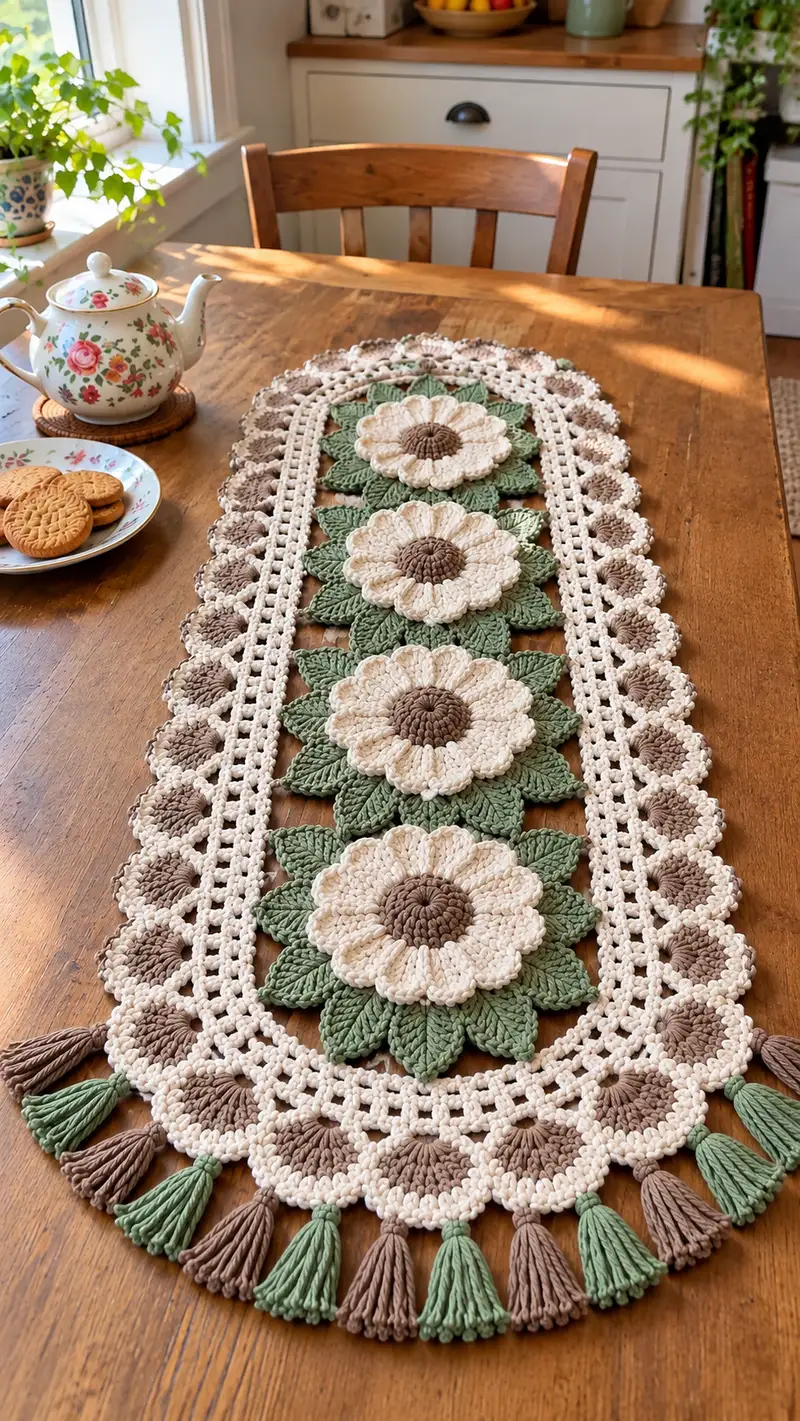
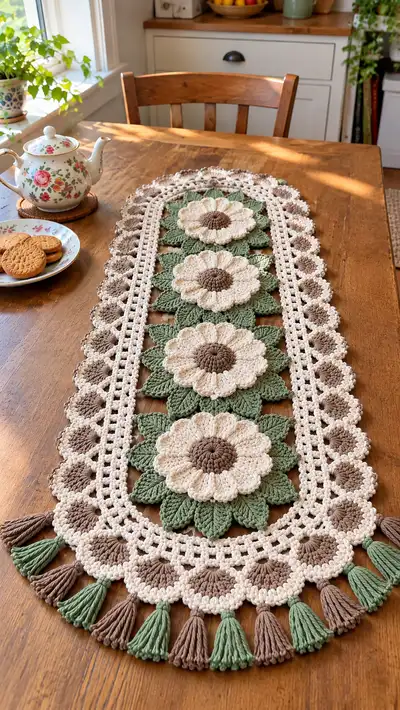
Create a stunning sunflower lace table runner featuring three dimensional cream flowers, layered green leaves, airy lattice panels, scalloped taupe borders, and alternating green and taupe tassels. This detailed pattern uses cotton or cotton-blend worsted yarn for a sturdy, elegant runner that lays flat and photographs beautifully. Full step-by-step instructions guide you through each motif, leaf, connector, border scallop, and tassel to assemble a polished finished piece.
Progress Tracker
0% Complete
— Overview :
Info :
This pattern is modular: you will make 4 large sunflower motifs, make leaf sets to pair with each flower (8 leaves per flower), create two long lattice connector strips, add scalloped edge discs, and finish with tassels. Work motifs flat; sew them to the lattice strips as you progress so the runner remains even. All stitch counts are provided and double-checked for consistency.
Info :
Gauge is not critical for appearance but matters for final length: using worsted cotton and 4.0mm hook, each finished flower motif (center-to-petal-edge) measures approximately 12-13 cm across. Adjust hook/yarn to change size. The finished runner length shown with 4 motifs is about 95-105 cm, width approx 30-34 cm excluding tassels.
— Flower Motif (Make 4 identical motifs) :
Round 1 :
With taupe (center color) work 6 sc in magic ring (6)
Round 2 :
Inc in each st around (12)
Round 3 :
(1 sc, inc) x 6 (18)
Round 4 :
(2 sc, inc) x 6 (24)
Round 5 :
(3 sc, inc) x 6 (30)
Round 6 :
(4 sc, inc) x 6 (36)
Info :
Center is now 36 sts. Fasten off taupe. This rounds forms the sturdy textured center. Change to cream yarn for petal rounds. Use a stitch marker to note the beginning of the round; petals will be anchored evenly around 12 petal positions (36 sts / 12 = 3 anchor sts per petal area).
Round 7 :
Join cream in any stitch. 1 sc in each st around (36)
Round 8 :
1 sc in next 2 sts, *start petal cluster in next st: (yo, insert, pull up loop) 3 times, yo and pull through all loops on hook, ch1 to close petal. Skip next 0 sts (petal occupies the anchor stitch), 1 sc in next 2 sts; rep from * around to make 12 petal anchors (36). Note: this round builds petal bases; stitch count remains (36)
Info :
The petal cluster here is a short puff-style cluster: make 3 partial yo-insert pulls into same stitch and pull through all loops to create the puff then ch1. You can substitute a 5 dc cluster if preferred. Keep tension slightly loose when making puff clusters so petals sit raised above center.
Round 9 :
Working into ch-1 spaces (petal base loops), join cream and: *(ch2, (2 dc, tr, 2 dc) all in same ch-1 space to form a fan petal), sl st into next ch-1 space to secure (this makes each petal large and rounded); rep from * around to make 12 full petals. End with sl st to join (12 large petals, base still anchored to 36)
Round 10 :
Turn petals outward: With cream, working behind petals into base stitches only, 1 sc in each of the 36 base sts to create a tidy background row (36). This row stabilizes petals so they remain upright.
Round 11 :
Switch to cream if needed and work a decorative ridge round: *1 sc in next st, BLO 1 hdc in next st; rep from * around to add texture (36)
Info :
At this stage the flower face is complete. Make sure petals are fluffed and even. We will now add leaf foundation rounds around the outside; leave the flower on your hook and set aside, or proceed to attach leaves immediately if you prefer to build each flower completely before moving on.
Round 12 :
Switch to moss green to begin leaf-attachment foundation. Ch1, *1 sc in next 2 sts, ch3, skip 1 st; rep from * around to make 12 chain-loops between base groups (36)
Info :
These ch-3 loops are anchor points for separate leaf pieces. You will make 8 leaves per flower, alternating anchor loops so leaves overlap slightly under petals. Use stitch markers to mark every third anchor if you prefer exact spacing (12 anchors around; pick 8 evenly spaced anchors for leaves).
— Leaf (Make 8 per flower — 32 leaves total) :
Leaf Round 1 :
Join moss green to an anchor ch-3 loop from the flower base. ch1, work 1 sc into the loop, ch1, turn (counts as anchor)
Leaf Round 2 :
Work into same loop: (sc, hdc, 3 dc, hdc, sc) all worked into loop to form center swell (7 stitches into loop). Turn
Leaf Round 3 :
Edge shaping: sc in first st, (hdc in next, dc in next 3, hdc in next), sc in last st. Then work along opposite side of the loop returning to join: sc in first, hdc, (dc 3), hdc, sc — creating a symmetric leaf (14 total stitches around the loop). Sl st to first leaf base to close.
Leaf Round 4 :
Refine leaf point: *ch1, sl st into tip (center dc of the 3-dc group), ch1, then working on FLO of each edge chain work 1 sc, 1 hdc to create a ridge; rep from * across both sides (leaf remains flat). Fasten off leaving long tail for sewing if detaching, otherwise continue join.
Info :
Make 8 leaves for each flower and position them behind the petals so they peek out evenly. You can make leaves slightly larger by adding extra dc pairs at Round 2 — increase three-dc group to five-dc group for a wider leaf (ensure symmetry on both sides).
Leaf Round 5 :
Optional surface rib: With a contrasting moss green held double or single, use surface slip stitch along the center line of the leaf to make a vein. Work sl st from base to tip then back for a raised vein.
Info :
Sew leaves to the flower base with mattress or whip stitch using the long tail so leaves are evenly spaced. When all 8 leaves are attached, press lightly and block flat to make the assembly tidy.
— Flower Assembly Notes :
Info :
Make 4 flower motifs and their accompanying 8 leaves each (32 leaves total). Block each motif flat to ensure uniform shape. When blocking, pin petals into final rounded shape using steam or wet-blocking for cotton yarn; this helps the petals keep their sculpted 3D appearance when attached to the lattice connector.
— Lattice Connector Strips (Make 2 long strips — left and right frame) :
Round 1 :
With cream, ch 80 (or desired length to match number of motifs — adjust by adding multiples of 6 to fit motifs). Join with sl st to form a long oval if desired; for this runner we work a long straight strip. Ch1, 1 sc in 2nd ch from hook and in each across (79 sc) — foundation row.
Round 2 :
Ch3 (counts as dc), *skip 2 sts, dc in next st, ch2; rep across; end with dc in last st. Turn to create laddered spaces for airy look (79 approx)
Round 3 :
Ch1, 1 sc in each dc and ch-space across to stabilize (79)
Round 4 :
Ch4 (counts as tr), *sk 2, 5 dc cluster in next stitch (or cluster between dc groups), skip 2, tr in next; rep across to create tall open arches to match petal spacing. Turn (counts remain equal to stitch anchors)
Info :
The lattice strips should be made to match the spacing where flower motifs will be attached: plan to pin flower centers so that petals sit over the central section of the runner and leaves tuck under the lattice. Measure placement and mark positions along the strip with stitch markers. The pictured runner uses 4 flowers spaced evenly with about 6-8 chains between each flower's centerline.
Round 5 :
Ch1, sc in each st across to crisp the rows (79). Fasten off one end if you prefer or continue into border building rounds.
Round 6-12 :
Repeat alternating openwork (dc/ch) rows and sc stabilization rows as desired to create a triple-row lattice effect similar to the photo: e.g., Row pattern = (Row A openwork, Row B sc stabilizer, Row A openwork) total three repeats so the lattice is deep enough to sew petals to and has a chunky look. Keep counts consistent by working stabilization rows into stitch tops only.
Info :
Make two identical strips. One will live on the left and one on the right side of the sunflower column; pins will be used to attach flowers between them creating a long central floral column with lattice borders on either side.
— Joining Flowers to Lattice (Repeat for each flower) :
Info :
Position the first flower so its base aligns with the lattice center between the two strips. The flower center should sit approx 10-12 rows down from the top of the lattice depending on your chosen spacing. Pin the flower center to the runner backing (or directly to one lattice strip if attaching through both strips later).
Step 1 :
Sew flower center to the lattice using mattress stitch through base rounds (circle of 36 sts) and into corresponding sc rows of lattice. Use cream or taupe for invisible joins. Ensure petals sit above the lattice and leaves sit under the petals for depth.
Step 2 :
Sew each leaf to the lattice anchors you created (the ch-3 loops) so leaves are evenly spaced around the flower opening. Use the long tails from leaf construction or sew with yarn needle and matching thread.
Info :
Attach all four flowers in equal spacing before moving to the scalloped border so you can measure border scallops and align taupe disk motifs evenly along the edges.
— Scalloped Edge Discs (Make 24 small discs for outer edge) :
Round 1 :
With taupe, 6 sc in magic ring (6)
Round 2 :
Inc in each st around (12)
Round 3 :
(1 sc, inc) x 6 (18)
Round 4 :
1 sc in each st around (18). Fasten off leaving long tail for join.
Info :
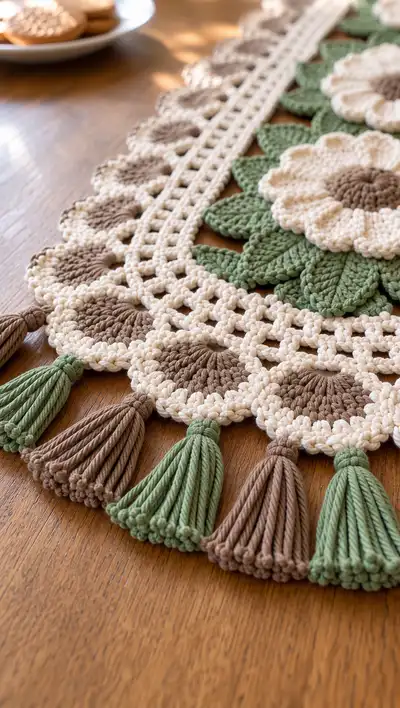
These taupe discs are placed along the scalloped border evenly (the pictured runner has 12 along each long side plus 2 at each curved end for symmetry — for 4+ motifs use total of 24-28 discs depending on length). Block discs flat if needed.
— Scalloped Border (Worked around entire runner — create scallop foundation then attach discs) :
Round 1 :
With cream join at lattice outer edge. Work 1 sc evenly around the outer perimeter of the two lattice strips and around the attached flower assembly to create a continuous edge; keep stitch counts even (approx 300-360 sc depending on your runner length). Use stitch markers to mark quarter points.
Round 2 :
*Ch4, skip 3 sc, sl st into next sc to form loop; rep across the length forming scallop loops; at corners and curved ends increase loops by working (ch4, sl st) twice into a single st to round the curve. This makes the scallop bases where taupe discs will attach.
Info :
Ensure you create a matching number of loops as taupe discs. If you made 24 taupe discs, make 24 scallop loops. Space them evenly and count frequently. Blocking after this round helps scallops look crisp.
Round 3 :
Into each ch-4 loop: join taupe disc tail and sl st through disc join point, then work 1 sc around the perimeter of the disc into the ch-4 loop to secure. Finish with 1 sc in next 2 foundation stitches between scallops to anchor (repeat around)
Round 4 :
To make the outer scalloped rim: in each ch-4 loop now filled with taupe disc, work (sc, hdc, dc, hdc, sc) around disc edge to form a scalloped petal border in cream, then sl st to next anchor. This scallop gives the textured halo effect seen in the photo.
Info :
Optional: Use BLO on the first sc of the scallop to create a neat ridge inside the scallop. The creamy scallops should alternate visually with the taupe discs underneath for a two-tone edge.
— Outer Lattice Rows Between Scallops and Flowers :
Round 1 :
With cream, work 2 rounds of 1 sc evenly to build a band between scalloped edge and main lattice (stitch count unchanged across rounds). These rows act as a stable frame for tassel placement.
Round 2 :
Work an openwork filet round: *ch3, skip 2, sc in next; rep across each side to create airy windows (count varies with runner length). Fasten off and weave ends.
Info :
These rows set up the final placement for tassels. Mark where tassels will attach (typically under each taupe scallop location) so they align with the small discs below.
— Tassels (Make tassels in alternating moss green and taupe; 16-20 total) :
Step 1 :
Cut 22 strands of yarn 12-14 cm long for a medium-thick tassel (adjust length for desired finished tassel drop). Fold in half and loop through a 4 cm top wrap using a crochet hook to pull loop through; secure knot and wrap tightly with coordinating yarn about 8 mm down to form the tassel head. Tie off and trim ends even.
Step 2 :
Attach tassel top loop to the underside of the scallop loops: thread the loop through the base of the scallop and pull tassel down. Secure by tying a small knot and whipstitching through the top band of the tassel head to the runner edge. Use a small dab of fabric glue inside the head if extra security is desired for heavy use.
Info :
Alternate colors: attach taupe then green then taupe across the long sides to replicate the pictured alternating tassel pattern. Balance tassel density for a neat trim rather than cluttered look — pictured runner uses tassels spaced under each scallop (~12-16 total per side depending on length).
— Final Edge Finishing Rounds :
Round 1 :
With cream, work 1 sc around entire outer edge including around each tassel knot to tidy and hide any join tails (stitch count varies). Use short stitches and slightly firmer tension for a crisp edge.
Round 2 :
Optional decorative ridge: *ch2, sl st into 2nd ch from hook along edge for a rope look; rep around. Fasten off and weave in all ends securely.
Info :
After final finishing, give the entire runner a gentle steam block or wet block and pin flat to remove any waviness. Allow to dry completely under pins to retain shape. This ensures petals lay neatly and the lattice remains flat on the tabletop.
— Sizing & Scaling Notes :
Info :
To scale runner longer: add additional flower motifs and extend lattice connectors proportionally (each extra motif typically requires +20–22 ch foundation plus repeat lattice pattern). To scale wider: add a central column or widen lattice and add more leaves per flower. Yarn and hook adjustments will change final dimensions accordingly.
Info :
If you prefer a denser look for table use, substitute a 3.5mm hook and hold yarn double for petals and leaves; ensure counts still align and adjust stitches per petal anchor if necessary.
This sunflower lace table runner is a beautiful statement piece that mixes texture and airy openwork for a warm, homey look. Each flower and leaf adds personality and depth, while the scalloped edge and alternating tassels bring a playful finishing touch. Take your time with the assembly and blocking — the result is a polished, heirloom-quality runner you’ll love displaying. 🧶🌼✨