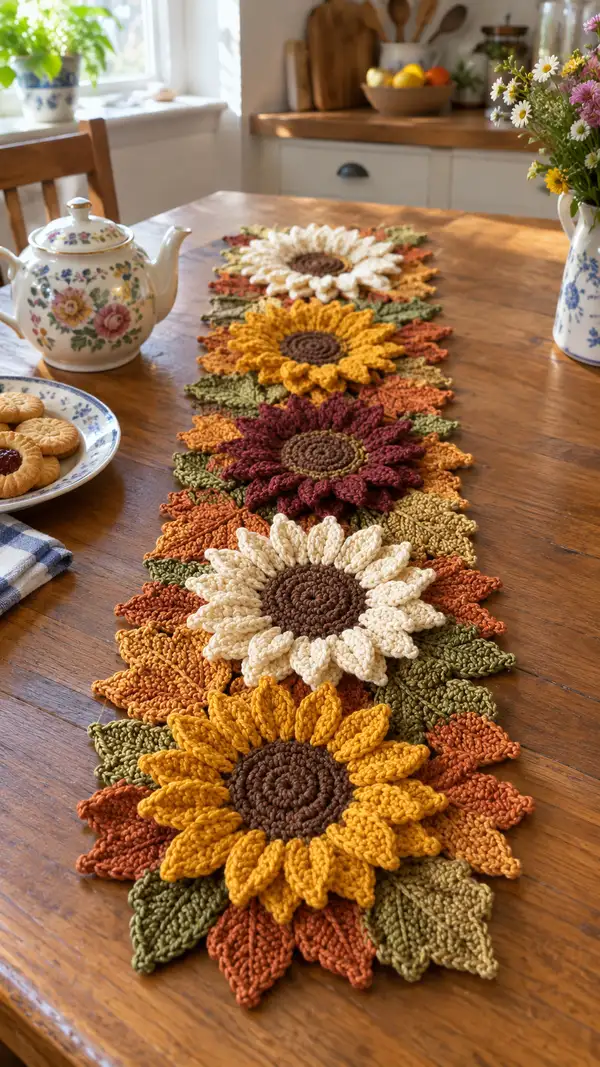
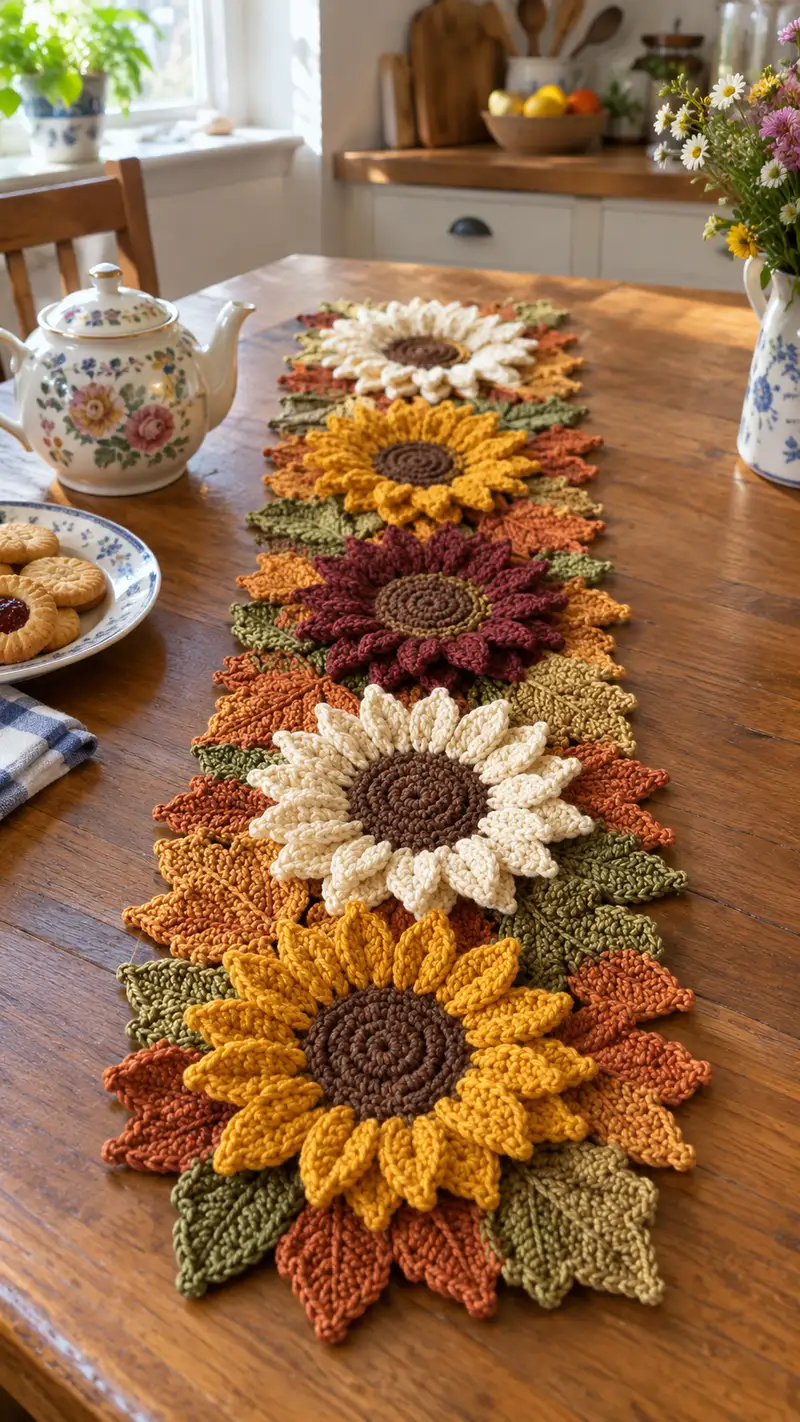
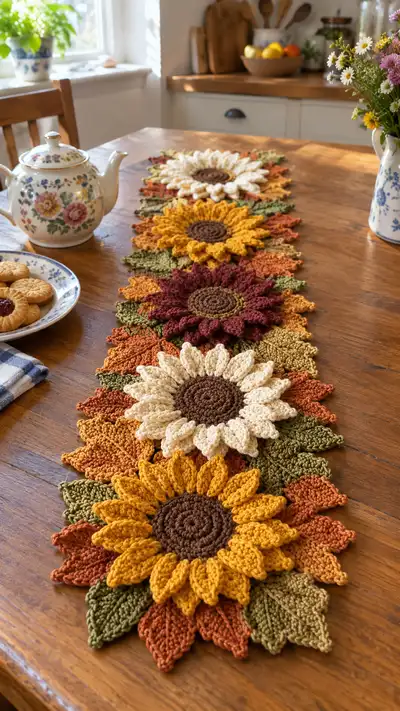
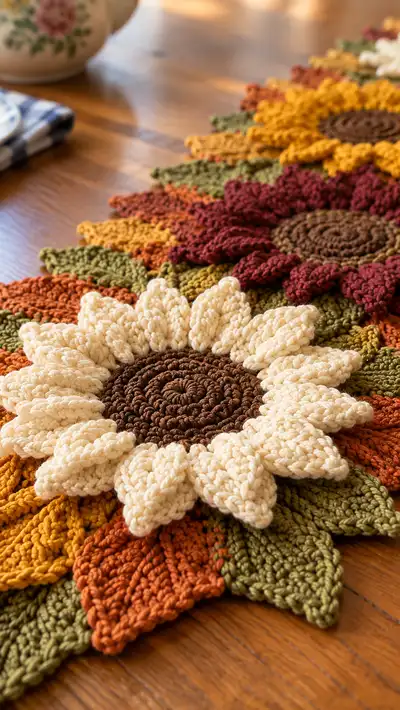
Create a warm, autumn-inspired sunflower table runner made of layered 3D sunflower motifs and leafy connectors. This pattern yields a long, textured centerpiece composed of bold sunflower centers, two-layered petals, and decorative leaves in rich fall tones. Each motif is modular—make as many sunflowers as you need to fit your table—and join them with leaves and a delicate edge. The finished runner has a rustic, hand-crafted look perfect for seasonal decorating and gift giving.
Progress Tracker
0% Complete
— Notes before you start :
Info :
This pattern is modular. One sunflower motif is composed of a center disc, a first (inner) petal layer and a second (outer) petal layer, plus a set of leaves that act as connectors. The instructions below are written for a single motif and then detail how to join multiple motifs to form a runner. Gauge is flexible for home decor, but using the recommended hook and yarn yields motifs approximately 9-10 inches (23-25 cm) across from outer leaf tip to opposite tip. Make a test motif to confirm your size and adjust hook size if necessary.
Info :
Throughout the instructions, I give detailed per-petal steps to create the deep 3D petals seen in the photos. These petals are worked directly from anchor spaces on the center so they flare outward naturally. Work petals consistently and block them after finishing for a uniform look.
— Center Disc (brown) :
Round 1 :
6 sc in magic ring (6)
Round 3 :
(1 sc, 1 inc) x 6 (18)
Round 4 :
(2 sc, 1 inc) x 6 (24)
Round 5 :
(3 sc, 1 inc) x 6 (30)
Round 6 :
(4 sc, 1 inc) x 6 (36)
Round 7 :
1 sc in each st (36)
Round 8 :
1 sc in each st (36)
Round 9 :
*Sc in next 2 sts, ch2 (space made); rep from * around to create 12 ch2 spaces, ending with sl st to first sc (36)
Info :
These ch2 spaces will anchor each petal. If you prefer 16 smaller petals, change round 9 to *sc in next 1 st, ch1* for 16 spaces; this pattern uses 12 anchors for a bold petal count that matches the photos.
Round 10 :
Fasten off brown center color if you will switch to petal color; leave a long tail for sewing if needed (fasten off is optional since petals are worked from the anchor spaces)
— Petal Base and Inner Petal Layer (petal color A - worked for each of 12 petals) :
Info :
Petals are worked into the ch2 anchor spaces made in Center Round 9. Each petal is worked as a small fan with height and post stitches to create dimension. Work Petal 1 fully, then repeat the same sequence for petals 2-12. The counts below are for one petal; repeat into each subsequent ch2 sp.
Petal 1 - Round 1 :
Join petal color to a ch2 sp with sl st, ch1 (does not count as st), 1 sc in same sp, ch1, turn (flower base point made)
Petal 1 - Round 2 :
Working into the small loop you made: (hdc, dc, tr, dc, hdc) all in same initial ch1 loop — total 5 stitches forming the inner height of the petal
Petal 1 - Round 3 :
Ch1, sl st at base of the petal back into the center disc to anchor. This completes one inner petal (do not fasten off). You should have a tidy fan that stands slightly up from the center.
Info :
Keep tension slightly looser on these petal stitches than on the center so petals can curve. Use your thumb to gently shape the petal outward as you anchor it so it doesn't flatten against the center.
Petal 2-12 :
Rep Petal 1 into each ch2 space around the center (12 petals total). After securing the 12th petal with a sl st, fasten off color A and weave in ends. You now have a single-layer of inner petals surrounding the center.
Info :
Once all inner petals are made, lightly steam or wet-block them to shape before attaching outer petal layer—this makes joining easier and produces the crisp layered look in the photos.
— Outer Petal Layer (petal color B - deeper or contrasting shade) :
Info :
The outer petal layer is worked around/behind the inner petals to create fuller blooms. Work petals into the gaps between inner petals for a staggered layered look. You will create 12 outer petals, each slightly larger and taller than the inner ones.
Outer Petal 1 - Round 1 :
Join color B at the back of an inner petal base with a sl st, ch2 (counts as small turning chain), 1 hdc in same join point
Outer Petal 1 - Round 2 :
In same space: (dc, tr, tr, dc) — a taller fan to push the petal forward visually
Outer Petal 1 - Round 3 :
Ch1, sl st at back base to secure; slip to next gap behind next inner petal and repeat sequence for Outer Petal 2
Outer Petal 2-12 :
Repeat Outer Petal 1 sequence into each gap behind inner petals until you have 12 outer petals. After the 12th outer petal, chain 1 and fasten off, weaving in ends on the reverse side.
Info :
Outer petals should peek out between inner petals. If your outer petals lay flat against inner ones, try working taller stitches (tr instead of dc) in the outer petal or block them to lift.
— Detailed Petal Stitch Alternative (puff-style for chunky petals) :
Info :
If you prefer the puffed, chunky petals shown in some photos (thick, rounded petals), replace the hdc/dc clusters above with puff stitches: into the anchor, work (yo, insert, pull up loop) 5 times, yo and draw through all loops, ch1 to close puff. Then sl st to base to secure. Puff petals are heavier and create very sculpted petals.
Petal Puff Note :
When using puff petals, block carefully while damp; puff stitches relax and spread a bit, so test one petal to judge size before committing to all 12 outer petals.
— Leaves (green) — Make 8 large leaves and 8 small filler leaves :
Info :
Leaves are worked separately and sewn or slip-stitched into place between motifs to both decorate and join motifs. The runner pictured uses two layers of leaves alternating colors—large leaves in olive and smaller leaves in a lighter green and rust for contrast. Leaves have a pointed shape with a central ridge made by working post stitches.
Large Leaf 1 - Round 1 :
Ch 12, sc in 2nd ch from hook, sc across 10 sts (10 sc). Turn to work on opposite side of foundation chain: 1 sc in last ch, sc across foundation chain (10 sc). Total 20 sc. (This forms an oval base)
Large Leaf 1 - Round 2 :
Ch1, 1 sc in each st across first side to tip (10), at tip work (sc, hdc, dc) to create point, continue back down opposite side with 1 sc in each st (10). Do not join; leave leaf as flat piece.
Large Leaf 1 - Round 3 :
Ch1, work BLO row on one side only: (sc, hdc, dc, hdc, sc) across the first 5 sts to create a central ridge beginning; turn and repeat on the other side in FLO to create a subtle fold. Fasten off, weave in ends.
Large Leaf 2-8 :
Make 7 more large leaves. Adjust length by changing the initial ch (ch 10 for shorter leaf, ch14 for longer leaf). Make the total number of large leaves to match the motifs you are joining; photos use 8 large leaves per motif set (4 on each side when motifs are joined).
Small Leaf 1 - Round 1 :
Ch8, sc in 2nd ch from hook and across (6 sc), turn and sc across back to start (12 sc round-oval). Fasten off after shaping point with hdc-dc-hdc at tip. Make 8 small leaves.
Info :
Block leaves slightly to shape. When joining motifs, place large leaves to overlap motif edges slightly and position small leaves as fillers between petal points. Use contrasting greens and rust to echo the photo palette.
— Motif Joining (one motif to the next) :
Info :
Arrange motifs in a line matching photo placement: sunflower, leaf cluster, sunflower, leaf cluster, etc. The motifs are joined by slip-stitching leaf edges and by sewing inner petal bases together at small connection points for stability. Work on the right side for a clean finish.
Join Step 1 :
Place Motif A and Motif B side by side so leaves overlap slightly (about 1/4" to 1/2" overlap). Use pins to hold them in position. Using a contrasting or matching green, insert hook through both leaf tips and sl st through both loops, continuing sl st across 8-12 stitches to join leaves. Fasten off and weave in ends.
Join Step 2 :
At the petal bases where motifs meet, use tapestry needle and yarn tail to sew a few whip stitches through the petal bases and center reverse to secure motifs together. Aim for 6-8 stitches at discrete points so the join is secure but not visible from top. Knot and weave in ends thoroughly.
Info :
When joining many motifs, work from one end to the other, checking alignment on a flat surface. Avoid pulling joints too tight—allow a little flexibility for drape on the table.
— Edging and Border (final tidy edges) :
Round 1 :
With a chosen border color (light tan or rust), work a round of sc evenly around the outside edge of the entire runner, working 3 sc in any outer leaf tip to round the corner and evenly spacing sc stitches along straight edges. Keep stitches to approximately 1 sc per 6-8 mm of edge length to avoid puckering.
Round 2 :
Ch3 (counts as dc), *skip 1 sc, sc in next sc, ch2, dc in same sc; rep from * around as a delicate scallop. At the end sl st to first ch3 and fasten off.
Info :
If you prefer a firmer border, work a second sc round in BLO before adding scallops to stiffen the edge. Alternatively, add a thin crochet cord by working 1 sc in each st to create a clean bonneted edge.
— Finishing Touches :
Info :
Weave in all loose ends neatly on the back side. Lightly steam-block each motif: pin flat or gently curve petals with pins, then press with steam from a distance—do not press directly onto yarn. Allow to dry fully. This step gives the petals their sculpted look and settles joins.
Info :
For extra durability, carefully apply a thin line of fabric glue to the back of leaf joins or where motifs overlap, then press and allow to dry. This is optional and best used on pieces that will see heavy table-top traffic.
— Variations and sizing :
Info :
Make a single motif as a trivet or placemat, or make 3-5 motifs for a small or large runner respectively. To change motif size, switch yarn weight (DK for smaller motifs or bulky for oversized sunflower centers) and adjust hook size accordingly. Remember to test one motif to determine finished size before making multiples.
Info :
Color arrangement in the photos alternates mustard, cream, burgundy and back to mustard—feel free to repeat a color sequence or make all sunflowers the same color for a cohesive look. Use two green shades in leaves for depth.
— Troubleshooting and Tips :
Info :
If petals flare too much, gently wet the tip and re-pin to a flatter shape and allow to dry; if petals are limp, block them over a small pad or apply a light spray starch designed for yarn. Keep consistent tension for petals and centers so motifs match in size.
Info :
Keep a small notebook noting which rounds you changed for alternative petals (puff vs fan) so you can recreate identical motifs when making multiple pieces.
Your sunflower runner is a beautiful celebration of texture and color—each clustered motif looks like a tiny burst of sun on the table! I love how the layered petals and contrasting leaves create depth and movement, making a simple table feel warm and personal. This runner works beautifully for seasonal décor, special gatherings or as a thoughtful handmade gift. 🧶🌻 Give it a final blocking and enjoy the cozy ambience it brings—then share a photo of your finished piece! ✨