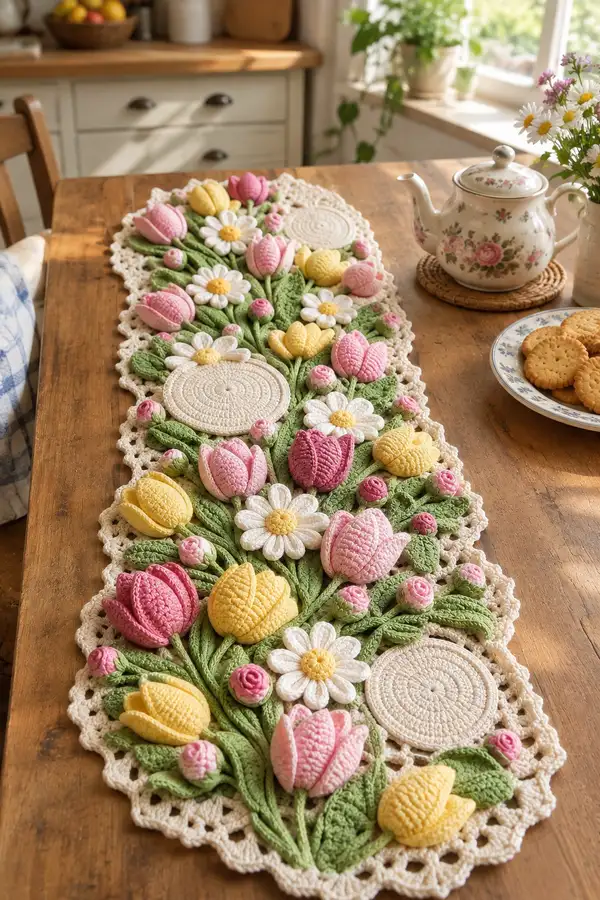
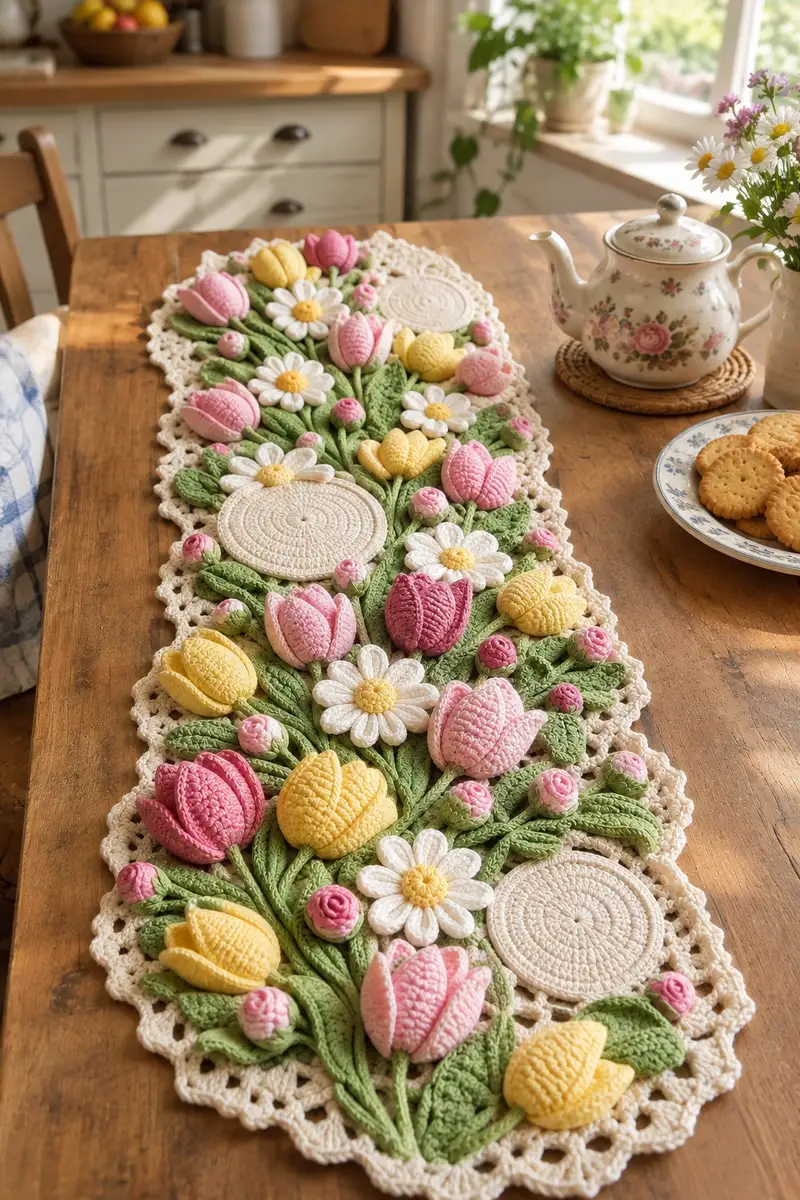
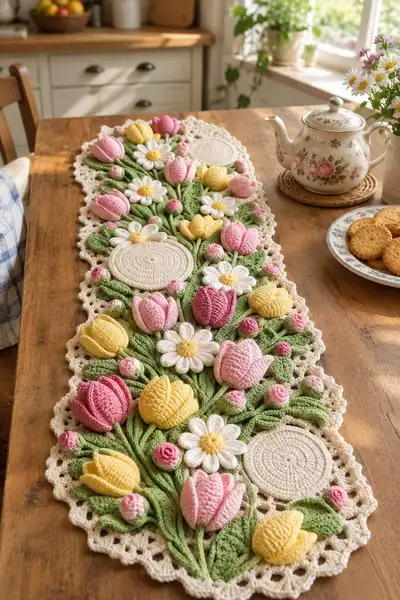
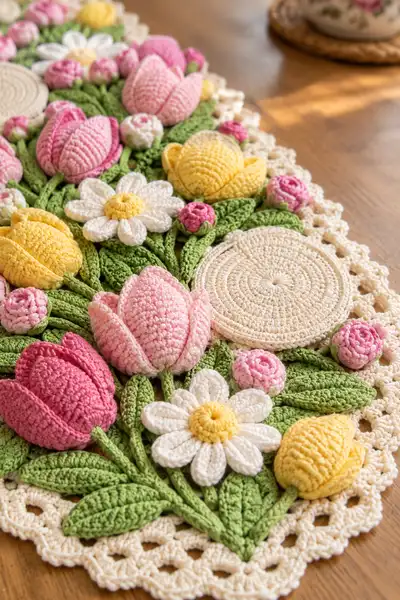
A lush, garden-inspired crochet table runner full of 3D tulips, daisies, rosebuds and textured leaves. This delicate pastel runner combines raised floral motifs with a lacy scalloped border to create a centerpiece that looks hand-planted on your table. Pattern includes detailed motif instructions, assembly notes and finishing tips so you can recreate this spring bloom in durable cotton yarn.
Progress Tracker
0% Complete
— Materials and Gauge :
Info :
Gauge is not critical for overall design but affects finished size. Sample runner measures approximately 36-42" long and 10-12" wide depending on spacing and number of motif repeats. With worsted cotton and 3.5mm hook, 1" = approx. 4 sc rows and 8 sc across an inch when worked flat for background mats. Work tightly enough to keep stuffing from showing through 3D petals.
— General Construction Notes :
Info :
This runner is assembled from multiple motif types: oval round mats (foundation panels), tulip motifs (each made of 5 petals attached around a small base), daisy motifs (center + petals), small rosebuds, leaves and stems. Motifs are sewn onto the oval base panel and joined with a final scalloped border. Make motifs first, block if desired, then arrange and sew to base.
— Tulip Petal (make petals and assemble into tulip) :
Round 1 :
6 sc in magic ring (6)
Round 3 :
(1 sc, inc) x 6 (18)
Round 4 :
(2 sc, inc) x 6 (24)
Round 5 :
(3 sc, inc) x 6 (30)
Info :
Switch to BLO for the next round to create a defined ridge that will act as petal center crease. Use slightly smaller hook (3.25mm) if you want snug petal edges.
Round 6 :
1 sc in each st BLO (30)
Round 7 :
(4 sc, inc) x 6 (36)
Round 8 :
1 sc in each st (36)
Round 9 :
(5 sc, inc) x 6 (42)
Round 10 :
1 sc in each st (42)
Round 11 :
(6 sc, inc) x 6 (48)
Info :
At this point the petal has a rounded oval shape. To form the petal cup and height, we will work short rows and tucks. Use stuffing sparingly at final assembly; petals are lightly stuffed between rounds 12-14.
Round 12 :
1 sc in next 14 sts, leave remaining sts unworked; turn, ch 1, 1 sc in next 14 sts on this short row only (14)
Round 13 :
Continue along full edge: 1 sc in next 10 sts, dec, 1 sc in next 2 sts, dec, 1 sc in each of next 22 sts (46)
Round 14 :
FLO: 1 sc in each st (46)
Round 15 :
(6 sc, dec) x 5, 1 sc (41)
Round 16 :
(5 sc, dec) x 6 (36)
Info :
Start shaping the petal cup. Fold petal slightly along BLO ridge and stitch base stitches together with sl st every 2-3 sts to create dimensional cup. Do not fasten off yet; leave long tail for sewing petal into tulip assembly.
Round 17 :
(4 sc, dec) x 6 (30)
Round 18 :
(3 sc, dec) x 6 (24)
Round 19 :
(2 sc, dec) x 6 (18)
Round 20 :
(1 sc, dec) x 6 (12)
Info :
Finish stuffing lightly at this stage if you want a fuller petal—use a small tuft of fiberfill placed at the petal cup. Fasten off, leaving long tail for sewing. Make 4-5 petals per tulip depending on fullness desired (sample uses 5 petals per full tulip).
— Tulip Inner Cup (small inner petal, optional) :
Round 1 :
6 sc in magic ring (6)
Round 3 :
(1 sc, inc) x 6 (18)
Round 4 :
1 sc in each st (18)
Round 5 :
(2 sc, inc) x 6 (24)
Info :
Work 1-2 more rounds even if you want a small inner cup (24). Fold and sew to base inside tulip to give layered look. Fasten off leaving long tail.
— Tulip Base / Calyx (make one per tulip) :
Round 1 :
6 sc in magic ring (6)
Round 3 :
(1 sc, inc) x 6 (18)
Round 4 :
1 sc in each st (18)
Round 5 :
(2 sc, inc) x 6 (24)
Round 6 :
(3 sc, inc) x 6 (30)
Round 7 :
1 sc in each st (30)
Round 8 :
*(ch 2, sl st) in next st, sk 1 st* around to create small loops for attaching petal bases (approx 15 loops)
Info :
Sew petals around this base using long tails. Position petals evenly using pinning. Insert a short stem (a 6-8" chain worked into a tube then reinforced with sc) or a narrow crocheted stem (see Stem section) into the base before finishing to secure the tulip to the mat.
— Tulip Stem (make one per tulip) :
Round 1 :
Ch 24 (or desired stem length). Join to first ch with sl st to make a small cord, OR work row of 23 sc returning to start for a flat stem (23)
Round 2 :
If working in the round cord: 1 sc in each ch around to create a 2-row tube (24)
Round 3 :
1 sc in each st (24)
Info :
For a sturdier stem, slide a length of floral wire inside tube then continue crocheting to hide wire. If you prefer softer stems, do not add wire. Make stems in leaf green and leave long tail for sewing into base mat; sew stem securely under tulip calyx.
— Leaf (make many) :
Round 1 :
Ch 18, sc in 2nd ch from hook and across (17)
Round 2 :
Ch 1, turn, hdc in first 3 sts, dc next 7 sts, hdc next 5 sts (17)
Round 3 :
Ch 1, turn, 1 sc in each st (17)
Round 4 :
Working around entire leaf: 1 sc along one long edge into each row end, 3 sc in tip, 1 sc along other edge back to base (approx 38)
Round 5 :
FLO: 1 sc in each st around to create a raised vein ridge (38)
Round 6 :
Work fpdc rows along center: ch 1, 1 sc in first st, *fpdc around next st, 1 sc in next st* repeat to end (38)
Info :
Make leaves in varying lengths by adjusting starting chain (10-24 ch) for visual interest. Gently block with steam or pins for a natural curve. When sewing to mat, position stems under base and sew through central vein for stability.
— Daisy Center (make 4-6 depending on layout) :
Round 1 :
6 sc in magic ring (6)
Round 3 :
(1 sc, inc) x 6 (18)
Round 4 :
1 sc in each st (18)
Round 5 :
(2 sc, inc) x 6 (24)
Round 6 :
1 sc in each st (24)
Info :
Use yellow yarn for center. Stuff lightly to make a raised button center. Fasten off leaving long tail for sewing. Attach 8-10 petals around this center (see Daisy Petal section).
— Daisy Petal (make 8-10 petals per daisy) :
Round 1 :
Ch 6, sc in 2nd ch from hook, hdc in next, dc in next two, hdc in next, sl st into base (5)
Round 2 :
Ch 1, sc across petal edge to strengthen and flatten: sc in base stitch, sc in next 4 top sts, sl st to finish (5)
Round 3 :
1 sc in base round attaching to center: ch 1, insert hook into center stitch, sc through center and petal base to secure (work 8-10 petals evenly spaced)
Info :
Petals are worked around a small chain base then attached to the center. Alternate petal placement slightly so petals overlap and create a full daisy. Use white yarn for petals.
— Small Rosebud (make many for filler) :
Round 1 :
Ch 30, sl st into first ch to form ring (30)
Round 2 :
Ch 1, sc in same ch and across (30)
Round 3 :
Ch 1, *sc in next 2, inc in next* rep across (40)
Round 4 :
Ch 1, sc in each st (40)
Round 5 :
Ch 1, (sc, hdc, dc) in next st, sk 1 st, sl st in next, rep across to create little petals (approx 20 petals)
Round 6 :
Roll the strip into a tight spiral and sew the inner base to create a small rosebud. Fasten off leaving long tail to sew onto mat. Add a small green base using 3 sc in a mr then attach to bottom of bud.
Info :
Use two-tone yarn for buds (lighter inside, darker outside) to give depth. Stuff very lightly if you want a slightly puffy bud before rolling.
— Round Mat / Circular Accent (make 3 large coaster discs) :
Round 1 :
6 sc in magic ring (6)
Round 3 :
(1 sc, inc) x 6 (18)
Round 4 :
(2 sc, inc) x 6 (24)
Round 5 :
(3 sc, inc) x 6 (30)
Round 6 :
(4 sc, inc) x 6 (36)
Round 7 :
(5 sc, inc) x 6 (42)
Round 8 :
(6 sc, inc) x 6 (48)
Round 9 :
1 sc in each st (48)
Round 10 :
1 sc in each st BLO (48) to create a subtle ridge for depth
Round 11 :
*(ch 2, sk 1) repeat around to create small picot-like loops if desired (approx 24 picots)
Info :
These round mats act as neutral visual anchors for the floral clusters. Make 3 of these in cream/ivory and stitch them securely onto the runner base for contrast with flowers. Block flat for neatness.
— Oval Runner Base Panel (make two mirror panels and join, or one long panel) :
Round 1 :
Ch 40, join with sl st to first ch to form oval foundation ring (40)
Round 2 :
Ch 2 (counts as hdc), hdc in each ch around, join (40)
Round 3 :
Ch 2, (hdc in next 3, inc in next) repeat around (50)
Round 4 :
Ch 2, hdc in each st (50)
Round 5 :
Ch 2, (hdc in next 4, inc in next) repeat around (60)
Round 6 :
Ch 2, hdc in each st (60)
Round 7 :
Ch 1, sc in each st (60)
Round 8 :
Ch 2, *dc, ch 1, dc* in next st, sk 1 st, 1 sc in next 4 sts; repeat to create a slightly open texture for the base (approx 60)
Round 9 :
1 sc in each st, join (60)
Round 10 :
Ch 3, *2 dc in next st, ch 1, skip 1* around to create subtle texture and spacing for flower placement (approx 40 clusters)
Info :
Work base lengthwise: make two oval halves and join them as needed to reach desired runner length (sample used 3 oval modules joined end-to-end). Block panels flat. Leave many surface stitches accessible for sewing motifs (sc rounds and ch-1 spaces work well for anchor points).
Round 11 :
Work 2 rounds of sc evenly to firm up base edges and create a stable platform (60)
Round 12 :
Change to cream/ivory if not already. 1 sc in each st (60)
Round 13 :
Begin working a scalloped joining foundation along the long edges: *ch 4, sl st into 3rd ch from base to form small loop, sl st into next base st* repeat along both sides to create loops for final border (approx 20 loops per side)
Info :
Make sure both long sides have the same number of loops. These loops will be used to attach the lace scalloped border later. The base should be firm but flexible; adjust rounds to match the exact runner length you want.
— Lace Scalloped Border :
Round 1 :
Join border yarn to one loop: *(sc, ch 3, 5 dc in same loop, ch 3, sc) in each base loop across* to form scallops (approx 40 scallops total if both sides treated)
Round 2 :
Ch 1, sc in each st across scallop, in center of each 5-dc shell work a picot: (dc3, ch3, sl st into top of dc), continue across to finish border
Info :
Work border evenly and check scallop spacing frequently. If scallops look tight, increase ch spaces between shells. When both sides are bordered, work an end scallop cluster of 3 shells to create rounded ends for the runner.
— Assembly: Attaching Motifs to Base (General Instructions) :
Info :
Layout all motifs on the base before sewing. Place large round mats first as anchors, then position tulip clusters, daisies and rosebuds in pleasing clusters. Use pins to hold motifs in position and check spacing from each end and between clusters. Sew motifs on using mattress stitch or whip stitch through bottom rows and base ch-1 spaces; for 3D pieces sew through calyx or underside for stability.
— Example Tulip Cluster Placement and Stitching :
Round 1 :
Pin a round mat onto base. Using long tail from round mat, stitch through base mat and runner base with 8-10 evenly spaced stitches around circumference for sturdy attachment (no numerical change)
Round 2 :
Position a finished tulip above round mat; insert stem end into base by weaving the stem tail through sc rounds 2-4 of round mat, then stitch calyx to base with long tail. Use additional stitches through calyx and the base panel for stability
Info :
Sew leaves under tulips, slightly overlapping petals and other leaves. Use hidden mattress stitch where possible. For stems with wire, ensure wire ends are wrapped with yarn or tape before sewing into base to avoid snagging or poking through runner backing.
— Finishing Touches: Petal and Leaf Embroidery Details :
Round 1 :
Use a strand of same green yarn and yarn needle to embroider a central vein down each leaf: make long running stitches from base to tip, knot on underside
Round 2 :
With contrasting shade of pink or white, add small French knot-like stitches at daisy centers if additional texture is desired (use doubled yarn through needle to mimic knot)
Info :
Embroider lightly — too many stitches can distract from 3D shapes. Keep ends woven in securely and hidden on underside of runner. Add minimal secure stitches to hold petals in place if they tend to flop outward.
— Optional: Securing with Blocking and Spray Starch :
Info :
Blocking the completed runner will flatten and shape background but can also compress 3D motifs. If you want crisp lace but raised flowers, block only the base panels before attaching motifs. For added stiffness on base, use dilute spray starch on blocked base and re-press. Always spot-test on scrap yarn before applying starch to finished motifs.
— Care Instructions :
Info :
Hand wash gently in lukewarm water with mild detergent. Reshape and lay flat to dry. Avoid machine washing which can flatten 3D elements. Iron base on low with pressing cloth if necessary, avoiding direct heat on stuffed petals.
Completing this runner is such a satisfying finish—watching each petal and leaf come together into a blooming path is pure joy! The layered 3D flowers create a tactile centerpiece that invites touch and compliments. Whether you keep it for daily springtime charm or gift it to someone special, every stitch shows care and personality. 🌷🧶 Enjoy the slow, meditative process and the beautiful result—your table will look freshly sprung each time you lay it out. 🌼