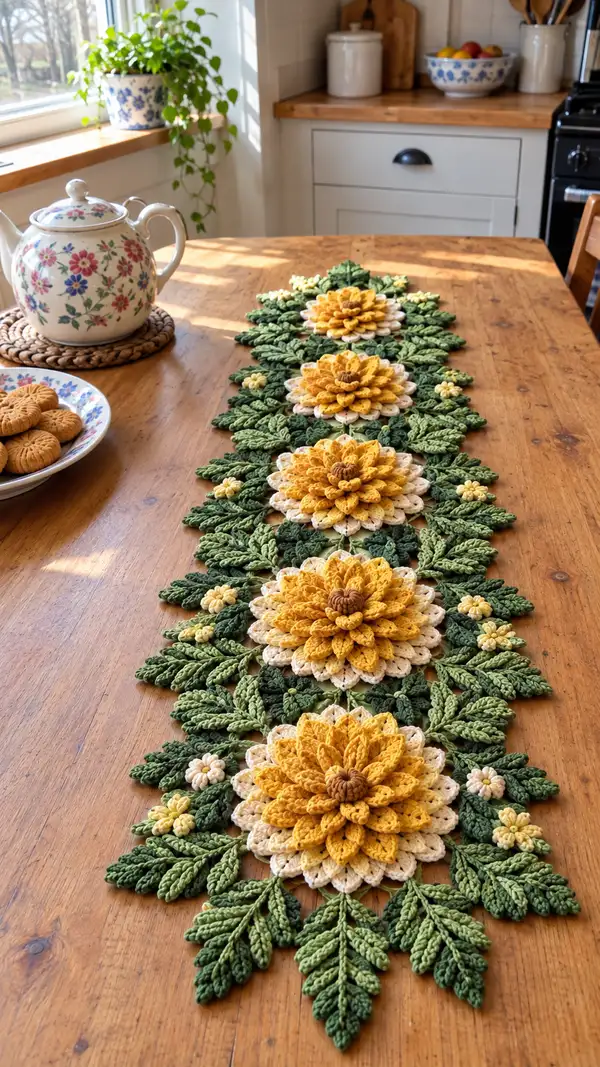
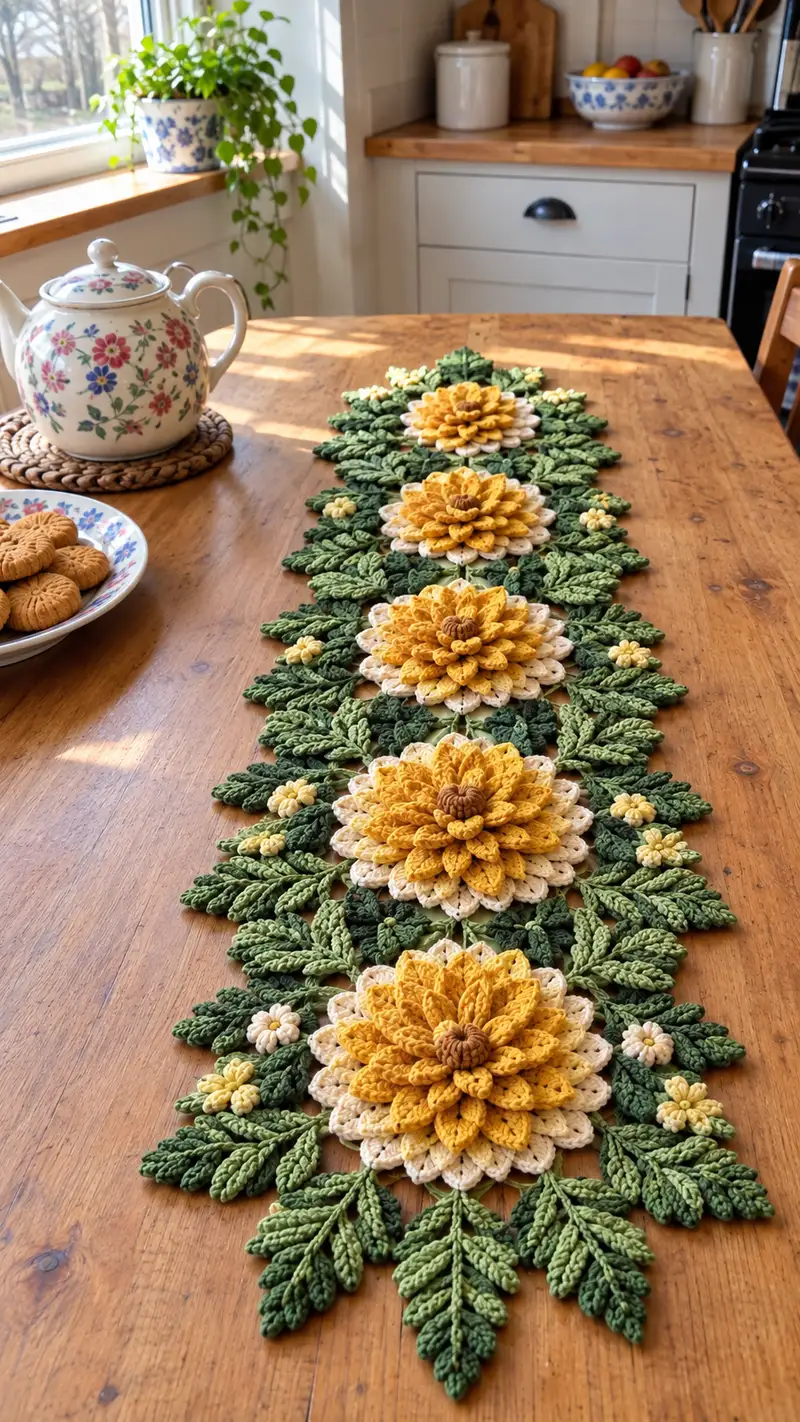
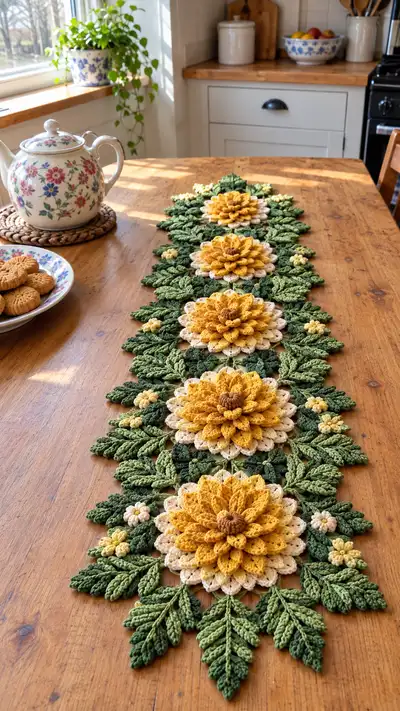
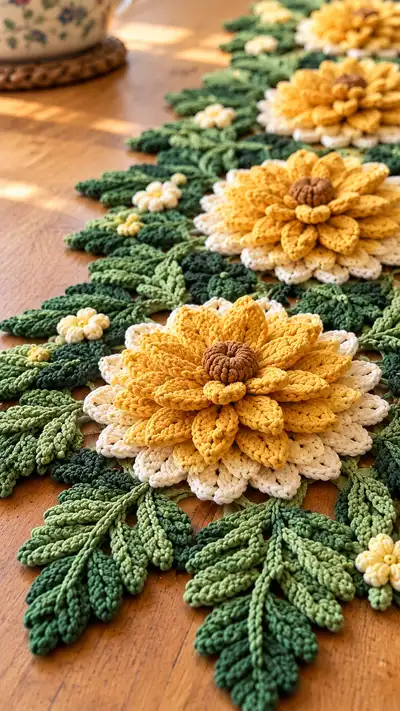
A long, botanical-inspired table runner featuring four layered sunflower medallions surrounded by lush, textured leaves and tiny blossom accents. Worked in cotton yarn with dimensional petal clusters and raised leaf motifs, this runner lays flat and adds farmhouse charm. The pattern uses join-as-you-go assembly to create a continuous, elegant centerpiece for dining tables and sideboards. Perfect for seasonal decorating or a handmade gift, the warm yellow blooms and mixed greens create a cozy, welcoming display.
Progress Tracker
0% Complete
— Notes & Gauge :
Info :
Gauge is not critical for motif-based table runners but good tension will ensure motifs lay flat. Gauge sample: 10cm square in sc rounds worked in worsted cotton with 3.5mm hook should yield about 16 sts x 18 rows. Adjust hook to achieve a relatively firm fabric to prevent curling of layered petals.
Info :
This pattern is written in US terms. Work in continuous rounds for motifs unless otherwise stated. Use stitch markers and a row counter. Join-as-you-go (JAYG) instructions are given in the Assembly section.
— Central Seed Pod (Make 4 for each large sunflower) :
Round 1 :
6 sc in magic ring (6)
Round 3 :
(1 sc, 1 inc) x 6 (18)
Round 4 :
1 sc in each st (18)
Round 5 :
(2 sc, 1 inc) x 6 (24)
Info :
Switch to warm brown yarn before Round 6 for a darker seed center. Use tight tension to create a compact center bulge. You may also work two seed pods per flower and stack them for extra height.
Round 6 :
1 sc in each st (24)
Round 7 :
(3 sc, 1 inc) x 6 (30)
Round 8 :
1 sc in each st (30); sl st to join and fasten off, leaving 20cm tail for sewing into petal layer
Info :
Make 1–2 seed pods per sunflower depending on desired center height. For a more textured center, embroider short clusters of sc over the pod later.
— Base Round: Foundation Disc (Make 4) :
Round 1 :
6 sc in magic ring (6)
Round 3 :
(1 sc, 1 inc) x 6 (18)
Round 4 :
(2 sc, 1 inc) x 6 (24)
Round 5 :
(3 sc, 1 inc) x 6 (30)
Round 6 :
(4 sc, 1 inc) x 6 (36)
Round 7 :
1 sc in each st (36)
Info :
This base disc (worked in cream/ivory) provides the first layer of petals to contrast with the bright golden top layers. Fasten off with a 20cm tail for attaching the center seed pod.
— Petal Tier A (Inner, cream) (Make 4 per large sunflower) :
Round 1 :
Join cream yarn with sl st to any st of base disc, ch1, sc in same st, *sk1, (ch3, 3-dc cluster into the next st, ch3, sl st into same st) forming a loop-petal; sl st into next base st*, rep around to create 12 loops (12 loop petals)
Round 2 :
Work into each loop: sl st into loop, ch2, (2 hdc, 2 dc, 1 tr) into loop, sl st to base between loops to anchor (12 petal bases)
Round 3 :
In front of each petal base, create a textured slip-stitch ridge: fpdc around the dc of each petal base to create a raised seam (12)
Round 4 :
1 sc evenly between each petal at base edge (12)
Info :
Petal Tier A sits flat and wide; keep stitches loose enough to allow these petals to spread. Block if necessary before adding Tier B so the petal shape remains open.
Round 5 :
Fasten off, leaving long tail for joining Tier B. Weave the base tail under petal foundations for added stability
— Petal Tier B (Middle, golden) (Make 4) :
Round 1 :
With golden yarn, join with sl st behind each Tier A petal near its base; ch1, sc into petal back; *ch4, (5-tr cluster into next petal base worked by pulling up long loops across center to create elongated petal), ch4, sl st into next petal base* - rep around to form 12 elongated loop petals (12)
Round 2 :
Work 1 sc in each ch4 space to anchor petals and create a foundation round (12)
Round 3 :
Into each elongated loop: sl st into loop, ch2, (3 hdc, 3 dc) into loop, ch1, sl st to anchor (12 textured petals)
Round 4 :
fpdc around the central dc of each petal to add ridge; 1 sc between petals (12)
Info :
Work petals so they sit over gaps of underlying tier for visual fullness. Use a hook one size smaller if petals feel too loose and tend to flop.
Round 5 :
Fasten off leaving long tail for assembly. Arrange petals outward and block gently if needed
— Petal Tier C (Outer, bright golden) (Make 4) :
Round 1 :
Join golden yarn to the back of Tier B near petal tip: ch1, sc, *ch5, (7-tr cluster worked as 7 yarn overs pulled through to create a long petal, cluster closed) into next anchored spot, ch5, sl st* rep to make 12 large outer petals (12)
Round 2 :
Into each outer loop: sl st, ch2, (3 dc, 2 tr) into loop, sl st to base; 1 sc between petals (12)
Round 3 :
BLO: 1 sc in each st around outer edge to create a neat scalloped outline (approx 48 sc)
Info :
Outer petals are decorative and make the flower visually large. Work clusters uniformly for a consistent look. If your yarn is splitty, use fewer wraps in the cluster to maintain crisp edges.
Round 4 :
Fasten off, weave in ends to prevent the petals from shifting. Pin together the three tiers, positioning Tier B between Tier A and Tier C and tack in a few spots using tail yarn
— Stacking & Center Attachment :
Info :
Place the seed pod at the center of the assembled petals. Use the long tail from the seed pod to sew through all layers, pulling firmly so the pod sinks slightly into the petal crown. Sew several passes to secure and hide the tail between layers.
Round 1 :
Sew seed pod to petal assembly by stitching through base disc and securing with mattress/whip stitch; repeat 12-16 times in a radial pattern (no numeric stitch count)
Info :
After sewing, check that the petals are evenly distributed around the center. If needed, add a few small stitches at petal bases to hold the desired overlap and shape.
— Small Blossoms (Make 12 per runner) :
Round 1 :
6 sc in magic ring (6)
Round 3 :
Ch1, *sk1, (ch3, 3-dc cluster into next st, ch3, sl st to anchor into the skipped st)* rep to create 6 tiny loop petals (6)
Round 4 :
Into each loop: sl st, ch1, 3 dc into loop, sl st to base (6)
Info :
Use pale yellow or cream for these tiny flowers and flatten gently with blocking to make them sit crisply between leaves.
Round 5 :
Fasten off leaving tail for sewing onto runner
— Leaf Motif (Make 36-48 depending on runner length) :
Round 1 :
With light green, ch10, in 2nd ch from hook: sc, hdc, dc, tr, dc, hdc, sc into last ch (leaf shaped chain worked flat) - now work along opposite chain: sc, hdc, dc into same last ch, tr into previous, dc, hdc, sc across returning to start; sl st to join into a small central stem (approx 18 sts total)
Round 2 :
Working around the edge: *(sc, sc, hdc, dc, tr, dc, hdc, sc) into each side to add thickness; sl st to base between sides* - work symmetrical increases to create a fuller leaf (approx 36 sts)
Round 3 :
Using darker green, join at stem, ch1, make a central spine by working 10 sc along center chain on top of stem to make a raised ridge; sl st to base (10)
Round 4 :
On either side of central ridge, work fpdc clusters: *fpdc around each of the central spine sc to create textured veins; 1 sc between each fpdc cluster* repeat both sides (approx 20 textured veins)
Info :
Leave the leaf flat; do not overstuff. Vary leaf sizes by using ch8 for smaller leaves or ch12 for larger ones. Make pairs of leaves in light and dark green to replicate depth seen in the photo.
Round 5 :
Fasten off leaving 20cm tail for joining. Make a set of leaves in alternating shades and sizes to mimic the layered foliage effect
— Long Feathered Leaf (Make 24 larger leaves for edges) :
Round 1 :
Ch18, in 2nd ch from hook: sc, hdc, dc, dc, tr, tr, dc, dc, hdc, sc across to tip (approx 10 sts), now work down opposite side: sc, hdc, dc, dc, tr, tr, dc, dc, hdc, sc; sl st to join at base (approx 20 sts)
Round 2 :
BLO 1 sc in each st around to create a subtle raised edge and help the leaf fold naturally (approx 20)
Round 3 :
Use fpdc to create multiple parallel veins along the leaf length: work 6 fpdc along center spaced evenly; 1 sc between veins for definition (6 fpdc)
Round 4 :
Using contrasting green, add a picot edge: *sc, ch3, sl st into same st, sk1, sc* rep around to make a decorative edge (approx 12 picots)
Info :
The long feathered leaves are placed as radiating sprigs around each flower and at the runner ends. Block these leaves along a gentle curve so they lie naturally.
Round 5 :
Fasten off and leave tail for joining
— Additional Tiny Buds (Make 16) :
Round 1 :
4 sc in magic ring (4)
Round 3 :
1 sc in each st (8)
Info :
Use these buds in pale yellow to fill small gaps and add weight balance across the runner. Sew onto leaves or between flowers as shown in photos.
Round 4 :
Fasten off leaving tail for sewing
— Joining Motifs & Runner Assembly (JAYG and Sewing) :
Info :
Arrange your four sunflower medallions in line with approximately 6-8cm overlap between outer petals of adjacent flowers depending on desired continuity. Position leaf clusters radiating from each flower forming a diamond shape between two flowers.
Round 1 :
Working from the backside of Flower 1, take a long tail from Tier A or the base disc and whip-stitch to Flower 2 through a few petal anchors where petals overlap (stitch count varies; ensure 8-12 secure stitches across overlap)
Round 2 :
Repeat between Flower 2 and Flower 3, and Flower 3 and Flower 4, keeping spacing consistent. Use small whip-stitches to avoid visible seams on the front
Round 3 :
Position large feathered leaves so their stems nestle into the spaces created between adjacent flowers. Sew stems into place using ladder stitch along the runner base, adding 6-10 stitches along each stem to secure
Info :
For a neater join-as-you-go, you can slip-stitch leaf bases into the outer sc round of a flower while working the leaf last round. Where slip-stitch joining is used, secure with a few invisible stitches afterwards to prevent slippage.
Round 4 :
Sew small blossoms and buds into gaps; place 2–3 small blossoms between each pair of flowers and 1 bud at the outer points of leaf clusters (stitch count varies)
Round 5 :
Weave in all remaining tails. Gently steam-block entire runner on a flat surface using pins to set petals and leaves in the desired open positions
Info :
When sewing leaves and blossoms, keep stitches small and hidden behind petals or along leaf stems. Check both front and back frequently to maintain a smooth top surface.
— Decorative Edge & Finishing Touches :
Round 1 :
With contrast green, sc around the entire outer edge of the completed runner, placing 3 sc in rounded petal points and 1 sc along leaf edges; work evenly to avoid puckering (approx 200–260 sc total depending on runner size)
Round 2 :
Work a scallop round: *skip 2 sc, (5 dc in next sc), skip 2 sc, sl st into next sc* repeat around to form a decorative border (approx 30–36 scallops)
Info :
Work the border loosely to prevent edge from pulling in. Block again if necessary. Trim any remaining loose ends and secure them by weaving through several stitches before clipping.
Round 3 :
Optional: Embroider small veins on outer petals or add tiny French knot-style knots with a few wraps of yarn to mimic seed texture between petal layers
Info :
Your runner is now complete. Press lightly with steam and allow to dry fully before use. Avoid heavy tableware directly on petals; use as a decorative runner under a protective tray if needed.
— Alternate Sizes & Adjustments :
Info :
To lengthen or shorten the runner, add or remove complete flower units. For a shorter centerpiece use two flowers, for a long table use five or six. For a table mat version, make single medallions without leaves and add a uniform sc border.
Info :
To change scale, use a lighter DK yarn and 3.0mm hook for a smaller, delicate runner, or a bulky cotton and 4.5mm hook for an oversized statement piece. Adjust yarn quantities accordingly.
This sunflower table runner combines classic crochet techniques with layered dimensional petals and lush foliage for a stunning handmade centerpiece. Watching each flower grow into a radiant medallion is so satisfying, and the join-as-you-go assembly makes the final construction neat and rewarding. Whether for everyday farmhouse charm or a sunny seasonal display, this piece is a joy to make and to give. 🧶🌻 Enjoy every stitch and share your finished runner with pride!