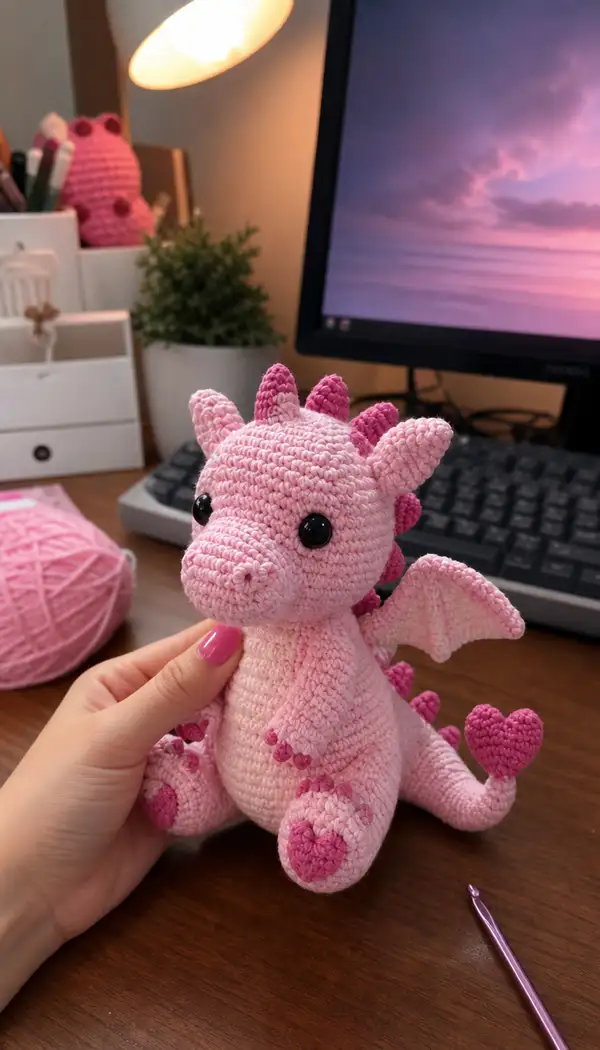
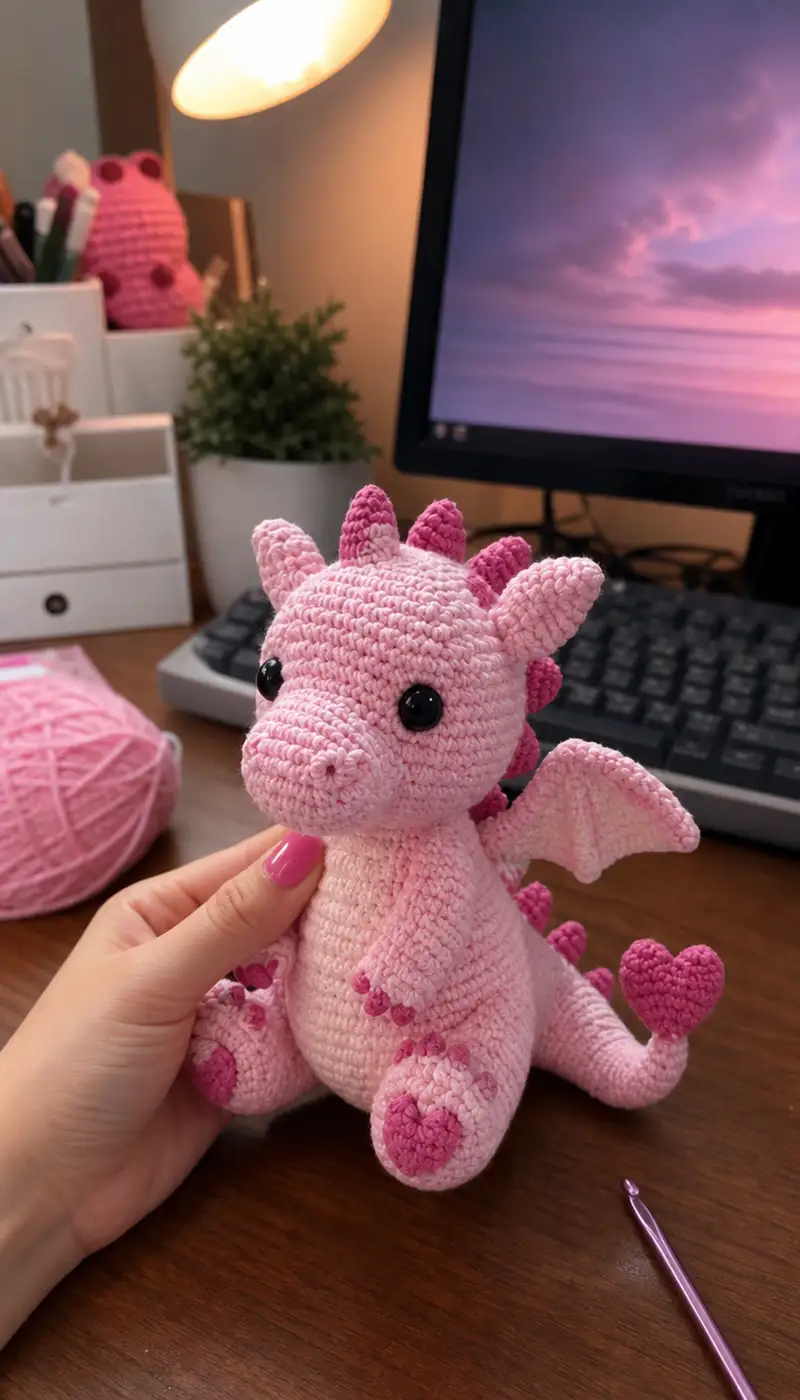
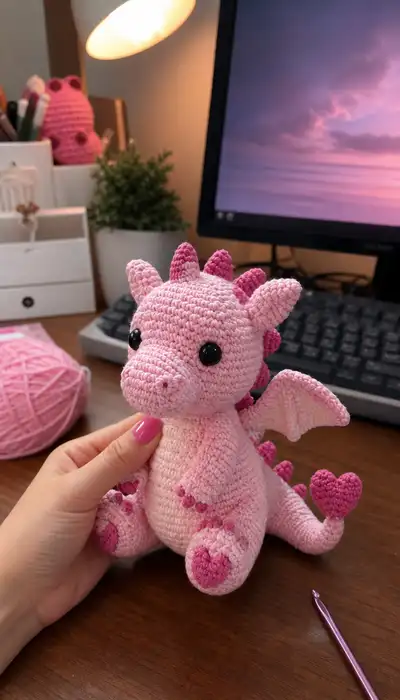
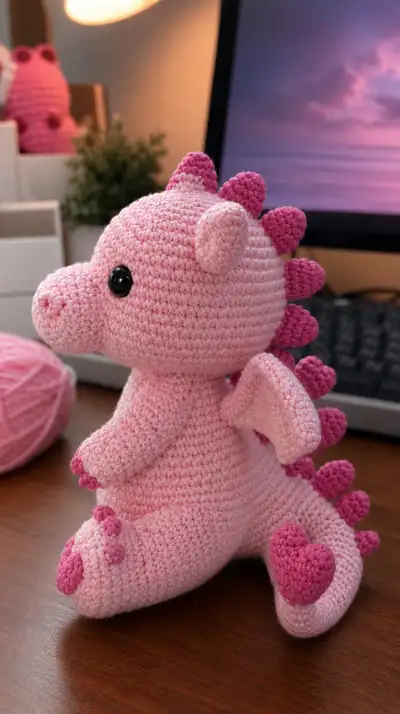
This adorable hand-sized dragon features soft pastel pink body yarn, contrasting hot-pink spikes and heart details on tail and feet, plus cute rounded wings and a plump snout. Designed with clear, round-by-round instructions, this pattern includes detailed tips on stuffing, positioning safety eyes, and sewing pieces for a professional finish. The finished dragon sits with a friendly posture and heart-shaped accents that make it a perfect gift or nursery decoration.
Progress Tracker
0% Complete
— Head :
Round 1 :
6 sc in magic ring (6)
Round 3 :
(1 sc, 1 inc) x 6 (18)
Round 4 :
(2 sc, 1 inc) x 6 (24)
Round 5 :
(3 sc, 1 inc) x 6 (30)
Round 6 :
(4 sc, 1 inc) x 6 (36)
Round 7 :
(5 sc, 1 inc) x 6 (42)
Round 8 :
(6 sc, 1 inc) x 6 (48)
Round 9-20 :
1 sc in each st around (48) — work 12 rounds even to build head height and allow room for snout attachment
Info :
Place safety eyes between rounds 13-14 approximately 10-12 stitches apart depending on desired expression (for a slightly wider, innocent look use 12 sts apart). Use stitch markers to hold eyes before locking in place.
Round 21 :
(6 sc, 1 dec) x 6 (42)
Round 22 :
(5 sc, 1 dec) x 6 (36)
Info :
Begin lightly stuffing the head now; add small amounts of fiberfill and shape evenly. Leave the top less stuffed until you attach the snout and ears to make shaping easier.
Round 23 :
(4 sc, 1 dec) x 6 (30)
Round 24 :
(3 sc, 1 dec) x 6 (24)
Round 25 :
(2 sc, 1 dec) x 6 (18)
Round 26 :
(1 sc, 1 dec) x 6 (12)
Round 27 :
6 dec (6) — fasten off leaving a long tail for sewing if you prefer to close and sew later
Info :
Alternatively, stop at 12 sts (after round 26) and leave opening to sew to the neck of the body rather than closing to 6. For this dragon we will leave 12 sts open as a neck tunnel to attach later for a seamless join.
Round 28 :
Continue with 1 sc in each st around 12 for 2 rounds (12) to create a neck tube if you prefer the neck to be elongated (optional)
Info :
Keep the head slightly overstuffed so that, after sewing to the body, the face remains plump. Use extra stuffing at the cheeks and above the eyes for expression. Secure the yarn tail for sewing when ready.
— Snout / Muzzle :
Round 1 :
6 sc in magic ring (6)
Round 3 :
(1 sc, 1 inc) x 6 (18)
Round 4 :
1 sc in each st around (18)
Round 5 :
(3 sc, 1 inc) x 4, 2 sc (22) — slight lengthening at base for a rounded muzzle
Info :
Stuff the muzzle firmly to keep it rounded. Use small amounts so you can flatten the join to the face. Embroider two tiny nostrils now with a darker pink yarn using small satin stitches between rounds 2-3 of the muzzle.
Round 6 :
1 sc in each st around (22)
Round 7 :
(3 sc, 1 dec) x 4, 2 sc (18)
Round 8 :
(2 sc, 1 dec) x 4, 2 sc (14)
Round 9 :
1 sc in each st around 14 — finish stuffing so the top is nicely rounded and slightly protruding
Info :
Fasten off leaving long tail to sew the muzzle onto the head. Position the muzzle centered between the eyes at rounds 13-14 of the head — pin and check symmetry before sewing. Sew using mattress or whip stitch through both pieces' rounds for a secure, neat join.
— Ears (Make 2) :
Round 1 :
6 sc in magic ring (6)
Round 3 :
(1 sc, 1 inc) x 6 (18)
Round 4 :
1 sc in each st around (18)
Round 5 :
BLO 1 sc in next 18 sts to create a slightly folded ear edge (18)
Info :
Sew ears to the top sides of the head at approximately rounds 10-12, angled slightly forward. Use a few hidden stitches to curve the ear forward so it looks naturally folded.
— Body :
Round 1 :
6 sc in magic ring (6)
Round 3 :
(1 sc, 1 inc) x 6 (18)
Round 4 :
(2 sc, 1 inc) x 6 (24)
Round 5 :
(3 sc, 1 inc) x 6 (30)
Round 6 :
(4 sc, 1 inc) x 6 (36)
Round 7-10 :
1 sc in each st around (36) — work 4 rounds to establish body base before shaping
Info :
If you'd like a slightly lighter belly panel, change to pale pink yarn now. Carry the unused yarn inside the body or cut and join new yarn at the start of the next rnd. Working 1 round in BLO at the color change gives a subtle ridge for the belly seam.
Round 11 :
(5 sc, 1 inc) x 6 (42) — increase to create a round tummy
Round 12-16 :
1 sc in each st around (42) — 5 rounds even to build height
Info :
Begin stuffing the bottom of the body from round 12 onwards. Stuff firmly to create a stable seated base, but leave the top less stuffed so the head will sit well when attached.
Round 17 :
(5 sc, 1 dec) x 6 (36)
Round 18 :
(4 sc, 1 dec) x 6 (30)
Round 19 :
(3 sc, 1 dec) x 6 (24)
Round 20 :
(2 sc, 1 dec) x 6 (18)
Info :
Stop and try a dry-fit: hold the head over the body opening to judge how much to leave for neck join. If you plan to sew the head on, leave the opening wide enough to maneuver stuffing and secure stitches. Continue stuffing as you shape the top of the body.
Round 21 :
(1 sc, 1 dec) x 6 (12)
Round 22 :
1 sc in each st around 12 for 2 rounds to build a neck base (12)
Round 23 :
Do not close; fasten off leaving a long tail for sewing the head. Ensure the body is nicely stuffed into the shoulders and neck area, slightly tapered where the head will be joined.
Info :
For a stronger attachment, leave a longer neck tube on both head and body (2 rounds each) and sew tube-to-tube using mattress stitch. This gives a neat, deep seam that holds well for play.
— Legs (Make 2) :
Round 1 :
6 sc in magic ring (6)
Round 3 :
(1 sc, 1 inc) x 6 (18)
Round 4 :
(2 sc, 1 inc) x 6 (24) — begin foot base
Round 5 :
(3 sc, 1 inc) x 6 (30)
Round 6-9 :
1 sc in each st around (30) — work 4 rounds even to shape foot length
Info :
Create heart-shaped foot pad later by sewing a separate small heart to the top of the foot before closing completely. Keep a slightly flat area on the top of the foot when stuffing for heart placement.
Round 10 :
(3 sc, 1 dec) x 6 (24)
Round 11 :
(2 sc, 1 dec) x 6 (18)
Round 12-16 :
1 sc in each st around (18) — build leg height (5 rounds)
Round 17 :
(2 sc, 1 inc) x 4, (1 sc x 2) to shape thigh (22)
Round 18 :
1 sc in each st around (22)
Round 19 :
(2 sc, 1 dec) x 4, (1 sc x 2) (18)
Info :
Stuff feet firmly and legs more moderately so the toy sits stable. Insert stuffing with a pencil or stuffing tool to reach narrow spots. Keep toes slightly smaller and firmer for neat appearance.
Round 20 :
(1 sc, 1 dec) x 6 (12)
Round 21 :
1 sc in each st around 12 (12) — leave opening to sew into body. Fasten off leaving long tail for sewing.
Info :
Sew the legs to the bottom of the body at rounds 4-8 of the body (count from the base up) so they attach to the wider part of the belly. Space them evenly, about 8-10 stitches apart depending on body width.
— Arms (Make 2) :
Round 1 :
6 sc in magic ring (6)
Round 3 :
(1 sc, 1 inc) x 6 (18)
Round 4-6 :
1 sc in each st around (18) — work 3 rounds for hand length
Round 7 :
Attach 3 tiny darker pink toes: ch 2, sc in 2nd ch, fasten off and sew to the front of the hand; repeat two more times and space slightly apart. Continue arm body:
Round 8 :
(2 sc, 1 inc) x 6 (24) — widen slightly toward shoulder
Round 9-14 :
1 sc in each st around (24) — work 6 rounds for upper arm length
Round 15 :
(2 sc, 1 dec) x 6 (18)
Round 16 :
(1 sc, 1 dec) x 6 (12)
Round 17 :
1 sc in each st around 12 — fasten off leaving long tail for sewing to body at approximately rounds 16-18 on the sides
Info :
Stuff hands firmly, arms lightly. Sew to the sides of the body so that palms face slightly inward; pin and adjust until satisfied with positioning.
— Tail :
Round 1 :
6 sc in magic ring (6)
Round 3 :
1 sc in each st around (12)
Round 4-8 :
1 sc in each st around (12) — work 5 rounds to create initial tail tube (12)
Round 9 :
(2 sc, 1 inc) x 4 (16)
Round 10-14 :
1 sc in each st around (16) — 5 rounds elongating tail
Round 15 :
(2 sc, 1 dec) x 4 (12)
Round 16-18 :
1 sc in each st around (12) — tapering tail slightly
Round 19 :
(1 sc, 1 dec) x 4 (8)
Round 20 :
1 sc in each st around (8) — leave a short tail for attaching the heart tip after stuffing and attaching to body
Info :
Sew tail to back lower body center. Keep the tail slightly stuffed but not overly firm so it curves naturally. Add spikes along the tail by sewing individual small spikes (pattern below) spaced evenly.
— Spikes (Make 8-10 small spikes and 1-2 larger for top, each):
Small Spike Round 1 :
5 sc in magic ring (5)
Round 3 :
(1 sc, 1 inc) x 5 (15)
Round 4 :
1 sc around (15) — work 1-2 rounds even for fuller spike
Round 5 :
(1 sc, 1 dec) x 5 (10)
Round 6 :
5 dec (5) — fasten off leaving tail for sewing. Stuff slightly or leave unstuffed for a flatter spike effect.
Info :
Make spikes in hot-pink contrast color. Space along center back from top of head (just behind ears) down tail; smaller spikes toward tail end, larger spikes near head.
— Wing Pair (Make 2) :
Round 1 :
6 sc in magic ring (6)
Round 3 :
(1 sc, 1 inc) x 6 (18)
Round 4 :
(2 sc, 1 inc) x 6 (24)
Round 5 :
1 sc in each st around (24)
Round 6 :
BLO 1 sc in each st around (24) — this creates a defined edge for the wing
Round 7 :
Work 8 sc across to form wing top curve, ch 3, turn, sc in 2nd ch and next ch, continue to finish shaping wing membrane; fasten off (these steps will create a semicupped shape)
Info :
Flatten wing and sew the straight inner edge to the back side of the body between rounds 12-16. Sew with a slight forward curve so wings look cupped and natural.
— Heart Tail Tip :
Round 1 :
6 sc in magic ring (6)
Round 3 :
(1 sc, 1 inc) x 6 (18)
Round 4 :
(2 sc, 1 inc) x 6 (24)
Round 5 :
1 sc in each st 24 — fold in half and sew two sides together to form a heart shape; stuff lightly before finishing
Info :
Make two heart halves and sew them together to form a full puff heart. Attach securely to tail tip with several passes of yarn for durability. Use hot-pink contrast yarn for a pop of color.
— Foot Heart Pads (Make 2) :
Round 1 :
6 sc in magic ring with hot-pink (6)
Round 3 :
(1 sc, 1 inc) x 6 (18)
Round 4 :
Work 1 sc around 18 — flatten and shape into a small heart by sewing a couple of tucks on the underside; fasten off with tail for sewing
Info :
Sew these hearts on top of each foot before closing the foot completely. Position so the wider end faces toward the toes for a natural look. Add three tiny toe bumps with hot-pink yarn using small bobble stitches.
— Tiny Toes (Make 6 for front and back feet) :
Round 1 :
3 sc in magic ring (3)
Round 2 :
3 sc around (3) — fasten off leaving tail for sewing to the top front area of each foot
Info :
Sew toes in groups of three at each paw with tiny spacing. Use hot-pink for contrast and sew securely so they do not twist with play.
— Assembly & Finishing Touches :
Info :
Weave in ends as you go and block rounds gently with fingers to even stitches. Use safety eyes with washers secured behind the eye placement. Sew muzzle to face centered between eyes at rounds 13-14. Sew ears, wings, spikes, tail and legs in the positions noted below. Add embroidered nostrils if not done earlier and a small mouth with darker pink thread between rounds 9 and 10 on the muzzle.
Info :
Once pieces are pinned, use yarn tail and yarn needle to sew with small whip or ladder stitches. Go through several stitches in the body and the piece to create a sturdy join. Double-stitch any high-stress points like leg bases and tail.
Round 1 :
After assembly, apply final shaping: use a few mattress stitches under the belly to create a stable sit. Add a little more stuffing in the torso if the dragon leans backward.
Info :
Consider adding a small bit of blush to cheeks with fabric-safe pastel powder or light paint for extra cuteness. Secure all safety eyes and small parts for children's toys by sewing additional yarn over the washer for reinforcement.
This adorable pink dragon comes together beautifully with clear, thoughtful shaping and sweet heart accents — a perfect handmade gift or desk buddy! 🧶 Its soft curves and expressive face make every stitch worth it, and the contrasting spikes and heart pads add playful character. Enjoy the meditative pace of crocheting each small detail, and be proud of your finished dragon. Share your creation and celebrate your handmade achievement! 💖