🧢 Beautiful ✨ Detailed πŸ’ Adorable

The Little Sheep Amigurumi Pattern

The Little Sheep Amigurumi Pattern
4.3β˜… Rating
2-3 Hours Time Needed
2.3K Made This
βœ‚οΈ

Intermediate Level

Ideal for those with basic crochet experience, featuring slightly more advanced stitches and techniques to expand your skills.

⏱️

Bite-Sized Project

Finishes in 2-4 hoursβ€”perfect for an afternoon of creative relaxation.

🧸

Cute Companion

An adorable friend to cherish, handcrafted with love to bring comfort and joy for years to come.

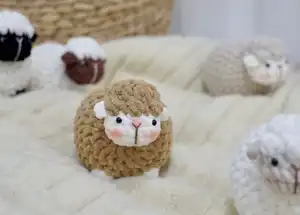
About This The Little Sheep Amigurumi Pattern

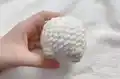
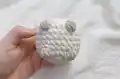
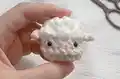
This pattern creates a small, textured sheep amigurumi worked in chunky velvet yarn with bobble stitches for a fluffy finish. You will make a rounded body and a separate small head, then sew them together and add facial details. The instructions include photos and video links to help with tricky steps.

The Little Sheep Amigurumi Pattern crochet pattern - detailed view of completed project

Techniques used include bobble stitches, invisible decreases, and working in the round with front loop details. The finished toy is compact and makes a delightful handmade gift.

Why You'll Love This The Little Sheep Amigurumi Pattern

I absolutely love this pattern because it turns simple crochet techniques into a charming, squishy sheep with lots of personality. The bobble stitch texture creates an instant fluffy look without complicated finishing. I enjoy how quickly it comes together using chunky yarn, so you get a finished project in just a couple of hours. Sewing the head and adding facial embroidery is so satisfying and really brings the little sheep to life.

The Little Sheep Amigurumi Pattern step 1 - construction progress The Little Sheep Amigurumi Pattern step 2 - assembly progress The Little Sheep Amigurumi Pattern step 3 - details and accessories The Little Sheep Amigurumi Pattern step 4 - final assembly and finishing

Switch Things Up

I love changing up the colors to personalize each sheepβ€”try pastel tones for a nursery-friendly set or bright colors for a playful look.

I often switch to a textured or boucle yarn for the body to make an even fluffier result; just adjust the hook size as needed.

You can make a mini keychain version by using thinner yarn and a smaller hook; this creates adorable pocket-sized sheep.

I sometimes embroider different facial expressions by changing eye placement or mouth shape to give each sheep a unique personality.

Try adding tiny accessories like a crocheted scarf, bow, or tiny bell sewn to the neck for a festive touch.

I recommend experimenting with different bobble stitch sizesβ€”use bo2 or bo4 creatively to change the density of the woolly texture.

If you want posable limbs, consider inserting thin wire into the legs before stuffing to allow gentle repositioning.

For a set, make several sheep in coordinating colors and display them in a small basket as a charming gift or decoration.

I sometimes blend two yarns held together for marled color effects that give the body subtle depth and interest.

If you like mixing techniques, try crocheting a tiny blanket or pasture mat for the sheep to sit on, using simple granny squares or a small rectangle.

Common Mistakes & How to Fix Them

βœ— Using loose tension for the bobble stitch sections will make the toy floppy and lose definition; maintain consistent, slightly firm tension and check gauge as you work. βœ— Skipping the instruction to stuff parts gradually causes uneven shaping and lumps; add stuffing little by little while shaping to keep the form smooth and even. βœ— Not placing safety eyes at the recommended rounds and spacing may misplace facial features; insert the 4.5mm safety eyes between rounds 3 and 4, four stitches apart, before stuffing fully. βœ— Forgetting to weave the yarn tail through the front loops when closing leaves holes at the top; always weave the tail through the front loop of each remaining stitch and pull tight to close securely.

The Little Sheep Amigurumi Pattern

Make an adorable little sheep amigurumi with this easy-to-follow pattern. You will crochet a textured body and a cute face using chunky velvet yarn and simple shaping techniques. Perfect as a handmade gift or a sweet desk companion. Clear photos and step-by-step rounds guide you through every stitch.

Intermediate 2-3 Hours

Materials Needed for The Little Sheep Amigurumi Pattern

β€” Main Fabric

  • 01
    Chunky yarn size 4-5mm (example: Himalaya Velvet, Himalaya Dolphin Baby) - main color (cream or chosen body color)
  • 02
    Contrast chunky yarn size 4-5mm - white for face and feet details
  • 03
    Toy stuffing (fiberfill) for stuffing body and head

β€” Tools Required

  • 01
    4mm crochet hook
  • 02
    4.5mm toy safety eyes (2 pieces)
  • 03
    Needle for sewing / yarn needle
  • 04
    Scissors
  • 05
    Stitch marker
  • 06
    Polyester toy stuffing (fiberfill)
  • 07
    Powder blush or fabric-safe blush for cheeks (optional)

Progress Tracker

0% Complete

β€” Body :

Info :

Start in white yarn. (Note: Use cream yarn in pink word, white yarn in black word)

Round 1 :

8sc in MR [8]

Round 2 :

8inc [16]

Round 3 :

(sc, inc) x 8 [24]

Round 4 :

(3sc, inc) x 6 [30]

Round 5 :

11sc, bo4, 4sc, bo4, 13 sc [30]

Round 6-9 :

30sc [30]

Round 10 :

11sc, bo4, 4sc, bo4, 13 sc [30]

Round 11 :

(3sc, dec) x 6 [24]

Round 12 :

(sc, dec) x 8 [16]

Info :

Stuff the body firmly with fiberfill.

Round 13 :

8dec [8]

Info :

Fasten off, leaving the yarn tail. Using the yarn needle, weave the yarn tail through the front loop of each remaining stitch and pull it tight to close.

Info :

~ How to weave in the yarn end on a stuffed piece: https://youtu.be/amYifc37uSs

β€” Head :

Info :

Start in cream yarn. Ch 4. Stitches are worked in both sides of the foundation chain.

Round 1 :

Skip the first ch on the hook, inc in next ch, sc in next ch, 4sc in next ch. Continue on the other side of the foundation chain, sc in next ch, inc in next ch [10]

Round 2 :

2inc, sc, 4inc, sc, 2inc [18]

Round 3 :

18sc [18]

Round 4 :

(ch 4, skip 3 ch from the hook, slst in next ch), sc in next st of the base, dec, (sc, dec) x 2, (ch 4, skip 3 ch from the hook, slst in next ch), sc in next st of the base, dec, (sc, dec) x 2 [12]

Info :

Change to white yarn.

Round 5 :

(sc, bo2) x 6 [12]

Info :

Stuff the head firmly with fiberfill.

Round 6 :

6dc-dec [6]

Info :

Fasten off, leaving the yarn tail. Using the yarn needle, weave the yarn tail through the front loop of each remaining stitch and pull it tight to close.

Info :

Insert the 4.5mm safety eyes between rounds 3 and 4, 4 stitches apart.

Info :

Embroider the nose with brown threads.

Info :

Sew the head to the body.

Info :

Use powder blush for the cheeks.

Infos :

Video tutorials: ~ How to crochet the sheep's head (from rnd 4 to 6): https://youtu.be/85tKbY9tJMk ~ How to embroider the sheep's face: https://youtu.be/_t3-pnZa54M ~ How to sew the head to the body: https://youtu.be/LlMfpMLDcvU

Assembly Instructions

  • Insert the 4.5mm safety eyes between rounds 3 and 4 of the head, spaced four stitches apart before finishing stuffing and closing the head.
  • Embroider the nose with brown thread centered beneath the eyes and add powder blush to the cheeks for a soft rosy look.
  • Sew the head to the body using the yarn tail and a yarn needle, aligning the bottom of the head with the top center of the body and sewing evenly around the opening.
  • Weave the yarn tail through the front loop of each remaining stitch when closing both head and body to create a neat, closed finish.
  • Pin parts in place before sewing to ensure correct alignment and symmetry, then sew with small, even stitches for a secure join.

Important Notes

  • πŸ’‘Make the invisible decrease stitches to have a better results and a neater finish when shaping the head and body.
  • πŸ’‘Add toy stuffing according to instruction of each part and stuff gradually to maintain smooth, even shapes without lumps.
  • πŸ’‘Stitches should be close together so that when the finished toy is stuffed, the stuffing doesn't come out through gaps in the stitches.
  • πŸ’‘The pattern includes color change techniques, bobble stitch technique and the X stitch technique for single crochet stitch; practice these techniques to get the best result.
  • πŸ’‘Finished size: the finished toy is approximately 7cm (~2.75 inch) high using the recommended chunky yarn and hook size.

Thank you for making The Little Sheep! This little project is perfect for practicing bobble stitches and shaping, and it makes a lovely handmade gift. Enjoy the process and have fun customizing colors and expressions. πŸ§ΆπŸ‘βœ¨

You ask,

we answer.

FAQs

What size will the finished piece be?

The finished toy is approximately 7cm (~2.75 inches) high when using chunky yarn (4-5mm) and a 4mm hook as recommended.

Can I use different yarn weights for this pattern?

Yes, you can use different yarn weights but it will change the final size and texture; choose an appropriate hook and expect variations in finished dimensions.

Do I need prior crochet experience for this pattern?

This pattern is rated intermediate because it uses bobble stitches, invisible decreases and some shaping; basic crochet knowledge is recommended.

How long does this project typically take to complete?

Most crocheters finish this small sheep in 2-3 hours, though time will vary with experience and customization.

Where should I place the safety eyes?

Place the 4.5mm safety eyes between rounds 3 and 4 of the head, leaving four stitches between the eyes for the correct facial proportion.