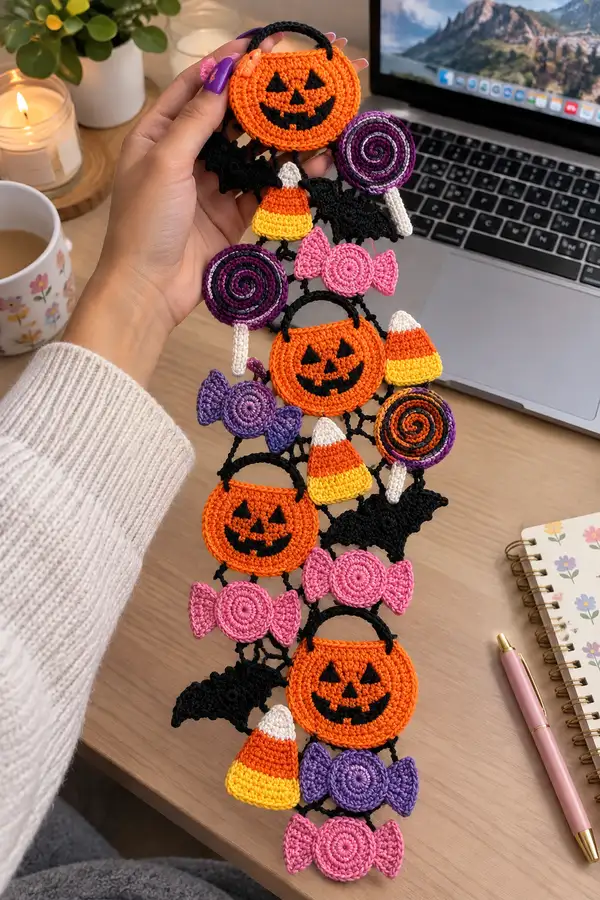
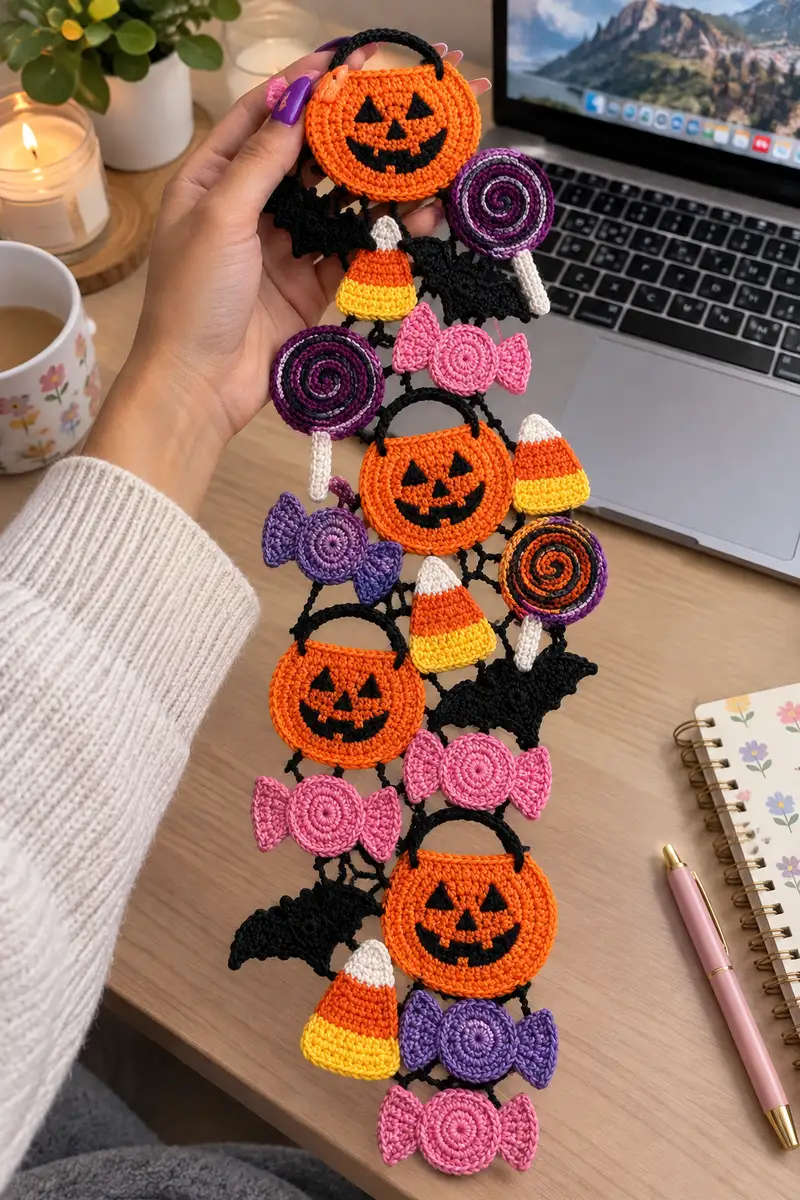
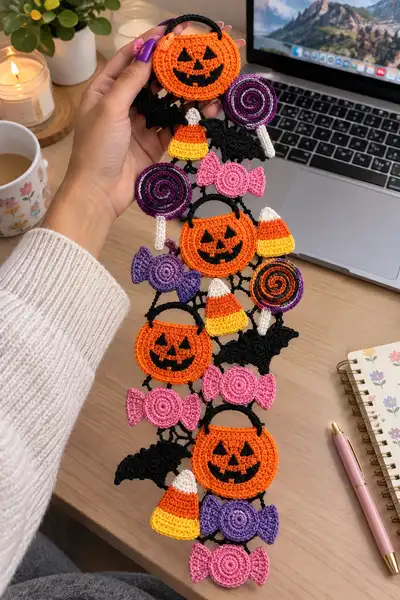
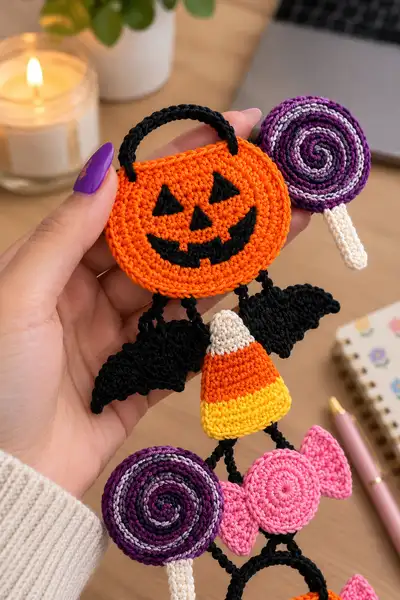
Create a whimsical Halloween table runner made of linked crochet candy motifs — smiling pumpkin buckets, swirled lollipops, wrapped sweets, candy corn and bats. This lightweight garland-style runner is worked in small motifs and joined with decorative black chain links for a festive look. Ideal for mantel, table or doorway decor, the pattern shows step-by-step rounds for each motif and clear assembly notes.
Progress Tracker
0% Complete
— Materials & Gauge :
Info :
Use sport weight cotton or light DK yarn. Gauge is not critical but motifs should be firm; 2.5mm hook recommended. Test one pumpkin to set size: one pumpkin main circle should be about 6-6.5 cm (2.5"-2.75") diameter when worked as written.
— Pumpkin Trick-or-Treat Bucket (Make 4) :
Round 1 :
6 sc in magic ring (6)
Round 3 :
(1 sc, 1 inc) x 6 (18)
Round 4 :
(2 sc, 1 inc) x 6 (24)
Round 5 :
(3 sc, 1 inc) x 6 (30)
Info :
Change to orange yarn if you started with a scrap. Keep tension tidy; these rounds form the flat disk of the bucket front.
Round 6 :
(4 sc, 1 inc) x 6 (36)
Round 7 :
(5 sc, 1 inc) x 6 (42)
Round 8 :
1 sc in each st around (42)
Round 9 :
1 sc in each st BLO (42)
Info :
BLO on round 9 gives a slight ridge that becomes the top edge of the pumpkin bucket. Keep it consistent for all pumpkins so handles sit uniformly.
Round 10 :
1 sc in each st (42)
Round 11 :
1 sc in each st (42)
Round 12 :
(6 sc, 1 dec) x 6 (36)
Round 13 :
(5 sc, 1 dec) x 6 (30)
Info :
Before continuing, embroider or surface crochet the pumpkin face using black yarn. Place eyes and mouth centered on rounds 7-9 area; see face placement info below.
Round 14 :
(4 sc, 1 dec) x 6 (24)
Round 15 :
(3 sc, 1 dec) x 6 (18)
Round 16 :
(2 sc, 1 dec) x 6 (12)
Round 17 :
(1 sc, 1 dec) x 6 (6)
Round 18 :
Fasten off leaving long tail for sewing (6)
Info :
Face placement: Using black yarn and a yarn needle, surface crochet or backstitch triangles for eyes and nose and a smiling mouth. Place eyes approximately between rounds 7-8 and 9-10 about 8-10 stitches apart (measure on your piece). Keep embroidery flat and tidy.
Round 19 :
Handle foundation: Join black yarn at top center (on the BLO ridge). Ch 1, sc in same st, ch 18-22 (depending on desired handle curve), sl st in same st to create a loop. Fasten off and weave ends.
Info :
Adjust chain length to make pumpkin handles that match the scale of your runner. For firmer handle, make a cord with 2-strand i-cord or single crochet over 18 chains then sew each end to top of bucket.
— Lollipop Spiral (Make 6) :
Round 1 :
6 sc in magic ring with purple (6)
Round 3 :
(1 sc, 1 inc) x 6 (18)
Round 4 :
1 sc in each st (18)
Info :
We will make a tight spiral by working two rounds of slightly offset slip stitches and chains. The outer spiral coil is created later by stitching a second-color spiral on top.
Round 5 :
FLO: 1 sc in each st (18)
Round 6 :
Change to variegated purple or a second purple. Ch 1, work 18 hdc around the outside edge of the circle, evenly placing them into the ends of stitches to form a slight raised rim (18)
Round 7 :
Working in continuous spiral on the top, attach contrasting color (lighter purple or cream) and sl st into center, ch1, then work a spiral: *sc in next st, sl st in next st* around to create tighter spiral texture (36 total worked placements but counts will be visually spiral not a strict stitch count)
Round 8 :
Reverse contrast join: With variegated purple, embroider a continuous spiral on top of the motif by using a yarn needle and a length of yarn, couching and sewing a spiral that follows from center to edge. Fasten off and weave ends.
Round 9 :
Stick: With cream yarn, ch 10, sc in 2nd ch from hook and across (9), sl st into base of lollipop body center from behind to secure. Fasten off leaving tail to sew (9)
Info :
For realistic spiral effect, alternate 2 or 3 rows of slip stitch and single crochet to form ridges. The lollipop is mostly decorative and should remain flat; do not stuff.
— Wrapped Candy (Make 6) :
Round 1 :
6 sc in magic ring (6)
Round 3 :
(1 sc, 1 inc) x 6 (18)
Round 4 :
1 sc in each st (18)
Round 5 :
1 hdc in each st (18)
Info :
To create the candy wrapper ends, we will make small semicircular wings on either side which are worked flat and sewn to the candy disc.
Round 6 :
Make right wrapper: Turn, ch 1, in next 6 sts work (sc, hdc, dc, hdc, sc) spread across 6 stitches to create a fan wing. Fasten off and weave.
Round 7 :
Make left wrapper: Rejoin on opposite side and repeat fan wing (sc, hdc, dc, hdc, sc) across 6 sts. Fasten off. Block flat if needed.
Info :
Use bright pink or purple yarn for wrapped candies. Make sure wings are symmetrical and sewn securely to the disc during assembly.
— Candy Corn (Make 4) :
Round 1 :
With white yarn, ch 4, join with a sl st to form ring, ch 1, 6 sc into ring (6)
Round 2 :
Change to orange, (inc) x 6 (12)
Round 3 :
Change to orange, 1 sc in each st (12)
Round 4 :
Change to yellow, (1 sc, inc) x 6 (18)
Round 5 :
1 sc in each st (18)
Round 6 :
Working in FLO for a subtle ridge, 1 sc in each st (18)
Round 7 :
Shape tip: (2 sc, dec) x 6 (12)
Round 8 :
Fasten off leaving tail for sewing (12)
Info :
Change colors cleanly by finishing last yarn-over with the new color to minimize ends. Candy corn should remain flat in profile; no stuffing required.
— Bat Silhouette (Make 4) :
Round 1 :
Ch 12, sc in 2nd ch from hook across to end (11). Do not turn; work back along opposite edge with slip stitches to form a flat oval base (11)
Round 2 :
Work spike stitches and scallops to form wing lobes: *sc, hdc, dc, tr, dc, hdc, sc* across center 11 sts to produce three lobes per wing. Fasten off and repeat on mirrored side to complete bat body, or make one larger flat motif and fold center.
Round 3 :
Create wing points: Rejoin and sc across wings, then make small picot edges every 2-3 stitches to add jagged wing tips. Fasten off leaving tail for sewing.
Info :
Bat motifs are worked flat and are intended silhouette shapes. Keep them small compared to pumpkins (approx 6-7 cm across). Use black cotton for crisp shape.
— Connector Rings and Decorative Chains (Make as many as needed) :
Round 1 :
With black yarn, ch 6, join with sl st to form small ring (6)
Round 2 :
Ch 1, 12 sc evenly around ring by working into back bumps of chain or into space if you used a ring base (12)
Round 3 :
1 sc in each st (12)
Round 4 :
Ch 1, turn and single crochet in BLO around for one round to create a slight ridge (12)
Round 5 :
Fasten off leaving a long tail for sewing. These rings are used to join motifs vertically: slip-stitch between rings to create chain segments, or sew rings to motif underside.
Info :
Create many connector rings according to how long you want your runner. Plan spacing by positioning motifs on a flat surface before joining.
— Black Linking Strands (Make many short chains to connect) :
Round 1 :
With black, ch 20, sl st back to start to make a loop if desired or leave as short chain strip. Alternatively work 20 sc in a foundation chain for a sturdier cord (20)
Round 2 :
1 sc in each ch back across to create a rope strip (20)
Info :
These chain strips connect motif bottoms to the rings or to other motif tops. Vary length (12-26 ch) to vary spacing; maintain consistent tension for straight lines.
— Assembly Preparation & Face Embroidery Details :
Info :
Arrange motifs on a flat surface in the vertical order pictured: top pumpkin, bat + candy corn + lollipop offsets alternating with pumpkin rows, then repeat. Make connector rings ready and plan where to sew each chain. Embroider pumpkin faces before joining so that ends are easy to weave in.
Info :
Face embroidery technique: Using black yarn and a sharp yarn needle, circulate single crochet stitches or surface slip-stitch to form triangular eyes and a jack-o-lantern mouth. Keep stitches shallow to avoid puckering the orange disk.
— Joining Motifs Into Runner (Step-by-step) :
Round 1 :
Lay top pumpkin on table. Sew connector ring to underside center top (use long tail left on ring). Use a ladder stitch to secure so stitching is invisible.
Round 2 :
Attach black chain: whip stitch one end of black chain to the connector ring at the top, leaving the chain hanging downward. Chain length should match spacing between stacked motifs (approx 3-4 cm depending on your motif size).
Round 3 :
Sew the next motif (bat) to the dangling chain by slip stitching its top edge into the chain or by sewing through the chain ring with the motif tail. Secure with multiple passes to avoid sagging.
Round 4 :
Alternate attaching lollipop and candy corn to the same chain using connector rings where two pieces meet. For the lollipop, sew the stick end to the chain so the candy face aligns slightly to the right like in the photo. For a more decorative join, use small looped slip stitch connections to create little hanging loops.
Info :
Keep tension on joins even; avoid pulling the chain to distort motif shapes. Pin each connection before final sewing to check spacing and alignment. Use matching black yarn to hide joins.
Round 5 :
Sew pumpkin handles to the top of the pumpkin and secure both ends firmly to the BLO ridge, making sure the handle sits upright.
Round 6 :
Repeat the motif assembly sequence down the length of the runner until desired length is reached. Mirror the arrangement for each repeat if you prefer symmetry.
Info :
Finishing: Once fully assembled, weave in all ends along the backs of motifs, block lightly to flatten and even out shapes, then steam-block (if cotton) for crispness. If you added any tiny stuffing to certain motifs, ensure it is distributed evenly before final blocking.
— Variation: Multi-Color Swirled Lollipop Technique :
Round 1 :
Use two thin strands held together (one variegated and one solid) for the spiral. Work sc around center for 3 rounds, then switch to slip-stitch spiral technique: sl st into next st, ch 1, sl st across in a spiral motion creating slightly raised ridges until the desired diameter is reached. Fasten off and sew stick as before.
Info :
Couching: For sharp spirals, couch a thin contrasting yarn on top of the spiral using a yarn needle and small stitches to secure the spiral path. This gives that layered candy look in the photos.
— Decorative Notes & Blocking :
Info :
Blocking: Pin each flat motif into shape on a blocking board using T-pins. Spray lightly with water or use a steam iron at a distance for cotton. Let dry fully before final assembly to maintain crisp edges and uniform motif size.
Info :
Storage: Store runner rolled gently or flat; avoid crushing motifs. For outdoor displays, use acrylic yarn and waterproof spray if required.
— Pattern Notes & Troubleshooting :
Info :
If a motif appears too small, switch to a slightly larger hook and re-make to match others. Keep one completed motif as a gauge sample to check all subsequent pieces by laying them together periodically.
Info :
When sewing motifs together, keep sewing passes shallow to avoid puckering the motif face. Use small back-stitches to secure heavier joins like handles and lollipop sticks.
This Trick or Treat Candy Halloween Table Runner is a delightful and eye-catching seasonal project that layers small motifs into a charming vertical garland. Each crochet piece — pumpkins, lollipops, candy corn and bats — comes together to create a festive and playful accent for your home. The modular design makes it easy to customize length, colors, and motif order. 🧶🎃 Whether you hang it on a mantel, doorway, or table edge, it's a cozy handmade touch that sparks smiles. Happy crocheting and enjoy your sweet creation! 🍬