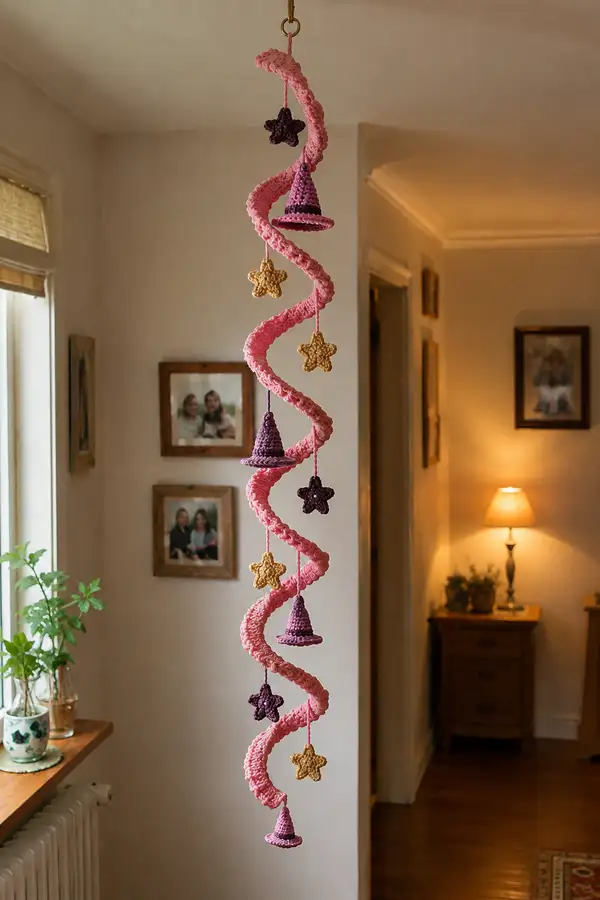
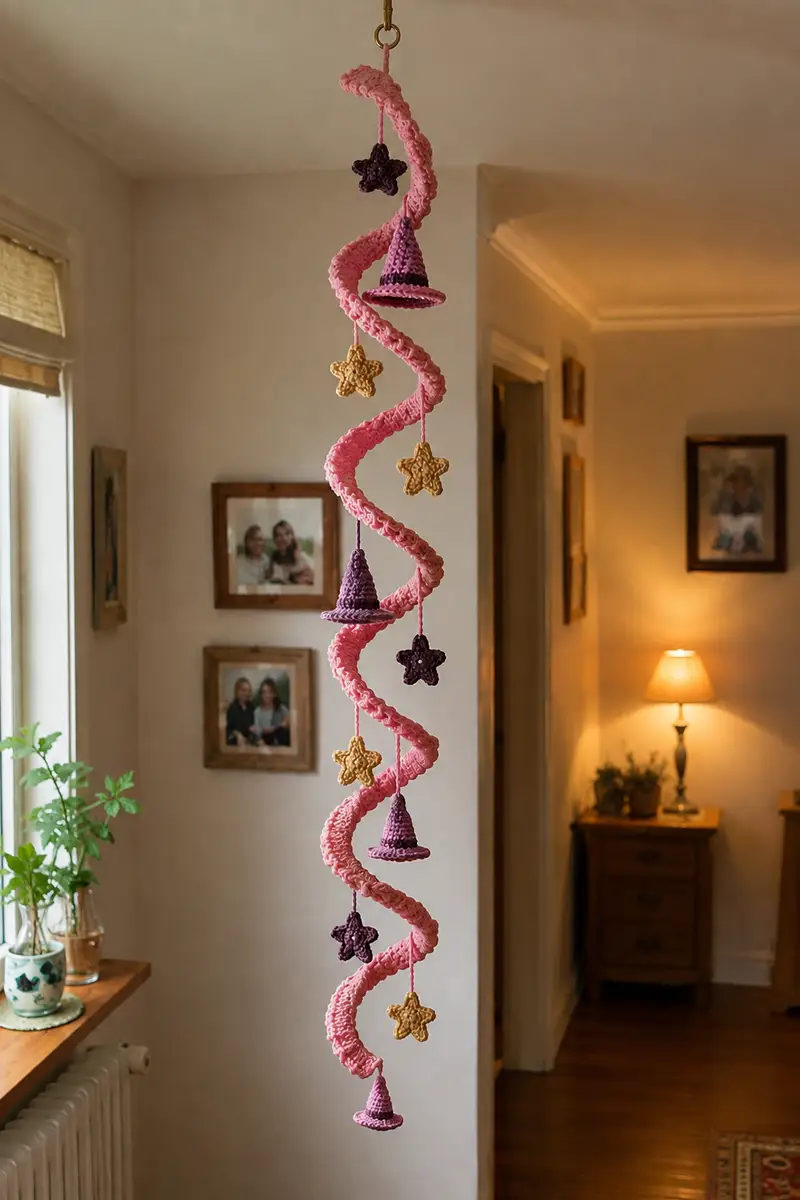
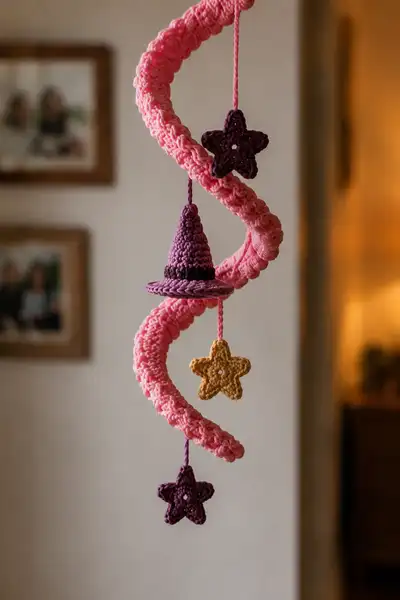
Create a whimsical spiral garland featuring a soft rose-pink corkscrew rope adorned with tiny purple witch hats and golden and plum stars. The design is lightweight, hangs beautifully, and makes a charming seasonal or year-round accent for a doorway or window. This pattern uses basic amigurumi rounds, flat star motifs and small conical hats that attach to an inner cord for a sturdy, curving spiral. Ideal for gifting or playful home decor.
Progress Tracker
0% Complete
— Materials and Prep :
Info :
Before you begin, gather all yarns and tools. The spiral will be worked as a closed tube in continuous rounds (amigurumi style) and shaped over a flexible core. Decide on the final length of your garland — this pattern describes a 100cm finished spiral with six hats and six stars suspended; adjust the number of rounds to lengthen or shorten.
Info :
Work in continuous rounds for the spiral tube (do not join rounds). Use a stitch marker to mark the first stitch of each round; move the marker up after every round. If you prefer, you can work alternating textures in BLO or using post stitches to create the chunky braid effect.
— Spiral Tube (Main Body) :
Round 1 :
6 sc in magic ring (6)
Round 3 :
(1 sc, inc) x 6 (18)
Round 4 :
(2 sc, inc) x 6 (24)
Round 5 :
(3 sc, inc) x 6 (30)
Round 6 :
(4 sc, inc) x 6 (36)
Round 7 :
(5 sc, inc) x 6 (42)
Round 8 :
(6 sc, inc) x 6 (48)
Round 9 :
(7 sc, inc) x 6 (54)
Round 10 :
(8 sc, inc) x 6 (60)
Info :
The tube has reached a stable diameter of 60 sts per round which provides a nice chunky rope. If you prefer a thicker rope, continue increases one more round: (9 sc, inc) x 6 = 66 sts. Keep in mind the core must fit inside the tube comfortably.
Round 11-20 :
1 sc in each st (60)
Info :
Start working a small internal cavity by leaving a 10cm tail of yarn at the last round for later joining to the hanging ring. After round 14, insert a 3mm flexible craft wire or plastic cord (folded or doubled if thicker) into the tube. The core should run the entire length you intend to shape. Leave an extra 20-30cm of core at the top for attachment to the ring.
Round 21-30 :
1 sc in each st (60)
Info :
To create the textured braid that catches light like in the photo, work every 6th round in BLO to form a shallow ridge. For example, on round 26: 1 sc in each st BLO (60). This gives alternating ridges and smooth rows which read as the chunky spiral surface.
Round 31 :
1 sc in each st BLO (60)
Round 32-40 :
1 sc in each st (60)
Info :
Work slowly and keep tension even; because the core is inside, the tube will feel resistant. If your core is too stiff, remove and replace with a slightly more flexible cord. Stuffing is minimal for this tube — add small amounts of fiberfill where the tube feels soft, but do not overstuff as this reduces flexibility.
Round 41 :
1 sc in each st BLO (60)
Round 42-50 :
1 sc in each st (60)
Info :
If you wish to create a spiral with visible alternating scallops, change to a slightly bulkier hook every 6-10 rounds for two rounds, then switch back; this subtle gauge change will encourage an alternating tension and help the rope curl. Keep a consistent strategy across the full length to keep the visual rhythm.
Round 51 :
1 sc in each st BLO (60)
Round 52-60 :
1 sc in each st (60)
Info :
Measure your tube periodically: by round 60 you should have approx. 40-45cm of tube length depending on gauge. This pattern describes a total of 100 rounds to achieve ~100cm; adjust rounds if your gauge differs.
Round 61 :
1 sc in each st BLO (60)
Round 62-70 :
1 sc in each st (60)
Info :
To strengthen the top and bottom ends where the ring and final knot will sit, add a round of hdc in each st (60) at round 68 then continue with sc. Hdc provides a slightly firmer edge for knotting and sewing in the core ends.
Round 71 :
1 hdc in each st (60)
Round 72-80 :
1 sc in each st (60)
Info :
When you reach the approximate final length minus 10cm for final finishing (around round 88-92 depending on your gauge), remove the core carefully from the last 15cm of tube if you want a tapered end; otherwise leave core in place and plan to fold/curve the end as desired.
Round 81 :
1 sc in each st BLO (60)
Round 82-90 :
1 sc in each st (60)
Info :
To prepare the attachment at the top, fold the top 6-8 rounds back over the core and sew through several layers to create a sewn loop, or leave a tail and tie the core to the hanging ring. For a neater finish, remove the core from the last 6-8cm, flatten the end and use mattress stitches to close the tube around the core tip.
Round 91 :
1 sc in each st (60)
Round 92-100 :
1 sc in each st (60)
Info :
Fasten off leaving a long tail. If you left a core extending, fold it over and bind it at the top to the hanging ring with the yarn tail and whip stitch through several layers to secure. Tuck tails inside the tube and weave in ends. Using the core and light shaping, carefully form the spiral coil by twisting along its length; secure key curves by sewing the core to the tube from the inside at 3-4 anchor points (these will be hidden).
— Witch Hat (Make 4) :
Info :
Each hat consists of a cone and separate flat brim later attached. Work in continuous rounds for the cone and join rounds for the brim. Make four hats alternating plum and berry colorways as in the photo.
Round 1 :
6 sc in magic ring (6)
Round 3 :
(1 sc, inc) x 6 (18)
Round 4 :
(2 sc, inc) x 6 (24)
Round 5 :
(3 sc, inc) x 6 (30)
Round 6 :
(4 sc, inc) x 6 (36)
Info :
At this stage the cone base is approx. 36 sts. Continue in even rounds to build height. If you want a taller, narrower cone, skip the round 6 increase and work even at 30 sts instead.
Round 7-12 :
1 sc in each st (36)
Round 13 :
(4 sc, inc) x 6 (42)
Round 14-18 :
1 sc in each st (42)
Round 19 :
(5 sc, inc) x 6 (48)
Round 20-24 :
1 sc in each st (48)
Info :
Stop increasing when the cone diameter matches the brim inner diameter you intend to create (see brim instructions). Stuff the cone lightly as you work from round 12 onward to maintain shape. The very tip can be left a bit hollow before stuffing to help a pointed look. Fasten off leaving tail for sewing to brim.
Brim Round 1 :
Make a separate magic ring: 6 sc in mr (6)
Brim Round 3 :
(1 sc, inc) x 6 (18)
Brim Round 4 :
(2 sc, inc) x 6 (24)
Brim Round 5 :
(3 sc, inc) x 6 (30)
Brim Round 6 :
(4 sc, inc) x 6 (36)
Brim Round 7 :
(5 sc, inc) x 6 (42)
Brim Round 8 :
(6 sc, inc) x 6 (48)
Brim Round 9 :
1 sc in each st (48)
Brim Round 10 :
1 sc in each st BLO (48)
Info :
The brim will be a flat disc with a slightly raised edge when worked BLO on the last round. If you want a flared brim, replace round 10 with (7 sc, inc) x 6 = 54 sts and then work one round of sc even. Join cone to brim by sewing cone base to the brim center, aligning inner circumference (cone bottom rounds ~48 sts) and sewing with neat whip stitch.
Finish :
Weave in tails, add a ring of contrasting color (single round of sc in contrasting berry) to the bottom edge of the cone or brim if desired for the dark band effect. Make four hats total, alternating colorways as shown.
— Stars (Make 6) :
Info :
Stars are flat 5-point motifs worked in rounds with a small center ring and pointed petals. Make six stars total (three golden, three plum) and block lightly if needed to open the points.
Round 1 :
6 sc in magic ring (6)
Round 2 :
ch1, (1 sc, ch2) x6 into ring, sl st to join into base of first sc (6 small loops)
Round 3 :
*In next ch2 loop work: sc, hdc, 2 dc, picot (ch3, sl st into top of last dc), 2 dc, hdc, sc; rep from * around to make 5 points total (each point uses one ch2 loop). Finish with sl st to base. (5 points)
Round 4 :
Optional: Round of sc around each point to tidy edges: sc in each st across points and sl st join. Fasten off leaving a medium tail for sewing.
Info :
Use a small amount of spray starch or very light blocking to open each star point if you want crisp edges. If you prefer a puffier star, work round 3 with 3 dc instead of 2 dc in the point center.
— Hanging Cords and Spacing :
Info :
Decide on the spacing of hats and stars before attaching. In the pictured piece there are six hanging motifs interspersed evenly along the spiral. Measure and mark points on the spiral tube approximately every 12-16cm (or visually space to your taste). Use pins to map positions before tying or sewing.
Cord :
Cut 6 lengths of yarn for hanging cords: three at 18cm and three at 16cm (adjust lengths by look). Use a strong chain of 12-20 ch worked in a double or triple-strand yarn if you want a sturdy thin cord; otherwise use a single strand crocheted chain with a 3.5mm hook.
Cord Assembly :
Attach each cord by sewing through the tube layers at the marked point with yarn needle, or tie through the tube and secure with a few stitches from the outside. Knot securely and weave ends into the tube for a clean finish. For extra security, add a tiny dab of clear craft glue to the knot base and let dry.
— Attaching Hats and Stars :
Info :
Sew hats and stars to the ends of hanging cords before or after attaching cords to the spiral. Sew through the top center of each star or the inside top of each hat cone with the cord tail, then secure with several back-and-forth stitches and a knot. Ensure hats sit level by balancing stitch tension and adding a few mattress stitches around the brim if needed.
Hat Mounting :
When mounting a hat, sew the hat top to the end of the cord about 1-2cm into the cone's interior; then sew a small running stitch through the underside of the brim to create a stable horizontal plane so the hat will sit flat against the spiral coil when hanging.
Star Mounting :
Sew the star through its center to the cord tail and knot securely. For a floating look, leave a short gap between the cone and star on the same cord to create visual rhythm as in the photo. Make sure knots are tight and ends woven in to prevent slipping.
— Final Shaping and Finishing :
Info :
Once all motifs are attached, hang the spiral from the metal ring and carefully form the corkscrew shape by bending and twisting the core inside. Make gradual curves, anchoring each curve by sewing from the inside of the tube to an adjacent internal wrap point (use long yarn tails to stitch through multiple layers). This secures the spiral and keeps consistent spacing between loops.
Finishing Touch :
Weave in any remaining yarn tails inside the tube. For extra durability, add a few stitches through the outer loops where the tube overlaps itself to keep loops from sliding. Trim any stray fuzz and block the hats and stars lightly if needed for presentation.
Care :
Spot clean only as the inserted core makes full washing difficult. If needed, remove hanging motifs and gently hand-wash separately, then reattach once dry.
This charming spiral garland is a delightful mix of texture and tiny motifs that bring personality to any corner of the home. The soft rose-pink rope curls like a ribbon while plum hats and golden stars add playful, handcrafted detail. Each section is modular, so you can make it longer, shorter or customize colors for seasons and gifts. I hope you enjoy making and styling it as much as I did designing it — happy stitching! 🧶✨