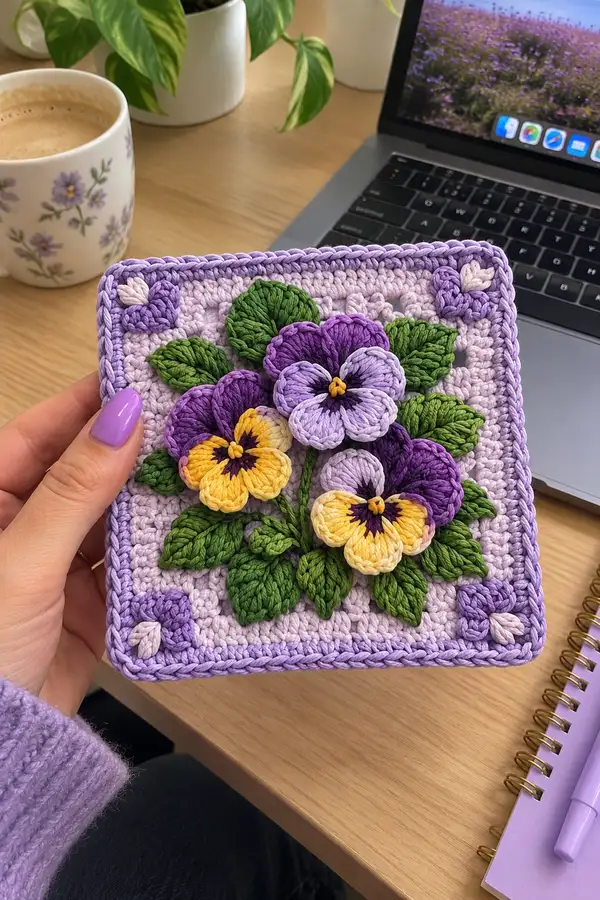
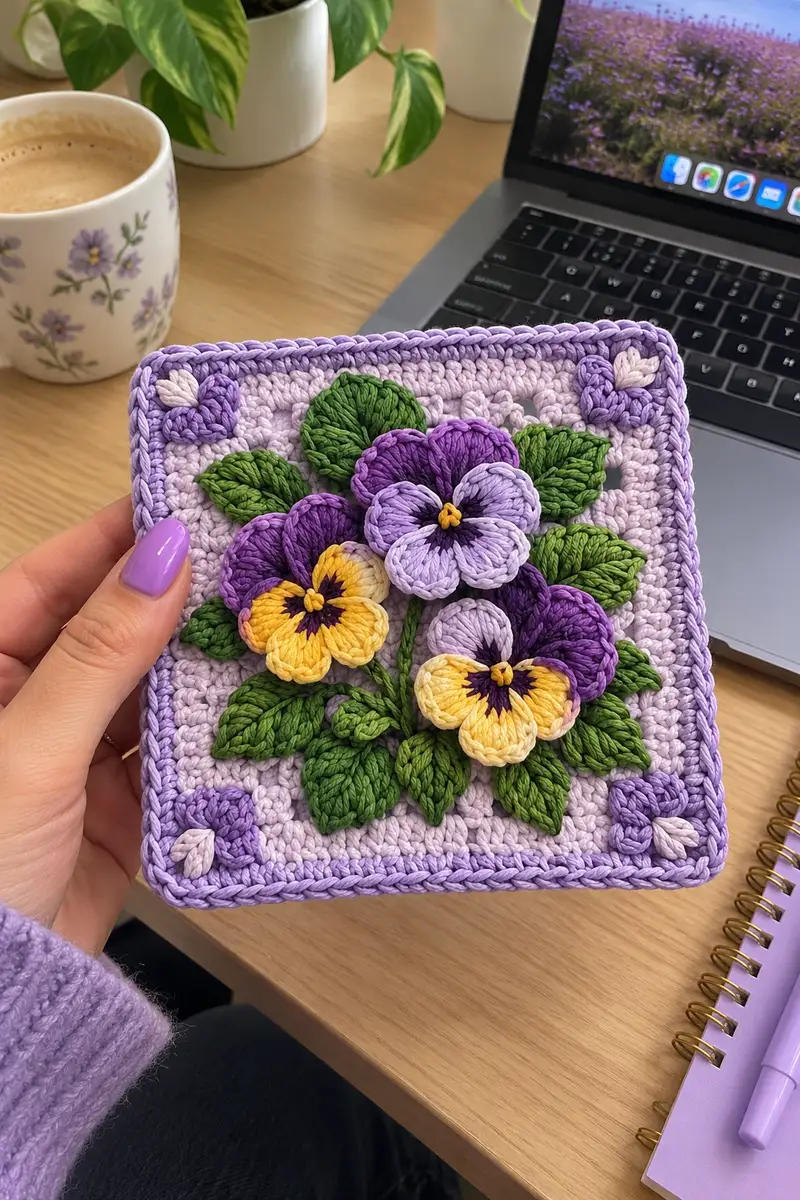
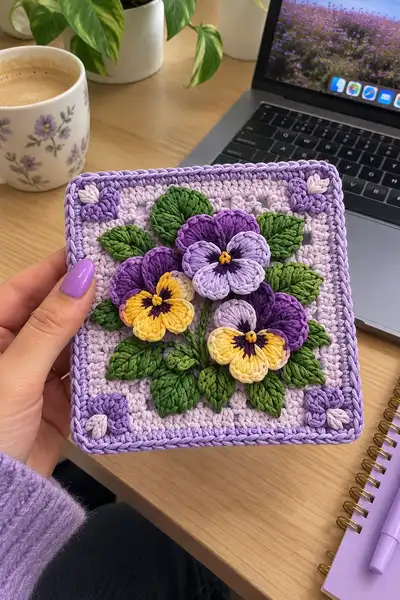
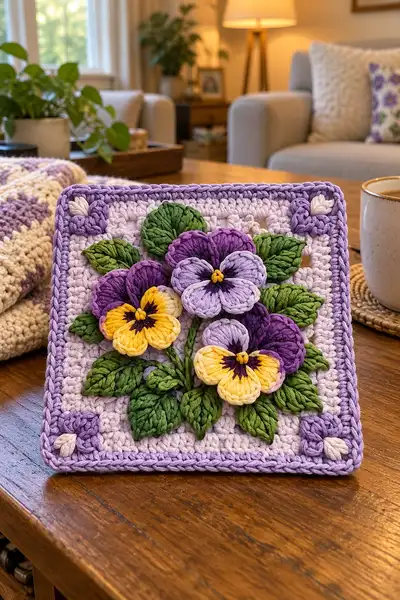
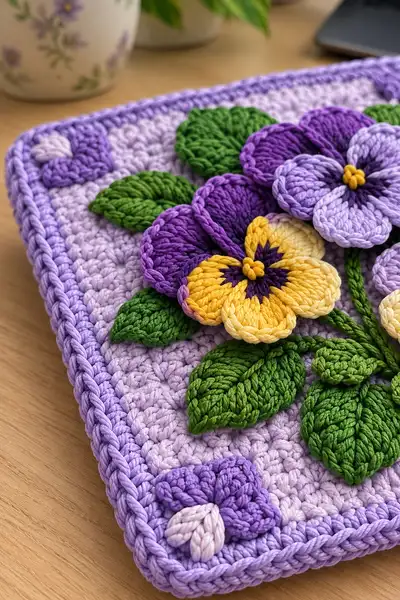
Create a sumptuous 3D pansy granny square perfect for a luxurious bedspread or decorative cushion. This pattern features layered dimensional pansy flowers, textured leaves, delicate stems and a softly shaded lilac background with a neat twisted border. Detailed stitch-by-stitch instructions guide you through shaping each petal and leaf to achieve a velvet-like finish. Ideal for making an heirloom blanket made of repeated squares.
Progress Tracker
0% Complete
— Background Square (Base Panel) :
Round 1 :
Using soft lilac variegated yarn, 6 sc in magic ring (6)
Round 2 :
Inc in each st around (12)
Round 3 :
(1 sc, inc) x 6 (18)
Round 4 :
(2 sc, inc) x 6 (24)
Round 5 :
(3 sc, inc) x 6 (30)
Info :
Keep rounds worked tightly to produce a dense base. These first rounds build a small circular center that will later be squared by corner shaping
Round 6 :
1 sc in each st around (30)
Round 7 :
(4 sc, inc) x 6 (36)
Round 8 :
1 sc in each st around (36)
Info :
We will now transition to a square. Mark four points that will become the corners by placing stitch markers every 9 stitches (approx). These markers define corner placement for the next rounds
Round 9 :
*Work 7 sc, (sc, ch 2, sc) into next st (corner made)* repeat 4 times working 7 sc between corners (total stitch count 36 + 8 extra for ch2 corners = 44 worked positions, counts managed by corner chains)
Round 10 :
Work around including corners: across each side work 1 sc in each st, in corner ch-2 space work (sc, ch2, sc) to maintain square corners. Aim to make sides even (44)
Round 11 :
1 sc in each st around (44)
Round 12 :
(9 sc, inc) x 4 (48)
Info :
If your square looks slightly round at this stage, gently block it after finishing the base before attaching appliques. Blocking helps flatten and square the sides
Round 13 :
1 sc in each st around working (sc, ch2, sc) in corners (48)
Round 14 :
1 sc in each st BLO around to create a subtle ridged stop for appliques (48)
Round 15 :
Switch to lighter lilac (if you want a subtle shaded center). Info: change color smoothly by finishing final yarn over of last stitch with new color. 1 sc in each st around (48)
Round 16 :
1 sc in each st around (48)
Round 17 :
(6 sc, inc) x 6 (54)
Round 18 :
1 sc in each st around (54)
Info :
At the end of Round 18 you should have a firm 4-corner square approx 12-13cm depending on yarn and tension. This is the panel you will attach the bouquet to. If making a larger spread, adjust round counts now to reach your preferred square size
Round 19 :
1 sc in each st BLO (54)
Round 20 :
1 sc in each st (54)
Round 21 :
1 sc in each st (54)
Info :
This base should be left unblocked if you prefer a softer edge while sewing appliques. Blocking will stiffen the panel and help with a neat border later
Round 22 :
Even round to finalize base: 1 sc in each st (54)
Round 23 :
Fasten off and weave tail to the inside of the square. Leave the surface tidy for applique placement
— Border Base (twisted rope edge) :
Info :
We will build a rounded twisted rope edge to frame the square. Work this after all appliques are sewn in to capture their outlines neatly
Round 1 :
Attach medium lilac in any corner ch-2 space. Ch1, 2 sc in ch-2 space, *sc evenly along side to next corner ch-2, 2 sc in corner space* repeat around (work approx 60 sc total including corners)
Round 2 :
1 sc in each st around (60)
Round 3 :
Work 1 sc in BLO around (60)
Round 4 :
Using the same lilac, make 1 round of BLO slip stitches to create a twisted appearance: *sl st in each st around (60)*
Info :
Optionally add a final round of reverse single crochet (crab stitch) for a neat rope effect. Use slightly smaller hook for a tighter finish
Round 5 :
Optional reverse sc (crab stitch) in lilac: work around corners working 3 stitches across corner to keep corners square. Fasten off and weave in tails
— Pansy Petal Module (Make 3 large pansies + 1 small) :
Info :
The pansy is built of 5 individual petals joined in the center. Each petal is worked as a small motif with elongated loop stitches and a final edging round to produce a velvet ruffle. Work petals in contrasting two-tone colors as shown in photos. We will provide a petal pattern that can be repeated 5 times per flower
Petal Round 1 :
Using main petal color (deep violet for dark petals or light lavender for pale petals), mr, ch1, 6 sc in mr (6)
Petal Round 2 :
Inc in each st around (12)
Petal Round 3 :
(1 sc, inc) x 6 (18)
Info :
We will now work elongated loop stitches to create the petal face. For elongated loops: yarn over longer and pull loop up approx 2-3 times the height of a dc, then secure with a sc across top)
Petal Round 4 :
Switch to slightly lighter or darker shade for petal interior (for natural gradient). Ch2 (counts as first elongated base), work 18 elongated loop stitches around next 18 sts anchoring each with a sc at the base: *(yo, insert, pull up long loop to approx 2.5x height, yarn over and pull through) then sc to anchor* x 18 (18 elongated loops + base sc anchors)
Petal Round 5 :
Work around the elongated loops edging them: *in each loop work (hdc, dc, hdc) to create a rounded bulbous petal tip* 18 petals created; sl st to join
Petal Round 6 :
Edging round: 1 sc in each stitch and 1 sc in top of each petal grouping to smooth edge (approx 36)
Info :
Carefully shape each petal by pinching and stretching the elongated stitches. If desired, add a tiny amount of fiberfill into the petal base for extra lift, but keep very light
Petal Round 7 :
Fasten off leaving 10cm tail for sewing. Make five petals for each full pansy (three pansies will require 15 petals plus the small flower will use 5)
Note :
For the smaller pansy reduce initial rounds: mr, 5 sc then inc to 10 and work 12 elongated loops instead of 18. This creates a compact flower perfect as a filler
— Petal Center Eye & Little Star (Eye Detail) :
Center Round 1 :
Using dark plum or deep purple, ch 2, 6 sc in mr (6)
Center Round 2 :
(sl st, ch 2, sl st) into each st to create a starburst effect (work 6 times). Fasten off leaving long tail for satin stitch sewing into petal centers
Info :
Sew this star into the base center of the five attached petals once petals are arranged. Use tight satin stitch to draw a small dark eye into the pansy that mimics the natural dark blotch in pansy centers
— Pansy Center Puff (Make 4 centers) :
Round 1 :
Using butter yellow, ch 2, 8 sc in mr (8)
Round 2 :
Work 8 small puff stitches in each st: *yo, insert, pull loop up, yo, pull through two loops on hook* repeat so you have 8 puff bumps. Sl st to join (8)
Round 3 :
Finish with sc around to tidy edge and fasten off leaving tail for sewing. Sew this tiny puff into the very center atop the dark star to finish a pansy center
Info :
Secure centers with a few stitches through the backing and into the petals. Use two or three stitches to anchor; knot securely on the wrong side
— Leaf Module (Make 10-14 leaves) :
Leaf Round 1 :
Using moss green, ch 5, sc in 2nd ch from hook, hdc, dc, hdc, sc along chain, then 3 sc in last ch to turn and work back along opposite side: sc, hdc, dc, hdc, sc (total approx 13 sts). Sl st to join at base. (13)
Leaf Round 2 :
Working around leaf, work 1 sc in each st along the edge to smooth (13)
Leaf Round 3 :
For textured leaf vein we now work fpdc ribs: working on the front face, along the center top of leaf work (fpdc, ch1, fpdc) spaced equally to create 3 raised ribs. Fasten off leaving 12cm tail for sewing (3 raised ribs)
Info :
To make larger leaves repeat chain length to ch 7 and follow the same increases. Make a variety of small and medium leaves to layer under the pansies
Leaf Round 4 :
Optional: Using a slightly darker green, embroider a central vein with satin stitch for extra realism. Use yarn needle and 2 strands for visibility
— Stem (Make several stems) :
Stem Round 1 :
Using leaf green, ch 30 (or desired length), sl st in 2nd ch from hook and each ch across to create a rope-like stem. Fasten off leaving long tail for securing to square
Info :
Alternatively use i-cord style crochet: 3 sc in each chain worked back and forth to create a thicker stem. Insert lightly padded wire if you want a poseable bouquet for shaping
— Corner Motif (Make 4) :
Round 1 :
In deep lilac make a tiny flower: mr, ch1, 6 sc in ring (6)
Round 2 :
(ch3, sl st) into each st around to form 6 little petals. Fasten off leaving tail. Add a small cream teardrop next to motif using 3 sc to make petal
Info :
Corners finish the square to coordinate with the central bouquet. Sew these motifs into each corner ch-2 space aligning the small teardrop toward the center
— Assembling a Single Pansy Flower (5 petals + center) :
Step 1 :
Arrange 5 completed petals in a circular layout with rounded edges overlapping slightly (about 1.5cm overlap). Mark positions with pins or small clips
Step 2 :
Sew center dark star into the middle by stitching through base of each petal into the star piece. Use the long tail from the star to pass through all petals several times pulling gently until petals sit evenly (6-8 passes)
Info :
Ensure petals are slightly cupped upwards for a velvet look. A gentle tug and arrangement at this stage sets the flower shape
Step 3 :
Sew the yellow puff center onto the star center. Stitch from the wrong side of the assembled flower through the puff base and back several times. Knot firmly and weave tail into underside
Step 4 :
Repeat to make 3 large pansies and 1 small pansy for the bouquet
— Flower Arrangement and Pinning :
Info :
Lay the background square flat. Using photos as reference, arrange three large pansies in a loose triangular cluster and the small pansy as a lower filler. Layer leaves beneath and between flowers to give fullness
Step 1 :
Place the central large pansy slightly above the panel center. Place second and third pansies overlapping slightly to left and right below center. Pin in place
Step 2 :
Layer leaves under the bouquet starting at the bottom center, fanning outward. Arrange stems so they converge under the center for neat sewing
— Sewing Appliques to Background :
Info :
Use a blunt tapestry needle and matching color yarn. Sew each petal base to the background by taking small running stitches through the petal base and into the base fabric. Secure every petal at 3-4 points for stability
Step 1 :
Sew leaves first: tack each leaf at its base with 3-4 small stitches. Conceal tails into the leaf underside by weaving horizontally
Step 2 :
Sew stems next: position stems to meet at the base center and tack every 1cm with small stitches. If using wire, sew around stem base multiple times for stability
Step 3 :
Sew flowers last: attach the underside of the flower center with 6-8 stitches, passing through background and leaf layers if necessary to anchor firmly. Arrange so flowers overlap leaves naturally
Info :
Always sew from inside outward; keep tension snug but not pulling the square into distortion. Use pins and check symmetry often
— Detailed Finishing Rounds (Final Texture and Edge) :
Round 1 :
With medium lilac, work 1 round sc around the entire square including over applique edges, working careful tiny stitches to hide joining threads (60)
Round 2 :
Work 1 round of sc in BLO to create a neat inside ridge (60)
Round 3 :
Work a final round of crab stitch (reverse sc) in light lilac for a neat twisted cord border. Fasten off and weave tails (60)
Info :
Use blocking lightly if you want a perfectly square finished edge. Pin and steam block with low heat using a damp cloth; avoid direct iron on cotton yarn to prevent flattening textured petals
— Optional Embroidery & Shading :
Step 1 :
Using dark plum, embroider subtle radial lines from the petal base toward the mid petal using single stranded yarn and long satin stitches to mimic pansy eye marks
Step 2 :
Embroider small stitches at leaf edges in a slightly lighter green to catch light. Use 2-3 strands of yarn to keep stitches visible
Info :
Take care not to go through overlapping petals too often with embroidery stitches or it will pull the flower shape. Use shallow surface stitches
— Repeat Notes for Bedspread (Joining Many Squares) :
Info :
When assembling multiple squares for a bedspread, make all squares to the same round count and block them before joining. Use mattress stitch or join-as-you-go slip stitch method in lilac to preserve edge rope motif
Joining Method :
For join-as-you-go: on last round of a new square before crab stitch, align to finished square and sl st through both loops every other stitch to connect without adding bulk. Work crab stitch around joined two squares for consistent border
Info :
Make test patch of 3x3 squares to check gauge and layout before committing to full bedspread. This helps verify yardage and final measurements
— Troubleshooting and Tips (useful techniques) :
Info :
If petals look too flat, increase elongated loop height or add one extra round of hdc/dc cluster to round 5 for more volume. If leaves curl, steam-block gently to shape veins
Info :
To achieve deep velvet look, use mercerized cotton or a cotton-blend with a slight sheen; it highlights elongated loop texture
Info :
Keep a sample square to test color transitions. Work petals for all squares in one session to keep tonal consistency across a blanket
Completing this Velvet Violet Pansy granny square is so rewarding — each petal and leaf comes alive with texture and color. The layered petals create a beautiful velvet-like flower that sits proudly on a soft lilac background. Make a single square for a framed accent or repeat it into a luxurious bedspread to fill a room with floral charm. 🧶💜🌿