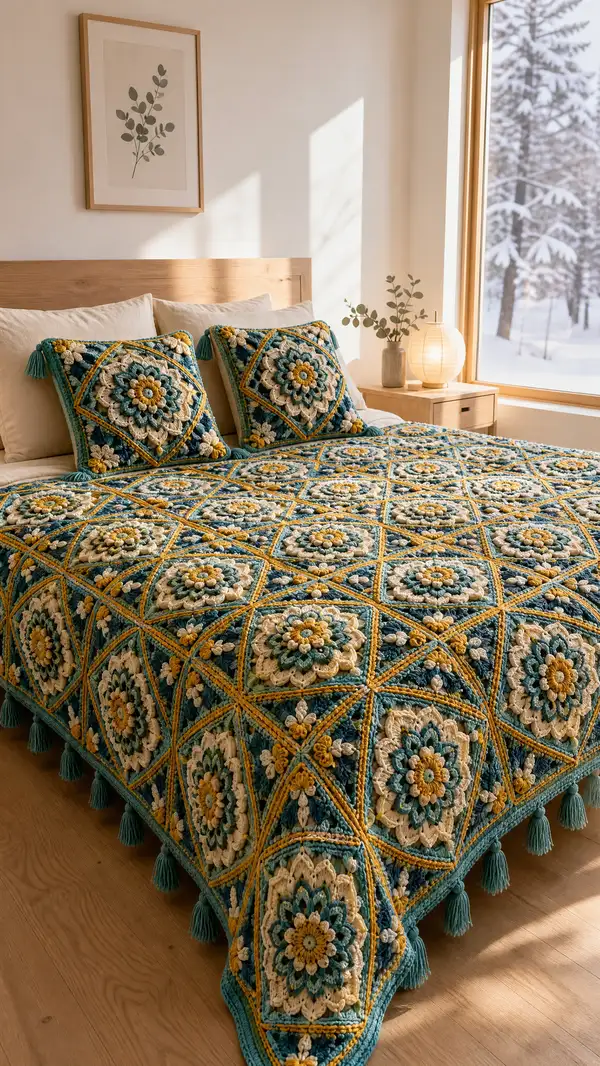
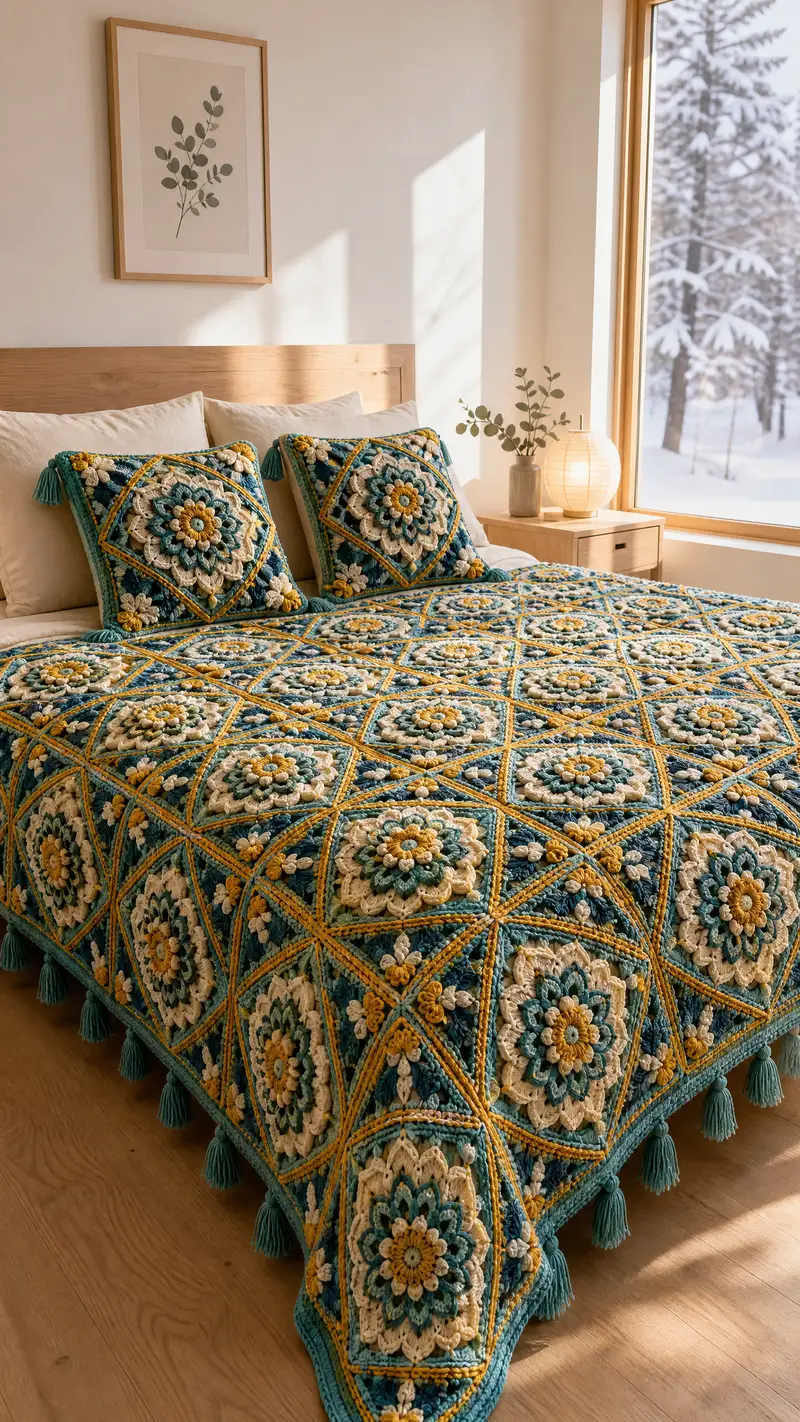
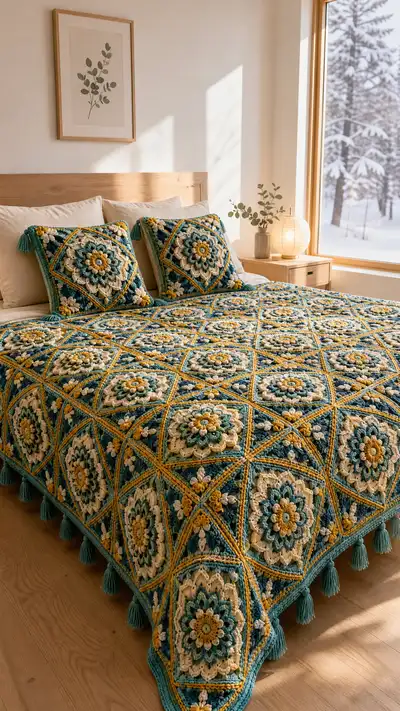
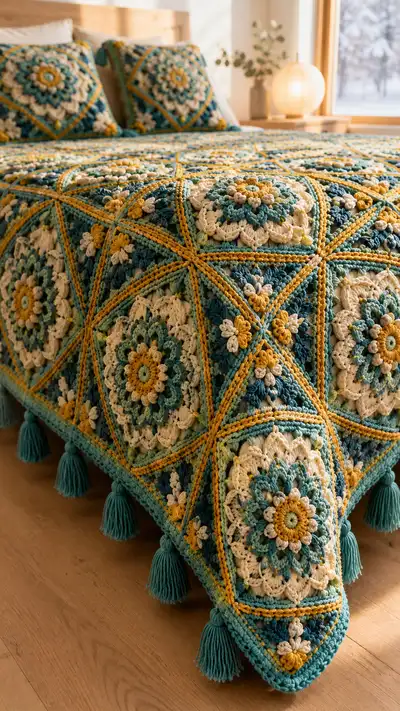
A luxurious, layered floral granny square bedspread worked in rich teal, mustard, cream and soft green. Each textured square features a raised floral medallion with popcorn/puff petals, framed by a diamond border and joined into a large bedspread with a chunky scalloped edge and tassels. The design reads as vintage-meets-modern with deep texture and a cozy weight — perfect for a statement bedspread or oversized throw.
Progress Tracker
0% Complete
— Notes & Gauge :
Info :
This bedspread is made of multiple identical floral granny squares joined together and finished with a wide border and tassels. Gauge is not critical for look, but is critical for finished size and even joins. With worsted weight yarn and a 4.0 mm hook, each finished square (after blocking) should measure approximately 10"/25 cm from point to point (diagonally across the diamond frame) or 8"/20 cm across the square's flat sides depending on your tension and puff/pop stitch height. Make a sample square and block it to determine your stitch size. Blocking will flatten and open the lace-like stitches and make joins easier.
Info :
Special stitch definitions - Puff stitch: yo, insert hook, pull up loop, (yo, insert hook, pull up) x 2 times more until there are 7 loops on hook, yo and pull through all loops, ch1 to close puff. Popcorn stitch: Work 5 dc in same st, remove hook from loop, insert into first dc, pull loop through to close forming a popcorn, ch1 to secure. For this pattern puff and popcorn stitches are used interchangeably for texture but instructions will specify which to use per round.
— Floral Layered Motif (make X squares) :
Round 1 :
MR, ch1, 8 sc in MR; pull tight and sl st to first sc to join (8)
Round 2 :
Ch2 (counts as hdc), 1 hdc in same st, 2 hdc in each st around, sl st to top of ch2 (16)
Round 3 :
Change to accent color B (mustard). *Ch1, 1 sc in next st, ch2, sk 1 st* repeat around joining ch2 spaces with sc to create 8 ch2 petals spaces. Sl st to first sc. This round establishes petal pockets (16 sc, 8 ch2 spaces)
Info :
Change color by completing last pull-through with new color so there's no knot at the color change. Leave tails long for weaving or carry yarn inside the central ring if you prefer fewer ends.
Round 4 :
Work petals into the ch2 spaces: In each ch2 space: (ch2, puff stitch, ch2, sl st into same ch2 space) x 1 to form raised petal cluster. Repeat in each of the 8 spaces (creates 8 puff petals). Join with sl st (8 puff petals, 16 base sc remain)
Round 5 :
Change to cream color. Ch1, sc in same st, *ch3, sk next puff cluster base (that is the sc between petals), sc into next sc (between petals)* repeat around to create 8 ch3 loops. Sl st to first sc (16 sc, 8 ch3 spaces)
Round 6 :
In each ch3 space work (1 dc, puff, 1 dc) all in same ch3 space; sl st to join. This forms a secondary larger petal behind the initial puff (8 larger petals). (Maintain 16 sc between petal groups)
Info :
Keep puff height consistent by pulling loops to approximately the same height before finishing the puff. Practice a few test puffs on scrap yarn to match size.
Round 7 :
Change to teal. Ch1, sc in same st, (3 sc in top of next petal cluster) x 8 around to create a small raised ring around petals. Join with sl st (24 sc total)
Round 8 :
Ch2, hdc in same st, (hdc in next 2 sts, 2 hdc in next) x around. Transition begins to round shape for inner medallion. Count: starting 24 sts then increases: (2 hdc then inc) pattern yields (24 + 8 = 32) (32)
Round 9 :
1 hdc in each st around (32)
Round 10 :
Change to pistachio green. Ch1, sc in same st, *ch2, sk 2 hdc, sc in next* repeat around to create spaces for outer petals (approx 10 sc and 10 ch2 spaces). Exact counts will match depending on increase; adjust spacing to keep petals centered.
Info :
If you need to adjust counts to keep symmetry, do so here: ensure petal spaces align with underlying petal points for pleasing layered effect. Use stitch markers at cardinal points to maintain alignment.
Round 11 :
In each ch2 space: (ch2, popcorn (5 dc popcorn), ch2, sl st) to form dramatic raised popcorn petals around the medallion. Repeat around and join (number of petals = number of ch2 spaces created)
Round 12 :
Change to cream. Ch1, sc in each st and each popcorn top working around petals to secure them and make a flat base: this round evens the edge (st count will be approximately 40-48 depending on petals)
Round 13 :
Work a round of (1 sc, ch1) across to create picot-like spacing for the next lace round: sc in next st, ch1, continue. Join (sc + ch1 spaces equal previous round count)
Info :
This is a good place to block the motif before working the square frame — blocking here helps petals sit flat and makes subsequent rounds easier. Wet block or steam block, pin to desired square dimensions, and allow to dry completely.
Round 14 :
Change to teal. Into each ch1 space work (sc, hdc, 2 dc, hdc, sc) to form scalloped round. Join with sl st. This round creates a full circular medallion base with small arcs between petals. (Counts vary per motif width ~ 48-56)
Round 15 :
Ch3 (counts as dc), dc in next 2 sts, *sk 2 sts, 5 dc in next st (cluster pop), sk 2 sts, dc in next 3 sts* repeat around to create spaced 5-dc clusters for texture. Join with sl st. Count should be consistent so clusters align across sides.
Round 16 :
Change to mustard. Ch1, sc in each st around, placing 3 sc in top of each 5-dc cluster to lock them in place and create a denser ring (approx 56 sc)
Round 17 :
Work corners that will later form the diamond frame: *ch6, sk 6 sc, sl st into next sc* repeat 4 times spaced equally to create 4 large looped corner spaces. If motif is circular, place loops on four compass points. Join with sl st.
Info :
These ch6 loops will become the corner anchors when the motif is squared and framed; space them evenly. If your motif is slightly larger or smaller, change chain length to keep corners square-shaped when framed.
Round 18 :
Change to teal. Into each chain-6 loop work: (sc, hdc, 3 dc, hdc, sc) to build a corner arc; in between corners work 1 sc per st to create straight edges. After working all corners the medallion will have 4 projections to begin squaring out.
Round 19 :
Ch1, sc in each st across edge, and in corner points work (*sc, ch2, sc*) into the top of corner arcs to form a defined corner cornerable point. This round flattens and squares each motif into a soft rounded square (count varies ~ around 72-84 sts)
Round 20 :
Change to mustard. Working evenly in each st: (1 sc in next 3 sts, inc) x around to build the square frame and prepare for diamond outlining. Work increases evenly to maintain a stable square (result approx +8-12 sts depending on previous count)
Info :
At this stage each motif should sit flat and measure close to your target square size. If motifs differ slightly in size, add a corrective round of sc evenly spaced (or a blo round) to make them identical. Mark the middle of each side — you will use these points when placing the diamond frame.
Round 21 :
Change to teal. Ch1, sc in each st for one round to create a clean edge (this creates consistent stitch count and a stable base for the frame). Join with sl st. (count maintained)
Round 22 :
Change to mustard. Using tapestry join method or surface slip stitch, outline a diamond on the square: join mustard at one side midpoint, ch1, work 2 sc in same st, *sk appropriate number of sc (calculated from count to reach corner), 1 sc at corner tip (top of corner arc)* continue forming four lines of sc that form a diamond over the square. The aim is to create raised mustard lines that will read as a frame when squares are assembled into the larger bedspread.
Info :
The diamond outline can be worked either as surface slip stitch (lighter line) or as raised sc lines by working 2-3 rows of sc along the line for thickness. In the pictured bedspread the mustard line is raised and slightly rounded; work 2 rows of sc for a similar look. Secure ends and weave in tails neatly behind the square.
— Square Frame & Edge Rounds (per motif) :
Round 23 :
With teal, ch1, sc around the full square working evenly (work 1 sc in each top of previous st and 3 sc in corner points) to even up sides and create a small border. Work 1 round (count maintained)
Round 24 :
Change to cream. Work 1 sc in each st creating contrast border (this will be visible inside the diamond frame). Join with sl st. (count maintained)
Round 25 :
Change to mustard. Work a raised rope effect along the diagonal edges: surface single crochet along each diagonal line if you used the surface method earlier, or work a 2nd round of sc on top of the first raised line to thicken it. Secure and weave in ends.
Info :
These rounds give each motif a sturdy perimeter to resist stretch when joined. Keep tension consistent; scissors will be used later to trim ends flush once blocks are joined and blocked.
Round 26 :
With teal, work 1 round of hdc in FLO only to create a subtle ridge inside the frame (1 hdc in each st FLO). This ridge adds a pleasing shadow line when the squares are placed side by side.
Round 27 :
Change to cream. Ch1, sc in each st, flattening petals and locking the frame (count maintained)
Round 28 :
Finish motif with a final teal sc round; in corner points place 4 sc to make corners firm. Fasten off and weave in ends. Each motif is now a decorative square with a visible diamond frame and a raised floral medallion.
Info :
Make the number of motifs required for your bedspread size: Example counts - Twin: 5 x 7 (35 motifs), Full: 7 x 7 (49 motifs), Queen: 8 x 9 (72 motifs) depending on motif size. The pictured spread is approximately queen size made from 8 x 9 layout; adjust counts and border accordingly.
— Corner Triangle Extension (optional for making perfect diamonds when joining) :
Round 29 :
To convert your square into a stronger join shape, make small corner triangles that fill gaps at joins. With teal, join yarn to corner point, ch1, work 5 sc in corner tip, turn and work 1 sc decrease rows to form a small triangle of approx 3 rows total. Fasten off. Make 4 small corner triangles per square or add them only to outer-edge squares where needed.
Info :
These small triangle reinforcements sit behind the tassels and help the tessellated diamonds sit flush without gaps. Alternatively you can block large squares tightly so corners meet without adjustments.
— Join-as-you-go Method (preferred) :
Round 30 :
Place first square flat with wrong side up. Align second square with right sides facing you and tapestry join along one edge using sl st or mattress stitch through both loops. Use teal or mustard to match the frame so the join reads like a continuous diamond line.
Round 31 :
When placing third square to complete a row, join the second square's free edge to it in the same manner. For each subsequent square in a row repeat. Once a full row is completed, join rows together by aligning vertical seam lines and using the same join method. Repeat until whole panel is constructed.
Info :
To preserve the raised mustard diamond line across joins, overlap mustard raised lines slightly during joining then secure with small invisible whip stitches on the inside so the line looks continuous and three-dimensional. Pin pieces together and check alignment before committing to sew.
Round 32 :
At each intersection where four squares meet, add a small decorative cluster: with mustard, insert hook at the cross point, ch3, 3 dc, sl st to secure forming a small rosette. This hides any gaps and emphasizes the lattice intersections (optional decorative pop).
Info :
If you prefer a less visible seam, use invisible mattress stitch or slip-stitch join in the back loops only so the front texture remains uninterrupted. The pictured bedspread uses raised joins visible intentionally as a grid.
— Row & Panel Assembly Rounds :
Round 33 :
Assemble squares into rows using your chosen join method. After each row is assembled, block the entire row flat and press into alignment to reduce cumulative distortion. Work slowly: a misaligned row will magnify across the spread.
Round 34 :
Once all rows are ready, join rows to form the bedspread body. Join using 2-3 passes of sc in matching frame color along the seams on the right side for a strong but decorative seam. For extra strength use 1 pass of whip stitch on the wrong side first, then sc on the right side to reinforce.
Info :
Check the spread by laying it over the bed and ensuring edges hang evenly. Minor adjustments can be made by inserting or removing a few stitches along seams or adding small wedges to edges to square up the finished piece.
— Outer Decorative Border (work around whole assembled spread) :
Round 35 :
With teal, join yarn at any outer seam, ch1, work 1 sc evenly around the entire spread, placing 3 sc in corner points. Work this round to even out the perimeter and create a base for the heavier border. (Stitch count varies with spread size)
Round 36 :
Change to mustard. Work 1 round of 1 sc, ch2 shell, sk 2 sc across to create a delicate lacy scallop base. Place shells evenly along edges and 3 shells in each corner to allow for rounded tassel placement.
Round 37 :
With cream, ch1, work 1 sc in each st around; in corner shells work (sc, ch2, sc) to turn the corner neatly. This stabilizes the lace round and prepares for puff scallops.
Round 38 :
Change to teal. Work puff scallops along the edge: in each shell space work (ch1, puff, ch1, sc) to build a raised scalloped edge. Keep puff stitch counts equal (3 puff loops per puff as defined in notes) to maintain uniformity.
Info :
Weave in ends from border color changes neatly to the wrong side and block the entire spread edge well. A crisp block will sharpen points and let the tassels hang properly.
Round 39 :
With teal, work 2 rounds of sc around to give thickness: Round 1 sc in BLO to create a ridge, Round 2 sc in regular loops to smooth. These two rounds produce the thick finished edge shown in the photo.
Round 40 :
Change to pistachio green. Work 1 round of hdc in each st to create a soft inner binding inside the teal edge. This subtle color ties the border into the motif interiors visually.
Round 41 :
Final finishing round in mustard: Using a thicker raised stitch (such as a surface single crochet run or 2 sc raised line), outline the entire spread diagonally to mimic the distributed diamond seams; this is optional but recommended for the pictured finished look.
Info :
At this point block the full bedspread carefully. Wet blocking and pinned drying will set the puffs and scallops. Allow to dry fully before attaching tassels, as tassels may become misshapen if attached prematurely and blocked with them in place.
— Tassels :
Round 42 :
Tassel size shown is approx 3.5"/9 cm long excluding loop. Cut multiple strands of teal yarn double the desired tassel length. For each tassel, use 40-50 strands depending on fullness. Fold strands in half, insert the fold through a corner loop, pull ends through the fold and tighten forming a lark's head knot, wrap yarn tightly just beneath the top knot to form the head, and secure. Trim bottom evenly.
Info :
Attach tassels to every corner of a square and at every corner of the bedspread border as pictured. For a lush edge place tassels along the long edges spaced approx 6-8"/15-20 cm apart depending on bedspread size.
— Cushion Covers (Make 2 matching pillow covers) :
Round 43 :
Make 2 motif squares as per earlier motif rounds. For cushion size 16"/40 cm, work 1 or 2 additional sc rounds evenly around the motif to reach desired dimensions. Use the same border framing and raised diamond lines so cushions match the bedspread motif style.
Round 44 :
For back panel: Work a square of simple sc rounds in teal to cushion back size + 1"/2.5 cm overlap for envelope closure. Example: ch 42, join and work sc rounds until square measures same as front panel. Fasten off.
Round 45 :
Assembly: Place front and back panels wrong sides together, whip stitch 3 sides leaving one side open for insertion of pillow form or cushion insert. Add tassels to the four corners of the cushion front to match bedspread styling as pictured.
Info :
Alternatively insert a zipper into the open side for a removable, washable cushion cover. If using an envelope back, overlap by at least 4"/10 cm to avoid the pillow peeking out.
— Final Finishing & Care :
Round 46 :
Weave in all ends using a tapestry needle, hiding tails through the body of motifs and along joins. Trim ends close. Gently wash in lukewarm water with mild detergent and block flat on a sheet or pins, shaping diamonds and points carefully. Allow to air dry fully before use.
Info :
Because of the textured stitches, avoid machine washing or aggressive agitation. Spot-clean when needed; hand-wash and dry flat to preserve puffs and prevent felting. If you must machine wash, use a delicate bag, cold water and low spin only—blocking will still be needed afterwards.
Round 47 :
Optional: Spray a fabric stiffener lightly on tassels to help them keep shape, or press lightly with steam iron from the wrong side to even tall puffs if the yarn tolerates steam. Test a scrap first.
Info :
Storage: Store folded with acid-free tissue to protect from dust. Avoid compression of tassels if storing long-term.
Info :
This completes the instructional run-through. The pattern intentionally leaves some stitch counts adaptive because puff/pop stitches vary with stitcher technique. The rounds above offer a stable, repeatable framework: a 22-28 round motif, 6-12 rounds of border and joining per motif, assembly and outer border of ~10 rounds, and cushion instructions depending on desired size. Adjust counts slightly as needed to keep motifs uniform. Happy crocheting!
Congratulations — your floral granny square bedspread is a joyful statement of texture and color! The layered petals, raised diamond lattice, and tasseled edge combine to create a heirloom-style piece full of personality. Each motif is a satisfying little project, and assembling them into the full spread is deeply rewarding — like watching a mosaic come to life stitch by stitch. 🧶 Take pride in your blocking and finishing; the careful details are what make this bedspread truly special. 🎉