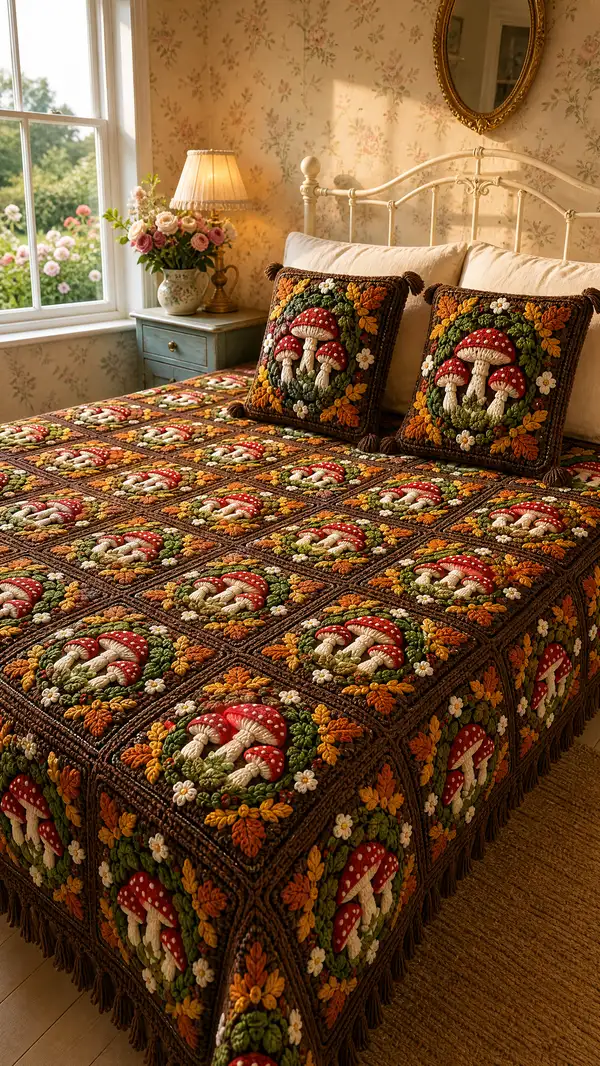
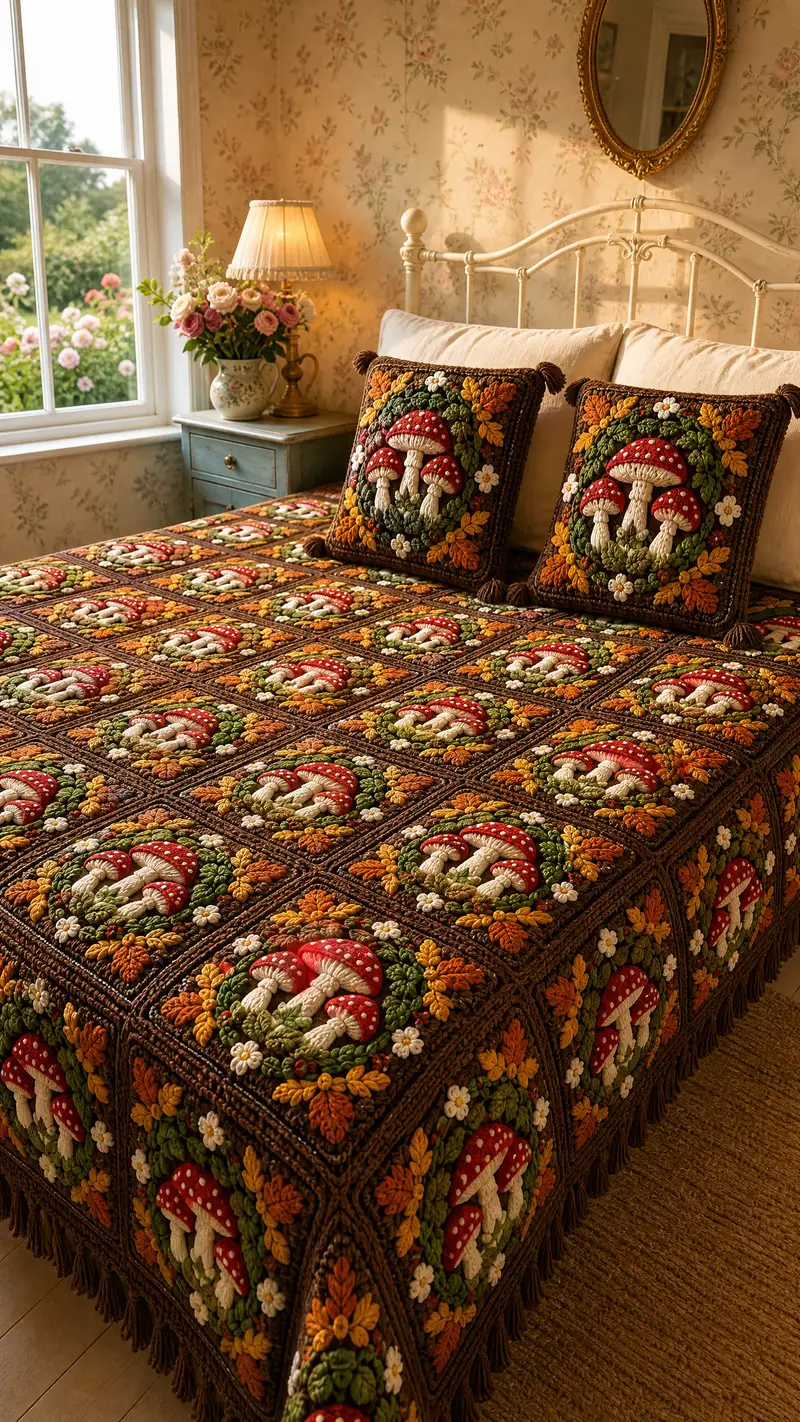
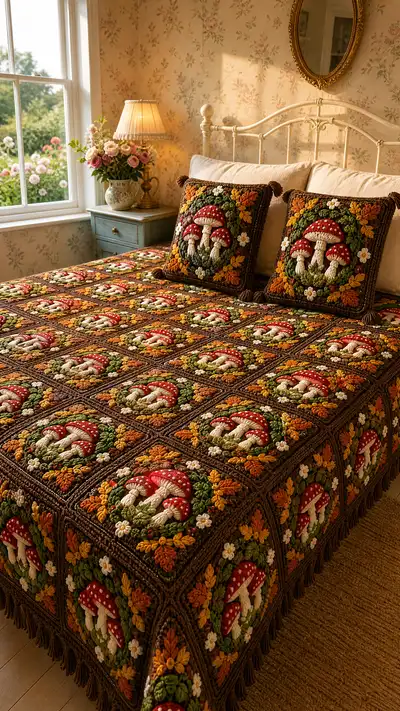
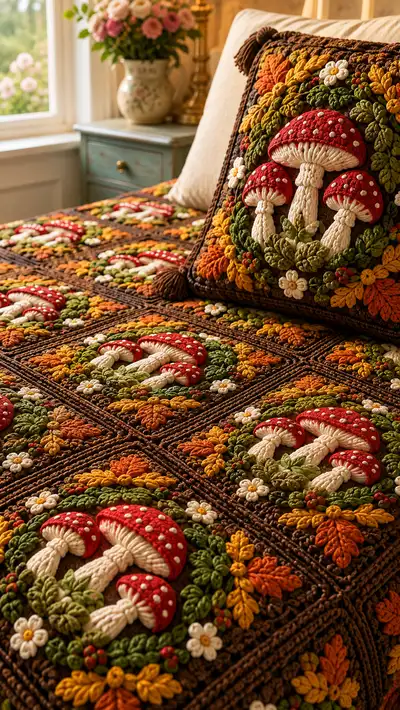
A richly textured, autumnal bedspread composed of repeated raised mushroom granny squares. Each square features sculpted cream stems, vermilion caps with dotted spots, layered green foliage and small white daisies, assembled into a warm brown edged throw. Detailed stitch textures include puff clusters, front-post ribbing, and raised popcorns for stunning 3D effect.
Progress Tracker
0% Complete
— Overview :
Info :
This pattern teaches one complete 3D mushroom granny square and the finishing techniques to assemble a bedspread. Each square is built in layers: background square base, mushroom stems, gills, caps, foliage (leaf clusters and daisies), and final square frame. The pattern includes join-as-you-go and full join instructions. Use a consistent tension and block all squares before joining. Gauge and color swaps will change final size.
— Square Background (Base Square) :
Info :
Work this background in main brown color. The base is a 9-round textured square designed to accept appliques. If you prefer a slightly larger square for bigger mushrooms, add repeat rounds of (3 sc, inc) pattern equally on all sides.
Round 1 :
Make mr, ch1, 8 sc in mr, pull tight (8)
Round 2 :
Inc in each st around (16)
Round 3 :
(1 sc, inc) x 8 (24)
Round 4 :
(2 sc, inc) x 8 (32)
Round 5 :
(3 sc, inc) x 8 (40)
Round 6 :
(4 sc, inc) x 8 (48)
Info :
At this stage you have a round with 48 sts. We'll begin to square the round by working corners in 3-sc clusters separated by straight sides. Place a marker at the first st of this round to keep track.
Round 7 :
*Work 8 sc, (ch2, 2 sc in next 2 sts, ch2) to form corner; rep from * around finishing with 8 sc between corners. After 4 corners you will still have 48 sts but arranged into 4 sides with corners
Round 8 :
On each side work 12 sc across; at each corner work (sc, ch2, sc) to create square-turn corners. (48)
Round 9 :
1 sc in each st BLO around to create a framed ridge (48)
Round 10 :
1 sc in each st (48)
Round 11 :
1 sc in each st (48)
Round 12 :
Work 1 rnd sc; at each corner work (2 sc, ch2, 2 sc) to square off and lock placement for applique (48 + corner chs)
Info :
Place square on a flat surface and mark the center with a removable marker. The applique pieces are worked separately and sewn or whip-stitched to the base. For best results, sew stems first, then cap and gills, then foliage and daisies.
— Mushroom Stem (Make 3 per square: Left, Center, Right) :
Info :
Stems are worked flat in a short ribbed tube using front-post and back-loop techniques to create the vertical ribs. Use cream yarn. Each stem is worked as a small ribbed rectangle, then folded and sewn closed to form a short tube. The center stem is taller; side stems are shorter. Stitch counts below are for center stem (tall). Adjust row numbers for side stems (subtract rows indicated).
Round 1 :
Ch 6, sc in 2nd ch from hook and across (5)
Round 2 :
Ch1, turn, BLO sc in each across (5)
Round 3 :
Ch1, turn, FPdc in first st, BPdc in next, FPdc, BPdc, FPdc (5)
Round 4 :
Ch1, turn, BLO sc across (5)
Round 5 :
Repeat Rounds 3-4 for 10 rows total to create rib texture (5)
Info :
For side stems make 6-8 body rows instead of 10. Keep the width at 5 sts for all stems so they look proportional when folded. After reaching desired height, we will convert rectangle to tube.
Round 6 :
Ch1, fold rectangle so short edges meet; sl st through both layers along short edge to form tube. Fasten off leaving long tail for sewing to base.
Round 7 :
Using yarn tail, whip stitch bottom edge of tube closed to create flat mushroom base. Secure and weave in tail inside stem.
Info :
Stuff stems lightly with a small amount of fiberfill if you want a slightly plump appearance — do this before sewing bottom edge fully closed. For a more floppy look, skip stuffing.
Round 8 :
Sew stem to background square at marked positions: center stem placed slightly lower than caps' eventual center; side stems placed symmetrically on left and right about 8-10 sts from center depending on square size.
Info :
Secure each stem with small whip-stitches along long back seam and through the square base; leave top of the stem open for gill attachment and cap anchoring. Position references: center stem top should be at about round 6 of the square base; side stems 4-5 sts lower to give perspective.
— Mushroom Gills / Underside (Make 3 per square) :
Info :
The gills are worked as small fan clusters in cream yarn and sewn under the cap rim. They use hdc, dc clusters and surface loop pulls to mimic layered gills.
Round 1 :
Make mr, ch1, 6 sc in mr, pull tight (6)
Round 2 :
Ch1, 2 sc in each st around (12)
Round 3 :
Ch1, (sc, hdc) x 6 (18)
Round 4 :
Ch2, turn, in each st: (dc cluster over next 2 sts, ch1) repeat across to make 9 clusters (9 clusters)
Round 5 :
Ch1, reverse single crochet around outer edge to provide firm rim for sewing (18)
Info :
Sew gills to top of stem opening and under cap rim with small stitches. Place center gill slightly recessed under cap. Side gills are smaller by omitting Round 4 clusters (stop at Round 3).
— Mushroom Cap (Make 3 per square) :
Info :
Caps are made using increases to form a dome, then a separate rim/gather is created to shape the underside. The cap is worked in vermilion/red with surface spots added using French knots (or small embroidered dots) in white. Cap sizes: large center cap has more rounds; side caps fewer rounds. Caps are worked flat in the round.
Round 1 :
Make mr, ch1, 6 sc in mr and pull tight (6)
Round 2 :
Inc in each st around (12)
Round 3 :
(1 sc, inc) x6 (18)
Round 4 :
(2 sc, inc) x6 (24)
Round 5 :
(3 sc, inc) x6 (30)
Round 6 :
(4 sc, inc) x6 (36)
Round 7 :
(5 sc, inc) x6 (42)
Round 8 :
1 sc in each st around (42)
Round 9 :
1 sc in each st BLO to make a slight ridge where the rim will sit (42)
Info :
For the large cap continue to Round 12 or 14 before forming rim. For medium cap stop at Round 10; for small cap stop at Round 8. The counts above assume a large cap. Adjust rounds for smaller caps maintaining the increase pattern so the dome remains even.
Round 10 :
(3 sc, dec) x 6 to begin slight shaping of rim if making a rounded skirt (36)
Round 11 :
1 sc in each st (36)
Round 12 :
Fasten off leaving long tail. Create a separate rim piece if desired: ch 1, attach to BLO of last round and work 1 rnd of sc in FLO to create a clean edge (36)
Round 13 :
Make a small gathering round under cap: with cream yarn work sl st loops under cap rim or create tiny hdc loops to accept gills. Sew cap to top of gill assembly and to stems.
Info :
To get the curled-up mushroom rim you can single crochet in BLO while decreasing slightly each round to draw the rim up. For a flatter cap, avoid decreases and finish with a neat sc round. Embroider small white dots using duplicate stitch or French knots after the cap is sewn on.
— Cap Spot Embroidery :
Info :
Use white yarn and a yarn needle to add small spots. For a clean raised French-knots look, use a contrasting embroidery thread or smaller gauge yarn and wrap twice for each knot.
Round 1 :
Thread needle, bring white yarn from wrong side to right side where spot should appear, wrap yarn twice around needle and push through pulling to make a small knot. Repeat varying sizes and spacing to match the pictured mushroom dots — 12–18 spots per large cap, 6–10 for smaller caps.
Info :
If you prefer crocheted spots, make tiny 3-sc circles: make mr, 3 sc, close. Sew these little discs to the cap top. Ensure they are proportionate to cap size.
— Foliage Leaf Cluster (Make multiple for wreath) :
Info :
Leaves are worked using puff stitches and elongated clusters to create a petal/leaf look; colors alternate olive, moss and burnt orange. Work many small leaves and join into wreath arcs around the mushroom trio.
Round 1 :
Ch5, sc in 2nd ch from hook, hdc in next, dc in next, sl st in next; fasten off (leaf size small)
Round 2 :
For puff leaf: ch3, insert hook in base sc, pull up loop, repeat 4 times (5 loops), yarn over and pull through all loops, ch1 to close, sl st in next st to anchor. Fasten off (puff leaf)
Round 3 :
Make 2 chain leaves and 3 puff leaves alternately to form a small sprig; join sprigs in an arc around bottom half of mushroom cluster (approx 6–9 leaves per side).
Info :
Use a yarn needle to stitch leaf sprigs to the square; vary color placement and orientation to create the layered wreath effect seen in the photo. Use green closer to stems and warmer tones at outer edges to mimic fall foliage.
— Daisy Flower (Make 4 per square plus small centers) :
Round 1 :
Make mr, ch1, 6 sc in mr, pull tight, sl st to join (6)
Round 2 :
*Ch4, sl st into next stitch* repeat around to form 6 loops (6 petals)
Round 3 :
In each ch4 loop, work (sc, hdc, dc, hdc, sc) to create petal puff; fasten off, weave in ends
Round 4 :
Sew small yellow French-knot or 5-thread bullion in center of each daisy for the yellow center
Info :
Position daisies at each corner area of the wreath and small daisies along sides to mimic the photo — they break up color and provide scale.
— Leaf Rosette / Accent Puff (Make many) :
Round 1 :
With olive yarn ch3, 5 puff stitches worked into same st (ps: YO, insert, pull loop, repeat until 5 loops on hook), yarn over and pull through all, ch1 to close; sl st to anchor (creates a small 5-lobed puff)
Round 2 :
Make 8–10 of these rosettes per square and sew into clusters around the base of stems and caps where foliage meets mushrooms
Info :
Alternate colors (moss green, olive, mustard) to give the wreath depth. Stagger placement and slightly flatten some rosettes to avoid excessive bulk when joining squares.
— Small Round Accents / Berries :
Round 1 :
For berries make mr, 6 sc, pull tight, fasten off, leave tail for sewing. Use crimson or bright orange for small berry clusters (2–3 per cluster).
Round 2 :
Sew tiny berries into leaf clusters with a few stitches; space evenly to match photo reference
Info :
These small accents help disguise join seams and add visual interest. Use them sparingly so the mushrooms remain the hero of the square.
— Assembly of Motif on Base Square :
Info :
Attach stems first, then gills, then caps. Add rosettes, leaves and daisies last. Use matching yarn to sew in place with small whip-stitches. Pin every piece before sewing to check placement symmetry.
Round 1 :
Place center stem so its top begins at square round 6 and sew along back seam with matching cream with evenly spaced stitches (approx 8–10 stitches along seam) to secure (no numerical stitch count change on base)
Round 2 :
Sew two side stems 6–8 sts from center axis. Ensure they are a little lower than center stem — use pins and step back to check symmetry
Round 3 :
Position gills over stem openings and sew gills to stems and base with small whip-stitches along the gill rim. Each gill rim will take 6–9 small stitches depending on size
Round 4 :
Place caps over gills; match the cap underside to gill rim and tack into place using mattress stitch or small whip-stitches all around cap rim; pull slightly to shape if needed
Round 5 :
Add foliage pieces around base: stitch leaf sprigs overlapping each other in alternating colors to form half-wreaths and side wreath elements. Use 12–16 small stitches per larger sprig and 4–6 stitches for small rosettes
Info :
Take time to arrange leafy arcs so they form an oval wreath around mushrooms. Use temporary thread to baste on and adjust before final sewing. Leave daisies unsewn until final square frame is completed so you can hide tails behind final frame.
— Square Frame and Texture Rounds :
Info :
After applique is secured, we create the raised frame around the motif using post stitches and bobbles to match the pictured textured frame. Work in main brown. This section uses rounds rather than rows to create a boxy, stacked cord border.
Round 1 :
Attach brown yarn at any corner ch2 space, ch1, 2 sc in corner ch2 space, sc along side in back loop only for next 12 sts, 2 sc in next corner ch2 space, rep around (keeps corner structure). Final count back to 48 sc but shaped into square corners
Round 2 :
1 sc in each st around (48)
Round 3 :
1 rnd FPdc around to create a raised rib; work FPdc over each st (48)
Round 4 :
1 rnd BPdc around (48)
Round 5 :
Work 1 rnd of 'cord' texture: *(ch1, skip 1, sc in next) repeat across side; at corner work (sc, ch2, sc)* to maintain square (approx 48 sc)
Round 6 :
1 rnd sc in each st (48) - this locks the previous round and provides a firm edge
Info :
Add two more rounds of sc if you want slightly thicker frames so the join seams will be hidden inside when joining squares. Keep counts equal across squares for uniform assembly.
— Outer Border / Final Square Edge (Optional Wider Frame) :
Round 1 :
Ch1, *sc 16, (2 sc, ch2, 2 sc) in corner*, repeat around to create larger frame — adjust side sc to keep square even (approx 64 sc)
Round 2 :
1 sc in each st around (64)
Round 3 :
1 rnd of puff clusters spaced evenly: *(ps in next st, ch1, skip next st) repeat across; at corners work (ps, ch2, ps) to keep corner bulk
Round 4 :
Work reverse sc (crab stitch) around for a neat finishing edge; fasten off and weave tail to back
Info :
If you plan to join-as-you-go (JAYG), stop here and follow JAYG instructions below. If you prefer making all squares first then joining, block squares now and stack them in rows matching motif orientation.
— Join-As-You-Go (JAYG) Method for Row Joining :
Info :
JAYG allows you to attach new square to previously completed squares on one or two sides while working the final frame round. You will join in the last frame round by substituting sl sts or scs into the adjacent square's edge instead of working ch or sc. This creates a seamless join.
Round 1 :
When you reach a side that touches an already-completed square, sc into both the current square st and the corresponding st of the adjoining square through both loops to join (this reduces counts on that side by the number of joins and maintains structural integrity)
Round 2 :
Continue sc across other sides normally; at corner make (2 sc, ch2, 2 sc) and join corner with sl st into adjacent square corner if present
Info :
Use this method to join entire rows left-to-right or top-to-bottom. For a bedspread, join squares into motifs of 4 or rows of 7-9 squares depending on finished size. Keep consistent orientation of mushrooms for a cohesive look.
— Full Join (After All Squares are Completed) :
Round 1 :
Lay two squares right sides together and whip stitch through the back loops only of the final sc rounds to create a fine seam. Use brown yarn and small stitches (approximately 1 whip stitch per sc) for a tidy join
Round 2 :
For stronger join use mattress stitch: align squares, insert needle under the edge loops of both squares and pull tight; repeat evenly along join
Round 3 :
After joining in rows, join rows together using same technique. Press joins flat and block again if needed.
Info :
When joining, hide small rosettes and daisy tails between squares by tucking them into seams before sewing. Adjust extra bulk by flattening or trimming underside tails. Make sure motifs align visually; rotate squares when necessary to maintain consistent mushroom orientation across the bedspread.
— Final Edge and Tassel Fringe :
Round 1 :
With brown yarn, work 2 rounds of sc evenly around whole assembled blanket, working (2 sc, ch2, 2 sc) in each outer corner for a crisp square edge
Round 2 :
Work a round of FPdc to create a raised cord then 1 round of sc to tidy (counts vary by blanket size — work evenly)
Round 3 :
To add tassels, cut yarn lengths twice the desired tassel length. Fold bunches of 6–8 strands through ch spaces around edge every 6–8 sts. Secure with a wrapped yarn piece and trim evenly (tassel placement at every corner of squares or every 6-8 stitches for dense fringe)
Info :
Attach tassels firmly and optionally add a drop of fabric glue on wrap for durability. For a lighter fringe, use single tassel groups spaced further apart.
— Cushion Cover Variation (One Pillow Shown) :
Info :
Make a 3x3 or 4x4 square arrangement for a pillow front. Back the pillow with solid fabric or crocheted panels. The pictured pillows have extra-large center mushroom and a firm inner board for stability and prominent 3D effect.
Round 1 :
Make nine squares (3x3) using base instructions; for a larger pillow, make 16 squares (4x4). Block and arrange 3x3 with center motif as focal point.
Round 2 :
Sew squares together by whip stitch through sc rounds aligning motifs. Secure seams with tight, neat stitches. Add a firm pillow form or a thin cardboard insert between front and back panels if you want a shaped cushion.
Round 3 :
Finish pillow with a deep brown border and tassels at each corner as shown. For closure use an envelope back or zipper concealed under the border.
Info :
If adding an insert board, cut to size slightly smaller than inside measurement to press the front into a square, this emphasizes the 3D appliques.
— Blocking and Finishing :
Info :
Wet-block each square by pinning it to a square template and steaming lightly or pinning damp squares until dry. This evens edges and helps motif symmetry. Once dry, perform final joining and edge finishing. Weave in all tails through multiple stitches to secure. Trim excess yarn close to work.
Round 1 :
Go over all embroidered dots to ensure they are secure; add extra knots on the wrong side if necessary
Round 2 :
Spot-check seams for loose stitches; reinforce with additional running stitches where under stress (corners, tassel attachments)
Info :
Final gentle steam or blocked press (avoid crushing 3D motifs) will set the blanket. Store folded gently between acid-free paper if gifting.
— Scaling & Customization Notes :
Info :
To make a smaller lap blanket, make fewer squares in each direction. Use thicker yarn and a larger hook for a chunkier finish or a smaller hook with the same yarn for tighter texture. You can also convert mushrooms to different colors for seasonal variations (spring pastels, winter whites, holiday reds and greens).
Completing this Vermilion Toadstool Bedspread is like finishing a cozy autumn story: each square is a tiny scene stitched with love. The layered texture, sculpted mushrooms and warm color palette create a handmade heirloom perfect for slowing down and enjoying your craft. I love how the 3D details invite touch, and how each square becomes a meditative mini-project. 🍂🧶 Happy stitching — you'll treasure every finished square and the final, beautiful spread!