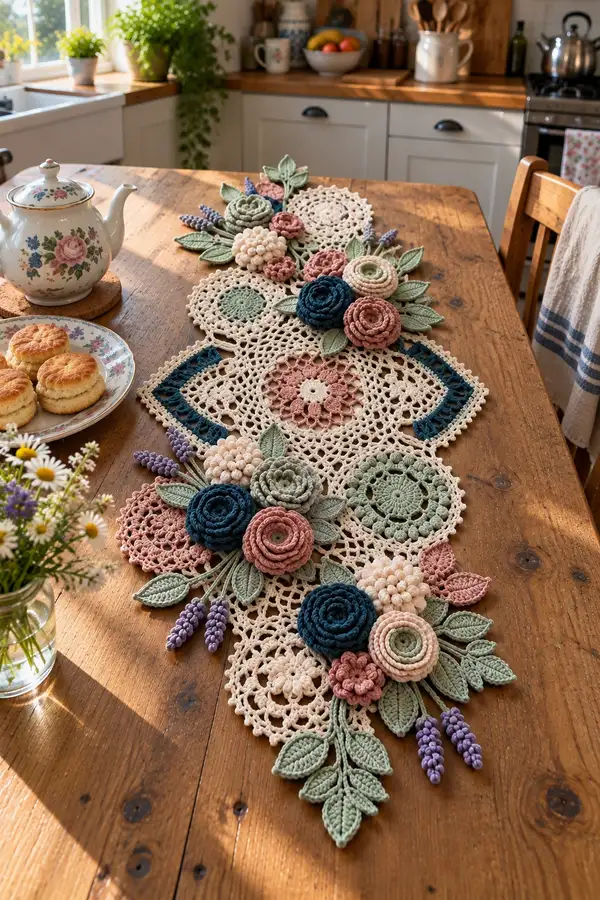
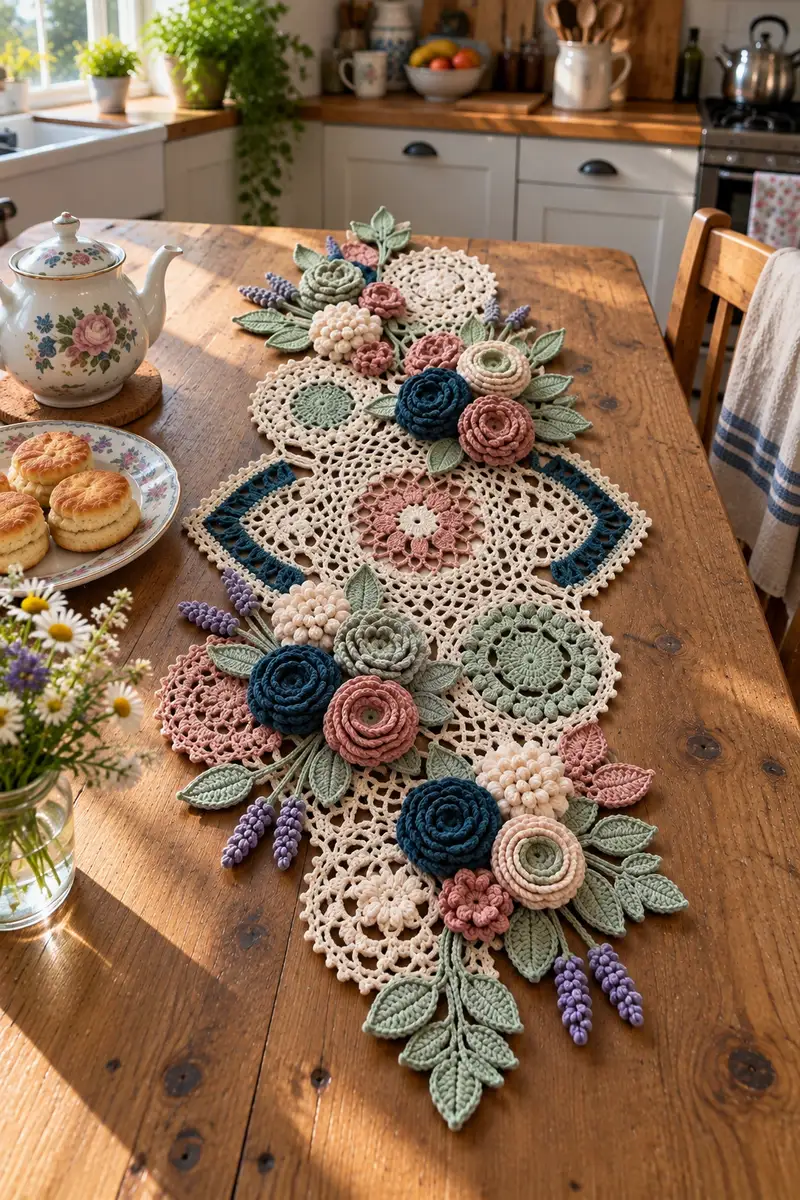
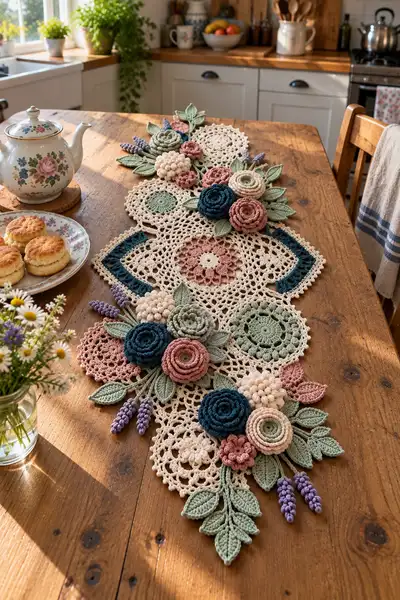
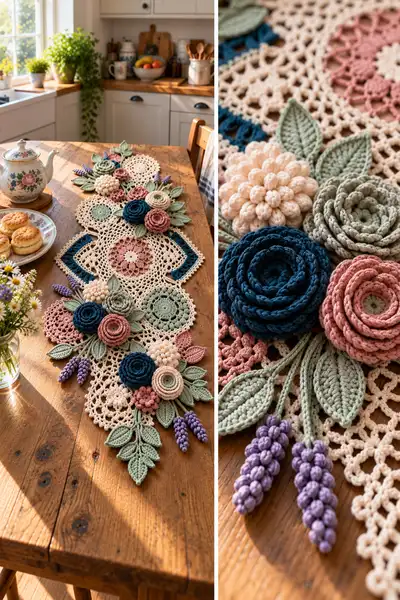
A romantic vintage-inspired crochet table runner composed of lacy doilies, textured spiral roses, bobble chrysanthemums, delicate lavender sprigs and sculpted leaves. This pattern shows how to make a layered, dimensional centerpiece in soft cream, dusty pinks, navy, sage and lavender tones. Perfect for dressing a dining table or dresser — the motifs are crocheted separately then joined into an artful runner. Detailed stitch counts and assembly notes included for accurate reproduction.
Progress Tracker
0% Complete
— Large Square Medallion (Central Ground Motif) :
Round 1 :
6 sc in magic ring (6)
Round 3 :
(1 sc, inc) x 6 (18)
Round 4 :
(2 sc, inc) x 6 (24)
Round 5 :
(3 sc, inc) x 6 (30)
Info :
This medallion is worked in the cream ground colour. Keep tension relaxed but even to allow lace to block open later
Round 6 :
(4 sc, inc) x 6 (36)
Round 7 :
(5 sc, inc) x 6 (42)
Round 8 :
(6 sc, inc) x 6 (48)
Round 9 :
Ch3 (counts as dc), *ch3, skip 1 st, dc in next st* around to create mesh points. Adjust last repeat to meet starting ch3 (48 mesh points)
Info :
Press gently flat with hands. This round begins the open lace look that will define the square corners—count chain spaces carefully
Round 10 :
Work into chain spaces: (sc, ch5, sc) in every 4th chain space to form corner points; sc in remaining spaces to maintain square shaping (48 main loops)
Round 11 :
1 sc in each sc and work (3 dc in ch5 space) at each corner cluster to open the square (48)
Round 12 :
Ch 4, *sk next 2 sts, (dc, ch2, dc) in next st; ch 2, sk 2 sts, sc in next* around creating small arches (48)
Info :
Check square symmetry: you should have four expanded corners. Block the motif flat once complete before joining to make sure the square measures consistent width with other medallions
Round 13 :
(2 sc, ch5, 2 sc) in corner arches; 1 sc between corner clusters to create a scalloped edge (48 scallop bases)
Round 14 :
Picot round: *sc, ch3, sl st in 3rd ch to make picot, sc in next 3 sts* repeat to edge for delicate finish (48 picots)
Round 15 :
Work BLO: 1 sc in each st BLO to produce a subtle ridge where floral clusters will sit (48)
Info :
If adding coloured inset squares (as seen in the photo with blue arches), change to that colour here and work 3 rounds of dc shells in the corner arches before picot edging, then switch back to cream
Round 16 :
1 sc in each st (48) - even round to stabilize
Round 17 :
Optional decorative loop round: *ch7, sl st into sc 3 sts ahead* around forming airy loops between scallops (48 loops)
Round 18 :
Reinforce edging: 1 sc in each loop and along sides to tidy counts (48)
Info :
Fasten off leaving a long tail for sewing to adjacent motifs. Block fully to square shape and pin into place while drying
— Large Round Doily (Full Circular Motif) :
Round 1 :
6 sc in magic ring (6)
Round 3 :
(1 sc, inc) x 6 (18)
Round 4 :
(2 sc, inc) x 6 (24)
Info :
Keep work flat by checking often—if it cups, tighten tension; if it ruffles, skip an increase in the next round to even out
Round 5 :
(3 sc, inc) x 6 (30)
Round 6 :
(4 sc, inc) x 6 (36)
Round 7 :
1 sc in each st (36)
Round 8 :
*ch5, sl st into next sc* around forming open chain rings; adjust last to sit evenly (36 chain loops)
Round 9 :
In each chain loop work (sc, ch3, 3 dc, ch3, sc) to create petal shells (36 shells)
Info :
These picot-like petals give the doily a floral center—count stitches carefully in each petal so all are uniform
Round 10 :
1 sc around petals to secure them and even the edge (36)
Round 11 :
Ch4, *sk 2 sts, dc in next st* around creating a lacy mesh (36)
Round 12 :
*(sc, ch3, sc) in each chain space, sc in remaining dc* around to form small lacy rings (36)
Round 13 :
(2 sc, inc) x 12 (48)
Round 14 :
1 sc in each st (48)
Round 15 :
Shell round: *(sc, ch5, sc) in every 4th st; 1 sc in others* around creating edge lace (48 scallops)
Info :
Switch to cream if using a coloured centre for contrast. Block flat and measure diameter; these large rounds are the main visible medallions
Round 16 :
Picot border: *sc, ch3, sl st in 3rd ch* around for elegant finish (48 picots)
Round 17 :
1 sc in each st (48) tidy up and reinforce the edge
Round 18 :
Optional: work one more lace row of (ch7, sc in next ch space) for added openness (48)
Info :
Fasten off with long tail for joining. Make at least three large round doilies for a runner of this scale
— Medium Circular Doily (Smaller Round Motif) :
Round 1 :
6 sc in magic ring (6)
Round 3 :
(1 sc, inc) x 6 (18)
Round 4 :
(2 sc, inc) x 6 (24)
Round 5 :
1 sc in each st (24)
Info :
This motif will be used as filler between larger medallions; make several in sage, dusty rose and pale green for tonal interest
Round 6 :
*ch4, sl st into every second st to create four chain arches around center* (24)
Round 7 :
Work (sc, ch3, 3 dc, ch3, sc) in each arch to form small petals (24 petals)
Round 8 :
1 sc around petals, then *(ch5, sc) in next stitch* around forming open lacy ring (24)
Round 9 :
*(2 sc, ch2, 2 sc) in ch5 spaces to make picot clusters; 1 sc between clusters* (24 clusters)
Round 10 :
Sc around to reinforce counts and tidy the rim (24)
Info :
Finish with a small picot or scallop for visual interest. Make at least four to six of these for balanced runner composition
— Small Circular Doily (Tiny Filler Motif) :
Round 1 :
6 sc in magic ring (6)
Round 3 :
(1 sc, inc) x 6 (18)
Round 4 :
1 sc in each st (18)
Round 5 :
*(ch3, sl st into next st) repeat to create tiny loops around rim (18)
Round 6 :
1 sc in each loop to make a neat border (18)
Info :
These small doilies are excellent under small floral clusters and for balancing negative space. Make several in cream and blush
— Lace Connector Mesh (Foundation for Joining Motifs) :
Round 1 :
With cream yarn, ch 120 (or long chain to desired runner length). Join ends to form a circular chain ring with sl st, being careful not to twist.
Round 2 :
Ch3, dc into each chain around to create a solid base (120 dc)
Round 3 :
*ch5, skip 2 dc, sc in next dc* repeat around forming airy arches (40 arches)
Round 4 :
In each arch work (sc, ch7, sc) to enlarge open lace (40)
Info :
This long mesh is worked as a flexible strip. If you prefer, work multiple shorter strips and join after motifs are sewn on. Keep counts to allow symmetrically spaced medallions.
Round 5 :
1 sc in each st and each ch7 space to stabilize the mesh (120)
Round 6 :
Decorative shell round: *(ch3, 3 dc, ch3, sl st) into every other arch to produce scallops along both edges* (60 scallops)
Round 7 :
1 sc along entire top and bottom edges to even counts and create a consistent join line (120)
Round 8 :
Optional motif joining points: mark positions every 30 sts (4 per long strip) where doilies will be attached
Round 9 :
Repeat mesh pattern across the full required length, keep edges consistent and block flat after finishing
Info :
If making runner in sections, ensure that the last round of each strip creates matching arch spacing for seamless join
— Rolled Spiral Rose (Make multiple in varying sizes) :
Round 1 :
With dusty rose (or chosen flower colour) ch 80 (adjust length for larger/smaller roses). Do not join; work a long strip.
Round 2 :
Row 1 on strip: ch1, sc in 2nd ch from hook and in each ch across; turn (79 sc)
Round 3 :
Work 3 rows of sc across to create a firm band (79 sc each)
Info :
For tighter coils use a 3.0mm hook; for looser, use same as main. Keep strip flat — if it scrunches, add one extra sc row
Round 4 :
Edging: *ch2, sl st in next sc* across the long edge to create an even selvedge for rolling
Round 5 :
Attach at one short end and begin rolling the strip clockwise to form rose. Secure by sewing through the base every 6-8 wraps using the tail and yarn needle
Round 6 :
When rose reaches desired fullness, stitch through the entire spiral base several times to lock shape; weave in ends into centre
Info :
Vary strip length to create roses of different diameters. Use fewer sc rows for extremely delicate petals or thicker strip for more pronounced layers
Round 7 :
Optional: Add 1-row ruffle around outer edge by working *(sc, ch3, sc) across outermost edge then gather slightly with running stitch before final securing
Round 8 :
Fasten off and leave long tail for sewing to doily. Make 6–8 roses in mixed sizes and colours to cluster along runner
— Coiled Rope Rose (Tighter Spiral Rolls) :
Round 1 :
With navy (or chosen deep colour) ch 40. Work sc in 2nd ch from hook across (39 sc)
Round 2 :
Work 2 rows of sc back and forth to give body (39 sc each)
Round 3 :
Edge round: sc across, finish with long tail. Start rolling tightly from one end, sewing along the base every 4-6 wraps
Info :
These made in navy will give deep dimensional roses as seen. Use strip width to control the thickness of each petal layer
Round 4 :
Sew base thoroughly and weave tail into back of flower; block lightly by shaping with fingers
— Layered Rosette (Round Coil with Raised Centre) :
Round 1 :
Start with 12 sc in magic ring for a tiny dense centre (12)
Round 2 :
1 sc in each st (12)
Round 3 :
ch2, *fpdc in next st, bpdc in next st* around for ribbed texture (12)
Round 4 :
Work (sc, inc) x6 to expand to 18 and then continue coiling by spiralling outward: ch2 at each coil join and continue to wrap centre with sc rails until desired diameter reached (varies by coil)
Info :
Coil tightly and sew through coil base; these form the smallest textured rosettes seen among clusters
— Chrysanthemum Bobble Flower (Make several) :
Round 1 :
10 sc in magic ring (10)
Round 2 :
Inc in each st around (20)
Round 3 :
*ch2, 5 dc cluster in same st (bobble), sl st in next st* repeat to end creating 10 bobbles (10 bobbles)
Round 4 :
Work one round sc between bobbles to bring them tighter to centre and make a compact pom shape (20 sc)
Info :
Keep bobbles dense and uniform. Use the yarn tail to cinch the base before securing with multiple stitches to lock shape
Round 5 :
Sew through bobble centres to flatten slightly if needed and fasten off leaving long tail for sewing to runner
— Single Stem Lavender Sprig (Make several) :
Round 1 :
With lavender colour ch 18 (or longer for longer sprig). Work sc back along chain to form a thin cord (17 sc)
Round 2 :
Along the front loops, make tiny bobbles: *sc in next 2 sts, ch2, 5 dc cluster in next st, sl st* repeat 3–4 times to create the clustered buds (counts vary)
Round 3 :
Fold cord back and sew edge to secure shape; leave long tail for sewing to background
Info :
For sturdier stems insert thin florist wire along cord before sewing base. Fold ends of wire to avoid sharp tips
Round 4 :
Make 6–8 sprigs overall to cluster with leaves and larger flowers
— Sculpted Leaf (Make many) :
Round 1 :
Ch 12, sc in 2nd ch from hook and next 4 ch (5 sc), 3 sc in last ch to turn around, sc down opposite side of chain 4 sc, (3 sc, sc) in last ch of base to form pointed end (14 sc)
Round 2 :
1 sc in each st around (14)
Round 3 :
Ribbing: *ch2, bpdc across next st, fpdc across next st* repeat across middle length to create raised vein texture; sc to finish edge (14)
Round 4 :
Repeat ribbing round another 1–2 times for sculpted look; fasten off leaving tail for sewing (14)
Info :
Block leaves lightly over a curved surface for natural bow. Make different sizes by varying starting chain length
— Compound Leaf Spray (Long cluster of leaves) :
Round 1 :
Create central chain of ch 30 for the stem. At intervals of ch 4, join small leaves using sl st to stem then crochet a small leaf directly or sew pre-made leaves on later to form a trailing spray (stem ch 30)
Round 2 :
After attaching all leaf pairs, work 1 sc along stem to tidy, fasten off and leave long tail for securing into assembly (30)
Info :
Make 3–4 sprays to anchor clusters and create the tapered ends of the runner as seen in the photo
— Small Cluster Flowers (3D Five-Petal Blossoms) :
Round 1 :
Make 5 sc in magic ring (5)
Round 2 :
*ch3, sl st into ring* rep 5 times to form small petals. Fasten off leaving tail (5 petals)
Info :
These tiny flowers are perfect for filling gaps. Use contrasting centres or beads if desired
— Assembly Preparation and Layout :
Info :
Before sewing anything: block all flat motifs (doilies and leaves) on a pin surface. Arrange runner base mesh on table and lay out medallions and clusters without attaching. Take reference photos of your layout so you can reproduce symmetric placement if interrupted
Info :
Decide on cluster groupings: typically group one large rose, one navy rolled rose, one bobble chrysanthemum, a small rosette and 3–5 leaves plus 1–2 lavender sprigs per cluster. Plan clusters to sit over medallion intersections
Info :
Thread a yarn needle with a strong doubled strand of cream yarn for sewing motifs to the mesh. Use hidden whip stitch and work through several loops of both piece and mesh for security
Round 1 :
To sew round doilies: place doily on marked position and from the underside, whip stitch through picot/loop round to the mesh every 6–8 sts (secure with 8–10 stitches per motif)
Round 2 :
Attach square medallions in similar manner along the central axis of mesh so their corners align with marked arch points. Use longer stitches at corners to prevent pulling
Info :
Sew leaves and roses last to the assembled medallions. For dimensional flowers, sew through the base in a spiral pattern to anchor securely to the ground fabric
Round 3 :
When sewing rosettes and roses, use the long tail to take multiple small stitches into the mesh, and back through the flower base, repeat 8–12 times around for a secure hold
Info :
For lavender sprigs insert ends into back of mesh and sew through several stitches, tuck any wire ends safely before finalizing
Round 4 :
Secure all ends by weaving tails into the reverse of assembled runner; trim close. Consider a thin running stitch around some cluster bases to pull them slightly into mesh for a more integrated look
Info :
Once assembly is complete, press lightly with a steam iron held above the surface (do not touch if using cotton yarn that may flatten 3D flowers). Ensure all pinned areas are unpinned and hardened pieces are free to sit naturally
— Finishing Touches and Edging :
Round 1 :
Edge the entire runner by working 1 round sc around the exposed mesh edges, catching the picot points gently to create a consistent border (count depends on runner length)
Round 2 :
Work final decorative picot round: *sc, ch3, sl st in 3rd ch* around to match medallion edges
Info :
Gently block the whole assembled runner flat. Pin down flowers and leaves to keep shape as adhesives may be used if any pieces still shift after sewing
Round 3 :
Trim any surplus threads. Optionally, add a few small slip-stitched backings under heavy flower bases to protect table finish
Info :
Enjoy the tactile result — the runner is decorative not meant for heavy wear or machine washing. Spot-clean or hand wash gently if needed
This vintage floral table runner brings together delicate lace doilies and richly textured 3D flowers to create a stunning, handcrafted centerpiece. Each motif is an opportunity to practice precision and creativity — from coiled roses to bobble chrysanthemums and sculpted leaves. The modular construction allows you to change clusters and colours for new looks year after year. I hope you enjoy every stitch of this slow, satisfying project — it makes a beautiful gift or keepsake for a cozy home. 🧶🌸