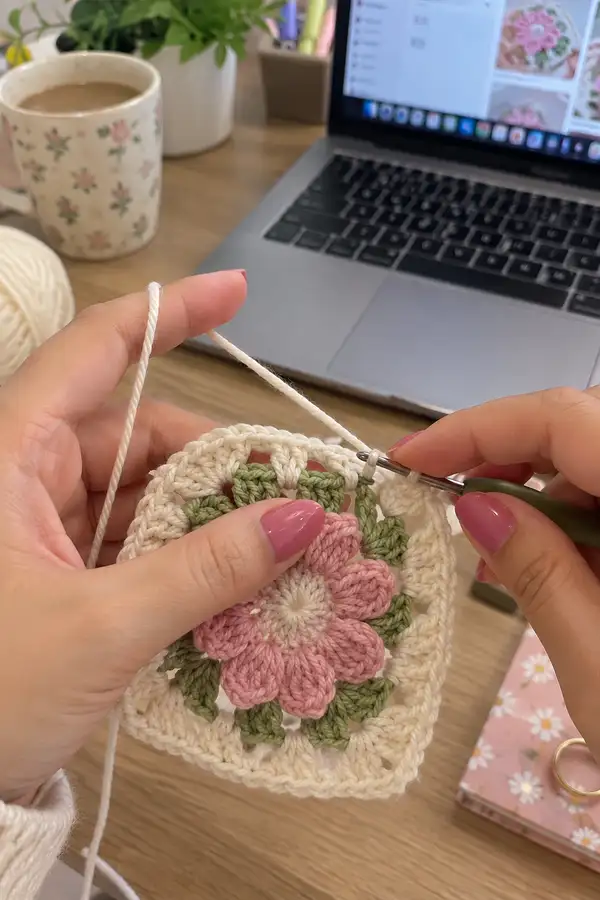
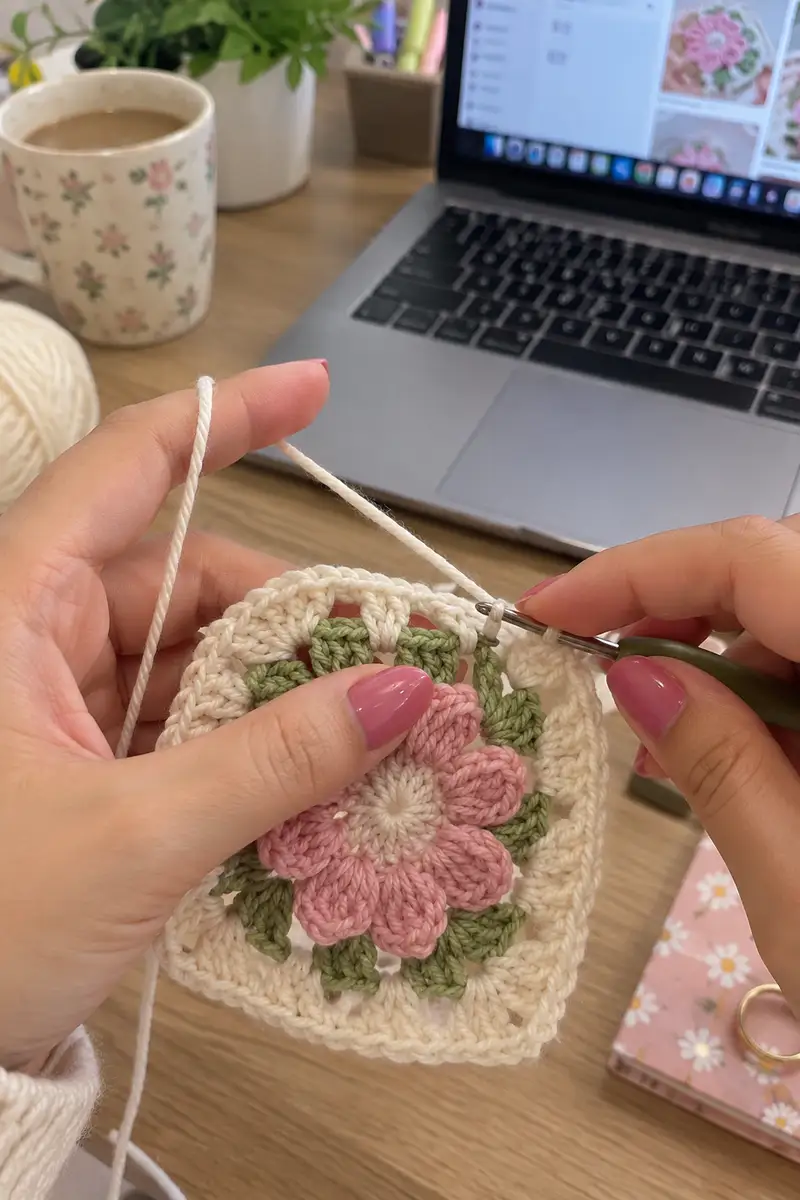
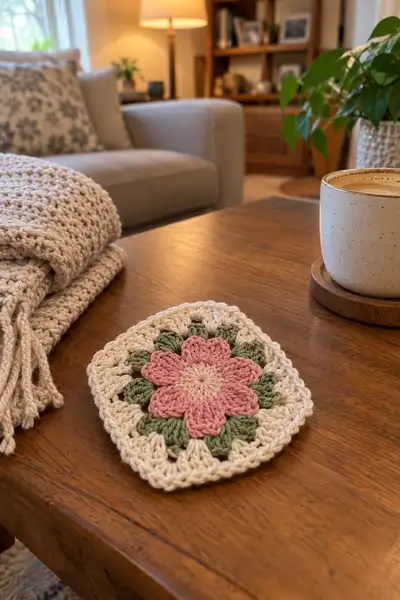
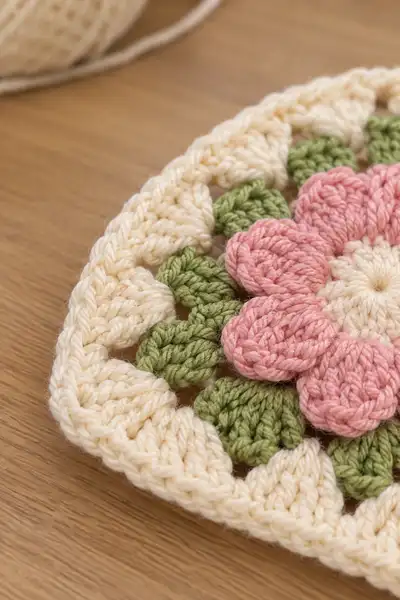
A delicate floral granny square with layered petals and leafy clusters, worked in soft cream, dusty pink and sage green. The motif builds from a tightly worked center through textured petals, an elegant square round and a scalloped outer border — perfect for a cozy blanket, cushion or decorative throw. This pattern gives clear round-by-round instructions, stitch counts, color-change tips and joining methods to create a cohesive floral afghan.
Progress Tracker
0% Complete
— Center Flower :
Round 1 :
With dustypink, work 6 sc in magic ring. Pull tight and join with sl st to first sc. (6)
Round 2 :
Ch1, 2 sc in each st around (inc each st). (12)
Round 3 :
Ch1, (1 sc, 1 inc) x 6. (18)
Info :
Keep your first rounds snug to form a firm center. Use a small hook (3.5mm) if you prefer a tighter center before switching to the 4.0mm hook for the rest.
Round 4 :
Ch2 (counts as first hdc), hdc in same st, (2 hdc in next st) x 11, join with sl st to top of ch2. (36 hdc including ch2)
Round 5 :
Change to softwhite if desired for a small pale center: sl st to next st, ch1, 1 sc in each st around. (36)
Info :
Switch back to dustypink for petal shaping. Place a stitch marker on the first stitch of the next round to track petals. The flower will be formed from cluster stitches worked into grouped spaces.
Round 7 :
Ch1, *(work puff/petals: yo, insert hook in next st, yo pull up loop, repeat 4 times in same st to create 9 loops on hook total, yo and pull through all loops, ch1 to close puff), skip next st, sc in next st*; rep from * to * around. You will have 12 puffs and 12 sc separating them. Join with sl st to first sc. (12 puffs + 12 sc)
Info :
For the puff/petal: keep loops even and consistent height. Ch1 after pulling through all loops secures the puff and creates a small petal tip. Put the hook through the base to sl st into the sc that separates pulses to keep positioning.
Round 8 :
Ch1, sc in same st, *(ch2, sc at base of next puff), sc in next sc*; rep around to create small arches between petals. Join with sl st. This gives each petal a tiny gap to emphasize shape. (12 sc + 12 ch2 spaces)
Info :
Check the petal placement visually. If a petal looks too squashed, pull a little yarn at the base to even it before moving on. Visual symmetry here gives the motif a neat center.
— Petal Layer (definition & height) :
Round 9 :
Change to dustypink (if you used softwhite earlier). Ch3 (counts as dc), work (3 dc) into base of each puff stitch across the front loop at the base of each puff to create fuller rounded petals: *(3 dc in base of puff), sl st in next sc*; rep around. Join with sl st to top of ch3. You will have 12 petal groups. (36 dc)
Info :
Work these dc clusters into the base of the puff formed in Round 7 to fold the petal upwards slightly. Use your thumb to shape petals as you come to the end of each cluster so they sit nicely.
Round 10 :
Ch1, sc in each dc and sc around (36). Join with sl st. This evens the round and prepares for leaf placement.
Round 11 :
Ch1, *(sc in next 2 sts, ch3, skip 1 st) repeat around to mark 12 small ch3 spaces between petals for the leaves. Join with sl st. (24 sc + 12 ch3)
Info :
The ch3 spaces will receive the sage green leaf clusters next — count them and make sure you have the same number as petals (12).
— Leaf Clusters (Make 12) :
Round 12 :
Change to sagegreen. Work into each ch3 space as follows: sl st into ch3 sp, ch1, *(hdc, dc, hdc) all in same ch3 sp) to create a little leaf cluster, sl st into next sc to anchor*; rep around. You will make 12 leaf clusters. Join with sl st. (12 leaves)
Info :
Work the leaf cluster pointed outwards so the leaves tuck between petals. Keep the base tight; the 3-stitch leaf gives a neat triangular leaf shape that contrasts petal roundness.
Round 13 :
Ch1, sc in each st around including leaf cluster stitches to create a small band that unifies the flower and leaves. Join with sl st. (count will vary depending on leaf cluster size, typical total 48-52 sc)
Info :
Here you can adjust: if your motif is tighter or looser, you may have 48 sc (if smaller) or up to ~52. We will square out in the next rounds, so aim to have an even total divisible by 4 for corner shaping.
— Round Transition & Evening (pre-square) :
Round 14 :
Ch2 (counts as hdc), hdc in each sc around to build height and slightly flatten the centerpiece. Join with sl st. (48-52 hdc)
Info :
Work even to create a consistent band. If your count is 52 hdc, proceed with that number; we will use increases at corners spaced evenly to square the motif.
Round 15 :
Ch1, *(sc in next (N) sts, where N = round total / 4 - 1 to place corner), (sc, ch2, sc) in next st to form corner; repeat from * 3 more times across. Example: with 52 sts work sc in next 12 sts, corner in next st, sc in next 12 sts, corner, etc. After final corner join with sl st. This yields 4 corners and establishes quarter points.
Info :
Math: with 52 sts around, dividing by 4 gives 13 sts per quadrant; allocate 12 sc then a corner in the 13th. If you have 48 sts use 11 sc then corner. Adjust so corners are evenly spaced between petals and leaves.
— Squaring Rounds (build a square) :
Round 16 :
Change to cream. Ch3 (counts as dc), dc in each st to the corner, work (2 dc, ch2, 2 dc) in each corner sp, continue dc around, join with sl st. Count will vary; this round creates a larger band and the first real square shape. (approx 64-72 dc)
Info :
For a neat square, ensure corner clusters are worked into the ch2 corners established. Corner clusters expand the motif outwards evenly.
Round 17 :
Ch1, sc in each st across including corner clusters (approx 64-72 sc). Join with sl st.
Round 18 :
Ch3 (counts as dc), dc in next 2 sts, *(dc in next dc, dc in next dc) continue to corner, (2 dc, ch2, 2 dc) in corner; rep around. This is an even dc round expanding in proportion. Join with sl st.
Info :
At this stage the square will measure roughly 6-7cm across depending on yarn and hook. Keep tension even to ensure sides are approximately equal in length.
Round 19 :
Ch1, sc in each st around. Join with sl st. (same count as previous)
Round 20 :
Ch2, hdc in next st, *(dc clusters and ch1 spaces: work 2 dc, ch1, 2 dc across each side evenly) in side sections to create a decorative panel, (2 dc, ch2, 2 dc) in each corner. Join with sl st. This gives an airy granny-like look while keeping a solid border for joining squares later.
Info :
To keep symmetry, mark the midpoints of each side with a stitch marker during this round; these marks help you position additional rounds and final edging uniformly.
— Side Rows to Add Size :
Round 21 :
Ch1, sc in each st around including dc clusters and ch spaces (this evens the row and prepares a base for the shell border). Join with sl st. (count will vary, approximate 96 sts if motif expanded)
Round 22 :
Ch3, dc in next 2 sts, *(skip first dc of each pair and work (2 dc, ch1, 2 dc) in the ch1 spaces along the side), work corner cluster (2 dc, ch2, 2 dc) at corners; join. This keeps the granny-squared aesthetic and builds additional girth. (approx 112 dc total)
Info :
Count after this round — many crocheters prefer even multiples of 4 for easy joining. If your count is off, add or remove a dc in a quiet spot between corners to bring total to the nearest multiple of 4.
Round 23 :
Ch1, sc in each st around. Join with sl st. (evening round)
Round 24 :
Ch1, *(skip 1 sc, shell in next sc (5 dc shell), skip 1 sc, sc in next sc) across side sections; at each corner work sc, ch2, sc to keep corner opening small. Join. This results in a decorative shell band across each side. (approx 96 shells depending on gauge)
Info :
Shell stitches add texture and visual interest. If your shells feel too full, reduce to 3-dc shells in subsequent rounds for a calmer border.
— Outer Scalloped Border :
Round 25 :
Ch1, sc in each st around to set a neat edge, join. (count stays same)
Round 26 :
Ch2 (counts as hdc), *(work 5-dc shell into next shell space), sc into the flat sc between shells to anchor; rep around. Join to top of ch2. This creates the prominent scalloped frame you see in the photos. (shell count corresponds to side shell count)
Info :
Work shells into the shell spaces only; avoid working across corners in a way that pulls the motif out of square. If your shell round causes slight scalloping of corners, add a small sc cluster at each corner next round to flatten.
Round 27 :
Ch1, sc in each st across to tidy. Join and fasten off. Weave in ends. This completes one floral granny square motif. Approximate finished block size: 10–12cm (4–4.75in) depending on yarn and hook.
Info :
Block your motif flat: wet-block or steam lightly, pin to a square template to ensure sides are straight before joining multiple motifs.
— Making a Blanket: Repeat & Layout :
Repeat :
Make X motifs (e.g., 9, 12, 25 or any desired number). For a 3x3 throw use 9 motifs; for a lapghan use 12 or more depending on desired final size. Arrange motifs in a pleasing color layout with the flower centers oriented consistently for a floral field effect.
Info :
We recommend making a sample square and blocking it, then measuring how many motifs you need to reach your target blanket size. Keep consistent tension and blocking method for all squares to ensure even joining.
— Joining Motifs (Join-As-You-Go method) :
Round 28 :
Work motifs until the final sc round before outer scalloped round. For the first row of motifs join subsequent motifs along the long side as follows: place two motifs with right sides facing up, align edges. With cream and 4.0mm hook, join at corner: sl st to first corner sc, ch1, sc in same st; sc evenly along side; when meeting the adjacent motif, insert hook through corresponding st on both motifs and sc through both loops to join. Continue to end and work corner join (sc, ch2, sc). Repeat to join all motifs in a row.
Info :
Count stitches on both squares before join: if there's a small stitch count mismatch, distribute extra stitches evenly across the side to avoid puckering at a single point. Use stitch markers at corner points to keep placement correct.
Round 29 :
After assembling rows, join rows vertically using the same method across the exposed edges. Work from left to right to keep joins tidy. Join every corresponding stitch across both motifs to create continuous seams. Fasten off and weave ends as you go to avoid a tangle of tails later.
Info :
When joining, keep tension slightly looser than your single-motif tension to prevent the joined seam from pulling the motifs inwards. If seams look loose, block the joined blanket after completion to even things out.
— Seaming Variation: Slip-Stitch Join (Visible Join) :
Round 30 :
With a contrasting color or same cream, use sl st through both loops of corresponding stitches for a decorative ridge. Work sl st across and around corners using (sl st, ch2, sl st) to form a small corner bar. This creates a raised seam and is great if you want the joining to read as a design element.
Info :
Visible joins add a handcrafted aesthetic and save time. Practice on two sample squares to find a tension you like before doing all joins.
— Wide Border & Final Rounds (to make blanket edges neat) :
Round 31 :
After all motifs are joined, pick up cream yarn at any corner. Ch1, sc in each stitch around entire blanket including seam ridges. Work (sc, ch2, sc) at each blanket corner to provide flexibility and shape. Join and fasten off. (This evens the perimeter)
Round 32 :
Ch3, dc in each st around to create a stronger outer band. At corners work (2 dc, ch2, 2 dc). Join and sl st to finish. This gives structure for the wide decorative rows that follow. Count will be a multiple of 4 dependent on blanket dimensions.
Info :
Measure blanket after this round to decide how many decorative shell rounds to add for desired width. Add more rounds for larger afghans.
Round 33 :
Ch1, sc in each st around. Join. This neatens the outer edge and prepares for a wide scalloped frame.
Round 34 :
Ch1, *(skip 2 sc, 5 dc shell in next sc, sc in next sc); repeat across sides, working (sc, ch2, sc) at corners. Join and fasten off. Weave in ends. This match the single-motif scallop but on the full blanket for a consistent finish.
Info :
Optional: Add a final round of reverse single crochet (crab stitch) in cream to create a firm, rope-like finish around the perimeter and reduce curling.
— Troubleshooting & Tips (placement, tension, color carries) :
Info :
When carrying colors, carry along the wrong side and catch with each round's first stitch to avoid long floats. For long color runs between adjacent petals, weave in the leftover tail neatly at the end of that round rather than carrying across many rounds. To reduce bulk at corner joins when many yarn ends meet, use a tapestry needle to bring tails towards the inside and knot them under a stitch rather than tying bulky knots on the surface.
Info :
Blocking: Wet-block every motif pinning to a square of the same measurements. Allow to fully dry for crisp corners. If you skip blocking you risk uneven motif sizes and wonky joins.
Info :
Gauge: 18 dc x 10 rows = 10cm measured in dc band using stated hook and yarn. Adjust hook up or down to match. Changing gauge will alter final motif size and yardage needs.
Info :
Cleaning: Use machine-washable worsted cotton/yarn for blankets intended for regular use; hand wash delicate yarns. Avoid heavy agitation on puff/petal areas to preserve texture.
Completing this vintage floral granny square is such a satisfying experience — the petals pop, the leaves tuck in neatly and the scalloped border frames everything like a little picture. Whether you stitch a single coaster, a cushion cover or a full blanket, each motif feels like a small work of art. Pick your favorite color pairings, block carefully and enjoy watching a field of flowers grow stitch by stitch. 🧶🌸💛