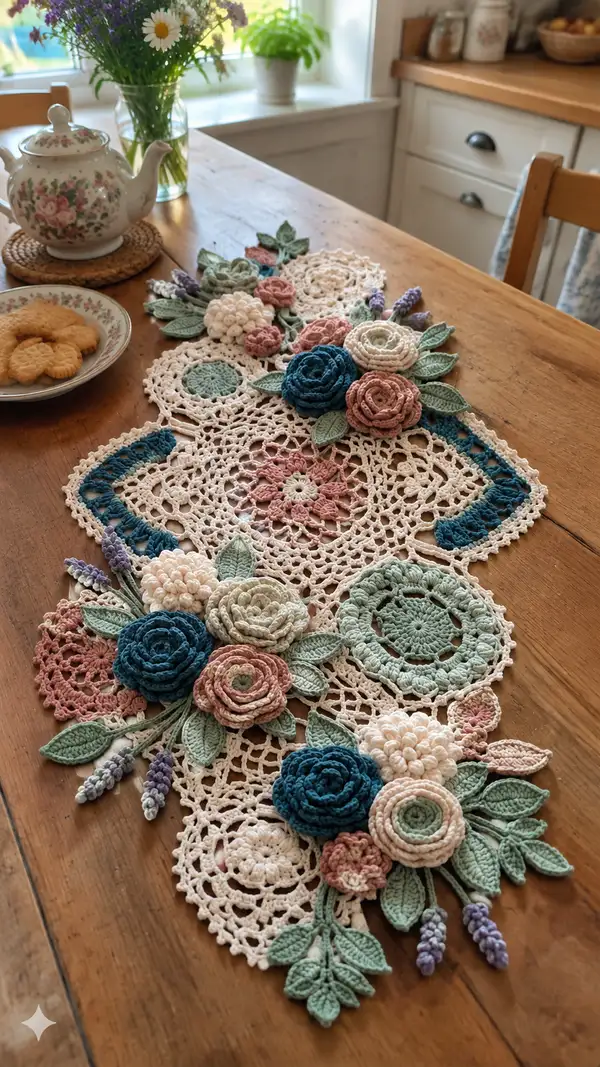
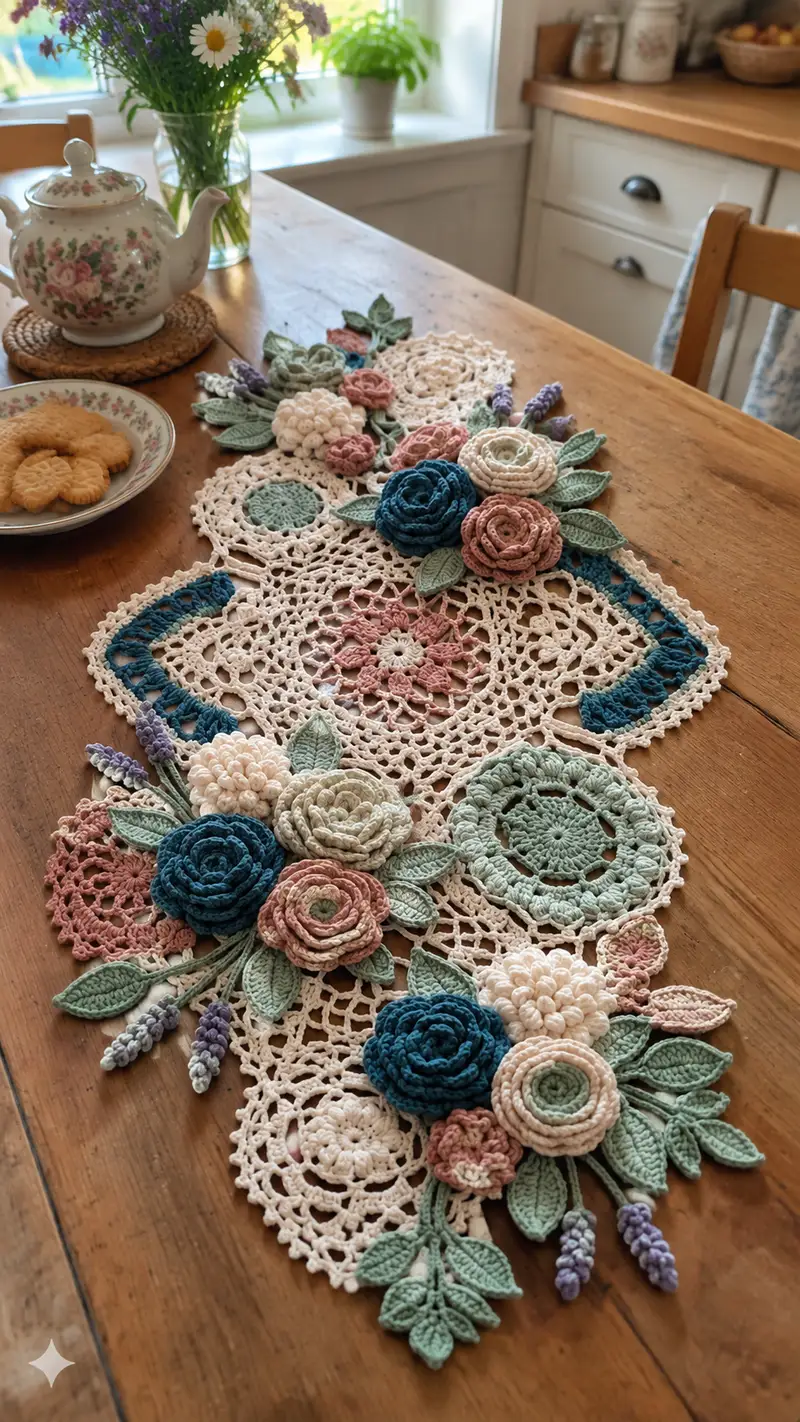
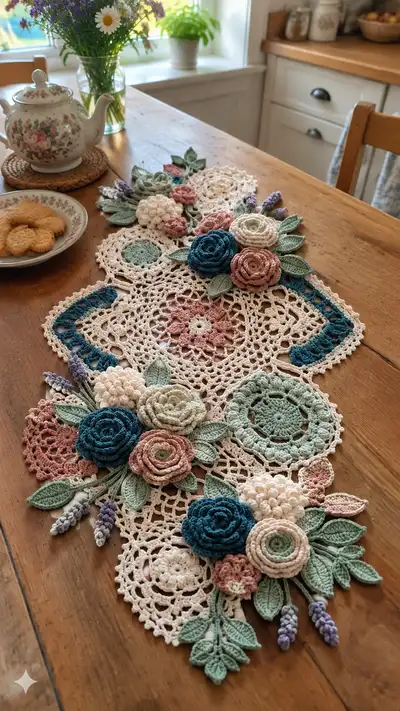
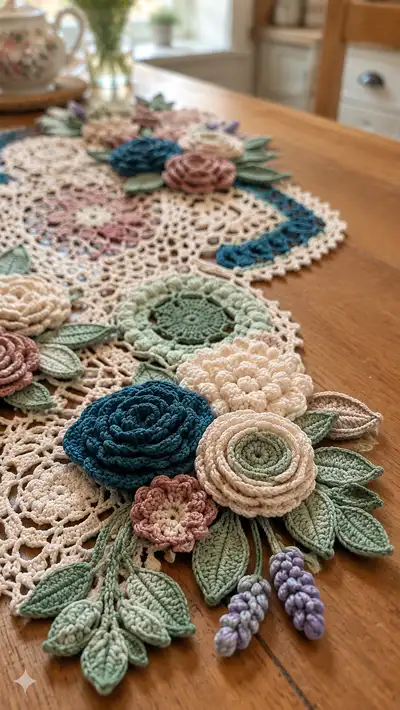
Create a vintage-inspired lace table runner crowned with layered 3D roses, chrysanthemums, lavender sprigs and delicate leaves. This pattern uses cotton thread in soft pastels and teal accents to build ornate circular motifs joined by airy mesh panels. Ideal for adding a romantic, handcrafted centerpiece to your table, the design combines flat crochet doilies with sculptural flowers and leaves for a lush, dimensional finish.
Progress Tracker
0% Complete
— Large Doily Motif (Make 3) :
Round 1 :
6 sc in magic ring (6)
Round 3 :
(1 sc, 1 inc) x 6 (18)
Round 4 :
(2 sc, 1 inc) x 6 (24)
Round 5 :
(3 sc, 1 inc) x 6 (30)
Round 6 :
(4 sc, 1 inc) x 6 (36)
Info :
Start in cream/off-white. Keep tension even; this round establishes base size. Use a stitch marker to mark round start
Round 7 :
1 sc in each st (36)
Round 8 :
*ch3, skip 2 sts, sc in next st* around (12 ch3 sp)
Round 9 :
Into each ch3 sp: sc, ch3, sc (36 sc, 12 ch3 sps)
Round 10 :
*sc in next sc, (dc, ch2, dc) in next ch3 sp, sc in next sc* repeat around (36 sc and 12 shell clusters)
Round 11 :
*ch5, sl st into middle dc of shell, ch5, sl st into next sc* around forming large picot loops; join (12 large loops)
Info :
These large loops create airy lace. Adjust chain counts if you prefer more or less openness; blocking will open the loops uniformly
Round 12 :
Work around each large loop: (sc, hdc, 5 dc, hdc, sc) in each loop (12 petal clusters)
Round 13 :
1 sc in each st around base row (count will be 12*(1+1+5+1+1)=108 stitches approximately depending on joins; work evenly for symmetry)
Round 14 :
*ch4, sk 4, sc in next* around to create secondary mesh (approx 27 ch4 loops)
Info :
Check that motif lies flat. If it curls, slightly enlarge chain loops or block more aggressively. This is the central large doily that will sit as the focal base for floral clusters
Round 15 :
Into each ch4 loop: sc, ch3, (2 dc, ch2, 2 dc), ch3, sc (decorative spokes) - produce 27 decorative spokes
Round 16 :
1 sc around to set motifs; if counts differ, normalize by adding extra sc evenly (approx 108-120 sc)
Round 17 :
*ch6, sl st into next sc to form scalloped arches* around (approx 18-20 arches)
Round 18 :
Work into each arch: (sc, hdc, 7 dc, hdc, sc) making bold scallops (counts will vary by arch size)
Round 19 :
Sl st to join, then sc evenly around scallops to create a defined outer ring (approx 120-140 sc)
Round 20 :
*ch5, sl st into base between scallops* repeat to create decorative picot edging
Info :
Fasten off leaving a long tail for sewing to the connector panel. Block each large doily to approx 18-20cm diameter, using pins and spray starch if desired
— Medium Round Motif (Make 4) :
Round 1 :
6 sc in magic ring (6)
Round 3 :
(1 sc, 1 inc) x 6 (18)
Round 4 :
(2 sc, 1 inc) x 6 (24)
Round 5 :
1 sc in each st (24)
Round 6 :
*ch3, sk 2, sc in next* around (8 ch3 sps)
Round 7 :
In each ch3 sp: sc, (dc, ch2, dc), sc (8 small shells)
Info :
Use contrasting color (sage or mint) for variation if you like. These medium motifs will tuck under larger roses
Round 8 :
1 sc around to secure (approx 32-36 sc)
Round 9 :
*ch4, sl st into next sc* repeat to make small arches (approx 16 arches)
Round 10 :
Work (sc, 3 dc, sc) in each arch to form textured daisy-like edges
Round 11 :
1 sc evenly around to tidy the edge (approx 64 sts depending on prior counts)
Round 12 :
Fasten off leaving tail for sewing. Block to approx 8-10cm diameter
— Small Round Motif / Rosette Base (Make 8) :
Round 1 :
6 sc in magic ring (6)
Round 3 :
*ch2, 1 dc in next* around into the previous round creating a ring of dc (12 dc)
Round 4 :
*ch3, sl st into next dc* around (12 tiny loops)
Round 5 :
Work 3dc clusters into each loop (12 clusters) to make a raised frill
Round 6 :
1 sc around to consolidate base (approx 36 sc)
Round 7 :
Fasten off with long tail for rolling into rosettes; do not block—these are rolled centers
Info :
These small round bases act as centers for rolled roses or as small filler motifs; the long tail will be used to stitch the spiral when forming the rosette
— Connector Mesh Panel (Make 2 large panels) :
Round 1 :
Join cream yarn to a central starter loop on the underside of a large doily and work 1 sc evenly around to pick up loops (count will vary)
Round 2 :
Ch6, sk 3, sc into next working point to form wide mesh arches; continue forming a grid of ch6 loops across the span you need (dimension approx 30-35cm long per panel)
Round 3 :
Into each ch6 loop: sc, ch4, sc to make middle mesh loops - this creates a sturdy openwork lace that will sit flat under flowers
Round 4 :
Work 1 row of sc across row tops to stabilize the mesh, placing extra sc at corners to avoid puckering
Info :
Panels are worked rectangular/oval as needed to connect motifs; measure against your table runner layout and make extra rows if you want more length
Round 5 :
*ch3, sk 1, sc in next 3 sts, ch3, sc in next* repeat to create decor chain-bridges along panel edges
Round 6 :
Work small picot edging: *sc, ch3, sl st in 3rd ch* around outer edges for a refined finish
Round 7 :
Fasten off leaving long tails for sewing to doilies. Block panels flat to match motif sizes before assembly
— Large Spiral Rose (Make 3) :
Round 1 :
With teal or dusty rose, ch40, sl st to join into a ring (or ch to form foundation for spiral)
Round 2 :
Round of work: sc in each chain around (40 sc) - this makes a flat strip that will be worked into a spiral
Round 3 :
Row 2: (sc, hdc, 2 dc, 3 dc, 2 dc, hdc, sc) across to form graduated petal heights; repeat pattern along entire strip
Round 4 :
Turn strip and work a second row of slightly higher petals offset to create dimension: (sc, hdc, 3 dc, 4 dc, 3 dc, hdc, sc) along the row
Info :
Keep petals slightly staggered so when you roll the strip into a spiral the petals overlay naturally; tug the strip gently while stitching to calibrate petal fold
Round 5 :
Fasten off leaving long tail. To form rose, start at one end and roll strip inward; stitch base with whip stitch through the lower loops every 6-8mm to secure spiral. Use long tail to tack inner coils tightly and anchor each petal layer
Round 6 :
When rolled, secure around base using 8-12 small whip stitches. Hide tails by weaving through middle and trimming
Info :
For larger roses, increase initial chain (e.g., ch50) and add extra petal rows before rolling. Do not overstuff; these are flat sculptural roses
— Rolled Rosette (Small Rolled Rose) (Make 6) :
Round 1 :
Use small round motif base (from earlier). With dusty rose, join to edge and ch1
Round 2 :
Work around base edge: *(sc, ch2) x 3, 3 dc in same st* repeat to create 12 small petals
Round 3 :
Next row: *(sc, ch3, sc) in each petal base* to form loops for rolling
Round 4 :
Fasten off leaving long tail. Roll the decorated base and stitch through as with spiral roses to form a neat rosette (use long tail to attach to motif later)
Info :
These are compact and sit neatly as accents around larger roses and chrysanthemums; make a variety of colors for depth
— Chrysanthemum / Bobble Flower (Make 3) :
Round 1 :
6 sc in magic ring (6)
Round 3 :
1 sc in each st (12)
Round 4 :
*ch2, 7 dc bobble into next st, ch2, sl st into next st* repeat around to create bobble clusters (12 bobbles)
Round 5 :
Sl st around to tidy. If necessary, work a round of sc between bobbles to anchor them (approx 36 sc)
Info :
Make bobbles fairly tight—use the same hook as base or slightly smaller. These bobble flowers are three-dimensional and may be lightly stuffed at center with a pea of fiberfill before stitching closed if you prefer a plumper look
Round 6 :
Fasten off with long tail for sewing to base
— Leaf (Large) (Make 12) :
Round 1 :
Ch10, sc in 2nd ch from hook and in next 7 sts, 5 sc in last ch (turn to work along opposite side of foundation), sc in next 7, sl st to first sc to close (approx 26 sts total)
Round 2 :
Work along outer edge: *(sc, hdc, 2 dc, 2 dc, hdc, sc) across tip to form point, then continue along opposite side with sc to base* (leaf shape emerging)
Round 3 :
Into the central spine: ch1, sc along center with tiny picots for vein: *ch2, sl st in next st* to create visual vein; return and sc evenly to tidy edge
Info :
For crisp shape, work BLO on Round 2 to create slightly curved leaf. Block leaves lightly giving them a gentle curve to sit under flowers
Round 4 :
Fasten off leaving long tail for sewing. Make some leaves in sage and some in a paler mint for depth
— Leaf (Small) (Make 18) :
Round 1 :
Ch6, sc in 2nd ch from hook and next 3, 4 sc in last ch, continue back 3 sc, sl st into first sc (approx 14 sts)
Round 2 :
Fast round: sc around (14 sc) then add single ridge row in BLO: 1 sc BLO in each st to give definition (14)
Info :
These small leaves are excellent for filling gaps; keep them flat and lightly block to unify look
Round 3 :
Fasten off leaving a long tail for sewing
— Lavender Spike (Make 8) :
Round 1 :
Make a chain of 18 (ch18), sc in 2nd ch from hook through entire chain to form thin stem (17 sc)
Round 2 :
Attach pale lavender at top third of stem, work tiny bobbles along the last 8 sc: *(ch1, 5 dc bobble in same st, sl st into next)* repeat across 8 sts (8 tiny bobbles)
Round 3 :
Turn stem to underside and sl st into base to secure. Fasten off with long tail for sewing
Info :
Make lavender with a slightly thicker hook if you want the bobbles to stand out. Trim stem length to fit into your floral grouping
— Edging Scallop for Panels :
Round 1 :
Join cream yarn around panel edge, sc evenly around (count varies by panel length)
Round 2 :
*ch5, skip 3, sc in next* repeat around to establish arches
Round 3 :
Into each arch: sc, hdc, 7 dc, hdc, sc to form scallops (counts approximate per scallop)
Round 4 :
Work a tidy sc round to finish and hide joins. Fasten off and block
Info :
If you prefer a more delicate edge, reduce to ch3 and 3dc in each arch for subtler scallops
— Assembly Preparation Rounds :
Info :
Before assembly, arrange all motifs on a flat blocking mat. Aim for three large doilies spaced along the runner, medium motifs filling gaps and the connector panels joining them. Take a photograph of layout for reference
Round 1 :
With cream yarn, work a narrow sc join across adjacent loops: insert hook through loop on doily A, then corresponding loop on connector panel, sc both together to join; repeat every 6-8 mm across contact edge
Round 2 :
Continue joining doilies and panels in the same manner; if you need more flexibility, use a mattress stitch with tapestry needle to sew edges instead of crocheted joins
Info :
When joining, alternate slip stitches and single crochets for a fluid seam; pin tightly and keep tension even so joined edges lie flat
— Attaching Flowers & Leaves :
Round 1 :
Position finished spiral roses above and around the junctions of doilies and connectors. Use long tails to ladder stitch through the doily fabric and the flower base; secure with at least 10 evenly spaced stitches per flower for stability
Round 2 :
Sew medium motifs and small rosettes layered under and around larger roses to create clusters. Overlap edges slightly and tack them with hidden stitches in the center of each motif
Round 3 :
Arrange leaves to fan outward from flower clusters. Stitch leaves with whip stitch along their center tail into the base fabric; make sure stitches are invisible on the right side
Info :
Use pins to build each cluster before sewing: start with large elements, then add medium motifs, then small flowers, then leaves and lavender for depth. This layering produces a natural bouquet effect
Round 4 :
Sew lavender sprigs tucked under leaves with just a few secure stitches at the stem base; trim excess tails and weave in ends
Round 5 :
Double-back on any loose petals: run a small catch stitch behind each petal cluster into the base so petals sit up nicely without flopping
Info :
For extra security in high-traffic tables, run a few invisible mattress stitches through the underside of the runner between motifs to anchor joins without being seen from the top
— Final Finishing :
Round 1 :
Weave all loose tails into neighboring stitches at least 3-4cm to secure. Trim close to the fabric
Round 2 :
Lightly steam-block the entire assembled runner on a low setting if using cotton thread, or spritz with fabric starch and pin to shape; allow to dry completely
Info :
If you want a softer, more drape-able runner skip starch; for a sculpted statement with 3D flowers standing proud, starch lightly
Round 3 :
Inspect underside for any visible knots or large stitches and tidy them. Optionally add small fabric pads where heavy clusters sit to protect a tabletop
Round 4 :
Display on table and enjoy! Fasten off all remaining tails and store pattern notes for future variations
This floral lace table runner invites you to slow down and savor the joy of making. Each doily and flower is a tiny piece of art that, when assembled, becomes a lavish centerpiece brimming with texture and charm. The layered roses, delicate leaves and lavender sprigs blend vintage romance with modern color palettes—perfect for gifting or gracing your own home. Enjoy the meditative process and the beautiful result. 🌸🧶