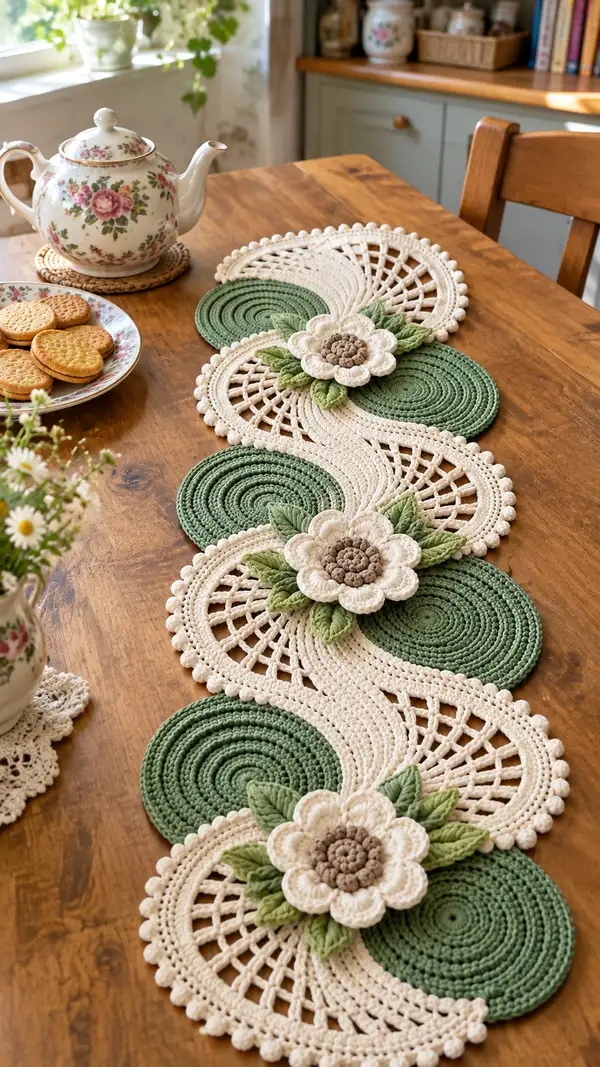
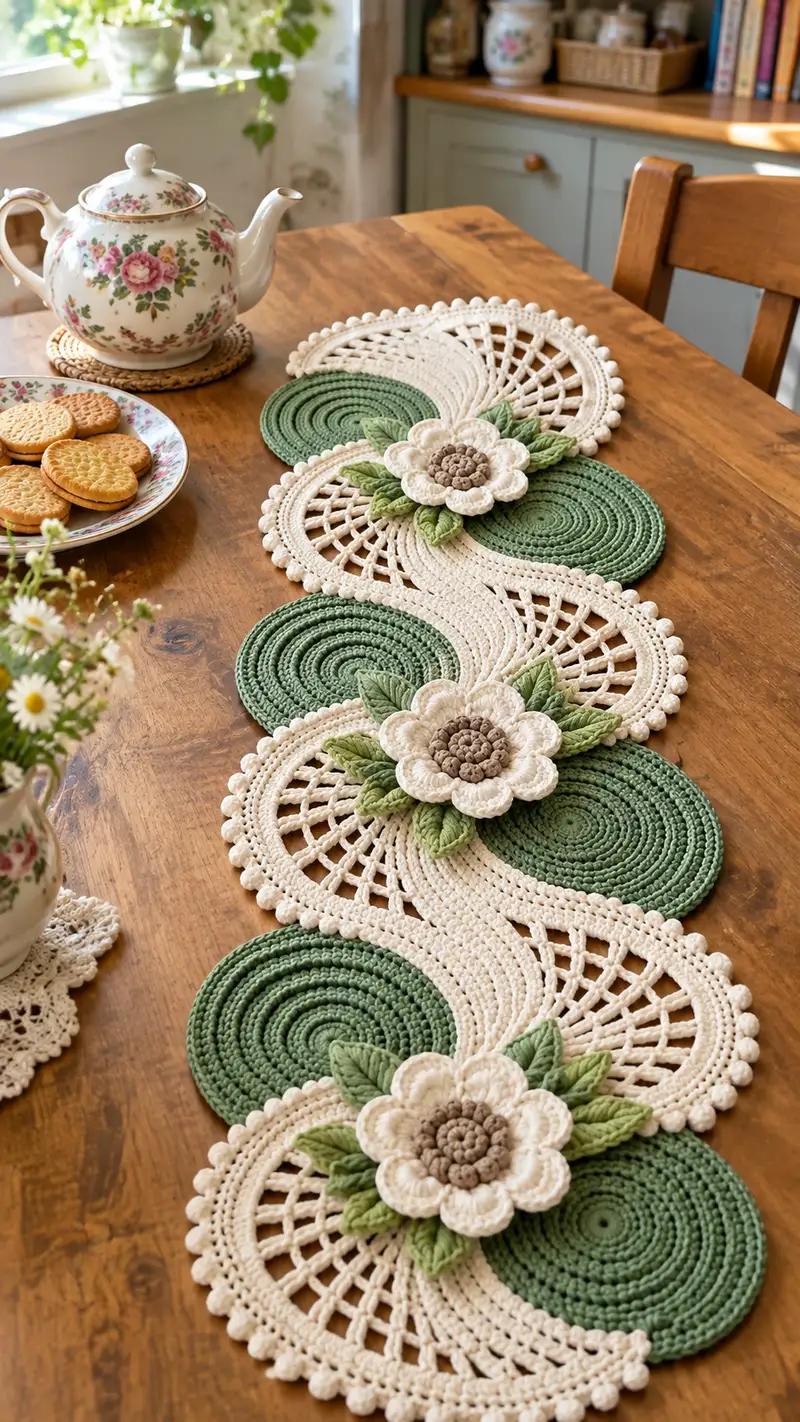
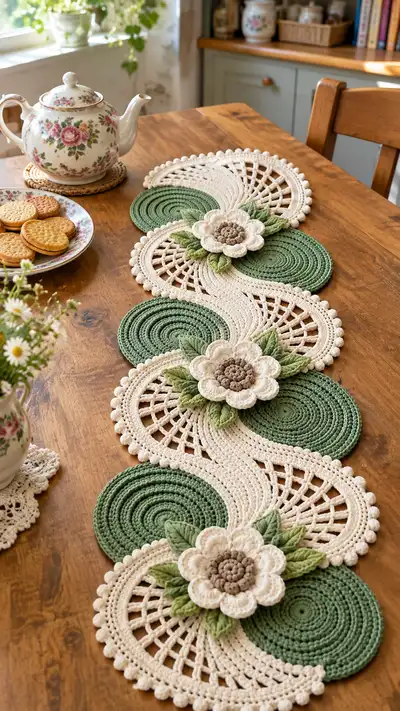
A graceful S-shaped crochet table runner featuring alternating deep green circular motifs and lacy cream semicircles, finished with layered cream flowers and textured green leaves. The runner uses thick cotton rope yarn for a sturdy, flat finish and decorative bobble edging for a vintage-inspired look. Perfect for a dining table centerpiece or a decorative dresser runner, this pattern guides you step-by-step through creating each motif and assembling them into a flowing, elegant runner.
Progress Tracker
0% Complete
— Overview & Notes :
Info :
This runner is modular. You will make 4 solid green circular discs, 3 cream semicircle lace panels and 3 layered cream flowers with leaves. After motif making you will join them into an S-shaped runner. Work tightly for a flat table-friendly fabric. Use a 4.5mm hook for the solid discs and petals, and a 4.0mm hook for open lacework if you prefer.
Info :
Pattern is written in US terms. For clarity we provide complete round-by-round instructions for one green circle, one cream semicircle, one flower (center and petals) and one leaf. Repeat the motif counts listed in assembly notes.
— Solid Circular Disc (Make 4) :
Round 1 :
6 sc in magic ring (6)
Round 3 :
(1 sc, 1 inc) x 6 (18)
Round 4 :
(2 sc, 1 inc) x 6 (24)
Round 5 :
(3 sc, 1 inc) x 6 (30)
Round 6 :
(4 sc, 1 inc) x 6 (36)
Round 7 :
(5 sc, 1 inc) x 6 (42)
Round 8 :
(6 sc, 1 inc) x 6 (48)
Info :
From this point we will build texture and thickness for the disc. If you prefer a smaller, tighter disc stop after Round 8 and fasten off. For a table runner you want sturdiness; continue to Rounds 9-18 working in BLO to create subtle ridges that help the disc lay flat.
Round 9 :
1 sc in each st BLO (48)
Round 10 :
1 sc in each st (48)
Round 11 :
1 sc in each st BLO (48)
Round 12 :
1 sc in each st (48)
Info :
The alternating BLO rounds create concentric ridges. If your yarn is very bulky you may wish to do fewer alternating rounds. Keep the tension consistent to avoid ripple.
Round 13 :
1 sc in each st BLO (48)
Round 14 :
1 sc in each st (48)
Round 15 :
1 sc in each st BLO (48)
Round 16 :
1 sc in each st (48)
Round 17 :
1 sc in each st BLO (48)
Round 18 :
1 sc in each st (48)
Info :
If you would like a slightly larger disc continue increasing before working BLO rounds: (7 sc, inc) x 6 = 54 then continue as above working 54 sts each round. For this runner 48 stitches gives a balanced size with the semicircle panels.
Round 19 :
Work 2 rounds of even sc in FLO to create a subtle ridge and a firm joining edge: Round 19: 1 sc in each st FLO (48)
Round 20 :
Round 20: 1 sc in each st (48)
Info :
Fasten off leaving a 12-16 inch tail for sewing when joining motifs later. Weave in starting tail neatly at the center using tapestry needle to avoid a visible knot.
— Cream Lace Semicircle Panel (Make 3) :
Info :
Each semicircle uses the same yarn as the cream edging and is worked from the center outward to create an open lattice. Use a 4.0mm or 4.5mm hook depending on desired openness. The pattern below creates a 180-degree semicircle that matches the green discs when placed together to make the S-shape.
Round 1 :
6 sc in magic ring (6)
Round 3 :
(1 sc, 1 inc) x 6 (18)
Round 4 :
(2 sc, 1 inc) x 6 (24)
Round 5 :
(3 sc, 1 inc) x 6 (30)
Round 6 :
(4 sc, 1 inc) x 6 (36)
Info :
At this stage the semicircle would be a full circle. To convert to a semicircle we will change shaping and work only across half the circle, creating an arc. For clarity we will now create a flat semicircular fan: fold the circle and identify opposing stitches to mark the arc center line.
Round 7 :
Ch 3 (counts as dc). Working in a 180-degree arc only: dc in next 17 sts (this forms the first semi-arc). Do not work on the other half (you will leave them unworked on this round). Turn work back along arc for lattice creation. (18 dc on arc)
Round 8 :
Ch 4 (counts as tr). *Skip 1 st, tr in next st; ch 1* across the arc to create a mesh. End with tr in last st. (Approx 9 tr and 8 ch-1 spaces depending on your arc count)
Round 9 :
Ch 3. Working into chain-1 spaces from previous round: (dc, ch 2, dc) in each chain-1 space across arc to create fan mesh (approx 8 fans)
Info :
Block this round: wet-block the semicircles to open the mesh. This will ease assembly and produce even spacing when you join multiple semicircles and discs.
Round 10 :
Ch 2 (counts as hdc). Work hdc into the top of each fan cluster across arc to stabilize mesh (approx 16-18 hdc)
Round 11 :
Ch 1. *Skip 1 st, 4 dc cluster in next st, skip 1 st, sc in next st* repeat across to make a decorative filled fan row (adjust to fit arc count)
Round 12 :
Ch 3. Work (dc, ch 2, dc) in each 4-dc cluster space to create a larger openwork square lattice along the arc.
Round 13 :
Ch 1. 1 sc in each dc and ch-space across to create a firm base for the outer edge (approx 48 sts across arc).
Round 14 :
Ch 3. Work shell stitches across arc: *skip 2, (5 dc) in next st, skip 2, sc* repeat around arc to create decorative shells spaced evenly (adjust shells to match arc stitch count)
Info :
Add stitch markers to mark the ends of the arc (the straight edge). These markers will help when you join the semicircles to the discs. The arc should have consistent spacing; if necessary add or subtract small shells in wider arcs to keep the mesh even.
Round 15 :
Ch 1. 1 sc in each st across to square the row and create a base for bobble edging (approx 48 sc)
Round 16 :
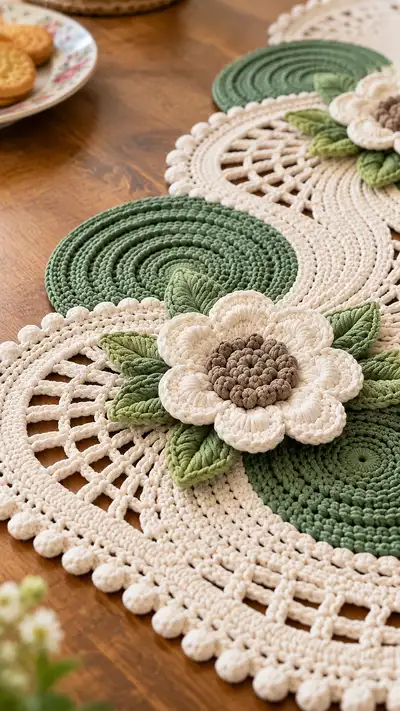
Work a bobble edging row along the curved side: *ch 2, skip 1, bobble in next st, ch 2, sc in next st* repeat across curve to produce scalloped bobbles. This will create the small round beads seen on the outer edge.
Round 17 :
Ch 1. 1 sc in each st across arc and in top of each bobble to secure (approx 48 sc)
Round 18 :
Work 2 rounds of even sc along arc to firm the outer edge: Round 18: sc across (48); Round 19: sc across (48)
Info :
The straight inner edge of the semicircle (the diameter) should be worked with a tidy row of sc to provide a neat joining surface to the discs. Add 2-3 rows of sc along that straight edge if you need a stronger attachment surface before joining.
Round 19 :
Work 2 rows along inner straight edge: Row A: turn work to the straight edge and sc across all stitches along the diameter (approx 24 sc), Row B: sc across again to firm up join (24)
Info :
Fasten off and leave long tails for sewing. Wet-block semicircles flat and pin to correct arc dimensions before sewing to discs for a smooth, even final runner.
— Layered Flower: Center (Make 3) :
Round 1 :
6 sc in magic ring (6)
Round 3 :
Work popcorn/bobble center: *pb in next st, sl st into next* around to create cluster bumps. Suggested: work 12 pb bumps by making 12 small bobbles across Round 3. (12 bobbles)
Info :
To make a dense textured center use 5-dc popcorn: (dc5 in st, remove hook, insert hook in first dc of popcorn, pull loop through and sl st). Work into consecutive stitches to form a tight rosette effect. Fasten off center color leaving long tail for attaching to petal base.
— Layered Flower: Petals :
Round 1 :
Join cream color to edge of center. Ch 1. *sc in next st, (ch 1, 3 dc, ch 1) in next st, sc in next st* repeat around to form 6 petal loops (12 sts used) (6 petals)
Round 2 :
For each petal work: attach yarn at base of petal, ch 2, (hdc, 2 dc, hdc) across petal to create fuller petal, sl st to base to secure. Repeat for each petal (6 petals)
Round 3 :
Work a round of sc around entire flower to tidy joins: 1 sc in each stitch and in the tip of each petal (approx 36 sc)
Round 4 :
Add an optional second petal layer: In between each first-layer petal, slip stitch to a base point and work small cluster (sc, hdc, 3 dc, hdc, sc) to make a second offset petal. This creates the layered flower seen in the photo (6 second-layer petals)
Info :
Use light finger pressing or steam-blocking to slightly flatten petals. Secure the center to the petal base with the long tail and a yarn needle before sewing the completed flower onto motifs.
Round 5 :
Work 1 more sc round to hide join tails and produce a neat back surface for sewing: 1 sc in each st across (approx 48 sc). Fasten off leaving long tail for sewing to semicircle-disc junction.
— Sculpted Leaves (Make 6-9) :
Round 1 :
Ch 8. Starting in 2nd ch from hook: sc, hdc, 2 dc, hdc, sc, sl st in last ch to base. (This creates one side of leaf)
Round 2 :
Turn and work along opposite side of foundation chain: sc, hdc, 2 dc, hdc, sc in each corresponding st to mirror the leaf. Sl st to join at base. (Approx 14 sts total)
Round 3 :
Working into each dc and hdc on top of leaf, sc around the entire leaf to create a smooth edge: 1 sc in each st around (approx 16 sc)
Round 4 :
Ch 1. Work a round of BLO sc back down the middle center to form a raised midrib: *sc in next 2 sts BLO, sc decrease over center chain* repeat to taper the leaf tip if desired.
Round 5 :
Use tapestry needle to create central veining: with contrasting or same yarn make a running stitch down center slightly pulling to cup the leaf shape. Fasten off leaving long tail for sewing. Make 2-3 leaves per flower cluster as seen in images (recommended 6 leaves per runner total).
Info :
For a plump leaf you can add a small strip of interfacing or a few stitches of extra yarn inside before closing to keep them slightly raised. Alternatively work an extra round of sc for a thicker leaf.
— Decorative Bobble Edge (applied to semicircles and runner seams) :
Round 1 :
Join cream yarn to outermost sc of semicircle shell row. Ch 1. Work sc evenly across outermost shells to create a base row (approx 48 sc).
Round 2 :
*Ch 2, bobble in next st, ch 2, sc in next st* repeat across curve to create evenly spaced bobbles. Aim for a bobble every 4-5 sts depending on spacing (approx 12-16 bobbles per semicircle).
Round 3 :
Sc across and sl st to secure bobbles. Fasten off and weave ends. This creates the bead-like outer rim shown on the cream semicircles.
Info :
Bobble stitch: make 5 dc into same st, remove hook, insert hook into first dc of the 5, pull loop through and sl st to close, creating a round raised bobble. Keep bobbles uniform by using same tension for each.
— Joining & S-Shaped Assembly :
Info :
Layout your pieces before sewing. The photo shows an alternating sequence: Green disc, cream semicircle (arc facing disc), green disc offset, cream semicircle reversed, green disc, cream semicircle, green disc. This creates a flowing S-shaped runner. Pin everything flat on a table to check spacing.
Round 1 :
Place a green disc adjacent to a semicircle so the straight diameter of the semicircle aligns and overlaps the outermost few stitches of the disc by approximately 6-8 sts. Using long tails from each motif, whip stitch the semicircle straight edge to the disc FLO stitches; match stitch-to-stitch for a neat seam. Sew through Round 20 (disc edge) and Round 19-20 of semicircle diameter.
Round 2 :
Repeat joining for each disc-semicircle pair following the S-flow. For offset discs (where a disc nestles partially under the curve of an adjacent semicircle) use ladder stitch to create a flat, nearly invisible join. Maintain even tension when sewing to prevent puckering.
Info :
When two discs meet at a narrow point, leave a single stitch gap and join by slip-stitching through both edges, then secure with whip stitch for strength. The runner uses many small joins so take time to place and pin pieces first.
Round 3 :
After all discs and semicircles are joined, work a 1-row sc border around the entire runner to neaten joins: sc evenly along all outer edges, placing 2 sc in corners/curves to maintain flatness. This establishes a base for the final decorative bobble edge.
Round 4 :
Work the decorative bobble edge across the entire outer perimeter: *ch 2, bobble in next st, ch 2, sc in next st* repeating. Space bobbles evenly; when working around discs place bobbles at regular intervals to match semicircle bobbles.
Info :
Fasten off and weave in all ends on the back side of the runner. Press lightly with steam or block flat with pins to set the shape. If necessary, add small hidden stitches to pull seams tight where two motifs slip.
— Placement of Flowers & Leaves :
Info :
The photo shows three flowers placed at the inner curves of the S-shape where semicircles and discs intersect. Each flower sits centered over the seam and is anchored by several whip stitches through the runner and the flower back.
Round 1 :
Position each layered flower so that its center sits slightly over the seam between a disc and a semicircle. Arrange 2-3 leaves under each flower to fan outward. Pin into position and tack stitch through the back of the runner and the back of the flower with matching yarn using an invisible whip or mattress stitch.
Round 2 :
Secure each leaf by sewing the base to the runner at its placement stitch points; use two passes of thread if the leaf will be under frequent handling. Hide all tails by weaving into the back of the motifs.
Info :
For extra stability you can baste the flower with a few stitches through the center bobble clusters to anchor it. Ensure stitches are not visible from the front by pulling knots to the back of the runner and trimming close after burying the tails.
— Finishing Touches :
Round 1 :
Check all joins and weave in remaining loose tails. Trim any excess and secure with a small dab of fabric glue on very stubborn tails then hide under stitches after drying.
Round 2 :
Lightly steam press the runner on low heat from the back using a damp cloth to set the bobbles and petals. Avoid direct hot iron contact with cotton rope yarn that can flatten bobbles if too hot.
Info :
Spot clean or hand wash on gentle cycle; reshape while damp and lay flat to dry. Because the runner is thick, avoid tumble drying to maintain the integrity of the bobble edging and three-dimensional flowers.
Extra Notes :
Adjust runner length by adding or subtracting one disc and one semicircle pair; ensure the final assembly stays balanced. Consider making matching coasters by using the green disc pattern and stopping after Round 12 for a coaster-size motif.
Completing this runner is such a delightful journey — you move from compact solid discs to airy lace, then top everything with soft layered blooms and sculpted leaves. The bobble edging and careful joins transform individual motifs into a flowing S-shaped centerpiece that feels both vintage and fresh. Whether it graces your dining table or becomes a gift, each stitch adds warmth and charm to your home. 🌿🧶