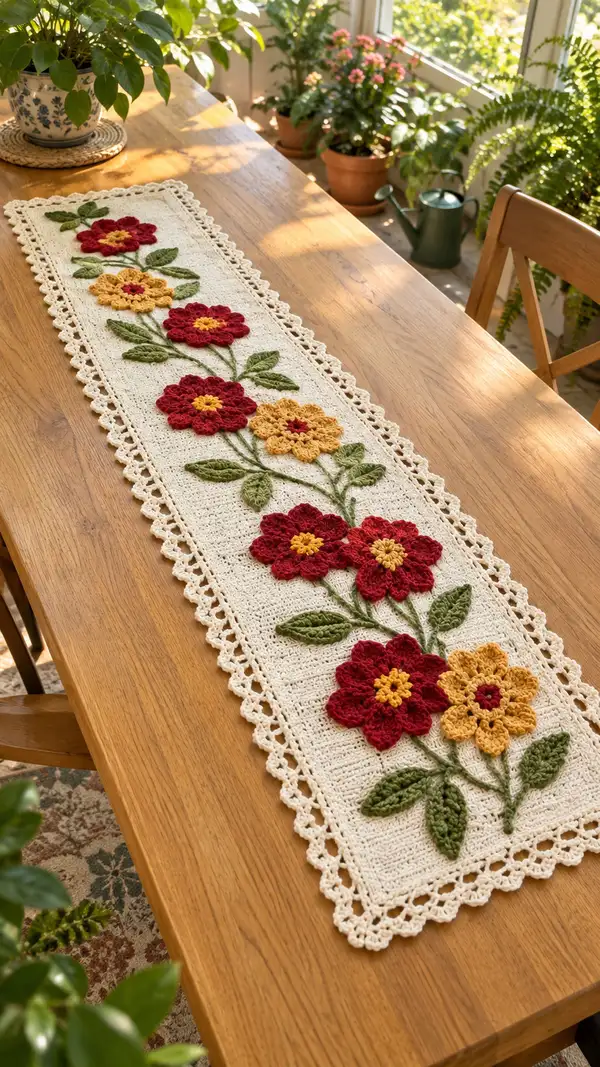
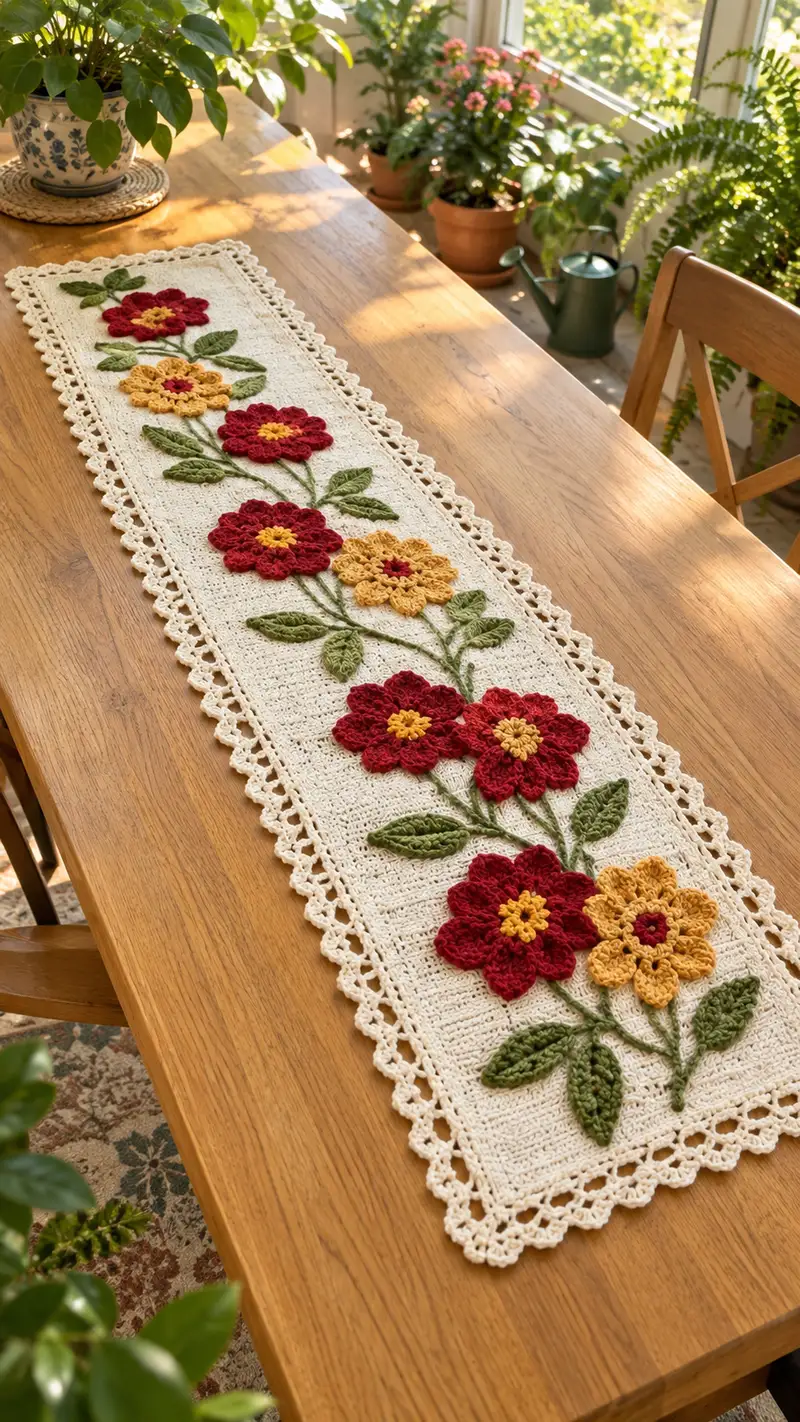
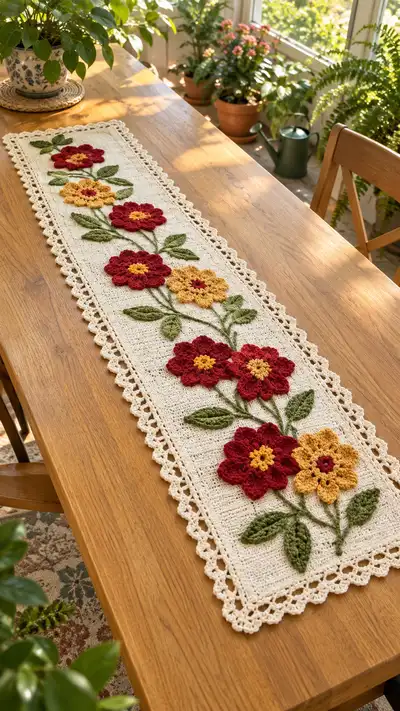
This vintage-inspired crochet table runner features a long cream panel adorned with raised floral appliques in deep red and warm mustard, and textured green leaves. The runner has a delicate lacy scalloped border that frames the central panel and gives a classic, handmade look. The floral stems are created with surface slip-stitch embroidery, while flowers and leaves are crocheted separately and sewn on for dimension. Perfect for seasonal decor or a warm dining table centerpiece.
Progress Tracker
0% Complete
— Main Panel (worked in rows) :
Round 1 :
Foundation chain 122 (this will create 121 working stitches across). Turn. (122 chain including turning chain)
Round 2 :
Row 1 (RS): Sc in 2nd ch from hook and in each ch across, turn (121 sc)
Round 3 :
Row 2 (WS): Ch1, sc in BLO in each st across, turn (121 sc). This BLO row creates a subtle ridge on the wrong side for a neater edge
Round 4-11 :
Row 3-10: Repeat Row 2 (121 sc each row). Work 8 rows maintaining consistent tension and straight sides (121)
Info :
Keep a stitch marker in the first stitch at the end of each row to ensure your edges remain square. Check width after 10 rows; adjust if you prefer a narrower/wider runner by altering foundation chain in multiples of 2.
Round 12-21 :
Row 11-20: Ch1, sc in BLO across for the first of these rows to build a subtle band, then continue sc in each st across for remaining rows (121)
Round 22 :
Row 21: Ch1, sc in each st across, turn (121)
Round 23-30 :
Row 22-29: Continue working even sc rows, 121 sc each row. This creates the neutral field for appliques (121)
Info :
Measure your runner periodically; 40 rows of sc will create a fairly dense fabric. For a soft drape, alternate a few rows of hdc (ch2, hdc) to maintain height while reducing stiffness.
Round 31-40 :
Row 30-39: To create a subtle horizontal texture, alternate rows - odd rows ch1 sc across, even rows ch2 hdc across; maintain 121 stitches to preserve width (121)
Round 41-50 :
Row 40-49: Return to sc rows only: ch1, sc in each st across (121). These 10 rows form the central section where appliques will be attached for best stability
Info :
Block the panel flat after you complete the base rows before attaching appliques. Wet-block or steam lightly and pin straight to prevent rippling when motifs are sewn on.
Round 51-60 :
Row 50-59: Continue sc across (121) for a total of 60 rows worked so far. This length yields a medium runner; to lengthen add additional repeats of 10-row sequences keeping 121 stitches per row
Round 61-72 :
Row 60-71: Work 12 more rows of sc across (121). These rows will be the lower field for appliques near one end of the runner (121)
Info :
If you want a longer runner, duplicate Rounds 31-50 sequence until you reach desired length. Each extra 20 rows adds about 8-10 inches depending on tension.
Round 73-80 :
Row 72-79: Work 8 final sc rows for the base panel before edging. Keep edges neat by working the first and last st in BLO on every 5th row to square corners (121)
Info :
Fasten off and weave ends long enough for attaching the border later. Keep panel flat and blocked; do not attach the border until appliques are positioned and sewn on for best results.
— Large Flower Motif (Make 5 in red) :
Round 1 :
Make a magic ring. 6 sc in magic ring. Pull tight (6)
Round 2 :
Inc in each st around (6 inc) (12)
Round 3 :
(1 sc, 1 inc) x6 (18)
Round 4 :
(2 sc, 1 inc) x6 (24)
Round 5 :
Ch1, sc in each st around (24) - this base round creates a flat disc for petal attachment
Info :
Join a second contrasting color for the petal foundation if you wish a two-toned petal; we'll continue in the same color for these flowers.
Round 6 :
*(Ch4, tr in next st, ch2, sl st into same st) repeat around for 8 petal loops across the 24 st base. Work across every 3rd st to create 8 even petal anchors*
Round 7 :
Working into each ch4 loop: (sc, hdc, 3 dc, hdc, sc) in each loop to form a full petal. Repeat for all 8 petals. Fasten off and weave tail (8 large petals)
Info :
Use a small hook (3.5mm) for crisp petals that hold shape. If petals feel floppy, add a scant amount of light fiberfill between petal layers or use a slightly smaller hook for petal row.
Round 8 :
Center: Join mustard yarn to center of flower with sl st. Ch1, 8 sc into the central ring formed by the first rounds (8)
Round 9 :
(1 sc, inc) x4 (12). Fasten off leaving long tail for sewing onto panel
Info :
Block each flower gently to open petals and create a flat back for sewing. Pin petals slightly outward and steam or wet-block to shape.
— Secondary Flower Motif (Make 2 in mustard) :
Round 1 :
Magic ring, 6 sc in ring (6)
Round 2 :
Inc in each st around (12)
Round 3 :
(1 sc, inc) x6 (18)
Round 4 :
(2 sc, inc) x6 (24)
Round 5 :
Ch1, sc around (24)
Round 6 :
Make 7 petal anchors by working *ch4, sl st in next 3rd st* around, spacing evenly for 7 petals
Round 7 :
Into each ch4 loop work (sc, hdc, 2 dc, hdc, sc) to create slightly smaller petals (7 petals)
Round 8 :
Center: Join deep red or contrasting color and make 8 sc in center ring to create a tight eye, fasten off leaving long tail for sewing
Info :
These secondary flowers are slightly smaller to add variety; you can work fewer or more petals depending on visual balance. Block before sewing.
— Flower Center (Optional Raised Button) :
Round 1 :
Using mustard or contrasting color, make a magic ring and 8 hdc into ring (8)
Round 2 :
Slip stitch in each st around to create a small raised disc. Fasten off leaving a long tail to whip-stitch into flower center
Info :
Sew these small centers into the middle of each flower for extra texture. You may stitch through the base petal round to secure.
— Leaf Motif (Make 10-12) :
Round 1 :
Ch10. Row 1: Sc in 2nd ch from hook, hdc in next, dc in next 3, tr in next 2 (central peak), dc in next 2, hdc in next, sc in last (9 sts worked along chain)
Round 2 :
Turn to work along opposite side of foundation chain: sc in next, hdc in next, dc in next 3, tr2tog across peak (sl st 2 treble together to shape tip), dc in next 3, hdc in next, sc in last. Fasten off and weave tail (a defined leaf shape)
Info :
For a more textured leaf, after completing both sides, work a central vein using surface slip stitch in contrasting green. Block leaves flat to set the shape.
Round 3 :
Alternative shaping: Work the same leaf but with BLO on the return pass to define one side ridge: ch10, sc across shaping as above, on opposite side sc in BLO to create crisp central ridge.
Info :
Create more depth by using two shades of green: work base leaf in light green and overlay with a darker raised vein using embroidery or surface crochet.
— Stem & Surface Crochet (Make as long as needed) :
Round 1 :
To create stems on the panel, join medium green yarn at the lower point where a flower will sit. Work a foundation row of sl st in each stitch you wish to create a visible stem path: ch1, sl st in desired stitch along surface (do not break yarn) for desired stem length
Round 2 :
For thicker stems, work a second line of sl st parallel to the first about 1-2 sts away. Use same color. To create a braided look, work sc into the side of previous sl st loop to raise the stitch height.
Info :
Surface crochet is easiest with a blunt embroidery needle and yarn tail; or use a small crochet hook and crocheting along the surface through the top loops. Work slow to keep stems smooth.
Round 3 :
Where stems meet leaves or flowers, extend a few extra sl st into the back of the applique base to anchor them securely. Fasten off and weave ends into the panel.
Info :
Test placement by laying flowers and leaves without sewing. Once satisfied, pin with rust-proof pins and sew each applique with mattress or whip stitch to the panel through the base rounds to prevent visible stitches on petals.
— Small Accent Flower (Optional) :
Round 1 :
Magic ring, 6 sc in ring (6)
Round 2 :
Inc in each st (12)
Round 3 :
(1 sc, inc) x6 (18)
Round 4 :
Ch3, sl st into next st around to create small scallop loops (6 loops). In each loop work (sc, hdc, sc). Fasten off and leave long tail for sewing.
Info :
These small accents are perfect to tuck near stems or between larger blossoms for visual interest. Make 2-4 as needed.
— Attaching Appliques (Positioning and Sewing) :
Round 1 :
Plan layout: Lay blocked panel flat and arrange flowers in two staggered columns along the center axis with about 6-7 inches between flower centers (adjust spacing per your runner length)
Round 2 :
Pin each flower and leaf with rust-proof pins, stepping back to make sure overall balance is pleasing. Mark placement with removable tailor's chalk if desired
Round 3 :
Sew flowers by threading a tapestry needle with long tail from motif. Use whipstitch or mattress stitch around the base round (the joined rounds under petals) to hide joining stitches. Sew through panel and motif using small, neat stitches (secure with 6-8 passes for stability)
Info :
Attach leaves last to allow overlapping stems to tuck under leaves for a natural composition. Use invisible stitches and anchor at the leaf base only to retain three-dimensional shape of petals and leaf tips.
Round 4 :
For additional security, apply a small dab of fabric glue under each applique center before final sewing if the runner will be handled frequently. Allow glue to dry thoroughly.
Info :
When sewing, keep stitches small and tight so the motif cannot catch. Avoid pulling petals flat; sew through the base rounds only and not through petal tips unless you want them flattened intentionally.
— Decorative Scalloped Border (Round the entire panel) :
Round 1 :
Join cream yarn at one corner of the blocked panel. Work 1 sc evenly across the short edge along the rows, placing approximately 1 sc for every row end to create an even base for the scallop. Turn corner with (sc, ch3, sc) worked into corner st to round the edge
Round 2 :
Work along long side: *skip 2 sts, 5 dc in next st (shell), skip 2 sts, sl st in next st*. Repeat along entire long side. At corner work sl st, ch3, sl st into corner to turn
Round 3 :
Return along opposite short edge with sc in each end-row. Continue scallop pattern on opposite long side mirroring the first (shell, sl st sequences). Maintain consistent spacing so shells align
Round 4 :
Finish with a small picot round if desired: *sl st into top of shell, ch3, sl st in 3rd ch to create tiny loop* around to add vintage lace effect. Fasten off and weave ends
Info :
Count stitches along the long side before starting shells so spacing is even; adjust by adding or subtracting a sc between shells. Use stitch markers to mark shell anchor points before crocheting.
Round 5 :
Optional lace extension: Work an additional round of smaller shells (3 dc in each shell top) to give more pronounced border. Fasten off and block entire runner again to set border and appliques
Info :
Blocking after border ensures scallops sit flat and symmetrical. Use pins to shape each shell precisely while drying.
— Final Finishing Touches :
Round 1 :
Weave in all tails at least 3 inches into the fabric. Trim closely but not flush to avoid cutting the weave and causing slip.
Round 2 :
Gently steam block the entire runner pinned to final measurements. Allow to dry completely before use or storage
Round 3 :
Optional: Use a small amount of diluted white craft glue along underside of larger petals to maintain raised shape over time (test on scrap first)
Round 4 :
Store flat or rolled in tissue paper to prevent scallop crushing when not in use. For frequent use, consider a runner pad to protect the appliques from heavy objects.
Info :
Enjoy your finished runner: placement of appliques and final blocking are what turn a neat panel into a polished heirloom. Photograph your piece laid on a natural wood table for the warm vintage look.
Completing this vintage floral table runner is such a satisfying journey — each petal and leaf stitches into a warm, charming focal piece for your table. The combination of simple rows and sculpted appliques creates an heirloom-quality finish that looks far more intricate than it is to make. Enjoy the relaxing rhythm of rows and the creative bursts of applique work as each section comes together. 🧶🌼 Display proudly or gift to someone special — every stitch tells a story. ✨