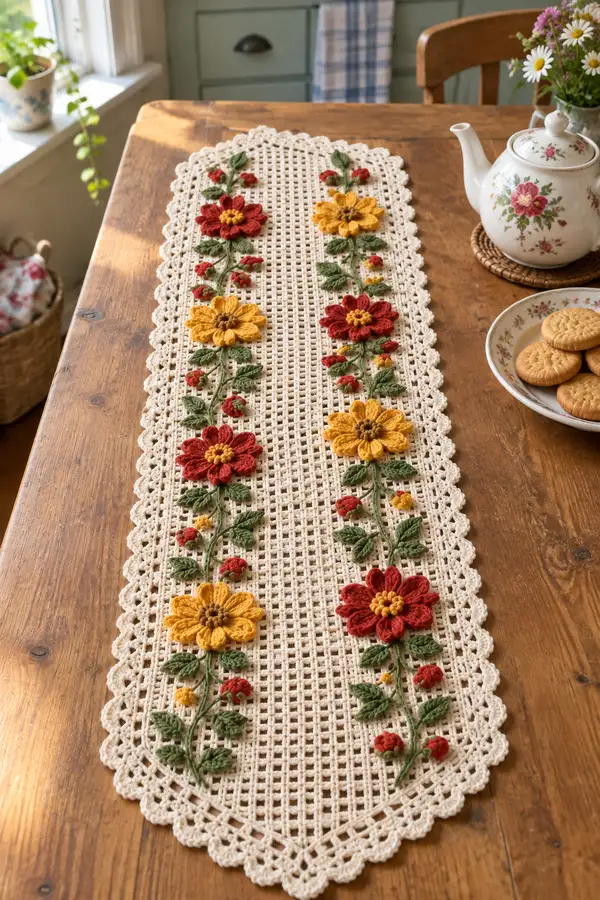
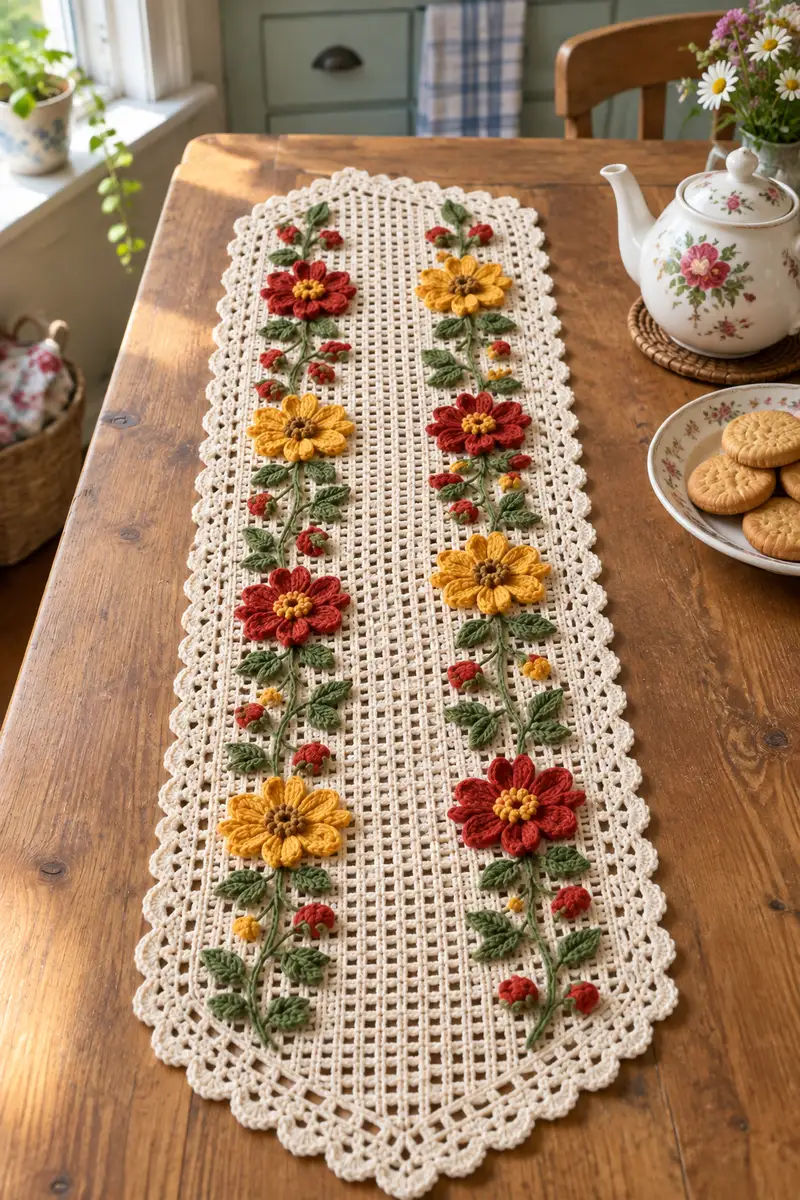
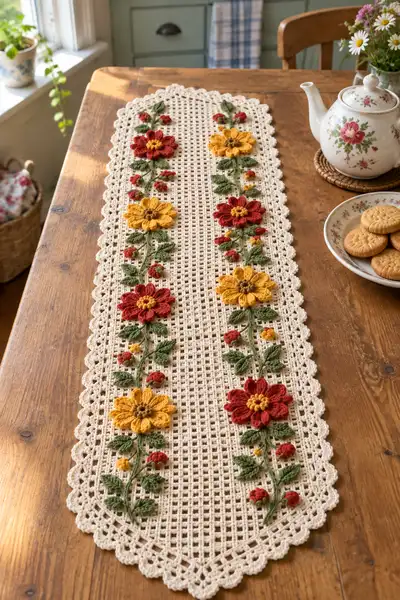
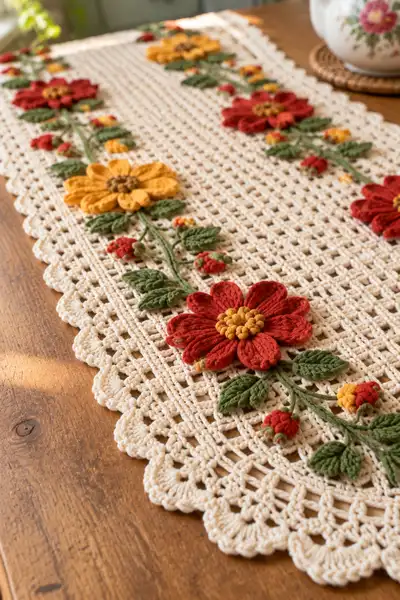
This elegant vintage-style crochet table runner features a delicate ecru mesh base with raised 3D floral applique9s in warm red and golden yellow with leafy green stems. The open filet-style grid creates airy texture while scalloped edges frame the runner. Perfect for a sunny table, tea service, or as a decorative centerpiece.
Progress Tracker
0% Complete
— Runner Base (Filet Mesh) :
Notes :
This base is worked in rows in a classic filet mesh using dc and ch-1 spaces. The foundation chain is a multiple of 2 plus 3 for turning. My sample uses a foundation chain of 101 (2 x 49 + 3) to make a long, narrow runner approximately 13" wide before blocking; adjust multiples for wider or narrower runners. Each row has 50 double crochets and 49 ch-1 spaces across the width when counted as dc + ch spaces.
Row 1 (Foundation) :
Ch 101. Dc in 4th ch from hook (counts as dc + ch-1 pattern start), *ch 1, sk next ch, dc in next ch; rep from * across ending with dc in last ch. (50 dc, 49 ch-1 spaces across foundation)
Info :
Place a stitch marker in the turning chain (the top of the starting dc) to mark the right side of the work. Maintain even tension; this mesh relies on consistent ch-1 spaces to form square, even blocks.
Row 2 :
Ch 3 (counts as first dc), turn. Dc in first dc, *ch 1, sk next dc, dc in next dc; rep across. (50 dc, 49 ch-1 spaces)
Rows 3-10 :
Rep Row 2 maintaining the mesh. Work even so your mesh opens cleanly. (50 dc across each row)
Info :
Check width after 10 rows and lightly steam or spritz to help the mesh settle. If your mesh looks too loose, try one hook size smaller for the motifs later.
Rows 11-20 :
Rep Row 2. Count your ch-1 mesh spaces frequently and correct any skipped spaces immediately. (50 dc each row)
Info :
This runner uses 120 mesh rows in the sample for a long table length. You can alter the length by adding or subtracting mesh rows in multiples of the motif spacing (see motif placement chart below).
Rows 21-30 :
Rep Row 2. Use stitch markers at rows that will align with major flower centers (for the sample place markers at rows 12, 30, 48, 66, 84, 102 counting from foundation). (50 dc each row)
Rows 31-40 :
Rep Row 2. Keep the edges straight by working the last dc into the top of the turning ch-3 each row. (50 dc)
Info :
If you prefer, work a single crochet edging later to tidy raw edges before the scallop border; I recommend blocking first.
Rows 41-50 :
Rep Row 2. At the end of row 50 fasten off or continue; keep the RS facing up so motif placement aligns visually with the sample.
Rows 51-60 :
Rep Row 2. (50 dc each row)
Rows 61-70 :
Rep Row 2. If you are counting rows for motif alignment, note the center rows where the big flowers will be applied (sample centers at rows 12, 30, 48, 66, 84, 102 from foundation start).
Rows 71-80 :
Rep Row 2. Keep ends tidy; weave in long color tails to the wrong side so they remain hidden under motifs later. (50 dc)
Rows 81-90 :
Rep Row 2. Double-check counts: 50 dc each row equals stable mesh lines for embroidery stems.
Rows 91-100 :
Rep Row 2. At row 100 begin preparing for final length: in the sample the full runner is 120 rows long; place markers where ends will be scalloped. (50 dc)
Info :
If you want a shorter runner, reduce total rows by 10-20 rows but keep motif spacing proportional. The pattern's motif spacing works well if runner length is a multiple of 18-20 mesh rows per motif repeat (sample uses 18 rows between motif centers).
Rows 101-120 :
Rep Row 2 until you reach your desired finished length; sample stops at row 120. (50 dc each row)
Info :
Finish off and block the base flat. Wet-block the mesh gently to square up the ch-1 spaces and open the grid before applying motifs. Allow to dry completely.
— Large Flower Petal Layer (Make 6) :
Notes :
Each large flower is made in two petal layers (outer and inner) plus a textured center. Work petals in rounds or short rows for a raised, ribbed look using FLO or post stitches to create definition. Petal counts are 8 petals for the sample flowers. Work 6 large flowers in alternating colors (3 red, 3 mustard) and place them as shown in photographs.
Round 1 :
With color A (red or mustard), ch 4, sl st to form ring. Ch 1, work 8 sc evenly around ring. (8 sc)
Round 2 :
*Ch 6, sk next sc, sl st in next sc; rep from * 8 times to create 8 long loops for petals. Join with sl st to first sl st. (8 loops)
Round 3 :
Working into each loop: join with sc into base of loop, ch 1, work 9 hdc into loop (or work 9 dc for fuller petal) across the loop, ch 1, sl st back into base to anchor. Rep around for 8 petals. (8 petals x 9 hdc)
Info :
Work petals with a slightly looser tension than the base so they sit nicely over the mesh. If you want deeper ribs, work petals in FLO for the return row to create texture.
Round 4 :
To shape petals, work 1 sc at base between petals, then *5 dc in the top of the petal working into the outermost loops' stitches, 1 sc in base between petals; rep to end. (8 petal peaks)
Round 5 :
Working behind Round 4, join a second color or the same color and sc around the base to tidy edges (8 sc). Fasten off leaving a long tail for sewing to base. Weave tail through base of flower to anchor before final sewing.
Info :
For a slightly layered look, make an inner petal round identical to Round 2 but with 7 loops and 7 hdc per loop; offset inner and outer petals when sewing so petals nest. The sample uses one full petal layer and a slightly smaller inner layer for depth.
— Inner Petal Layer (Make 6) :
Round 1 :
With matching or contrast color, ch 4, sl st to ring. Make 7 sc in ring. (7 sc)
Round 2 :
*Ch 5, sl st into next sc; rep 7 times to create 7 inner loops. Join. (7 loops)
Round 3 :
Work into each loop: sc in base, ch 1, 7 hdc into loop, ch 1, sl st to base. Repeat around for 7 inner petals. Fasten off and leave long tail for sewing. (7 small petals x 7 hdc)
Info :
Nest the inner layer inside the outer layer when assembling; offset petals so inner petals sit in the spaces between outer petals for a full look.
— Flower Center (Make 6) :
Round 1 :
With brown or dark beige, ch 2, work 8 sc in magic ring. (8 sc)
Round 2 :
*Inc in each sc around (16 sc) by working 2 sc in each st. (16 sc)
Round 3 :
To create textured bobble center: Using the same color, work 16 tiny bobble clusters around the round. For each bobble: (yarn over, insert hook, pull up loop) 3 times, yarn over and pull through all loops, ch 1 to secure. Sl st between bobbles if desired. Fasten off leaving a long tail to sew center to flower layers. (16 tiny bobbles)
Info :
Optionally lightly stuff center with a small bit of fiberfill before sewing to petals for extra lift. Use a darning needle and long tail to sew center into the middle of the petal layers on the wrong side of the petals so the bobbles face outward.
— Small Bud (Make 12) :
Round 1 :
With mustard or red, ch 2, 6 sc in magic ring. (6 sc)
Round 2 :
1 sc in each st around (6 sc). Fasten off leaving long tail. Pull center slightly closed if you prefer a closed bud look. Optionally add 1-2 green tiny leaves to the base later.
Info :
Buds are attached singly or in clusters along embroidered stems. For a half-open bud, add a row of 6 hdc over existing sc and then gather slightly with sewing thread.
— Leaves (Make 24) :
Leaf Row 1 :
With leaf green and 3.0 mm hook, ch 8. 2 sc in 2nd ch from hook, 1 sc in next, hdc in next, dc in next, hdc in next, 1 sc in next, sl st in last ch to create a tapered tip. (7 worked sts plus starting chain) Fasten off and block lightly to shape.
Leaf Row 2 :
For a more textured leaf: Work foundation as above but on the return row work FLO sc or surface slip stitch lines down the center to create a raised vein. Fasten off with long tail for sewing.
Info :
Leaves in the sample are slightly cupped by blocking with steam and shaping with fingers. Make a mix of small and medium leaves to place along stems for a natural look.
— Stems (Surface Embroidery) :
Info :
Stems are embroidered onto the blocked mesh using surface slip stitch or chain-stitched yarn lines. Count the mesh ch-1 spaces to place stems so they run centered through the flower and bud clusters. Each stem in the sample roughly follows a vertical line of mesh spaces with slight right/left offsets for natural curve.
Stem Method A (Surface Slip Stitch) :
Thread a length of green yarn onto a tapestry needle. From the wrong side, bring needle up at base point. Make surface slip stitches by inserting needle just in front of the next mesh bar and pulling yarn along the surface to create a raised line. Continue along counted mesh spaces until you reach the flower center. Secure and weave in tail on wrong side.
Info :
For a stem approximating the sample height, plan for approximately 25-35 mesh spaces per long vine (depends on your row count). Use two strands for a thicker stem or a single strand for a slender vine.
— Small Stem Tendrils and Leaf Attachment :
Round 1 :
To create short tendrils, use a chain of 6-10 in green and sl st back along chain to form a short cord. Sew ends to mesh where buds will be attached. Attach small leaves at 2-3 points along the tendril using the long tail from leaf pieces.
Info :
Sew all leaves with hidden stitches at their base. Pin leaf shapes in place on the mesh and use small, neat whip stitches through the grid bars so the wrong side remains tidy.
— Attaching Flower Layers (Assembly of a Large Flower) :
Info :
Pin the outer petal layer onto the blocked runner first: center the flower over your chosen mesh block and anchor with one or two sewing stitches through the mesh bars. Layer the inner petal round over the outer and sew through the base of the petals to anchor them. Finally, sew the textured center in place pulling the long tail through the petal bases and securing on the wrong side with several passes to prevent wobble.
Step :
When sewing on petal layers, use small stitches through the mesh bars (not through ch-1 openings) so the flower is stable and sits above the grid rather than slipping through holes.
Info :
Place flowers in alternating colors down two parallel vine columns. In the sample, flowers are centered approximately 4-6 mesh columns in from each long edge with a three-mesh spacing between the two columns. Pin everything, check symmetry, then sew from center outward to maintain balance.
— Bud Clusters and Small Flowers :
Step 1 :
Arrange small buds in clusters of 2-3 near larger flower stems as in the sample photo. Sew buds in place by anchoring into the mesh bars and stitching through the base of the bud. Add tiny mustard accent buds with one-row circles and sew adjacent to red buds for contrast.
Info :
Cluster spacing in the sample is roughly every 6-8 mesh rows between major flowers, but use your eye to balance clusters visually down the runner. Use pins to preview before committing stitches.
— Leaf Veining and Surface Details :
Technique :
Use surface slip stitch or simple chain embroidery to create central veins on leaves. For more depth, use a darker green strand of one or two plies and work a short backstitch down the leaf center, catching the leaf base and securing neatly at either end.
Info :
These veins add a hand-stitched botanical look; practice on a scrap mesh to perfect your tension before working on leaves attached to the runner.
— Scalloped Border / Edging :
Prep :
After motifs are attached, lightly block the entire runner again. Pin edges to desired shape. The scalloped border is worked around the entire perimeter in ecru using shells of dc clusters and chain loops to create feminine scallops. Work evenly into the top of the turning-ch 3 at row ends and through mesh bars along the sides.
Round 1 (Evening Up Edges) :
With ecru and 3.5 mm hook, join at a corner. Ch 1, sc through both loops along edge, placing approx. 1 sc per mesh column evenly; turn corner with (sc, ch 3, sc) in corner to build room for scallop. Continue around entire perimeter. (counts vary by runner length)
Info :
Space sc evenly along long sides by working 1 sc every two mesh columns (approximately). Use pins to mark where scallops will be centered — sample scallop count is 20-24 along each long side depending on length.
Round 2 (Scallop Shells) :
*Work (2 dc, ch 2, 2 dc) into a marked shell point, sk 2 sc, sl st into next sc; rep around. At corners work (2 dc, ch 3, 2 dc) to round the corner smoothly. Join with sl st to first sc. (repeat shells around, adjust spacing so shells sit evenly)
Round 3 (Picot/Finishing Row) :
To finish: sl st into each shell apex, ch 3, sl st into top of shell to form a small picot, sl st into the next shell apex; rep around. Fasten off and weave in ends. Block gently again if needed.
Info :
The scallop creates a framed look like the sample photo. If you prefer a tighter edging, substitute shells with (3 dc in shell) and smaller ch spaces for a subtler curve.
— Final Assembly and Finishing Touches :
Step 1 :
Weave in all ends on wrong side using a darning needle and trim close. Ensure motifs are securely sewn; reinforce any flower centers with extra stitches if they wobble.
Step 2 :
Wet-block the entire runner again to ensure scallops lay flat and the mesh is open and consistent. Pin scallops to uniform points and allow to dry fully before moving to table display.
Info :
If desired, add light starch or fabric sizing to the base before final drying to make the runner slightly more rigid for table use.
Extra :
For a seasonal twist, substitute flower colors for pastel spring or cool winter palettes. You can also create a matching set of placemats by shrinking base dimensions and using single flower motifs centered on small mesh rectangles.
This vintage floral table runner brings handmade charm to any table and makes a lovely heirloom piece to display or gift. Each layered flower and delicate leaf is an opportunity to add personal touches and color choices. Working the open mesh and 3D applique9s is both relaxing and rewarding, perfect for a cozy creative afternoon. I hope you enjoy making a runner that brightens your home and sparks compliments whenever guests stop to admire it! 🧶🌼