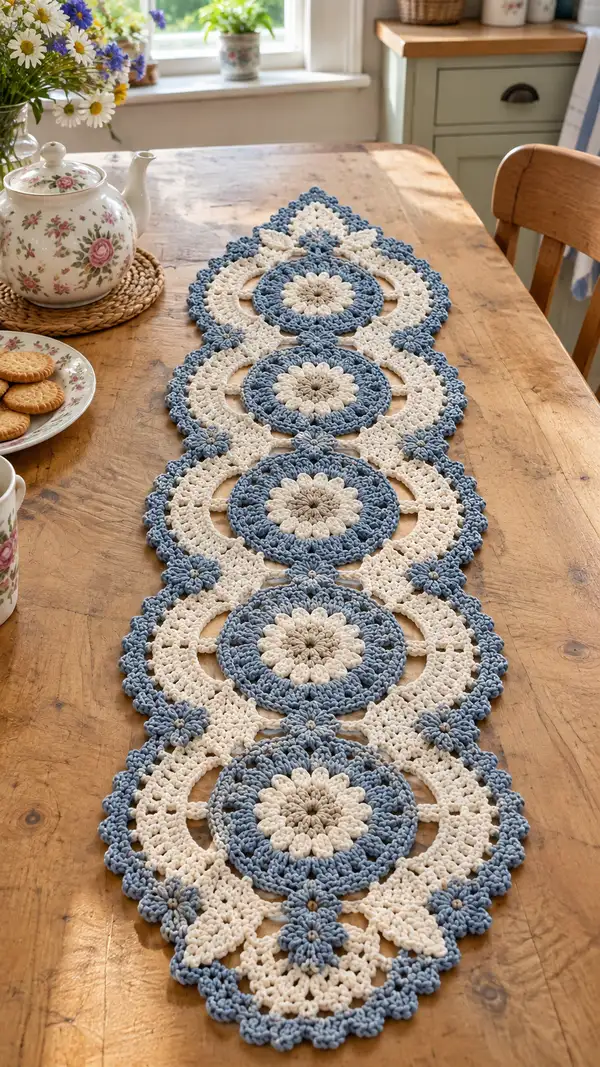
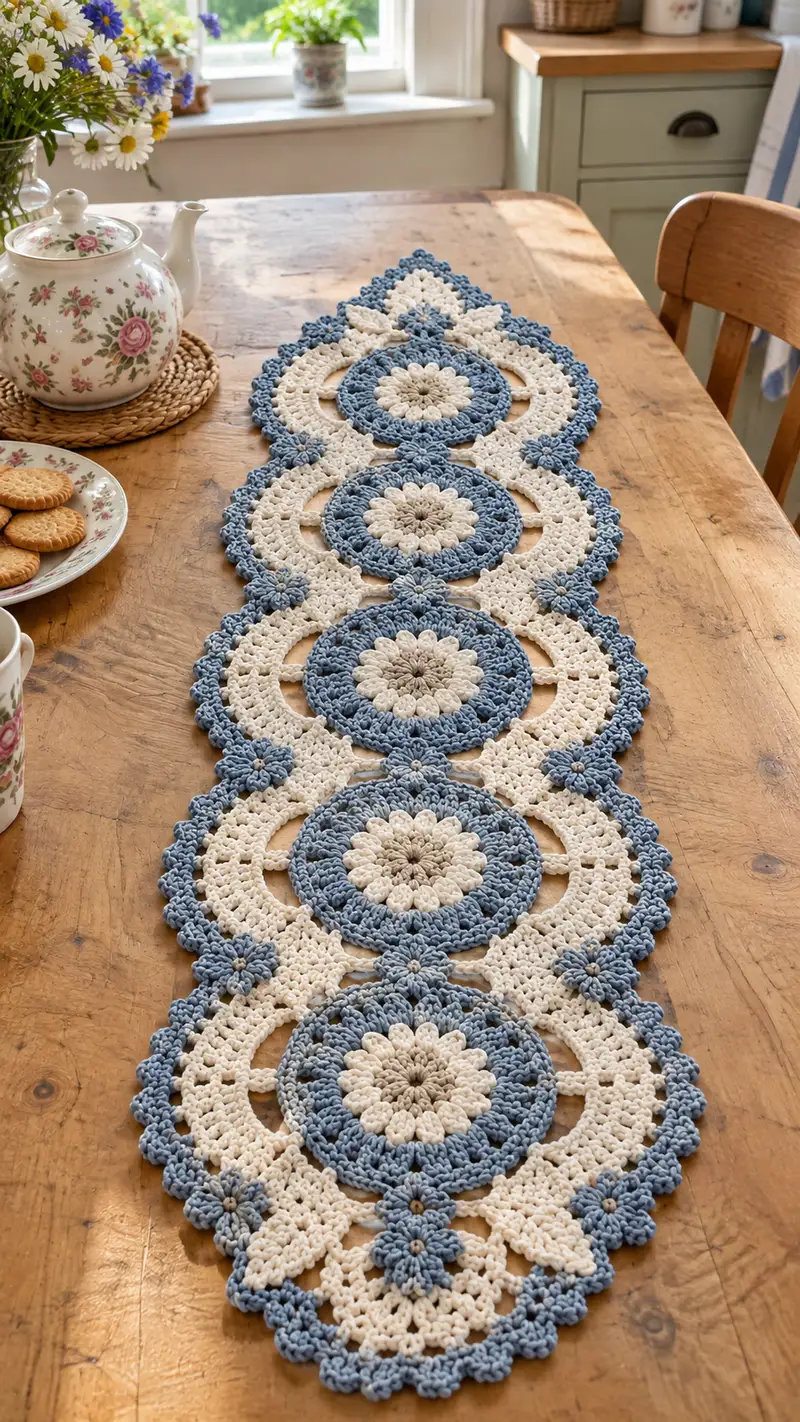
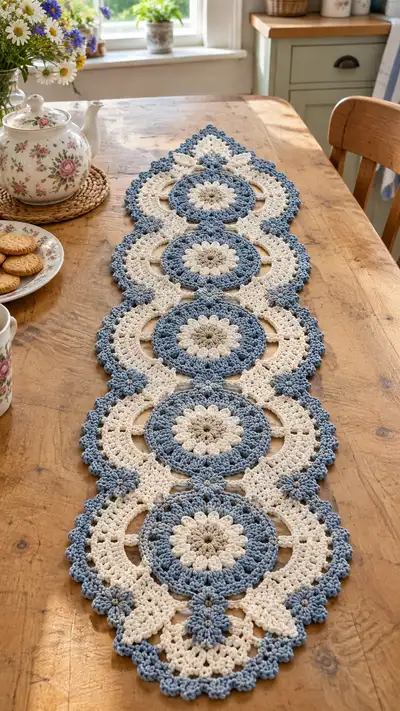
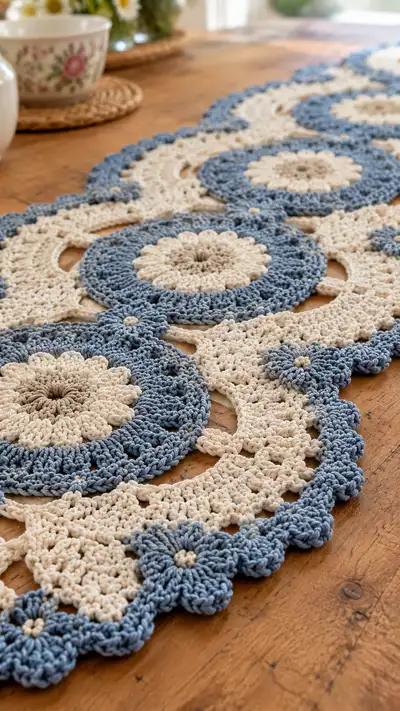
Create a charming vintage-inspired lace table runner made from interlocking round medallions and little floral joiners. This pattern uses two soft colours — a creamy ivory and a muted denim blue — to highlight puff-petal centers and scalloped edges. The finished piece lies flat on a dining table and features elegant openwork loops and tiny floral connectors for a delicate, classic look. Detailed round-by-round instructions walk you through every motif, join and border.
Progress Tracker
0% Complete
— Notes & Techniques :
Info :
Work with DK cotton and a 3.5mm hook for the gauge used in this pattern. The motifs are designed to be worked flat in rounds, then joined with small flower joiners and a final scallop border. Puff stitch used here is a 3-yarn-over puff (see technique below).
Info :
Puff stitch technique: yarn over, insert hook in stitch, yarn over and pull up loop; repeat three times to have 7 loops on hook, yarn over and pull through all loops, ch1 to secure (counts as puff), then sl st or sc as specified. Keep loops even for consistent puff height.
— Large Medallion (Make 4) :
Round 1 :
Make a magic ring, ch3 (counts as dc), 11 dc in ring, join with sl st to top of ch3 (12 dc) (12)
Round 2 :
Ch3, 1 dc in same st, ch2, *(2 dc in next dc, ch2)* repeat around, join with sl st to top of ch3. You will have 12 groups of 2 dc separated by 12 ch2 sps (24 dc, 12 ch2 spaces)
Round 3 :
Into each ch2 space: *(ch1, puff stitch (3-yo puff) around space working 5 loops total for petal: [yo, insert, yo pull] x3 then yo pull through all, ch1), sl st into next dc between ch2 spaces* repeat around (12 petals). Count: 12 puff petals, plus 12 sl sts and 24 dc untouched (visual petal ring).
Info :
Make sure each puff is consistent. Use your finger to slightly pull up the puff before finishing to make petals even. This round creates the prominent petal centre visible in the finished runner.
Round 4 :
Sl st into next dc, ch1, sc in same st, *(ch3, skip next dc, sc in next dc)* repeat around between the petals to form open arches; you will make 12 ch3 arches and 12 sc (12 sc, 12 ch3 sps)
Round 5 :
Working into each ch3 space: *(sc, ch2, 3 dc, ch2, sc) in ch3 space (a small shell)* around (12 shells). Work 1 sc in the sc between ch3 spaces to secure shells. Totals: 12 shells (36 dc within shells), plus 12 sc anchors = visible ring of small shells
Round 6 :
Ch2 (counts as hdc), hdc in same st, ch1, *(2 hdc in top of shell center dc, ch1)* repeat across each shell and anchor sc, finishing with 24 hdc and 12 ch1 spaces to create a tight textured band (24 hdc)
Info :
Change to contrast colour (Blue) at the last yarn over of the final stitch in round 6 if you want the medallion rim in blue. Fasten off previous colour and carry or attach blue as described below.
Round 7 :
Join Blue with sl st behind a shell seam, ch2 (counts as hdc), 1 hdc in same st, ch1, *(2 hdc in next anchor st, ch1)* repeat around (24 hdc, 12 ch1 sps). Join with sl st to top of ch2.
Round 8 :
Ch3 (counts as dc), dc in same st, *(ch2, 3 dc in next ch1 space) repeat around in each ch1 loop to build an outer band of dc shells. You will create 12 groups of 3 dc with 12 ch2 spaces, visually 36 dc total in groups.
Info :
At this stage each large medallion should measure approximately 12.5-13 cm (5"-5.25") across before blocking with DK cotton. Block flat to exact measurement if you need precise joins.
Round 9 :
Ch1, sc in each dc and in each ch2 space across the round, working 1 sc in each visible stitch (estimate 48 sc) to tidy the outer shell and prepare for a decorative picot ring. Count may vary slightly by tension; ensure your stitch count is even and symmetrical.
Round 10 :
*(Ch3, sl st into next st to create small loop), sc in next 3 sts* repeat around. You will create 12 small loops alternating with 3-sc sections. Purpose is to make a ring of small arches that will later connect to the open ring rounds (12 loops).
Round 11 :
Switch to Cream colour, sl st to an arch loop, ch1, 6 sc evenly into each arch loop to create a rounded raised border (12 x 6 sc = 72 sc). Join with sl st and weave in starting tail later.
Info :
If you prefer to work the medallion center in three colours, add taupe at round 3 for a subtle core. Make sure colour changes are tidy: break yarn and rejoin or carry behind petals if you plan to use blocking to flatten later.
Round 12 :
Ch2 (counts as hdc), *(BLO 2 hdc in next st, ch1)* repeat around to create a slightly ridged inner rim for visual depth (72 hdc approximated if worked in every sc; maintain rhythm and adjust counts equally across 12 sections)
Round 13 :
Ch3, dc in same st, *(skip 2, 5 dc shell in next st, skip 2, dc in next st)* repeat around to create large scalloped rim; final count equals 12 larger scallops arranged evenly (12 scallops of 5 dc each = 60 dc in scallops plus anchor dc stitches)
Round 14 :
Ch1, sc in each st across the scallop round to even out edges (estimate 84 sc depending on exact stitch count). Make sure the perimeter is smooth and each scallop sits evenly.
Info :
Fasten off and leave a long tail for sewing if you plan to join medallions later by whip stitch. Alternatively you can join with small flower connectors as shown in the join section below.
— Small Floral Joiner (Make 20) :
Round 1 :
Make a magic ring, ch1, 6 sc in ring, join sl st (6)
Round 2 :
*(Ch3, sl st in next st) x6 to create six small loops for petals; join and pull ring tight. You now have 6 ch3 loops around a small centre.
Round 3 :
Switch to Blue if required: In each ch3 loop make (sc, ch2, sc) to form tiny petals; finish with sl st and pull yarn through. Petal counts: 6 tiny petals, used to join medallions at 6 contact points.
Info :
These small flowers sit between medallions and fill open spaces. Make a few extras in case a couple are needed for the lace edge or to cover join points.
— Open Ring Connector Panel (Make 3) :
Round 1 :
Ch8, join with sl st to form ring (or make magic ring alternative), ch3 (counts as dc), 11 dc into ring, join (12 dc) — this creates the small ring that will sit between medallions externally.
Round 2 :
Ch1, sc in same st, *ch5, skip next dc and sc into next dc* repeat around to make 6 ch5 loops (6 loops). These become the large open arches pictured between the medallion rims.
Round 3 :
In each ch5 loop: *(sc, ch3, 3 dc, ch3, sc) to make a tall shell bridging the gap between medallions* repeat around (6 shells). This panel will be joined to medallion rims with small flowers at the shells' points.
Info :
Work 3 connector panels for the full runner length showing in the photo (if your table is longer or shorter you can add or remove panels). The panels are elongated to follow the runner's lengthwise axis.
— Assembling Medallions with Connectors :
Info :
Lay out your 4 large medallions in a straight line with connector panels between them, then position small floral joiners at the six symmetrical contact points per pairing (top, bottom and four sides where scallops meet the open ring). Pin each piece before joining.
Round 1 (join step) :
Using the long tail from medallion Round 14 or a matching yarn strand, whip stitch the corresponding sc anchors of medallion A to the sc anchors on a connector panel aligning petals so that 6 connection points meet. Each join point will be reinforced by sewing through the base of a small floral joiner later.
Info :
Make small floral joiners separately and place them over the sewn join points, catching the medallion and panel stitches through the center of the flower using a few neat whip stitches. This hides join stitches and gives the look of decorative connectors in the finished runner.
— End Panel (Pointed End) (Make 2 mirrored) :
Round 1 :
Work one half-medallion: follow Large Medallion rounds 1-8 but stop after Round 8, then shape into a pointed triangular end with rounds described below to mimic the tapered runner ends.
Round 2 :
Ch1, sc evenly across to form a firm base round; then (ch4, sc skip 2) repeat to shape the sides into a tapered scallop. The exact counts depend on your tension but make sure both ends mirror each other.
Info :
Pin these shaped ends to the first and last medallion and join in the same method as connectors using small flowers at contact points for a seamless look.
— Long Scallop Border Around Full Runner :
Info :
Once all medallions and connectors are joined in a straight line and end panels attached, work the border in rounds around the entire assembled runner, working continuously along the runner's outline. Keep motifs flat by pinning to the blocking board as you go.
Round 1 :
With Blue, join yarn at a visible outer sc on edge, ch1, sc evenly around the entire runner edge including into each small flower; place 1 sc for every visible stitch across the edges to create a base round. Keep stitch density consistent (estimate 200-260 sc depending on exact layout).
Round 2 :
*(Ch3, skip 1, sc) repeat around to make a ring of small loops; place one loop in the gap between medallion scallops and in the small flower spaces for symmetry. You will create a repeating loop rhythm along the whole perimeter (count equals perimeter stitch count divided accordingly).
Round 3 :
In each ch3 loop: *(sc, ch2, 3 dc, ch2, sc) to create a scallop shell. This is a repeat; work shells across the runner edge - adjust counts so shells meet at the tips of medallion scallops and small flowers.
Info :
Work in multiples that match the existing motifs. If you find an extra or missing stitch at the end of a round, redistribute by doing a single decrease or extra sc in several places rather than adding large alterations in one spot.
Round 4 :
Ch1, sc in each st across shells and anchors to smooth the outer edge (this evens counts and prepares for final decorative picot edging). Keep the total sc count constant around the perimeter (approx 240 sc typical for pictured runner).
Round 5 :
*(Ch3, sl st in same st to form picot, skip 1, sc) repeat along the scallop edge. This produces tiny picot bumps that catch light; place picots at the tip of each scallop and the points between flowers for a neat finish.
Round 6 :
Optional: Add a final decorative shell row in Cream inside each medallion boundary for extra contrast: *(3 dc, ch2, 3 dc) in selective outer scallop stitches* repeat across the runner to accent medallion rings. Carefully count repeats to keep symmetry (work on every other scallop for balanced contrast).
Info :
Weave in all ends securely. Block runner flat to final dimensions and allow to dry under pins. A light spray of starch or fabric stiffener will help maintain shape on tables.
— Optional Weighted Base & Care :
Info :
If you prefer a less slippy runner, add small felt or rubber pads under medallions, or apply a non-slip pad to the underside of the runner. Care: Hand wash gently in cool water with mild detergent, reshape and dry flat.
Completing this runner is such a satisfying project — the layered puff petals and little floral joiners create a beautiful handmade heirloom! The gentle contrast between cream and muted blue adds a soft vintage charm that looks lovely on a wooden table. Each medallion and connector comes together like a puzzle and the final blocked piece sits flat and elegant. Enjoy your mindful stitching and the pleasure of making something timeless and useful. 🧶🌼