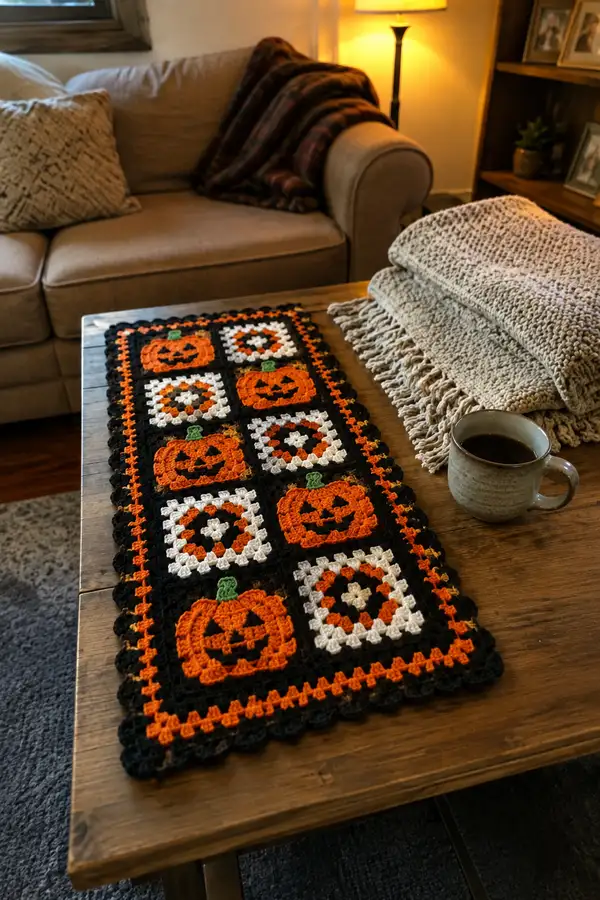
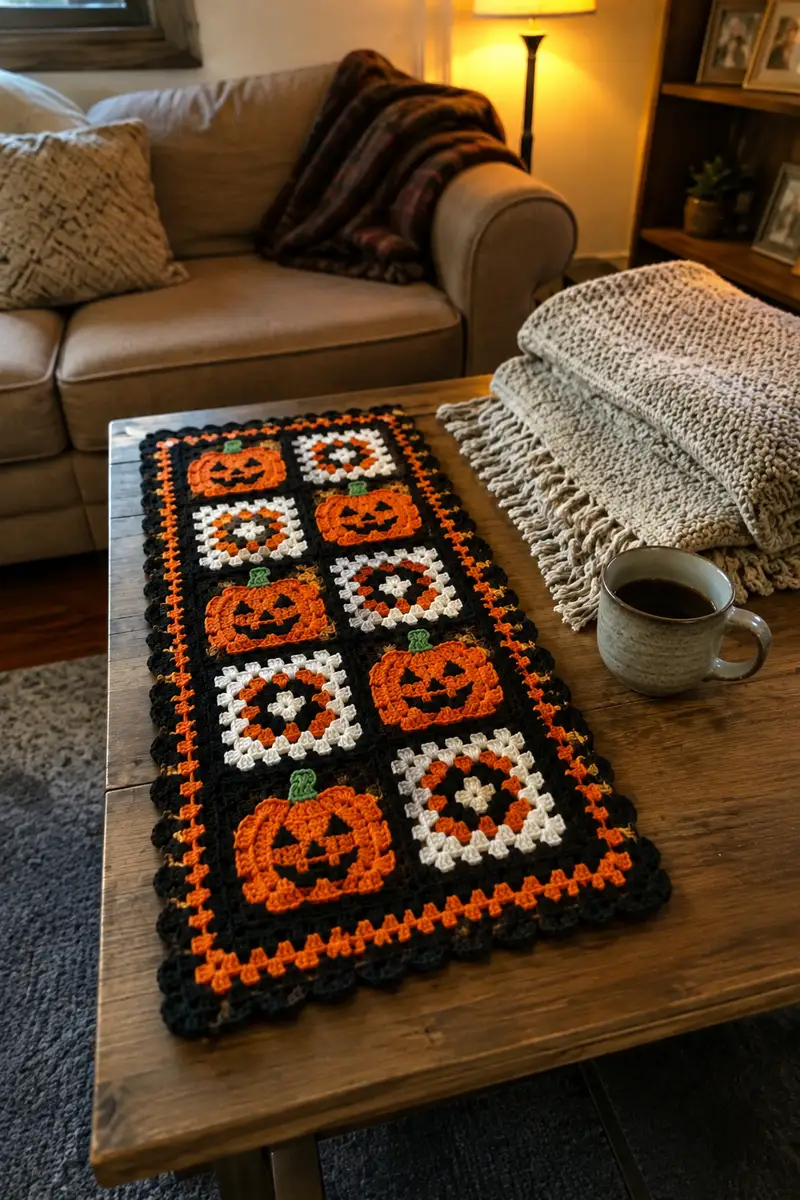
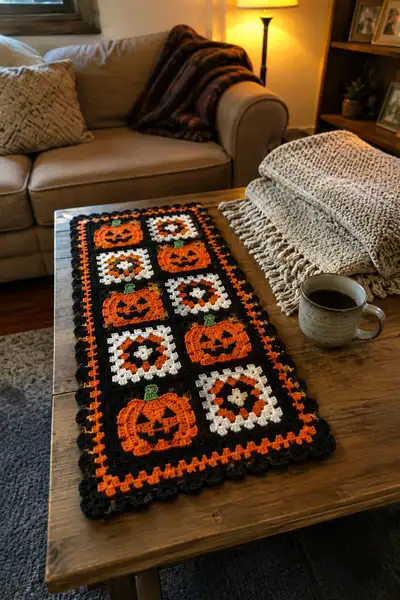
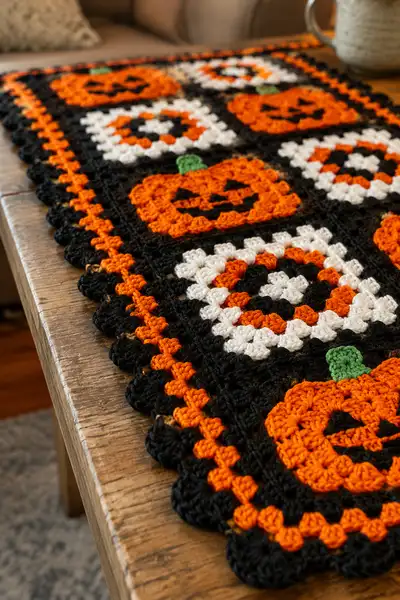
Create a festive Halloween table runner made from alternating pumpkin granny squares and classic granny squares, edged with bold black and orange scallops. This runner features bright orange pumpkin motifs with tiny green stems and contrasting white/grayscale granny squares to make a striking autumn centerpiece. Perfect for a coffee table, entry console, or mantel, the design is modular—make it longer or wider by adding more squares. Clear step-by-step rounds and joining instructions included for a polished finished look.
Progress Tracker
0% Complete
— Notes & Gauge :
Info :
This runner is worked in modular granny squares then joined and edged. Gauge is flexible for a decorative runner; sample gauge for one 3-round granny square = approximately 4.5" square using worsted yarn and 4.0mm hook. Adjust hook size if your squares measure larger or smaller. Blocks should be uniform for a neat join.
Info :
Tension tip: keep consistent tension when changing colors—carry yarn loosely across WS where possible or fasten off and weave ends for clean color changes on small pumpkin face sections.
— Pumpkin Granny Square (Make 6) :
Round 1 :
With orange, ch4, join with sl st to form ring. Ch3 (counts as first dc), work 2 dc into ring, ch2, (3 dc into ring, ch2) x3; join with sl st to top of ch3. (4 corner clusters, ch2 spaces)
Round 2 :
Sl st into next ch2 corner, ch3, (2 dc, ch2, 3 dc) into same corner ch2 space, *sk next 3 dc cluster, (3 dc) into next ch2 corner ch2 space; rep from * around finishing with (3 dc, ch2, 3 dc) in final corner; join. (Each side now has 1 shell between corners)
Round 3 :
Change to orange if not already. Sl st into corner ch2, ch3, (2 dc, ch2, 3 dc) in same ch2 sp, *3 dc in each side space (between corner shells) working into the space created by the previous round's 3-dc shell, across side work 3 dc, then in next corner (3 dc, ch2, 3 dc); rep from * around. Join. (Square established; this is a classic 3-round granny square base)
Info :
At this stage each side typically has 3 shells plus corners; if your square is tighter or looser, add or remove a shell round later to maintain the desired finished size. Keep each pumpkin square equal in rounds to match classic granny squares.
Round 4 :
Change to orange/continue orange. Sl st to corner, ch3, (2 dc, ch2, 3 dc) in corner, *work 3 dc into each side ch-1 space across (this increases the side shells) until you reach the next corner; in corner work (3 dc, ch2, 3 dc); rep from * around. Join. (Square is now larger; count 4 shells per side including corners)
Round 5 :
With orange work one more granny round: sl st to corner, ch3, (2 dc, ch2, 3 dc) in corner, *3 dc in each side space across, (3 dc, ch2, 3 dc) in corner; join. This produces a pumpkin-facing surface large enough for overlay.
Info :
Check square size—if this pumpkin square is slightly larger than the plain granny squares, you will match them by working the same number of rounds in the plain squares. You may end both motif types at the same round count for simple joining.
Round 6 :
Work an accent round in black to give the pumpkin a framing background: join black with sl st into any corner ch2 space, ch3 (counts as dc), work (2 dc, ch2, 3 dc) into same corner, *3 dc in each side space (into the top of the orange shells), (3 dc, ch2, 3 dc) into next corner; rep; join. This creates a black 'frame' on the same square while keeping the pumpkin raised.
Round 7 :
Optional depth round with orange: join orange in any corner ch2, ch3, (2 dc, ch2, 3 dc) into same corner, *3 dc in each side space across, (3 dc, ch2, 3 dc) in corner; join. This gives the pumpkin one more defined border inside the black frame.
Info :
Use tapestry or duplicate stitch style surface crochet for face placement guide: with a tapestry needle and contrasting scrap yarn, mark eyes and mouth positions before working surface crochet so facial features are centered and uniform across pumpkin squares.
Round 8 :
Switch to black to create the flat background area immediately surrounding the pumpkin for a neat face contrast: sl st into any corner ch2, ch1, sc into the corner center space, work sc evenly around the orange pumpkin body filling the spaces between shells (usually 2 sc into each shell top) finishing with sc across into corner; join. (This creates a relatively flat black area for the face to stand out)
Round 9 :
Surface crochet the pumpkin face with black yarn: using slip stitch or embroidery surface dc, outline and fill triangular eyes and a smiling jack-o-lantern mouth. Suggested placement: eyes set approximately 6-8 stitches apart across the center rows of shells, mouth spans 12-14 stitches centered beneath eyes. Use small neat stitches and keep facial features similar across all pumpkin squares.
Info :
Surface crochet technique: carry black yarn along WS or secure with a small knot at the start; for filled triangles, work series of surface slip stitches in parallel lines to create a dense shape. Alternatively embroider using black yarn and a yarn needle for precise, matte features.
Round 10 :
Make a small stem: With green, ch6, starting in 2nd ch from hook work sc across (5 sc), sl st to base of pumpkin at top center (pick the top corner center shell area), ch1, sc through the next 2 sts across the front to anchor, sl st into pumpkin top and fasten off. Weave in ends. (Small flat stem anchored into top center)
Info :
Alternate stem option: make a 3-round mini-granny leaf and sew to top center if you prefer a more dimensional stem. Keep stems small so they stack under the border neatly when joining squares.
Round 11 :
Optional final tidy round: With black, work sc evenly around the entire square working 3 sc in each corner ch2 space to preserve square shape; join and fasten off. This ensures all pumpkin squares have a consistent black frame for joining.
Info :
Make six pumpkin squares following the same face layout, keeping the face and stem placement the same on each square for visual rhythm across the runner.
— Classic Granny Square (Make 6) :
Round 1 :
With white, ch4, join to form ring. Ch3 (counts as dc), work 2 dc into ring, ch2, (3 dc, ch2) x3; join. (Four corner clusters)
Round 2 :
Sl st to corner ch2, ch3, (2 dc, ch2, 3 dc) into same corner, *3 dc in each side ch-sp across until next corner, (3 dc, ch2, 3 dc) into corner; rep from * around; join. (Classic two-round granny)
Round 3 :
Change to orange. Work 1 round similar to Round 2: sl st to corner, ch3, (2 dc, ch2, 3 dc) in corner, *3 dc in side spaces across, (3 dc, ch2, 3 dc) in corner; join. This gives the white square a contrasting orange inner round echoing pumpkin colors.
Round 4 :
Change to black and work one more granny round to make a black outer frame identical to the pumpkin squares: sl st to corner ch2, ch3, (2 dc, ch2, 3 dc) in corner, *3 dc in each side sp across, (3 dc, ch2, 3 dc) in corner; join. Fasten off. (This will produce square size matching pumpkin squares)
Info :
Make sure the total number of granny rounds (counting color rounds) in the classic square matches the pumpkin square to ensure neat joining. For example both finished at 4-5 rounds including borders.
— Small Stem / Leaf (Optional Extra) :
Round 1 :
With green, ch4 join to ring. Ch1, 6 sc into ring; join. (6)
Round 2 :
Ch1, (inc) around. (12)
Round 3 :
Work 1 sc in each st around to make a slightly raised leaf base (12). Fasten off leaving a tail to sew to pumpkin top.
Info :
Sew this small leaf to the pumpkin top center for added dimension. Make 6 if you prefer all pumpkins to have a dimensional leaf rather than a flat sc stem.
— Preparing All Squares for Joining :
Info :
Block each square lightly so all squares measure the same. Pin to a blocking board or flat surface and steam or wet-block following yarn manufacturer instructions. Squares should be square and edges should lie flat to make joining easier and neater.
Info :
Decide layout: The sample runner uses a 3 x 4 layout (3 across, 4 down) alternating pumpkin and classic granny squares in a checkerboard pattern. Lay out squares RS up in the desired order and adjust orientation of pumpkins (all faces facing the same way along the runner).
— Joining Squares (Join-As-You-Go or Sew Together) :
Info :
Two recommended joining options: 1) Join-As-You-Go (JAYG) for seamless joins, or 2) whip stitch/flat seam with a yarn needle for a sturdy visible black join. The following rounds give JAYG instructions followed by an alternate sewing method.
Method A - Join-As-You-Go (JAYG) Row Joining :
Work all squares but do not join. Arrange squares into rows of 3. To JAYG join the second square to the first: Start final round of second square in black; when you reach the side that abuts the first completed square, instead of working 3 dc in side space, sl st into the corresponding ch2 corner space or top of shell on the first square, then continue working around. Essentially join at the side shells using slip stitches into existing squares so that the rounds become continuous across the seam. Repeat across the row until three squares are joined. Fasten off and weave ends. Repeat for each row of three squares.
Info :
When joining rows together, join final rounds across the long edges using sl st into the matching top of the shells on the row below—this creates a continuous fabric and a nearly invisible seam. Keep joins flat and tension matched to avoid puckering.
Method B - Sewing Together (Alternate) :
With black yarn and a yarn needle, place two squares RS together aligning edges. Use a whip stitch or mattress stitch through the top loops only, spacing stitches every 3-4 chains (capturing shell tops) to create a flat seam. This method gives slightly raised black join lines for a framed effect. Sew rows together first, then join rows to form the runner rectangle.
Info :
Whichever method you choose, be sure to check alignment after joining the first row; adjust tension if the first row pulls in or stretches compared with others. Use blocking pins to hold joins flat while you finish the runner.
— Joining Detailed Rounds (for Precision) :
Round J1 :
Working final round of square 2 in black: when you reach an adjoining side, ch1, sc in side space, sl st into corresponding sc/space on adjacent finished square to attach, ch1, continue 3 dc cluster in your current square side as usual; this creates a decorative sc-join that alternates with the 3-dc shells. Repeat across the side. Join with sl st at end and finish.
Info :
By alternating shell work with slip-stitch joins you keep the exterior design consistent while creating a strong seam that lies flat for the border to work over later.
Round J2 :
After joining rows into strips of 3, join strips together along the long sides using the same J1 technique so that the seam pattern of slip-stitch join matches across all internal edges. Fasten off and weave in ends once the runner rectangle is complete.
Info :
Check alignment of pumpkin faces—if any pumpkins flipped or rotated unintentionally, undo that seam and resew with correct orientation. Consistent face direction makes the runner visually cohesive.
— Inner Border Rounds (Create a crisp black border around the assembled rectangle) :
Round B1 :
With black yarn, join anywhere on the outer edge of the assembled runner. Ch1, sc evenly around entire outside edge, work 3 sc into each corner to maintain square corners; join with sl st to first sc. (This creates a tidy single-round edge for the outermost seam)
Round B2 :
Ch3 (counts as dc), *skip next st, work (3 dc) into next space (i.e., shell into each 2-ch or space across), repeat around, working 3 dc in corner spaces; join. (This yields a classic granny-style shell round in the border to echo motif shells)
Info :
Work B2 carefully so the outer shells sit evenly relative to the squares. If you notice tightness or stretching on one side, add an extra shell in the middle of that side to correct tension differences.
Round B3 :
Change to orange. Ch3, (2 dc, ch2, 3 dc) into each corner space you created from B2; between corners work 3 dc into each shell space; join. This orange round will make a decorative inner rim echoing the pumpkin orange.
Round B4 :
Change to black. Ch1, sc in each st and sc into the ch-2 corner space 3 times to form a clear black band; join. This band will serve as the base for the scalloped outer border.
Info :
Adjust stitch count for a consistent feel around all sides—if corners look pointy, add 1-2 sc stitches evenly to that side before proceeding to scallop rounds.
— Outer Scallop Border (Finishing Edge) :
Round S1 :
With black, *ch1, sc in next 2 sts, ch3, sl st into same st as last sc to create a small picot-style loop; sk 2 sts, repeat from * around until you have a sequence across each side; at corners work (sc, ch3, sc) in corner to keep scallop flow; join. Fasten off black and prepare orange for contrast scallops.
Info :
This round creates a foundation for the alternating orange scallop detail. Keep scallops evenly spaced by working them into the tops of shells or into single crochet band stitches from B4. If your runner edge has large gaps, add an extra ch in each scallop foundation to compensate.
Round S2 :
Join orange in any picot loop: ch1, work (sc, hdc, 3 dc, hdc, sc) into each picot loop to create a bold orange scallop. At corners work the same cluster to keep consistent shape. Join and fasten off orange.
Round S3 :
Return to black and work a shallow scallop: join black into the base of any orange scallop, ch1, (sc into top of orange dc, hdc into next st, sc into next st) across each orange scallop to create a layered scalloped finish. Join and weave in ends thoroughly.
Info :
Alternate border option: for a stronger, framed look work one more round of 3 dc shells in black over the orange scallops, spacing shells evenly and working 3 dc, ch2, 3 dc in corners to keep symmetry.
— Optional Decorative Centerline (to create visual interest down the runner) :
Round C1 :
Using leftover black, with yarn needle stitch a narrow running line through the center seam between column 2 and column 3 (or down the middle if you want a central line). Use backstitch with a yarn needle and long black yarn to create a neat row of top stitches that sit on the runner surface. Anchor ends into the underside and weave in thoroughly.
Info :
This feature is purely decorative and optional; it creates a strong graphic vertical line that helps the checkerboard look read crisply on an elongated coffee table runner.
— Final Finishing Rounds & Weaving :
Round F1 :
Go around entire runner and inspect for loose ends and holes. Using tapestry needle, weave all tails into the fabric following a path through the tops of shells and inside black join to keep them hidden. Trim ends close but not so short they slip out.
Round F2 :
Lightly steam-block the completed runner or wet block to even out tension and flatten the scalloped edge. Pin scallops in place while drying if needed to keep outer edge crisp.
Info :
Allow the runner to dry fully before placing on your table. If the scallops relax too much, re-block them pinning into the desired curve for a few hours to set shape.
Round F3 :
Final inspection: trim stray fibers, check facial embroidery for consistent coverage on pumpkins, and press lightly with a steam iron on low through a cloth to settle stitches if required.
Info :
Store this runner flat or rolled — avoid folding long-term which could crease the scalloped edges. For table use during parties, protect with clear table runner protector to keep yarn clean and vibrant.
This Halloween runner brings a playful, handmade touch to your fall decor — charming pumpkin faces, crisp black framing, and bright orange scallops come together in a cheerful, seasonal centerpiece. The modular granny-square construction means you can adapt the runner to any table size or color scheme. I hope making it fills your home with cozy, autumn vibes and a little seasonal mischief. 🎃🧶